Sign In
Upload
Manuals
Brands
Eurocom Manuals
Laptop
DeskNote 3100C
Eurocom DeskNote 3100C Manuals
Manuals and User Guides for Eurocom DeskNote 3100C. We have
2
Eurocom DeskNote 3100C manuals available for free PDF download: Manual, User Manual
Eurocom DeskNote 3100C Manual (117 pages)
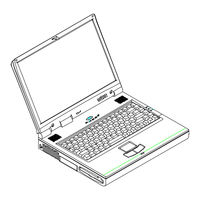
This manual is for the EUROCOM 3100C DeskNoteä
Brand:
Eurocom
| Category:
Laptop
| Size: 1 MB
Table of Contents
Table of Contents
3
Chapter 1: Getting Started
17
Unpacking the Desknote
18
Figure
18
Features of the Desknote
19
Opening the LCD Cover
19
Power Button
20
System Status LED Indicators
21
Top-Front View
22
LCD Panel
22
Keyboard
23
Microphone
23
Stereo Speakers
23
Trackpad and Buttons
23
Rear View
24
Dual USB Ports
24
Expansion Port
24
PS/2 Type Ports
24
Serial Port
24
AC-In Socket
25
External Monitor (CRT) Port
25
Parallel Port
25
S-Video Jack
25
Right-Side View
26
Battery Pack
26
Infrared
26
Removable 5.25" CD-ROM Drive
26
Line-In Jack
27
Microphone-In Jack
27
Phone Jack (Option)
27
Speaker-Out Jack
27
Left-Side View
27
PC Card Sockets
28
Removable 3.5" Floppy Disk Drive
28
Security Connector
28
Ventilation
28
Bottom View
29
CD-ROM Latch
29
Battery Pack Latch
30
CPU Cover
30
Floppy Disk Drive Latch
30
Hard Disk Drive Latch
30
Operating Environment
31
Powering the System
32
AC Power Adapter
32
Battery Pack
33
Inserting
33
Removing
33
Proper Handling of the Battery Pack
35
Recharging by AC Power
35
Chapter 2: Operation
36
Upgrading Processor Module
37
Replacing Processor Module
37
Figure
38
Reinstalling the Heat Sink
38
Setting Dip Switch
39
Flash ROM BIOS Update
39
CPU Core Frequency Settings
39
Figure
40
Accessing 8-Pole DIP Switch
40
Expanding Memory
41
Accessing the Memory Sockets
42
Installing Memory Module
43
Removing Memory Module
44
Using Hard Disk Drive
45
Removing the Hard Disk Drive Module
45
Replacing Hard Disk Drive
46
Inserting the Hard Disk Drive Module
46
Using Floppy Disk Drive
47
Inserting/Removing Diskettes
47
Replacing Floppy Disk Drive
48
Write-Protecting Diskettes
49
Do's and Don'ts
49
Using CD-Rom
50
Removing CD-ROM Module
51
Loading Compact Discs
52
Handling of Compact Discs
53
Using Pc Card Sockets
54
Inserting PC Cards
54
Removing PC Cards
55
Using Hot Keys
56
Using Numeric Keypad
58
Using Power Management
59
Advanced Power Management (APM 1.2)
59
Advanced Configuration and Power Interface (ACPI 1.0)
59
Global Standby
60
Hard Disk Standby
60
Suspend and Resume
60
Powered on Suspend (POS)
61
Resume from POS Mode
61
Resume from STD Mode
62
Suspend to Disk (STD)
62
Attaching Peripheral Devices
63
Attaching a Phone Line (Option)
63
Attaching a PS/2 Keyboard or Mouse
64
Attaching a Serial Mouse
65
Attaching a Parallel Printer
66
Attaching an External Monitor (CRT)
67
Attaching a Proprietary Port Replicator
68
Attaching a TV Set
69
Attaching a USB-Compatible Device
70
Chapter 3: Bios Utilities
72
Power on Self Test (POST)
73
POST Message: Normal Operation
73
POST Message: Error Detected
74
System Configuration Utility
75
Information in the System Configuration Utility
75
Initiating the System Configuration Utility
76
Working with the Menu Bar (Main Menu)
77
Working with the Pull-Down Menu (Submenu)
78
Features of the System Configuration Utility
79
Startup Menu
79
Memory Menu
81
Disks Menu
82
Components Menu
83
Power Menu
86
Exit Menu
89
Chapter 4: Troubleshooting
90
Battery
91
Power
92
Hard Disk Drive
93
Floppy Disk Drive
93
Hardware Installation
94
Lcd Panel
94
Memory Module
95
Pc Card
96
Boot Password
96
Audio
96
Printer
97
Chapter 5: Installing Drivers
100
Preparation
101
Installing Windows 95 (for Reference)
101
Installing Windows 98 (for Reference)
103
Installing Drivers in Windows 95
104
Step 1: Run USB Supplement Path Update File
104
Step 2: Installing TXPATCH Driver
104
Step 3: Installing VGA Driver
104
Step 4: Installing Audio Driver
105
Step 5: Installing PCMCIA Driver
106
Step 6: Installing ATI DVD Play (Option) Driver
107
Step 7: Using Infrared Wireless Communication
107
Installing Drivers in Windows 98
108
Step 1: Installing VGA Driver
108
Step 2: Installing Audio Driver
108
Step 3: Installing PCMCIA Driver
109
Step 4: Installing ATI DVD Play (Option) Driver
110
Installing Drivers in Windows
111
Step 1: Installing VGA Driver
111
Step 2: Installing Audio Driver
112
Appendix A: Specifications
113
PS/2 Type Port
116
Advertisement
EUROCOM DeskNote 3100C User Manual (107 pages)
Brand:
EUROCOM
| Category:
Laptop
| Size: 2 MB
Table of Contents
Table of Contents
2
Chapter 1-Getting Started
13
Unpacking the Desknote
13
Features of the Desknote
13
Opening the LCD Cover
15
Power Button
16
System Status LED Indicators
17
Top-Front View
18
LCD Panel
18
Keyboard
19
Microphone
19
Stereo Speakers
19
Trackpad and Buttons
19
Rear View
20
Dual USB Ports
20
Expansion Port
20
External Monitor (CRT) Port
20
PS/2 Type Ports
20
S-Video Jack
20
Serial Port
20
AC-In Socket
21
Parallel Port
21
Right-Side View
22
Battery Pack
22
Infrared
22
Line-In Jack
22
Microphone-In Jack
22
Phone Jack (Option)
22
Removable 5.25" CD-ROM Drive
22
Speaker-Out Jack
22
Left-Side View
23
PC Card Sockets
23
Removable 3.5" Floppy Disk Drive
23
Security Connector
23
Ventilation
23
Bottom View
24
Battery Pack Latch
24
CD-ROM Latch
24
CPU Cover
24
Floppy Disk Drive Latch
24
Hard Disk Drive Latch
25
Operating Environment
26
Powering the System
27
AC Power Adapter
27
Battery Pack
28
Inserting
28
Removing
28
Proper Handling of the Battery Pack
30
Recharging by AC Power
30
Chapter 2: : : : Operation
31
Upgrading Processor Module
32
Replacing Processor Module
32
Reinstalling the Heat Sink
33
Setting Dip Switch
34
Flash ROM BIOS Update
34
CPU Core Frequency Settings
34
Accessing 8-Pole DIP Switch
35
Expanding Memory
36
Accessing the Memory Sockets
37
Installing Memory Module
38
Removing Memory Module
39
Using Hard Disk Drive
40
Removing the Hard Disk Drive Module
40
Replacing Hard Disk Drive
41
Inserting the Hard Disk Drive Module
41
Using Floppy Disk Drive
42
Inserting/Removing Diskettes
42
Replacing Floppy Disk Drive
43
Write-Protecting Diskettes
44
Do's and Don'ts
44
Using CD-Rom
45
Removing CD-ROM Module
46
Loading Compact Discs
47
Handling of Compact Discs
48
Using Pc Card Sockets
49
Inserting PC Cards
49
Removing PC Cards
50
Using Hot Keys
51
Using Numeric Keypad
53
Using Power Management
54
Advanced Power Management (APM 1.2)
54
Advanced Configuration and Power Interface (ACPI 1.0)
54
Global Standby
55
Hard Disk Standby
55
Suspend and Resume
55
Powered on Suspend (POS)
56
Resume from POS Mode
56
Resume from STD Mode
57
Suspend to Disk (STD)
57
Attaching Peripheral Devices
58
Attaching a Phone Line (Option)
58
Attaching a PS/2 Keyboard or Mouse
59
Attaching a Serial Mouse
60
Attaching a Parallel Printer
61
Attaching an External Monitor (CRT)
62
Attaching a Proprietary Port Replicator
63
Attaching a TV Set
64
Attaching a USB-Compatible Device
65
Chapter 3-BIOS Utilities
66
Power on Self Test (POST)
67
POST Message: Normal Operation
67
POST Message: Error Detected
68
System Configuration Utility
69
Information in the System Configuration Utility
69
Initiating the System Configuration Utility
70
Working with the Menu Bar (Main Menu)
71
Working with the Pull-Down Menu (Submenu)
72
Features of the System Configuration Utility
73
Startup Menu
73
Memory Menu
75
Disks Menu
76
Components Menu
77
Power Menu
80
Exit Menu
83
Chapter 4-Troubleshooting
84
Battery
85
Power
85
Hard Disk Drive
86
Floppy Disk Drive
86
Hardware Installation
87
Lcd Panel
87
Memory Module
87
Pc Card
89
Boot Password
89
Audio
89
Printer
90
Chapter 5Chapter 5 ::Installing Drivers
93
Preparation
93
Installing Windows 95 (for Reference)
93
Installing Windows 98 (for Reference)
95
Installing Drivers in Windows 95
96
Step 1: Run USB Supplement Path Update File
96
Step 2: Installing TXPATCH Driver
96
Step 3: Installing VGA Driver
96
Step 4: Installing Audio Driver
96
Step 5: Installing PCMCIA Driver
98
Step 6: Installing ATI DVD Play (Option) Driver
99
Step 7: Using Infrared Wireless Communication
99
Installing Drivers in Windows 98
100
Step 1: Installing VGA Driver
100
Step 2: Installing Audio Driver
100
Step 3: Installing PCMCIA Driver
101
Step 4: Installing ATI DVD Play (Option) Driver
102
Installing Drivers in Windows
103
Step 1: Installing VGA Driver
103
Step 2: Installing Audio Driver
104
Appendix A: Specifications
105
Advertisement
Related Products
EUROCOM 3100-LX DeskNote
EUROCOM 3100-B Mobile Cinema
EUROCOM 3400 UltraLite
EUROCOM 3100-SE DeskNote
EUROCOM 3420 Ultimate Traveller
EUROCOM 3420-SE Ultimate Traveler
EUROCOM 3420-T2 UltraSlim
EUROCOM Monster 3.0
EUROCOM 3420 Ultimate Traveler
EUROCOM DeskNote 2100P
Eurocom Categories
Laptop
Desktop
Notebook
Fan
Tablet
More Eurocom Manuals
Login
Sign In
OR
Sign in with Facebook
Sign in with Google
Upload manual
Upload from disk
Upload from URL