Sign In
Upload
Manuals
Brands
Brother Manuals
Sewing Machine
CE-8080PRW
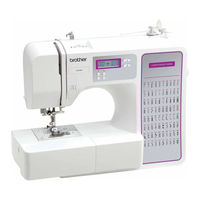
Brother CE-8080PRW Manuals
Manuals and User Guides for Brother CE-8080PRW. We have
8
Brother CE-8080PRW manuals available for free PDF download: Service Manual, Operation Manual, Manual De Instrucciones, Parts Reference List, Quick Setup Manual
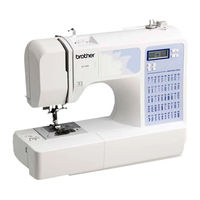
Brother CE-8080PRW Service Manual (196 pages)
Computerized
Brand:
Brother
| Category:
Sewing Machine
| Size: 8.51 MB
Table of Contents
4
Table of Contents
10
1 Outline Of Mechanism
11
Main Mechanisms
12
Driveline
13
Positions of Electronic Components
14
Control System Block Diagram
15
Operation of Other Electronic Components
16
2 Basics Of Disassembly/Assembly
16
2 Basics of Disassembly/Assembly
17
Disassembly Main Parts
20
Removal of Front Cover Assy
21
Electrical Parts and Motors
25
Needle Bar, Presser Mechanism / Upper Shaft Mechanism
27
Feed Mechanism
29
Bobbin Winder Mechanism
29
Assembly Bobbin Winder Mechanism
34
Attachment of Feed Module
35
Needle Bar, Presser Mechanism / Upper Shaft Mechanism
39
Electrical Parts and Motors
34
Feed Mechanism
42
6 Special Instructions of Wiring
44
Main Parts
45
Attachment of Front Cover Assy
46
Attachment of Face Plate
46
Attachment of Base Cover
46
Attachment of Needle Plate B Assy
47
Attachment of Accessory Table
48
3 Application Of Disassembly/Assembly
48
3 Application Of Disassembly/Assembly
48
NOTE: the Posting Pictures Are the "Square Shape Model
48
Basic Configuration Is the Same
49
Disassembly Main Parts
50
Disassembly of Needle Plate B Assy
51
Disassembly of Front Cover Assy
51
Removal of Thread Tension Holder a Assy
51
Disassembly of Thread Tension Holder a Assy
52
Removal of Thread Take-Up Holder B
52
Disassembly of Thread Take-Up Holder B
53
Removal of LED Lamp Assy
53
Removal of SSVR PCB Assy
54
Removal of Ss/Reverse/Np Buttons
54
Removal of SV Keytop
55
Removal of Operation PCB Assy
55
Square Shape Model" Equipped with LCD Backlight
55
Square Shape Model" Not Equipped with LCD Backlight
56
Curvy Shape Model" Equipped with LCD Backlight
56
Curvy Shape Model" Not Equipped with LCD Backlight
57
Removal of Selecting/Manual Buttons
58
Removal of LCD
58
Square Shape Model" Equipped with LCD Backlight
58
Square Shape Model" Not Equipped with LCD Backlight
59
Curvy Shape Model" Not Equipped with LCD Backlight
59
Curvy Shape Model" Equipped with LCD Backlight
60
Removal of Decoration Cover
60
Removal of Front Cover Thread Guard
60
Removal of Thread Guide Wire
61
Removal of Base Plate Rubber (Front Cover Side)
61
Disassembly of Rear Cover Assy
61
Removal of Spool Pin
62
Removal of Spool Pin Holder
62
Removal of Bobbin Presser
62
Removal of Bobbin Winder Guide Assy
62
Removal of Thread Guide Supporting Plate
63
Removal of Thread Guide Plate Assy
63
Removal of Cutter Cover Assy
63
Disassembly of Cutter Cover Assy
63
Removal of Base Plate Rubber (Rear Cover Side)
64
Electrical Parts and Motors
65
Disassembly of Power Supply Unit
65
Disassembly of Main Motor Assy
66
Needle Bar, Presser Mechanism / Upper Shaft Mechanism
67
Disassembly of Tension Pulley Assy
67
Disassembly of Upper Shaft Assy
67
Removal of Plate Spring
68
Bobbin Winder Mechanism
69
Removal of Bobbin Base Assy
69
Disassembly of Bobbin Base Assy
70
Feed and Rotary Module
71
Removal of Inner Rotary Hook Assy
71
Removal of Needle Plate a Assy
71
Disassembly of Needle Plate a Assy
71
Removal of Feed Dog
72
Removal of Spring
72
Removal of FPM Holder Sub Assy
73
Removal of Z Pulse Motor
73
Removal of Inner Rotary Hook Bracket Assy
73
Removal of Outer Rotary Hook Assy
73
Removal of Spring
74
Removal of Feed Bar
74
Removal of Vertical Adjuster Screw Assy
75
Removal of Drop Knob
76
Removal of Shaft Supporter
76
Removal of Feed Supporting Plate
76
Removal of Timing Pulley D
77
Removal of Upper Shaft Bushing
77
Removal of Bushing Presser B
78
Removal of Lower Shaft Assy
78
Removal of Feed Arm a Assy
79
Removal of Feed Arm B Assy
79
Removal of Feed Adjuster Assy
79
Disassembly of Feed Adjuster Assy
80
Needle-Presser Module
81
Removal of Presser Feed Holder Assy
81
Removal of Thread Slider Guide
81
Removal of Lead Wire Assy: Ground
82
Removal of BH Switch Assy
82
Removal of Thread Take-Up Lever Link
83
Removal of Needle Bar Crank Rod Assy
83
Removal of Needle Bar Assy. N
84
Removal of Shaft Assy
84
Removal of Needle Bar Supporter Assy
84
Removal of Threader Hook Assembly
85
Removal of Zigzag Adjusting Nut
85
Removal of Needle Holder Shaft a
85
Removal of PF Switch Assy
86
Removal of Presser Foot Lifter
86
Removal of Presser Bar
86
Removal of Thread Release Lever
87
Removal of Z Zigzag Lever Assy
87
Removal of Z Zigzag Cam
87
Removal of Rubber
88
Removal of Lock Nut
88
Removal of Z Pulse Motor
88
Removal of Shaft Bushing
89
Assembly Main Parts
90
Assembly of Rear Cover Assy
90
Attachment of Base Plate Rubber (Rear Cover Side)
90
Attachment of Cutter Cover Assy
90
Assembly of Cutter Cover Assy
91
Attachment of Thread Guide Plate Assy
91
Attachment of Thread Guide Supporting Plate Assy
91
Attachment of Bobbin Winder Guide Assy
91
Attachment of Bobbin Presser
92
Attachment of Spool Pin Holder
93
Attachment of Spool Pin
94
Assembly of Front Cover Assy
94
Attachment of Base Plate Rubber (Front Cover Side)
94
Attachment of Thread Guide Wire
94
Attachment of Front Cover Thread Guard
95
Attachment of Decoration Cover
96
Attachment of LCD
96
Square Shape Model" Equipped with LCD Backlight
96
Square Shape Model" Not Equipped with LCD Backlight
97
Curvy Shape Model" Equipped with LCD Backlight
97
Curvy Shape Model" Not Equipped with LCD Backlight
98
Attachment of Selecting/Manual Buttons
99
Attachment of Operation PCB Assy
99
Square Shape Model" Equipped with LCD Backlight
99
Square Shape Model" Not Equipped with LCD Backlight
100
Curvy Shape Model" Equipped with LCD Backlight
100
Curvy Shape Model" Not Equipped with LCD Backlight
101
Attachment of SV Keytop
101
Attachment of Ss/Reverse/Np Buttons
102
Attachment of SSVR PCB Assy
102
Attachment of LED Lamp Assy
103
Attachment of Thread Take-Up Holder B
104
Assembly of Thread Take-Up Holder B
105
Attachment of Thread Tension Holder a Assy
105
Assembly of Thread Tension Holder a Assy
106
Assembly of Needle Plate B Assy
107
Electrical Parts and Motors
108
Assembly of Main Motor Assy
108
Assembly of Power Supply Unit
109
Needle Bar, Presser Mechanism / Upper Shaft Mechanism
110
Attachment of Plate Spring
110
Assembly of Upper Shaft Assy
110
Assembly of Tension Pulley Assy
111
Bobbin Winder Mechanism
112
Attachment of Bobbin Base Assy
112
Assembly of Bobbin Base Assy
113
Feed and Rotary Module
114
Attachment of Feed Adjuster Assy
114
Assembly of Feed Adjuster Assy
115
Attachment of Feed Arm B Assy
115
Attachment of Feed Arm a Assy
116
Attachment of Lower Shaft Assy
117
Attachment of Bushing Presser B
117
Attachment of Upper Shaft Bushing
118
Attachment of Timing Pulley D
118
Attachment of Feed Supporting Plate
119
Attachment of Shaft Supporter
120
Attachment of Drop Knob
120
Attachment of Vertical Adjuster Screw Assy
121
Attachment of Feed Bar
121
Attachment of Spring
122
Attachment of Outer Rotary Hook Assy
122
Attachment of Inner Rotary Hook Bracket Assy
122
Attachment of F Pulse Motor
123
Attachment of FPM Holder Sub Assy
124
Alignment of F Gear Teeth
124
Attachment of Spring
125
Attachment of Feed Dog
125
Attachment of Needle Plate a Assy
125
Assembly of Needle Plate a Assy
126
Attachment of Inner Rotary Hook Assy
127
Needle-Presser Module
128
Attachment of Shaft Bushing
128
Attachment of Lock Nut
128
Attachment of Z Pulse Motor
129
Attachment of Rubber
129
Attachment of Z Zigzag Cam
130
Attachment of Z Zigzag Lever Assy
131
Attachment of Thread Release Lever
131
Attachment of Presser Bar
132
Attachment of Presser Foot Lifter
132
Attachment of PF Switch Assy
133
Attachment of Needle Holder Shaft a
133
Attachment of Z Zigzag Adjusting Nut
134
Attachment of Threader Hook Assembly
134
Attachment of Needle Bar Supporter Assy
135
Attachment of Shaft Assy
136
Attachment of Needle Bar Assy. N
137
Attachment of Needle Bar Crank Rod Assy
137
Attachment of Thread Take-Up Lever Link
138
Attachment of BH Switch Assy
138
Attachment of Lead Wire Assy: Ground
138
Attachment of Thread Slider Guide
139
Attachment of Presser Feed Holder Assy
140
4 Adjustment
140
4 Adjustment
141
Starting Test Mode/Starting and Stopping Operation
143
Timing Belt Tension
144
Motor Belt Tension
145
Upper Thread Tension
146
Left Base Line Needle Drop
147
Rotary Hook Unit Position
148
Needle Clearance Left/Right
149
Needle Bar Rising
150
Needle Bar Height
151
Clearance Between Needle and Rotary Hook Point
152
Needle Threader
153
Presser Bar Height and Parallelism
154
Feed Forward/Backward
155
Bobbin Winder
156
BH Lever Switch Position
157
Needle and Presser Foot Front/Back Position
158
Front/Back and Left/Right Position of Feed Dog
159
Feed Dog Height
160
Inner Rotary Hook Bracket Position
161
Inner Rotary Hook Assy. (Lower Thread) Tension
162
5 Failure Investigation For Electronic Parts
162
5 Failure Investigation For Electronic Parts
163
Error Message List
164
Error Message Is Displayed
168
Power Does Not Come On
169
Pulse Motor Does Not Return to Initial Position
170
Pattern Cannot Be Selected
171
Main Motor Does Not Rotate
173
Main Motor Rotation Is Not Normal
174
Pattern Cannot Be Sewn Correctly
175
Button Hole Cannot Be Sewn Correctly
176
Operation Button Does Not Work
177
Does Not Operate When the Foot Controller Is Used
178
Bobbin Thread Cannot Be Wound On the Bobbin
179
LED Lamp Does Not Light
180
LCD Is Not Normal
181
Buzzer Does Not Sound
182
Special Instructions of Wiring
Advertisement
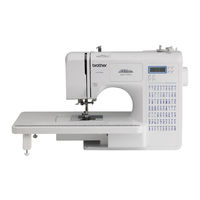
Brother CE-8080PRW Operation Manual (104 pages)
Users Manual - English
Brand:
Brother
| Category:
Sewing Machine
| Size: 7.91 MB
Table of Contents
1
Sewing Machine
3
Important Safety Instructions
6
Table of Contents
8
Accessories
8
Included Accessories
9
Optional Accessories
9
Accessory Compartment
8
1 Knowing Your Sewing Machine
10
Names of Machine Parts and Their Functions
10
The Main Parts
11
Needle and Presser Foot Section
11
Operation Buttons
12
Operation Panel
12
Spool Pin
14
Using Your Sewing Machine
14
Power Supply Precautions
14
Power Supply
15
Foot Controller
15
Sewing Speed Controller (For Models Equipped with the Start/Stop Button)
15
Changing the Needle Stop Position
16
Changing the Initial Needle Position
16
Cancelling the Operation Beep (For Models Equipped with the Operation Beep)
17
Threading the Machine
17
Winding the Bobbin
22
Lower Threading
25
Upper Threading
30
Drawing Up the Lower Thread
31
Replacing the Needle
31
Needle Precautions
31
Needle Types and Their Uses
32
Checking the Needle
32
Replacing the Needle
34
Sewing with the Twin Needle
36
Replacing the Presser Foot
37
Removing the Presser Foot Holder
38
Sewing
38
General Sewing Procedure
39
Selecting a Stitch
40
Adjusting the Stitch Length and Width
41
Starting to Sew
43
Thread Tension
38
2 Sewing Basics
44
Useful Sewing Tips
44
Trial Sewing
44
Changing the Sewing Direction
44
Sewing Curves
44
Sewing Thick Fabrics
45
Sewing Hook-And-Loop Fastener
46
Sewing Thin Fabrics
46
Sewing Stretch Fabrics
46
Stitching Cylindrical Pieces
47
Overcasting Stitches
47
Using Zigzag Foot
48
Using Overcasting Foot
47
3 Utility Stitches
49
Basic Stitching
50
Blind Hem Stitching
51
Stitch Width
52
Stitch Width Adjustment Key
53
Buttonhole Sewing
57
Button Sewing
59
Zipper Insertion
61
Sewing Stretch Fabrics and Elastic Tape
61
Stretch Stitching
61
Elastic Attaching
63
Appliqué, Patchwork and Quilt Stitching
64
Appliqués
64
Patchwork (Crazy Quilt) Stitching
64
Piecing
65
Quilting
66
Free-Motion Quilting
67
Beginning and End of Sewing
68
Reinforcement Stitching
68
Triple Stretch Stitching
68
Bar Tack Stitching
70
Decorative Stitching
71
Fagoting
72
Scallop Stitching
72
Smocking
73
Shell Tuck Stitching
73
Joining
74
Heirloom Stitching
75
4 Appendix
75
Stitch Settings
75
Utility Stitches
82
Maintenance
82
Restrictions On Oiling
82
Precautions On Storing the Machine
82
Cleaning the Machine Surface
82
Cleaning the Race
84
Needle Plate Cover
85
Troubleshooting
85
Frequent Troubleshooting Topics
85
Upper Thread Tightened Up
86
Tangled Thread On Wrong Side of Fabric
88
Needle Bar Thread Guide
89
Incorrect Thread Tension
90
Fabric Is Caught in the Machine and Cannot Be Removed
92
Bobbin Case
94
List of Symptoms
99
Error Messages
99
Operation Beep (For Models Equipped with the Operation Beep)
100
Index
101
Zigzag Stitch
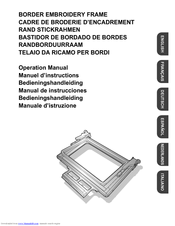
Brother CE-8080PRW Operation Manual (64 pages)
BORDER EMBROIDERY FRAME
Brand:
Brother
| Category:
Sewing Machine
| Size: 14.88 MB
Table of Contents
3
English
3
Table of Contents
4
Accessories
4
Embroidering with the Border Embroidery Frame
4
Sample Projects Using the Border Embroidery Frame
5
Selecting a Pattern
7
Hooping the Fabric in the Border Embroidery Frame
8
Attaching the Border Embroidery Frame to the Embroidery Unit
9
Embroidering the First Pattern
10
Removing the Border Embroidery Frame
10
Embroidering the Next Pattern
13
Français
14
Accessoires
14
Broderie À L'aide Du Cadre De Broderie De Bord
14
Exemples De Projets Avec Le Cadre De Broderie De Bord
15
Sélection D'un Motif
17
Mise En Place Du Tissu Dans Le Cadre De Broderie De Bord
18
Fixation Du Cadre De Broderie De Bord À L'unité De Broderie
19
Broderie Du Premier Motif
20
Retrait Du Cadre De Broderie De Bord
20
Broderie Du Motif Suivant
23
Deutsch
24
Sticken Mit Dem Bordüren-Stickrahmen
24
Beispiele Für Stickereien Mit Dem Bordüren-Stickrahmen
25
Auswahl Eines Musters
27
Einspannen Des Stoffes in Den Bordüren-Stickrahmen
28
Einsetzen Des Bordüren-Stickrahmens in Die Stickeinheit
29
Sticken Des Ersten Musters
30
Abnehmen Des Bordüren-Stickrahmens
30
Sticken Des Nächsten Musters
24
Zubehör
33
Español
34
Accesorios
34
Bordado Con El Bastidor De Bordado De Bordes
34
Ejemplos De Labores Con El Bastidor De Bordado De Bordes
35
Selección De Un Patrón
37
Colocación De La Tela En El Bastidor De Bordado De Bordes
38
Colocación Del Bastidor De Bordado De Bordes En La Unidad De Bordado
39
Bordado Del Primer Patrón
40
Extracción Del Bastidor De Bordado De Bordes
40
Bordado Del Siguiente Patrón
43
Dutch
44
Accessoires
44
Borduren Met Het Randenborduurraam
44
Voorbeeldprojecten Met Het Randenborduurraam
45
Patroon Kiezen
47
Stof in Het Randenborduurraam Plaatsen
48
Randenborduurraam Aan De Borduurtafel Bevestigen
49
Eerste Patroon Borduren
50
Randenborduurraam Verwijderen
50
Volgende Patroon Borduren
53
Italiano
54
Accessori
54
Ricamo Con Il Telaio Da Ricamo Per Bordi
54
Progetti Campione Utilizzando Il Telaio Da Ricamo Per Bordi
55
Selezione DI Un Disegno
57
Inserimento Del Tessuto Nel Telaio Da Ricamo Per Bordi
58
Montaggio Del Telaio Da Ricamo Per Bordi All'unità Da Ricamo
59
Ricamo Del Primo Disegno
60
Rimozione Del Telaio Da Ricamo Per Bordi
60
Ricamo Del Disegno Successivo
Advertisement
Brother CE-8080PRW Operation Manual (16 pages)
Bobbin work kit
Brand:
Brother
| Category:
Accessories
| Size: 0.7 MB
Table of Contents
2
Table of Contents
3
About Bobbin Work
3
Included Accessories
4
Preparing for Bobbin Work
4
Required Materials
5
Upper Threading
5
Preparing the Bobbin Thread
9
Creating Bobbin Work
9
Positioning the Fabric and Sewing
11
Finishing the Thread Ends
12
Bobbin Work Free-Motion Sewing
13
Templates for Free-Motion Sewing
14
Adjusting the Thread Tension
14
Adjusting the Upper Thread Tension
14
Adjusting the Tension of the Bobbin Thread
15
Troubleshooting
Brother CE-8080PRW Parts Reference List (23 pages)
Home
Brand:
Brother
| Category:
Sewing Machine
| Size: 1.79 MB
Table of Contents
4
Table of Contents
5
Main Frame / Cover
9
Upper Shaft Mechanism / Needle Bar / Presser Foot Unit
11
Feed Unit
13
Bobin Winding Mechanism / Needle Threading Mechanism
15
Electric Parts / Main Motor Unit
17
Accessory Parts / User Manual / Other Parts / Package
21
Spare Parts
Brother CE-8080PRW Quick Setup Manual (2 pages)
Quick Setup Guide - Multi
Brand:
Brother
| Category:
Sewing Machine
| Size: 0.45 MB
(Spanish) Brother CE-8080PRW Manual De Instrucciones (104 pages)
Users Manual - Spanish
Brand:
Brother
| Category:
Sewing Machine
| Size: 7.9 MB
Table of Contents
3
Instrucciones De Seguridad Importantes
6
Table of Contents
8
Accesorios
8
Accesorios Incluidos
9
Accesorios Opcionales
9
Compartimento Para Accesorios
8
1 Conozca Su Máquina De Coser
10
Nombres Y Funciones De Las Piezas De La Máquina
10
Componentes Principales
11
Sección De Aguja Y Pie Prensatela
11
Botones De Operación
12
Panel De Operaciones
12
Portacarrete
14
Uso De La Máquina De Coser
14
Medidas De Precaución Con La Corriente Eléctrica
14
Corriente Eléctrica
15
Pedal
15
Control De Velocidad Manual (Para Los Modelos Equipados Con El Botón De Inicio/Parar)
15
Cambio De La Posición De Parada De La Aguja
16
Cambiar La Posición Inicial De La Aguja
16
Cancelar El Pitido (Para Los Modelos Equipados Con El Pitido)
17
Enhebrado De La Máquina
17
Devanado De La Bobina
20
Control De Velocidad Manual
22
Enhebrado Del Hilo Inferior
25
Enhebrado Del Hilo Superior
30
Procedimiento Para Tirar Del Hilo Inferior
31
Cambio De La Aguja
31
Precauciones Con Las Agujas
31
Tipos De Aguja Y Sus Usos
32
Comprobación De La Aguja
32
Cambio De La Aguja
34
Costura Con Aguja Gemela
36
Cambio Del Pie Prensatela
37
Extracción Del Soporte Del Pie Prensatela
38
Costura
38
Procedimiento General Para La Costura
39
Seleccionar Una Puntada
40
Ajuste De La Longitud Y La Anchura De La Puntada
41
Inicio De La Costura
43
Tensión Del Hilo
38
2 Funciones De Costura Básicas
44
Consejos Útiles De Costura
44
Costura De Prueba
44
Cambio De Dirección De La Costura
44
Costura De Curvas
44
Costuras De Telas Gruesas
45
Costura De Cierres De Velcro
46
Costura De Telas Finas
46
Costura De Telas Elásticas
46
Costura De Piezas Cilíndricas
47
Puntadas De Sobrehilado
47
Uso Del Pie Para Zig-Zag
48
Uso Del Pie Para Sobrehilado
47
3 Puntadas Con Aplicaciones
49
Costura Básica
50
Costura Invisible Para Dobladillo
53
Costura De Ojales
57
Costura De Botón
59
Costura De Cremalleras
61
Costura De Telas Elásticas Y Gomas
61
Costura De Telas Elásticas
61
Colocación De Gomas
63
Aplicaciones, Patchwork Y Acolchados
64
Aplicaciones
64
Puntada Patchwork (Acolchado)
64
Remiendos
65
Acolchado
66
Acolchado Libre
66
Pie Móvil
68
Costura De Remate
68
Costura Elástica Triple
68
Costura De Barra De Remate
70
Puntada Decorativa
71
Vainicas
72
Puntada De Festón
72
Smoking
73
Puntada De Concha
73
Costura De Unión
74
Costura De Broches Y Adornos
75
Ajustes De Puntadas
75
Puntadas Con Aplicaciones
75
4 Anexo
82
Mantenimiento
82
Restricciones Para El Engrase
82
Precauciones Para El Almacenamiento De La Máquina
82
Limpieza De La Superficie De La Máquina
82
Limpieza De La Pista
84
Cubierta De La Placa De La Aguja
85
Solución De Problemas
85
Solución De Problemas Frecuentes
85
Hilo Superior Tensado
86
Hilo Enganchado En El Revés De La Tela
89
Tensión Del Hilo Incorrecta
90
La Tela Queda Enganchada En La Máquina Y No Se Puede Extraer
94
Lista De Síntomas
99
Mensajes De Error
99
Pitido (Para Los Modelos Equipados Con El Pitido)
100
Índice
101
Unidad De Cama Plana
(Spanish) Brother CE-8080PRW Manual De Instrucciones (16 pages)
Kit para crear efectos decorativos con bobinas
Brand:
Brother
| Category:
Sewing Machine
| Size: 0.71 MB
Table of Contents
2
Table of Contents
3
Accesorios Incluidos
3
Acerca De Los Efectos Decorativos Con Bobinas
4
Preparativos Para Crear Efectos Decorativos Con Bobinas
4
Materiales Necesarios
5
Hilo Superior
5
Preparación Del Hilo De La Bobina
9
Creación De Efectos Decorativos Con Bobinas
9
Colocación De La Tela Y Costura
11
Acabado De Los Extremos Del Hilo
12
Costura Libre Para Efectos Decorativos Con Bobinas
13
Plantillas Para Costura Libre
14
Ajuste De La Tensión Del Hilo
14
Ajustar La Tensión Del Hilo Superior
14
Ajustar La Tensión Del Hilo De La Bobina
15
Solución De Problemas
Share and save
Advertisement
Related Products
Brother CE-8080
Brother CE-4000
Brother CE-5500PRW
Brother CE-5000PRW
Brother CE5500T
Brother CE7070PRW
Brother CELEBRITY 15
Brother CE1125PRW
Brother CELEBRITY 10
Brother ce1100prw
Brother Categories
Sewing Machine
All in One Printer
Printer
Label Maker
Fax Machine
More Brother Manuals
Login
Sign In
OR
Sign in with Facebook
Sign in with Google
Upload manual
Upload from disk
Upload from URL