Table of Contents
Advertisement
Advertisement
Table of Contents

Related Manuals for Oster OGZC1101


Summary of Contents for Oster OGZC1101
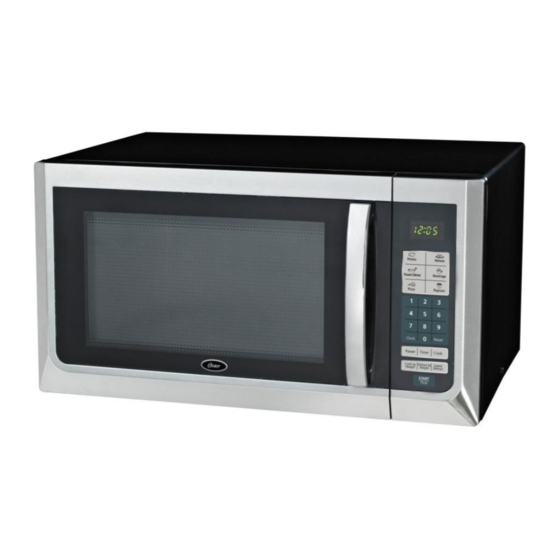
- Page 1 1.1 Cu. Ft. Countertop Microwave Model: OGZC1101 JRD061114...
-
Page 2: Table Of Contents
TABLE OF CONTENTS IMPORTANT SAFETY INSTRUCTIONS PRECAUTIONS TO AVOID POSSIBLE EXPOSURE TO EXCESSIVE MICROWAVE ENERGY INSTALLATION GUIDE GROUNDING INSTRUCTIONS PRODUCT DIAGRAM CONTROL PANEL INSTALLING THE TURNTABLE OPERATION INSTRUCTIONS 7-11 COOKING UTENSILS GUIDE 11-12 COOKING TECHNIQUES 12-13 CLEANING AND CARE BEFORE CALLING FOR SERVICE SPECIFICATIONS... -
Page 3: Important Safety Instructions
IMPORTANT SAFETY INSTRUCTIONS READ ALL SAFETY INSTRUCTIONS BEFORE USING THIS MICROWAVE WARNING - to reduce the risk of burns, electric shock, fire, injury to persons, or exposure to excessive microwave energy, basic safety precautions should be followed, including the following: 1. -
Page 4: Precautions To Avoid Possible Exposure To Excessive Microwave Energy
IMPORTANT SAFETY INSTRUCTIONS (continued) 20. Do not immerse the cord or plug in water. Keep cord away from heated surfaces. Do not let the cord hang over the edge of the table or counter. 21. Use only thermometers specifically designed for microwaves. 22. -
Page 5: Installation Guide
INSTALLATION GUIDE 1. Make sure all packing materials are removed from inside the microwave door. 2. Check the microwave for damage, such as misaligned or bent door, damaged door seals and sealing surface, broken or loose door hinges and latches, and dents inside the cavity or on the door. If there are any damages, do not operate the microwave and contact Customer Service at 1-800-324-0340. -
Page 6: Product Diagram
GROUNDING INSTRUCTIONS (continued) POWER CORD A short power supply cord is provided to reduce the risks resulting from becoming entangled in or tripping over a long cord. Longer cord sets or extension cords are available and may be used if care is taken in using them. ... -
Page 7: Control Panel
CONTROL PANEL DISPLAY Cooking time, power, indicators and present time are displayed. QUICK COOK BUTTONS Instant settings to cook popular foods. NUMBER PADS (0-9) Touch to set time or amount. CLOCK Set current time. RESET Clear all previous settings. -
Page 8: Installing The Turntable
INSTALLING THE TURNTABLE Never place the glass tray upside down. The glass tray should never be restricted. Both the glass tray and turntable ring assembly must always be used during cooking. All food and containers of food should always be placed on the glass tray for cooking. ... -
Page 9: Speed Defrost
OPERATION INSTRUCTIONS (continued) Use single digits to set a cooking power level: Number pad Cooking power 100% B. Two-stage Cooking Some recipes require different stages of cooking at different temperatures. SET STAGE 1: Follow steps 1 and 2 in “One-stage Cooking”. Do not touch START/STOP. SET STAGE 2: Touch COOK then enter proper cooking time and (lower) power level. -
Page 10: Cook By Weight
OPERATION INSTRUCTIONS (continued) COOK BY WEIGHT Touch COOK BY WEIGHT. Enter the one digit code by touching the correct number pad. (1-3) Use the number pad to enter food weight. Touch START/STOP. Cook By Weight Code Description CODE TYPE MAX WEIGHT Beef 5 lbs. -
Page 11: Quick Cook Settings
OPERATION INSTRUCTIONS (continued) QUICK COOK SETTINGS The QUICK COOK settings allow you to cook or reheat food automatically without entering power level or time. For smaller portions, simply touch the applicable pad and start. For larger portions, push the pad twice. FROZEN DINNER, BAKED POTATO and BEVERAGE allow you to cook multiple amounts of the same food. -
Page 12: Cooking Utensils Guide
Touch START/STOP. OPERATION INSTRUCTIONS (continued) BEVERAGE For small cups (5-7 oz./cup): Touch BEVERAGE once. Enter number of cups by touching number pads from 1 to 4. For larger cups (9-11 oz./cup): Touch BEVERAGE twice. Enter number of mugs by touching number pads from 1 to 4. Touch START/STOP FROZEN DINNER For small frozen dinners (7-9 oz./each):... -
Page 13: Cooking Techniques
COOKING UTENSILS GUIDE (continued) Glass and glass-ceramic bowls and dishes -- Use for heating and cooking. Paper plates and cups -- Use for short-term heating at low temperatures. Do not use recycled paper which may contain metal and could ignite. Wax paper -- Use as a cover to prevent splattering. - Page 14 COOKING TECHNIQUES (continued) ARRANGEMENT Arrange evenly shaped foods, such as chicken pieces or chops, with the thicker, meatier parts towards the outside of the turntable where they receive more microwave energy. To prevent overcooking, place delicate areas, such as asparagus tips, towards the center of the turntable. SHIELDING ...
-
Page 15: Cleaning And Care
CLEANING AND CARE 1. Turn off the microwave and unplug the power cord from the wall when cleaning. 2. Keep the inside of the microwave clean. When food splatters or spilled liquids adhere to microwave walls, wipe with a damp cloth. Mild detergents may be used if the microwave gets very dirty. Avoid using spray or other harsh cleaners. -
Page 16: Specifications
SPECIFICATIONS Power Consumption 120V, 60Hz, 1500W Output 1000W Operation Frequency 2450MHz Outside Dimensions (H×W×D) 11 15/16 × 19 13/16 × 15 9/16 inches Oven Cavity Dimensions (H×W×D) 9 7/16 × 13 15/16 × 14 1/8 inches Oven Capacity 1.1 cu. ft. Cooking Uniformity Turntable System Net Weight... - Page 17 © 2014 Sunbeam Products, Inc. doing business as Jarden Consumer Solutions. All rights reserved. ® Oster logo is a registered trademark of Sunbeam Products, Inc. used under license. Distributed by Guangdong Galanz Microwave Oven and Electrical Appliances Manufacturing Co., Ltd., Shunde, Foshan, Guangdong, 528305, China.
Need help?
Do you have a question about the OGZC1101 and is the answer not in the manual?
Questions and answers