Amantii BI-50-FLUSHMT-BLKGLS Installation And Operation Instructions Manual
Wall- mount and built- in units
Hide thumbs
Also See for BI-50-FLUSHMT-BLKGLS:

Subscribe to Our Youtube Channel
Related Manuals for Amantii BI-50-FLUSHMT-BLKGLS


Summary of Contents for Amantii BI-50-FLUSHMT-BLKGLS
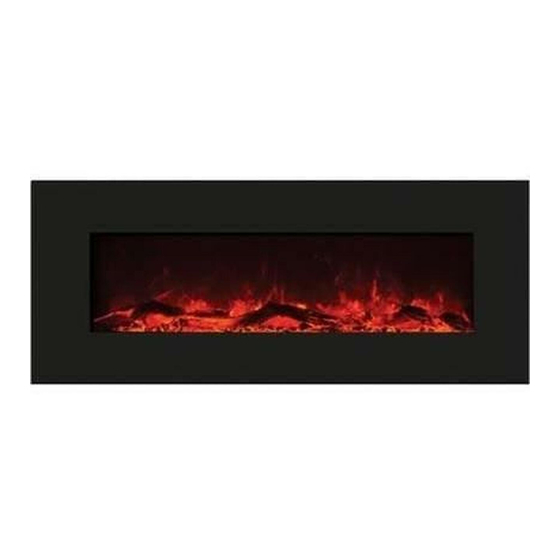
- Page 1 INSTALLATION AND OPERATION INSTRUCTIONS FOR WALL- MOUNT AND BUILT- IN UNITS BI-50-FLUSHMT-BLKGLS BI-50-FLUSHMT-WHTGLS BI-50-FI-FLUSHMT-BLKGLS operation 09 13-01...
-
Page 2: Table Of Contents
TABLE OF CONTENTS CONGRATULATIONS! In selecting this Amantii Wall Mount OR Built-in electric fireplace, you have chosen the finest and most dependable fireplace on the market today. A beautiful and functional addition to the finest homes. Welcome to the family of satisfied Amantii electric fireplace owners. -
Page 3: Important Instructions
IMPORTANT INSTRUCTIONS WARNING! 5. Do not use outdoors. properly grounded outlet box. The adapter should not be used if a three-slot grounded receptacle is available. Cover Of Grounded Outlet Box Metal Screws Grounding Pin Adapter Grounding Means Grounding Fig. 1 SAVE THESE INSTRUCTIONS... -
Page 4: Bi-50-Flushmt-Blkgls/Whtgls Bi-Fi-50-Flushmt-Blkgls
BI-50-FLUSHMT-BLKGLS/WHTGLS BI-FI-50-FLUSHMT-BLKGLS This appliance has been tested in accor- Built-In or Wall Mount Appliance dance with the UL Standand 2021 for Voltage 120V AC,60Hz appliances in the United States and Cana- Amps da. If you need assistance during installa- 1500W... -
Page 5: Installation Overview
INSTALLATION OVERVIEW NOTE: BEFORE YOU INSTALL SITE SELECTION wall. rapes, pillow Review and consider all of the following condi- re etc. wo (2) wall ht and away fr overhead light- ing. ethods: electric et for ease of electric t-In (page 7) nt (Page 9) and all hardware fr ox and r... -
Page 6: Package Contents
PACKAGE CONTENTS Part Wall Mount Bracket Decorative Media CONTENTS Description Quantity Picture Part Screw 0.16 in. x 1.0 in. Wall Plug 0.3 in. x 1.5 in. Wood Screw 0.16 in. x 0.6 in. -
Page 7: Built-In Installation
NEW CONSTRUCTION OR RENOVATION CAUTION: Two people may be needed to NOTE BEFORE YOU INSTALL min. 5 cm 2 in BI-50-FLUSHMT units must stick out of the wall a minimum of 1/2" or 1.3 cm. moisture and is located at least 0.91 m or als such as curtains or drapes, furniture, bedding, paper, etc. - Page 8 BI-50-FLUSHMT INSTALLATION BUILT IN NOTE BEFORE YOU INSTALL BI-50-FLUSHMT units must stick out of the wall a minimum of 1/2" or 1.3 cm. 4. Drive mounting screws through the holes The rough wall opening size of the fireplace. located on the top and both sides of the W(") D(") H(")
-
Page 9: Wall Mount Installation
NOTE: BEFORE YOU INSTALL Stakes for hanging wall bracket It is strongly recommended that the screws be screwed into the wall studs where possible. If anchors are used. ke sure it is level. 5 inch hanging into the keyholes on the back of the unit. Floor 3. -
Page 10: Media Options
Media op ons Model BI-50-FLUSHMT-BLKGLS is shipped with an LED ember log that is pre-installed. 3 colours of fire glass media are also included. See page 16 for log removal instruc ons. See page 16 for media installa on instruc ons. -
Page 11: Fire Glass Media Installation
Fire Glass Media - Log Installa on 1. Removing the log Unplug the unit from wall and make sure controls are switched off. The LED log is shipped in place. The log has tabs on each side that hold it secure. Remove the side panel to remove the log set and the LED strip. . -
Page 12: Front Installation
FRONT INSTALLATION NOTE: BEFORE YOU INSTALL It is recommended that two people install the front onto the appliance, w ear sa fety glasses and gloves when handling glass. 1.Lift fireplace front and line up the brackets with the four (4) shoulder screws on the side of appliance body NOTE: Before you lift the front glass. -
Page 13: Operating The Unit
OPERATING THE UNIT Wall 1. Make sure the appliance is switched OFF (refer on the right hand side of the unit. 3. Plug unit into electrical outlet. HARD-WIRE INSTALLATION If it is necessary to hard wire this appliance, a qualified electrician may remove the cord connection, and wire the appliance directly to the house hold wiring. - Page 14 OPERATING THE UNIT This remote control will be used on : BI-FI-50-FLUSHMT-BLKGLS, BI-50-FLUSHMT-WHTGLS The button located at the top position of the remote control is ON/OFF. Press it, the flame and ember will be on. The heater will be off. Press again, the fireplace will turn off. “DISPLAY ON/OFF”: Switching the fireplace flame and tray light ON/OFF.
- Page 15 This remote control will be used on : BI-50-FLUSHMT-BLKGLS The button located at the top position of the remote control is ON/OFF. Press it, the flame and ember will be on. The heater will be off. Press again, the fireplace will turn off.
- Page 16 1. Power ON/OFF switch 2. Heat control button 3. Flame control button 4. HEATER LED 5. POWER LED Plug the heater into a suitable outlet. 1) “Power ON/OFF” Set this switch to position I to turn the product ON. Setting it to O to turn the product OFF. The POWER LED will be lit when the fireplace insert is on.
-
Page 17: Replacing The Remote Control Battery
REPLACING THE REMOTE CONTROL BATTERY When the remote control stops operating or its range seems reduced, it is time to replace the batteries with new ones. Remove the batteries if the remote control won’t be used for a long period of time. 1. -
Page 18: Care And Maintenance
CARE AND MAINTENANCE CLEARANCE TO COMBUSTIBLES Keep electrical cords, drapery, furniture and other combustibles at least 3 ft. from the front of the heater and away from the sides. CLEANING TRIM Clean the metal trim using a soft cloth, slightly dampened with a citrus oil-based product and buff with a clean soft cloth. -
Page 19: Fireplace Maintenance
FIREPLACE MAINTENANCE WARNING: Disconnect power before performing any maintenance or cleaning to reduce the risk of LED LIGHT BULB REPLACEMENT LED light bulbs are to be replaced by the manufacturer, it’s service agent or similar quali- WARNING: UNIT DISPOSAL Do not dispose with other household wastes. To prevent possible harm to the environment or human health from uncontrolled waste disposal, recycle it responsibly to promote the... -
Page 20: Trouble Shooting
TROUBLE SHOOTING WARNING Disconnect power before performing any maintenance and allow to cool before servic- SYMPTOM POSSIBLE CAUSES CORRECTIVE ACTION Fireplace doesn’t work. Fireplace inner temperature over Reset switch by turning main power switch off and waiting five heatng or home circuit breaker mimutes, then turning it back on. -
Page 21: Parts List
PART LIST REF NO. PART NO. DESCRIPTION 1 602030C BLOWER AND HEATER ASSEMBLY 2 601089C CIRCUIT BOARD 3 601089E CIRCUIT BOARD 4 301506 REMOTE RECEIVER 5 601120H LED STRIP FOR FLAME 6 601121N LED STRIP FOR FLAME 7 601122H LED STRIP FOR LOG 8 601123N LED STRIP FOR LOG 9 601120J... -
Page 22: Service History
SERVICE HISTORY This heater must be serviced annually depending on usage. Dealer service technician Date service Performed special Concerns Name Name NOTES:... -
Page 23: Warranty
Products covered by this limited warranty have been tested and inspected prior to shipment and, subject to the provisions of this war- ranty, Amantii warrants such products to be free from defects in material and workmanship for a period of one (1) year from the date of the first purchase of such products. - Page 24 ELECTRIC FIREPLACES...
Need help?
Do you have a question about the BI-50-FLUSHMT-BLKGLS and is the answer not in the manual?
Questions and answers