
Summary of Contents for Fusion Research Ovation
- Page 1 FUSION RESEARCH Ovation Music Streamers and Players Installation & Setup Guide November 2014...
-
Page 2: Table Of Contents
TABLE OF CONTENTS Chapter 1: Opening & Testing Your Ovation ........3 Chapter 2: Basic System Setup ............ 6 Chapter 3: Adding Streaming Apps ..........12 Chapter 4: Your Own Music & Syncing ........... 16 Chapter 5: Creating & Deleting Playlists ........21 Chapter 6: Ovation Wireless Player Setup........23... -
Page 3: Chapter 1: Opening & Testing Your Ovation
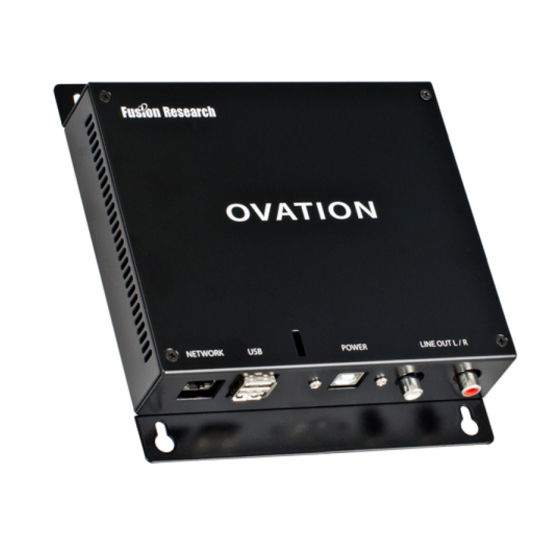
Chapter 1 Opening & Testing your Ovation IMPORTANT NOTICES ON OPERATION OF THIS PRODUCT DO NOT remove the power during boot-up. Though this is a headless unit, please note that the boot sequence can take up to 2 full minutes. Removing the power during this process will corrupt the image. - Page 4 FLAC & MP3 for streaming Video Connections: Ovation Servers are headless units, that means there is no TV display. You will control the system through computers on the same network and any of the many drivers that are available for Squeezebox servers.
- Page 5 Ovation devices. The Finder will return a list of the Ovation devices located on the network. Select the desired player from the Ovation Finder Utility list and click on its IP address.
- Page 6 Chapter 1 Opening & Testing your Ovation NOTE: After clicking the IP of the player it can take up to one minute to access the Fusion Music Configurator home page. INTERNET RADIO: The quickest way to ensure your OMS server is working properly is to select an internet radio station.
-
Page 7: Chapter 2: Basic System Setup
Chapter 2 Basic System Setup SETTING UP AN OVATION MUSIC SYSTEM: The Ovation Music Streamers are very powerful machines. When setup properly, a user of the system may access music through: One of the many Streaming Apps Any of the thousands of Internet Radio Stations... - Page 8 Chapter 2 Basic System Setup 2. Fusion System Configurator accessed by using the Ovation Finder Utility [http://ovation.fusionrd.net] and clicking on the IP of the Ovation device. This is the integrator interface and will be used for setting up and changing various options on the Ovation system.
- Page 9 You need to select Static IP as the option and fill in the IP Address, Subnet Mask, Gateway & DNS1. Then hit the [Apply & Reboot] button. Once you’ve hit the [Apply & Reboot] button, it will reboot the Ovation machine. You’ll also see that your web browser will no longer be connected.
- Page 10 Chapter 2 Basic System Setup Give the server enough time to completely reboot, at which point you should then refresh the Ovation Finder Utility page and select the device again. If you are using [http://fusionmusic], [htt://musicstream] or [http://oms-000####] you will want to completely close the browser and re-open it as your computer will remember the old IP address and by closing the browser, you’ll clear the cache.
- Page 11 1. Go to the [www.mysqueezebox.com] website where you will be able to log into the client’s existing account or create a brand new account. 2. Once you’ve logged in or created a new account, Go to the Ovation Music Manager page. Choose [Settings] on the bottom right of the page.
- Page 12 If one or more players is not listed, try playing music on that player, then close the webpage completely and go back to it. At this point your basic setup is finished and you are ready to use internet radio or begin adding your streaming apps. Ovation Music Server Installation Manual...
-
Page 13: Chapter 3: Adding Streaming Apps
Adding Streaming Apps to Your Ovation ADDING STREAMING APPS: Adding streaming apps to your Ovation streamer is very simple. Begin by going to www.mysqueezebox.com and enter your login information. Click on the [App Gallery] tab to see all the applications available, select the app your interested in adding and click [Install App]. - Page 14 Under the player settings tab you can specify whether or not you want that particular app to show up on the Ovation. By clicking on the [My Apps] tab you can manage your individual apps and uninstall them if desired. All changes made on this website will appear on the Ovation.
- Page 15 Chapter 3 Adding Streaming Apps to Your Ovation ADDING THE SPOTIFY STREAMING APP: Activating a Spotify account is done in a slightly different way from the other streaming apps. To do this, go to the ‘home page’ for managing your client’s music: Type in [http://fusionmusic], [http://musicstream] or [http://oms-000####] into your browser.
- Page 16 Simply put in your Spotify username and password and click on the apply button. NOTE: Spotify requires a paid subscription to work with Ovation. This is similar to Pandora and some of the other services. Ovation Music Server Installation Manual...
- Page 17 NOTE: You must have a user name and password for the shared folders on your remote computer. You’ll also want to set a static IP on the remote computer, so the Ovation knows to look to the same place every time music from the remote folder is requested.
- Page 18 5. The password for that same folder FORMATS FOR STREAMING YOUR OWN MUSIC: Ovation can natively play music in one of two formats: FLAC (for lossless audio) and MP3 (for compressed lossy audio). When importing music to this server, music files may be transcoded to one of these formats.
- Page 19 Settings’ tab, select that same remote folder in the ‘Media Folders’ section. SYNCING AN ITUNES ACCOUNT: With the Ovation Music Streamer you can set up a one-way sync with iTunes. Once set up, music loaded into a client’s iTunes account will automatically be synced to the Ovation.
- Page 20 Now you need to link the XML & music files with the Ovation. 1. Click [Browse], select [remotefolders] and find the .XML file in your shared folder.
- Page 21 Configuring Sync Settings Once you have completed linking the server with remote folder locations in the Ovation Client interface you will need to access the Fusion Music Server Configurator and select the [Server] tab. The Server Configuration screen lets you manage the re-scan function of the Library and iTunes syncronized media content.
- Page 22 Playlists - Creation & Deletion CREATING NEW PLAYLISTS You’ll be creating new playlists in the Ovation Music Manager. To create a playlist, simply start a new queue by playing a song you want to have in the playlist. Go to the next song (or album) you desire and click on the + button to add it to the queue.
-
Page 23: Deleting Playlists
DELETING PLAYLISTS Deleting playlist is just as simple. Select the playlist you wish to delete and click [delete]. It will then ask you to confirm deletion. Check the box and click delete again. Ovation Music Server Installation Manual... -
Page 24: Chapter 6: Ovation Wireless Player Setup
Ovation Wireless Player Setup Ovation Wireless Player Setup You should at this point have your Ovation server fully configured and online. You should also be familiar with its operation and be able to see it through the web browser on your PC or Mac. If you have not yet configured your Ovation Server please refer to the previous chapters for complete instructions. - Page 25 With the Ovation devices connected to the [Wired Network] you are able to access the Ovation Player Configuration the same as the Ovation servers by using either the Ovation Finder Utility or by entering in the IP address of the unit followed by [:4742].
- Page 26 You will need to supply the device with a IP, Subnet and DNS information. Failure to fill in the information correctly can result in the Ovation device not being able to be seen on the network, issues using the internet radio and improper function of streaming apps, requiring the device to be reset to factory specs before further use.
- Page 27 Once you have completely filled in the required information, select [Apply & Reboot] which will apply the network information and reboot the Ovation device. Upon reboot of the device you can now relog into the Ovation Player at which point you should see screen below featuring the wireless network information now activated.
- Page 28 Now that you have completed configuration of the Ovation Player hardware you are ready to access the device as another playback Zone. To do this you will need to access your Ovation Server from a web browser and select the [Choose Player] button.
- Page 29 Ovation Wireless Player Setup Changing Your Ovation Player Name If you want to rename the Ovation Player Zone you can do this by logging into the Ovation server configurator page. From the Ovation Music Server Configurator homepage select [Remote Player(s)] icon to bring up a list of the zones available to the Ovation server.
-
Page 30: Chapter 7: Warranty And Return Information
USA to return repaired or replacement units to the owner. Ovation Music Server Installation Manual... - Page 31 Fusion provides out of warranty repair service on a flat-rate basis if the system fails the system evaluation test. Minimum charges will apply to evaluate the system. Technical support will provide information on this service at the time of the call. Ovation Music Server Installation Manual...
- Page 32 Fusion Research | Danville, CA | 925.217.1233 | www.fusionrd.com Ovation Music Server Installation Manual...
Need help?
Do you have a question about the Ovation and is the answer not in the manual?
Questions and answers