
Subscribe to Our Youtube Channel
Summary of Contents for Wirepath Surveillance WPS-100-NVR-4IP
- Page 1 WPS-100-NVR-4IP IP NVR Installation and User’s Manual Review manual thoroughly before installation. Retain for future reference.
-
Page 2: 1- Important Safety Instructions
WPS-100-NVR-4IP Installation Manual 1- Important Safety Instructions WARNING: To reduce the risk of fire or electric shock, do not expose this apparatus to rain or moisture. Read and follow all instructions and warnings in this manual. Keep for future reference. -
Page 3: Table Of Contents
WPS-100-NVR-4IP Installation Manual 1- Important Safety Instructions ...................... 2 2- Manual Overview .......................... 7 3- Required Items for Installation ....................7 4- Package Contents ......................... 7 5- Optional Accessories ........................8 5.1-Power Supplies ........................8 5.1.1-Remote Power Supplies ..........................8 6- NVR Overview .......................... - Page 4 WPS-100-NVR-4IP Installation Manual 2-Configure a Privacy Mask ...................... 22 3-Configure Motion Detection Areas ..................23 4-Selecting a Motion Detecting Area ..................23 5-Setup a Schedule ........................23 6-Configure NVR for Remote Access ..................24 12- Browser Configuration Menu ....................25 12.1-System Information ......................
- Page 5 WPS-100-NVR-4IP Installation Manual 14.1.1- ......................... 43 14.1.2- ......................... 45 14.1.3- ......................... 46 14.1.4- ......................... 47 14.1.5- ......................... 47 14.1.6-Privacy Mask Area Setup ........................48 14.1.7-Camera Audio Setup Menu ........................48 14.1.8-Quick Setup Menu ..........................49 14.2- Record Menu ......................49 14.2.1-...
- Page 6 WPS-100-NVR-4IP Installation Manual 14.6.1- ........................61 14.7- System Menu ......................61 14.7.1- ........................62 14.7.2- ........................62 14.7.3- ........................62 14.7.4- ........................62 14.7.5- ........................63 14.7.6- ........................63 15- Specifications ..........................64 10/1000 ............................. Error! Bookmark not defined. 16- Dimensions ..........................67 17- Warranty ............................
-
Page 7: 2- Manual Overview
WPS-100-NVR-4IP Installation Manual 2- Manual Overview We recommend that this document is read in its entirety before proceeding with system design, installation, or operation of the WPS- 100-NVR-4IP. When viewing this document electronically, the content identified within references can be quickly located by clicking on the reference. -
Page 8: 5- Optional Accessories
WPS-100-NVR-4IP Installation Manual 5- Optional Accessories Wirepath Surveillance offers a wide range of accessories that provide power to the NVR, , and make connections to the head end quick and easy. 5.1- Power Supplies 5.1.1- Remote Power Supplies Use these remote power supplies to power all the Wirepath™ Surveillance products in the system from a remote location. -
Page 9: 6- Nvr Overview
WPS-100-NVR-4IP Installation Manual 6- NVR Overview 6.1- Features Hexaplex Operation Whether at home, on the job or sitting at the airport, the NVR along with Wirepath IP Cameras enables you to simultaneously perform six system operations all at once:... -
Page 10: Nvr Connections And Controls
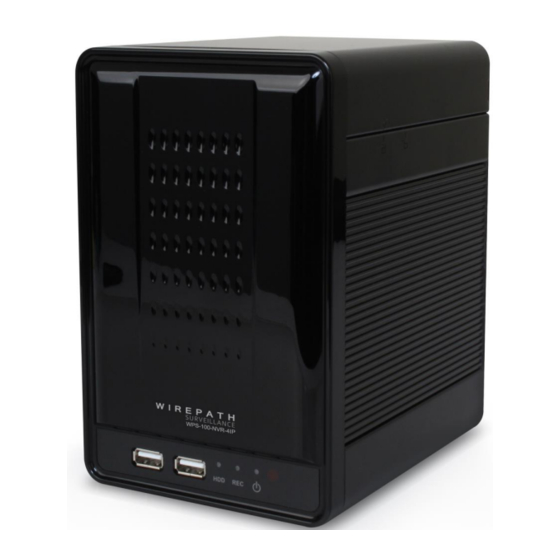
WPS-100-NVR-4IP Installation Manual 6.2- NVR Connections and Controls 6.2.1- Front Panel WPS-100-NVR-4IP USB Ports Connection for USB Drives for storage of recordings, and photos. HDD LED Flickers BLUE indicating HDD activity. REC LED Illuminates BLUE when NVR is Recording. Power LED Illuminates BLUE when NVR is powered On. -
Page 11: 2-Rear Panel
WPS-100-NVR-4IP Installation Manual 6.2.2- Rear Panel AUDIO VGA OUTPUT ETHERNET 12V DC 4.16A HDMI OUTPUT INPUT Main Monitor Out (VGA) Connect to a VGA display for viewing of NVR content. DC Power Connection Connect to the included 12V DC 4.16A Power Supply. -
Page 12: Ir Remote
WPS-100-NVR-4IP Installation Manual 6.3- IR Remote Record Starts and stops recording of the currently displayed image. ID 1 to 8 Sets the IR Remote to control an NVR set to that ID. Zoom Digital Zoom of currently displayed Camera. Menu Displays OSD Menu, or Exits the current menu. -
Page 13: Browser Interface
WPS-100-NVR-4IP Installation Manual 6.4- Browser Interface Note: The NVR requires configuration before accessing for the first time. See sections 9-IP Installer Software 10-Initial Configuration before accessing the NVR through the local interface. 6.4.1- Accessing the NVR Note: IE 8.0 or higher is required to access the NVR; other browsers are not supported at this time. -
Page 14: 3-Live View Controls
WPS-100-NVR-4IP Installation Manual 6.4.3- Live View Controls 6.4.3.1- 6.4.3.2- Top of Screen Bottom of Screen Rewind (REW) Split Screen Display Selection Rewinds the currently playing recording. Select 1 to display or advance to next single image Stop Select 4 to display a 4 image Split Screen. -
Page 15: 4-Ptz Camera Controls (Browser)
WPS-100-NVR-4IP Installation Manual 6.4.4- PTZ Camera Controls (Browser) Navigation Buttons Up, Down, Left and Right. Home Returns camera to the preset Home position. Zoom + to Zoom In, - to Zoom Out. Speed Sets the speed for navigation buttons. Auto Pan Press Play to start, and Pause to stop. -
Page 16: 7- System Diagram Considerations
WPS-100-NVR-4IP Installation Manual 7- System Diagram Considerations 7.1- Recommended Equipment 7.1.1- Networking Devices Streaming content from IP NVR requires bandwidth greater than most devices. We recommended the use of 1Gbps routers and switches in order to maintain a high quality streaming image. Additionally, to reduce traffic on the overall network, we recommend that all IP Surveillance devices be connected to a dedicated 1Gbps switch or dedicated VLAN. -
Page 17: 8- Nvr Installation
WPS-100-NVR-4IP Installation Manual 8- NVR Installation 8.1- Placing the NVR The WPS-100 Series NVR contains a fan for cooling the HDD and other internal components. A minimum of 3” of free space is required on the sides and rear of the unit to maintain proper air flow. -
Page 18: 9- Ip Installer Software
WPS-100-NVR-4IP Installation Manual 9- IP Installer Software The IP Installer software provides a quick view of Wirepath™ IP Surveillance devices connected to local network. This software is required for initial setup of any Wirepath™ IP Surveillance device. Recommendation: Before starting any configuration or service of Wirepath™ IP devices, we recommend that the latest version of the IP Installer is downloaded from www.SnapAV.com to ensure that all functionality is available. -
Page 19: 10- Initial Configuration
WPS-100-NVR-4IP Installation Manual 10- Initial Configuration While the NVR has a local interface that can viewed on a monitor or HDTV, we recommend that initial configuration be performed through the browser interface. Recommendation: While the NVR can be configured remotely from outside the local network, operation can be slow. We strongly recommend that the bulk of configuration be performed via the local network to avoid slow response times. -
Page 20: 5-Configure The Date And Time
WPS-100-NVR-4IP Installation Manual 5- Configure the Date and Time To ensure that recordings and photos are accurately time stamped, the Date and Time of the NVR need to be set to the correct time for the location of the NVR. -
Page 21: 8-Assign Cameras To Channels Of The Nvr
WPS-100-NVR-4IP Installation Manual 8- Assign Cameras to Channels of the NVR While the cameras are IP and appear on a local network, there may be cameras on the network that will not be viewed by the NVR (for example, a stand-alone camera intended to be monitored, but not recorded) . Assigning cameras to the NVR is required in order to view, control and record them from the NVR GUI. -
Page 22: 11- Additional Configuration
WPS-100-NVR-4IP Installation Manual 11- Additional Configuration Recommendation: While the NVR can be configured remotely from outside the local network, operation can be slow. We strongly recommend that the bulk of configuration be performed via the local network to avoid slow response times. -
Page 23: 3-Configure Motion Detection Areas
WPS-100-NVR-4IP Installation Manual 3- Configure Motion Detection Areas Motion Detection allows for specific areas of the image to be used for triggering the recording of video, an alarm, or sending a notification. When an area is defined, motion in that area will trigger the predefined action; this is useful to avoid unwanted events from being triggered due to motion in areas of no concern. -
Page 24: 6-Configure Nvr For Remote Access
WPS-100-NVR-4IP Installation Manual 6- Configure NVR for Remote Access Access to the NVR from outside the local network requires configuration of individual ports for each NVR, a Dynamic DNS name from a DDNS service provider be assigned, and the router setup for port forwarding. Follow the steps within this section to configure the NVR(s) for Remote Access. -
Page 25: 12- Browser Configuration Menu
WPS-100-NVR-4IP Installation Manual 12- Browser Configuration Menu The local and browser configuration menus contain the same settings for the NVR. Changes to settings are synced in real time and are available in both menus as they are made. 12.1- System Information This menu displays important information about the NVR’s network settings, and allows for setting items such as language, Date, and... -
Page 26: User Management
WPS-100-NVR-4IP Installation Manual 12.2- User Management There are 2 levels of users: Administrator which is the default Admin account, and Guest accounts. The Admin account is the only account that can be set as an administrator. An unlimited number of guest accounts can be added. -
Page 27: System Update
WPS-100-NVR-4IP Installation Manual 12.3- System Update Important Note: Updating Firmware MUST be performed over a wired IP connection to the device. While it is possible to recover from an upgrade that fails due to a lost or intermittent connection, the NVR will be inoperable until it is recovered via a reliable connection. -
Page 28: Ip Settings
WPS-100-NVR-4IP Installation Manual 12.1- IP Settings 12.1.1- IP Assignment Allows for configuration of the NVR’s network settings for IP communication. We recommend that this information is provided by the network administrator to avoid address conflicts with other devices on the network. -
Page 29: Pppoe
WPS-100-NVR-4IP Installation Manual 12.1- PPPoE 12.1.1- PPPoE Settings Point-to-Point Protocol Over Ethernet (PPPoE) is a network protocol primarily used DSL (Digital Subscriber Line) providers and modems. This protocol requires a login to connect to the modem even when a router is used. -
Page 30: Server Settings
WPS-100-NVR-4IP Installation Manual 12.1- Server Settings A “server” in this case is an Email account or FTP site, either of which must be configured in order to send or save notifications, snapshots or short video recordings. While either method can be used, only Email is needed for notifications. -
Page 31: 2-Ftp Settings
WPS-100-NVR-4IP Installation Manual Secure Check this box to enable a secure connection when sending emails. This is required Connect for most current SMTP servers. Refer to the Email provider or network administrator for information on the use of TLS and SSL. -
Page 32: Nvr Settings
WPS-100-NVR-4IP Installation Manual 12.3- NVR Settings The NVR settings menu is used to assign Cameras to the NVR, configure Camera settings such as Privacy masks and Motion Detection, configure settings for NVR Recording and Alarms, check status of and format the NVR HDD(s), and configure System settings. - Page 33 WPS-100-NVR-4IP Installation Manual 12.3.1.2- Quick Search Menu This menu is located in the NVR Setup menu and displays a list of connected IP devices. Use this menu to quickly assign devices to channels of the NVR. Server Name of the device...
- Page 34 WPS-100-NVR-4IP Installation Manual 12.3.1.3- Camera Video Setup The settings in this menu relate to the resolution and performance of the connected Wirepath™ device. The image maybe low quality, or not appear at all if the setting is not supported. While experimentation is good, referring to the specifications for the device is the best place to start before configuring these settings.
- Page 35 WPS-100-NVR-4IP Installation Manual 12.3.1.4- Camera Image Setup The settings in this menu allow for adjusting of the appearance of the Wirepath Camera or Encoder image. Recommendation: We recommend that these settings be left at the default unless there are issues with the image.
- Page 36 WPS-100-NVR-4IP Installation Manual 12.3.1.5- Motion Setup Provides 3 areas (or All) to select for detecting motion on the Camera. When configured, an action such as record, take a photo, and send notification will be performed after the motion is detected.
-
Page 37: 2-Record Tab
WPS-100-NVR-4IP Installation Manual 12.3.2- Record Tab The Record Tab is used to configure the Pre- and Post-Alarm Record Times, Record Mode, Mobile Streaming, and provides the ability to manually start or stop a recording. Pre Alarm Amount of time from 0 to 30 seconds prior to the event to start the recording... - Page 38 WPS-100-NVR-4IP Installation Manual 12.3.2.1 (B) Mail Schedule Setup Use this menu to configure the types of events for which to send email at the scheduled Day/Time. A recording will be saved to the HDD, and sent via email as configured in section 12.1.1-Mail...
-
Page 39: 3-Alarm Tab
WPS-100-NVR-4IP Installation Manual 12.3.2.1 (D) Mobile Stream Setup Mobile Enable or Disable the ability to view or record from a mobile device GUI. Must be Enabled to access the NVR from the Wirepath WPS-IP iPhone, iPad or Android apps. Recommendation: To ensure that a mobile stream is always available, we recommend that this feature is left enabled. -
Page 40: Log List
WPS-100-NVR-4IP Installation Manual NVR ID Sets an ID to identify the NVR for IR Remote control to avoid interfering with other NVRs that are in the same location. When set to “0”, the NVR will respond to any ID selected on the remote control. -
Page 41: 13- Local Display Interface
WPS-100-NVR-4IP Installation Manual 13- Local Display Interface 13.1- Right Side Navigation The local NVR display interface can be navigated using the IR remote or the mouse. These controls are located on the right hand side unless Video (full screen display) is selected on the OSD or the remote. -
Page 42: Single Image Controls
WPS-100-NVR-4IP Installation Manual 13.2- Single Image Controls When viewing a single image, controls for Audio, and PTZ notification will appear in the upper right hand corner of the image. 1. Camera Audio Turns the cameras microphone input On and Off of the selected channel. -
Page 43: 14- Local Configuration Menu
WPS-100-NVR-4IP Installation Manual 14- Local Configuration Menu The local and browser configuration menus contain the same settings for the NVR. Changes to settings are synced in real time and are available in both menus as they are made. 14.1- Camera Menu Channel Tabs Selects channels 1 to 4 to allow connection. - Page 44 WPS-100-NVR-4IP Installation Manual 14.1.1.1- Camera Quick Search Menu This menu opens from the Camera Setup menu when the Camera Quick Search button is selected. Server Name Name of the Wirepath Camera or Encoder. IP Address IP Address of the Camera or Encoder. Selecting the IP Address adds the selected information and returns to the Camera Setup Menu.
- Page 45 WPS-100-NVR-4IP Installation Manual Channel Selects channels 1 to 4. Tabs 14.1.2- Resolution Available Resolutions (High to Low Quality): 1920x1080 1280x720 640x480 320x240 176x144 Quality Available Bit Rates (Low to High): 1Mbps 2Mbps ...
- Page 46 WPS-100-NVR-4IP Installation Manual Channel Selects channels 1 to 4. Tabs 14.1.3- Display When selected the image will be displayed for adjusting Title Displays the current Title of the channel Auto SEQ When the NVR main GUI is in SEQ mode, this setting determines the length...
- Page 47 WPS-100-NVR-4IP Installation Manual Provides 3 areas (or All) to select for detecting motion on the Encoder. When configured, an action such as record, take a photo, and send notification can be performed after the motion is 14.1.4- detected. Channel Tabs Selects channels 1 to 4.
-
Page 48: 6-Privacy Mask Area Setup
WPS-100-NVR-4IP Installation Manual 14.1.6- Privacy Mask Area Setup Opens when the Privacy Mask Area Setup is selected in the Privacy Mask Setup Menu. To Set An Area For Masking A. Place the mouse at the upper left hand corner of the area to mask, hold down the left mouse button and drag the box over the area, and release the mouse button. -
Page 49: 8-Quick Setup Menu
WPS-100-NVR-4IP Installation Manual 14.1.8- Quick Setup Menu The Quick Setup Menu allows of manual access of camera IP addresses, and ports as list by channel. Camera Quick Opens the Camera Quick Search menu that provides a list of IP Cameras and Search encoders connected to the network. - Page 50 WPS-100-NVR-4IP Installation Manual 14.2.1- Use this menu to setup a schedule for recording video based on a preset schedule. Recordings are stored on the HDD. Schedule Split Screen with Days of the Week and Time of day for recordings. Enabled, or Disabled days and times appear as colors as listed below.
- Page 51 WPS-100-NVR-4IP Installation Manual Use this menu to configure the types of events for which to send Email at the 14.2.2- scheduled Day/Time. A recording will be saved to the HDD, and sent via Email. See section 14.4.4- Schedule Split Screen with Days of the Week and Time of day for recordings.
- Page 52 WPS-100-NVR-4IP Installation Manual Use this menu to setup a schedule a Day/Time to save recordings to an FTP location. 14.2.3- Recordings are stored to the FTP location configured. See section 14.4.5- Schedule Split Screen with Days of the Week and Time of day for recordings. Enabled, or Disabled days and times appear as colors as listed below.
-
Page 53: Alarm Menu
WPS-100-NVR-4IP Installation Manual 14.3- Alarm Menu 14.3.1- Alarm Auto Selects the NVR local display action to occur when a Motion event is Switch detected or an alarm input is triggered. Disable: NVR local display does not change Full Screen: NVR local display switches to Full Screen view for the Camera that detected Motion or has its DI input triggered. -
Page 54: Network Menu
WPS-100-NVR-4IP Installation Manual 14.4- Network Menu 14.4.1- Allows for configuration of the NVR network settings for IP communication. We recommend that this information is provided by the network administrator to avoid address conflicts with other devices on the network. Note: If a static IP used it must be outside the DHCP range of the router to avoid conflicts with other devices on the network. - Page 55 WPS-100-NVR-4IP Installation Manual Point-to-Point Protocol Over Ethernet (PPPoE) is a network protocol primarily used DSL (Digital 14.4.2- Subscriber Line) providers and modems. This protocol requires a login to connect to the modem even when a router is used. Configuration of these settings is not required to operate the camera on a standard network.
- Page 56 WPS-100-NVR-4IP Installation Manual A “server” in this case is an Email account or FTP site, either of which must be configured in 14.4.4- order to send or save notifications, snapshots or short video recordings. While either method can be used, only Email is needed for notifications.
- Page 57 WPS-100-NVR-4IP Installation Manual Subject Subject to use for the email. Secure Check this box to enable a secure connection when sending emails. This is Connect required for most current SMTP servers. Refer to the Email provider or network administrator for information on the use of TLS and SSL.
- Page 58 WPS-100-NVR-4IP Installation Manual When an FTP server is configured, recorded video and snapshot files can be stored on the 14.4.5- server for later access. Contact the network administrator for FTP server information. Enable Alarm Notifications will be sent when an alarm event occurs.
-
Page 59: Password Menu
WPS-100-NVR-4IP Installation Manual 14.5- Password Menu This menu allows for requiring a password to modify perform configuring or modifying certain parameters of the NVR. HDD Format When Enabled (checked), prevents a user of the NVR local GUI Password from formatting the NVR HDD unless they can provide appropriate Confirmation login credentials (admin, or user with HDD Setup permission). -
Page 60: Hdd Menu
WPS-100-NVR-4IP Installation Manual 14.5.1.1- User Credentials Menu This menu appears when the Permission or Add User is selected in the User Management menu. User Credentials User Usernames can only contain Letters and Numbers. Spaces and special characters such as underscores will not be accepted. -
Page 61: System Menu
WPS-100-NVR-4IP Installation Manual 14.6.1- Displays a list of installed HDDs, and connected USB drives, and their current state. Disk HDD/USB number Capacity Total size of the HDD/USB Free Amount of free space available on the HDD/USB 14.6.1- Formats the HDD. A warning will appear allowing for proceeding, or canceling the format request. - Page 62 WPS-100-NVR-4IP Installation Manual 14.7.1- Unlike the web interface, updating software on the local interface is performed via a connected USB drive. Download the latest software from www.Snapav.com, and save to a USB drive. The software may be in a folder that can be selected.
- Page 63 WPS-100-NVR-4IP Installation Manual 14.7.5- Enable When enabled, Daylight Saving Time Start and Stop parameters can be Daylight configured. By default this is set to On. Savings 14.7.6- As opposed to Camera Image settings, these settings affect the entire VGA display output of the NVR, including the GUI.
-
Page 64: 15- Specifications
WPS-100-NVR-4IP Installation Manual 15- Specifications Video Hexaplex - Simultaneous Live View, Record, Playback, Control Systems Control, Remote Multi Operation Access, Backup Display Channel Support Ip Cam Resolution Up to 1080P (2 MP) Display Frame Rate Up to 30 FPS @ NTSC per CH... - Page 65 WPS-100-NVR-4IP Installation Manual Video Backup Playback Viewer Storage & Backup Device Internal HDD Support SATA HDD x 2 / (1) 1TB HDD preinstalled External USB Backup Device Network Ethernet Yes (10/1000M/1000M) Internet Explorer 6.0 or above DDNS Yes (wirepathdns.com with geo-redundant USA servers)
- Page 66 WPS-100-NVR-4IP Installation Manual Audio Audio Output 3.5mm x 1 Audio Input 3.5mm x 1 Audio Backup Audio Streaming Others Remote (with battery) x 1 Adapter(With Power Cord) x 1 Mouse x 1 Accessories CD x 1 Quick Start Guide x 1...
-
Page 67: 16- Dimensions
WPS-100-NVR-4IP Installation Manual 16- Dimensions 7in. WPS-100-NVR-4IP 4.5in. 5.7in. Pg. 67 www.snapav.com Support: 866.838.5052... -
Page 68: 17- Warranty
WPS-100-NVR-4IP Installation Manual 17- Warranty 3-Year Limited Warranty This Encoder has a 3-Year Limited Warranty. The warranty includes parts and labor repairs on all components found to be defective in material or workmanship under normal conditions of use. This warranty shall not apply to products which have been abused, modified, disassembled or improperly installed. -
Page 69: 19- Technical Information Glossary
WPS-100-NVR-4IP Installation Manual 19- Technical Information Glossary 19.1- RTSP (Real Time Streaming Protocol) RTSP, or Real Time Streaming Protocol, is a network protocol designed to allow media devices to stream content over Ethernet to devices on the same network or even to devices over the Internet. Instead of using a separate server or video recorder to control the video feed to remote devices, using RTSP in our IP cameras allows the direct control of the stream from within the camera. - Page 70 © 2013 Wirepath™ Surveillance 130409-1721...
Need help?
Do you have a question about the WPS-100-NVR-4IP and is the answer not in the manual?
Questions and answers