Table of Contents
Advertisement
Quick Links
Advertisement
Table of Contents

Related Manuals for Martin Stage Cyclo


Summary of Contents for Martin Stage Cyclo
- Page 1 Stage Cyclo User manual...
- Page 2 © 2005 Martin Professional A/S, Denmark. All rights reserved. No part of this manual may be reproduced, in any form or by any means, without permission in writing from Martin Professional A/S, Denmark. Printed in Denmark. P/N 35000167, Rev. B...
-
Page 3: Table Of Contents
DMX protocol ........28 Stage Cyclo Specifications ......29... -
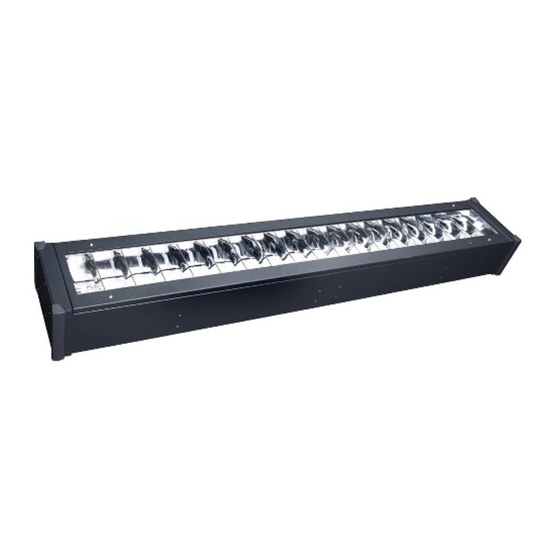
Page 4: Product Overview
J DMX out (RJ-45) D White tube K DMX out (3-pin XLR) E Reflector L DMX in (3-pin XLR) F Clear plastic cover M DMX out (5-pin XLR) G Front frame N DMX in (5-pin XLR) O Main fuseholder Stage Cyclo user manual... -
Page 5: Introduction
The Stage Cyclo can be controlled via DMX or programmed with a stand- alone light show (which it can run alone or in a synchronized group). It has a wide range of mounting options, including stacking to form dynamic color- changing light walls. - Page 6 • Do not expose the fixture to rain or moisture. • Refer all service not described in this manual to a Martin service technician. P r o t e c t i o n f r o m b u r n s a n d f i r e •...
-
Page 7: Installation
AC power and connect to a DMX controller. These procedures must be performed by qualified professionals. M o u n t i n g The Stage Cyclo features a range of mounting and stacking options when used in combination with Martin Omega clamps. - Page 8 Martin half-coupler Ensure that mounting hardware can bear at least ten times the total weight of the fixtures installed. Using the mounting bracket or Martin half-coupler (P/N 90602005) and Martin omega clamps (P/N 91602001), a maximum of eight fixtures may be flown in one connected stack.
- Page 9 Figure 4: Quarter-turn fasteners Placing on a su rface The Stage Cyclo can be placed flat or at an angle on a level surface and used as an uplight. The adjustable support rods allow the fixture to be placed at various angles.
-
Page 10: Ac Power
It is the installer’s responsibility to ensure that all local regulations and legal requirements are observed when installing and powering the Stage Cyclo. The Stage Cyclo is available in two models, one for 100-130 V, 60 Hz AC power only, and one for 208-250 V, 50/60 Hz AC power only. Full power compatibility and consumption data are given in the Specifications section on page 29. - Page 11 Check that your local AC power voltage matches the voltage specified on the serial number label before applying power. ® The Stage Cyclo is supplied with a Neutrik PowerCon NAC3FCA power cable connector that must be installed on a power cable approved for extra hard usage.
-
Page 12: Connecting To A Data Link
To remove the cable connector, pull back the latch to release the lock, twist the connector counterclockwise and pull out. Additional connectors can be obtained from Martin dealers (P/N 05342804) ® and Neutrik stockists C o n n e c t i n g t o a d a t a l i n k Important! Never connect more than 1 data input and 1 data output. -
Page 13: Burning In Fluorescent Tubes
Your Martin Architectural dealer can advise and supply suitable cable. The Stage Cyclo has RJ-45 as well as 3-pin and 5-pin XLR sockets for DMX input and output. To avoid damage to the fixture, use only one input and one output at the same time. -
Page 14: Stand-Alone Operation
Stand-alone operation In stand-alone operation, the Stage Cyclo can be used without a DMX controller. Static single colors or two-color mixes can be displayed, or fixtures can be programmed to change colors in cycles. Changes can be programmed at 1, 5, 10 or 30 second intervals. -
Page 15: Dip-Switch Settings In Stand-Alone Mode
DIP-switch settings in stand-alone mode Function White active Red active Green active Blue active 5 & 6 Program speed Pin 6 Pin 5 Speed 1 sec. steps (fastest setting) 5 sec. steps 10 sec. steps 30 sec. steps (slowest setting) OFF = Blackout fading, ON = Crossfading OFF = Run program, ON = Pause program OFF = Master, ON = Slave (Note: do not set more than one fixture as master) - Page 16 8 is moved to OFF. Note that the paused color is lost when the fixture is powered off. When powering the fixture on again, DIP switch pin 8 must be moved to OFF before the program will start. Stage Cyclo user manual...
-
Page 17: Single Stand-Alone Operation
More sophisticated light shows can be programmed using a DMX controller (see “DMX-controlled operation” on page 21). The synchronization signal used by Stage Cyclo fixtures is identical to that used in other DMX-controllable Cyclo fixtures with the same number of tubes, allowing these products to be combined in master/slave operation on one data link. - Page 18 1 2 3 4 1 2 1 2 3 4 1 2 1 2 3 4 1 2 . . . Program examples The following examples show how an individual fixture’s program is made up of scenes. Stage Cyclo user manual...
- Page 19 The following symbols are used in program diagrams: Tube turned fully off Fade in Fade out Fade to 50% and back to 100% in one scene (applies when only one color is active and crossfading is selected) Example 1 DIP switch 7 is set to ON (crossfading) and only red is activated: Scene Example 2 DIP switch 7 is set to OFF (blackout fading) and only red is activated:...
- Page 20 4. When power is applied, slave fixtures will go to the next scene in their program each time the master goes to its next scene. Slave fixtures will also start scene 1 of their programs each time the master starts scene 1 of its program. Stage Cyclo user manual...
-
Page 21: Dmx-Controlled Operation
The Stage Cyclo responds to commands sent to the DMX address and the next three channels. For example, if the DMX address is set to 100, the Stage Cyclo uses channels 100, 101, 102 and 103. - Page 22 The default factory-set control address is ‘1’. To reset the Stage Cyclo’s DMX address: 1. Decide on a DMX address for the fixture. If you are calculating the DMX addresses for multiple fixtures, save time by using the online Martin Address Calculator at http://www.martin.dk/service/utilities/AddrCalc/index.asp (see illustration...
- Page 23 To use this table, first find the DMX address in the main block in the table. Then read the settings for pins 1 - 5 to the left and read the settings for pins 6 - 9 above the address. “0” means OFF and “1” means ON. For example, to set the DMX address to 101, you need to set DIP-switch pins 1, 3, 6 and 7 to ON, as highlighted in the table.
-
Page 24: Service
10 000 hours, after which color intensity may gradually fall. Average tube life is 20 000 hours, but note that tube life will vary depending on operating conditions. Tub e positio ns Tube positions in the Stage Cyclo are identified as shown below: Marking in Marking on fixture... - Page 25 Chan ging a tube To change a tube: 1. Disconnect the fixture from AC power and allow to cool for 5 minutes. 2. For access to the white tube, use a 3mm Allen key to remove the 8 retaining screws and remove the front frame (G) and clear plastic cover (F).
-
Page 26: Main Fuse
Never replace a fuse with one of a different type or rating. See “Power” on page 30 for main fuse details. C l e a n i n g Turn off power to the fixture before cleaning, and use a damp cloth to wipe clean. Stage Cyclo user manual... -
Page 27: Troubleshooting
Troubleshooting Problem Probable cause(s) Remedy No response from fixture when No power to fixture. Check power connections. power is applied. Ground fault protection circuit Reset RCD. If problem breaker (RCD) has tripped. persists, have an electrician replace the RCD or reduce the number of fixtures powered via one RCD. -
Page 28: Dmx Protocol
DMX protocol Start code = 0 Channel Value Percent Function White intensity Tube off → 3-252 1 - 99 Intensity 1 100% 253-255 Intensity 100% Red intensity Tube off → 3-252 1 - 99 Intensity 1 100% 253-255 Intensity 100% Green intensity Tube off →... -
Page 29: Stage Cyclo Specifications
I N S T A L L A T I O N Floor or surface mounting with adjustable legs Stacking/side-by-side/end-to-end: lockable with Martin omega brackets Rigging with optional adjustable mounting bracket and omega brackets Orientation ..........Any... - Page 30 P O W E R AC power, 230 V model....198 - 250 V, 50/60 Hz AC power, 110 V model ..... . . 100 - 120 V, 60 Hz ®...
- Page 31 Stage Cyclo, 208-250 V, 50/60 Hz....P/N 90350000 Stage Cyclo, 100-130 V, 60 Hz ....P/N 90350100...
- Page 36 7. ON = Crossfading OFF = Blackout fading 5/6. Program speed Quick reference Stage Cyclo DIP switch settings Martin Professional A/S - Olof Palmes Allé 18 - DK-8200 Aarhus N - Denmark Phone: +45 87 40 00 00 Internet: www.martin.com...