Table of Contents
Advertisement
Advertisement
Table of Contents

Subscribe to Our Youtube Channel
Related Manuals for PowerVibe Zen Pro TVR?6920FE

Summary of Contents for PowerVibe Zen Pro TVR?6920FE
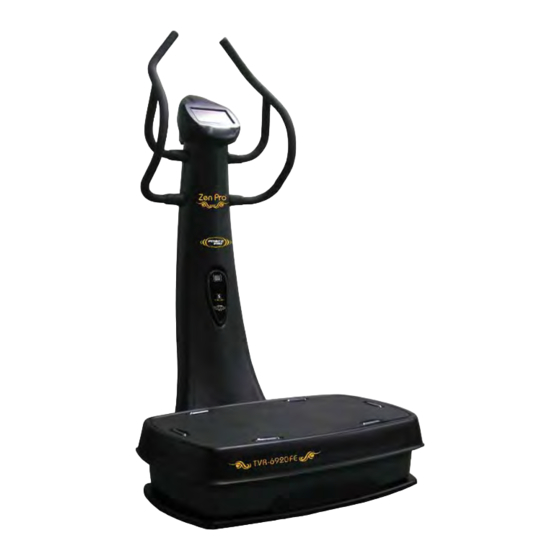
- Page 1 ‐ ‐ User manual...
-
Page 2: Table Of Contents
Contents ‧‧‧‧‧‧‧‧‧‧‧‧‧‧‧‧‧‧‧‧‧‧‧‧‧‧3 SAFETY INSTRUCTIONS 1 Important Safety Instructions ‧‧‧‧‧‧‧‧‧‧‧‧‧‧‧‧‧‧‧‧‧‧‧‧3 2 Personal Safety Instructions ‧‧‧‧‧‧‧‧‧‧‧‧‧‧‧‧‧‧‧‧‧‧‧‧ 4 ‧‧‧‧‧‧‧‧‧‧‧‧‧‧‧‧‧‧‧‧‧‧‧‧‧‧5 3 Grounding Instructions PRODUCT INTRODUCTION ‧‧‧‧‧‧‧‧‧‧‧‧‧‧‧‧‧‧‧‧‧‧‧‧‧‧6 1 Origin - Vibration Training ‧‧‧‧‧‧‧‧‧‧‧‧‧‧‧‧‧‧‧‧‧‧‧‧‧‧6 ‧‧‧‧‧‧‧‧‧‧‧‧‧‧‧‧‧‧‧‧‧‧‧‧6 2 Principle - Vibration Theory 3 Application of Vibration Training ‧‧‧‧‧‧‧‧‧‧‧‧‧‧‧‧‧‧‧‧‧‧‧6 ‧‧‧‧‧‧‧‧‧‧‧‧‧‧‧‧‧‧‧‧‧‧‧‧‧8 FEATURES AND BENEFITS PRODUCT SPECIFICATIONS ‧‧‧‧‧‧‧‧‧‧‧‧‧‧‧‧‧‧‧‧‧‧‧‧‧9... -
Page 3: Safety Instructions
SAFETY INSTRUCTIONS Important Safety Instructions Read all instructions before using your PowerVibe Whole Body Vibration machine. DANGER - To reduce the risk of electric shock: Always unplug this appliance from the electrical outlet when not in use and before cleaning. -
Page 4: Personal Safety Instructions
Personal Safety Instruction 2. Attention Always consult with your physician FIRST before starting any exercise program. Please do not use this product if you have any of the following conditions: Acute arthritis & rheumatoid arthritis Detached Retina Cardiovascular disease Epilepsy Acute migraine Pregnancy Recent surgeries or open wounds... -
Page 5: Grounding Instructions ‧‧‧‧‧‧‧‧‧‧‧‧‧‧‧‧‧‧‧‧‧‧‧‧‧‧5
Grounding Instructions This product must be grounded. If it should malfunction or breakdown, grounding provides a path of least resistance for electric current to reduce the risk of electric shock. This product is equipped with a cord having an equipment-grounding conductor and a grounding plug. The plug must be plugged into an appropriate outlet that is properly installed and grounded in accordance with all local codes and ordinances. -
Page 6: Product Introduction ‧‧‧‧‧‧‧‧‧‧‧‧‧‧‧‧‧‧‧‧‧‧‧‧‧‧6
Operation Info PRODUCTS INTRODUCTION 1. What is Whole Body Vibration Training? ‧Origin Vibration Training Humans experience the effects of externally applied forces constantly when exercising. When our feet contact ground during locomotion or as we strike objects with sport implements and daily activities, for example skiing, surfing, riding, dancing, public transportations, boat, aircraft and many more. - Page 7 Since osteoporosis and muscular atrophy were both noted in Russia’s cosmonauts the Russian space agency used vibration training to combat the effects of the zero gravity environment of space. (Because there is no gravitational force in space, muscles and bones are not loaded leading to bone loss and muscle atrophy.) The results of vibration training on the cosmonauts were very significant including improved muscular strength, increased bone density and preventing osteoporosis.
-
Page 8: Features And Benefits ‧‧‧‧‧‧‧‧‧‧‧‧‧‧‧‧‧‧‧‧‧‧‧‧‧8
Operation Info 2 Features and Benefits (1) Features ‧ High intensity Tonic Vibration Reflex ‧ High/Low adjustable vibration strength design to meet different demand.(Let user has chance to choose Lower strength if he can not afford Higher strength) ‧ High-definition TFT-LCD console display ‧... -
Page 9: Product Specifications ‧‧‧‧‧‧‧‧‧‧‧‧‧‧‧‧‧‧‧‧‧‧‧‧‧9
3 Product Specification ® ‧Product Name Zen Pro TVR-6920FE ‧Voltage 120Vac / 60Hz and 230Vac / 50Hz ‧Frequency 25Hz~50Hz ‧Amplitudes HIGH: 2.5mm; LOW: 1.2mm ‧KN Value(Force) HIGH: 2.5KN; LOW: 1.8KN ‧Motor DC Motor 1HP (Heavy Duty) ‧Console Display 7” TFT touch panel ‧Column Display 7-segment LED on stem ‧... -
Page 10: Spare Parts List
Operation Info ASSEMBLY DESCRIPTION 1 Spare parts list Number Name Specification Amount Base assy Stem assy Console assy Handle Bar assy-Left Handle Bar assy-Right Strap L-wrench Black crank with Red T-wrench PVC cover Hex socket flat head screw M8x25L Round Head Screw M5x15L M8 Screw Sets Inner Hex round head screw... -
Page 12: Assembly Instructions ‧‧‧‧‧‧‧‧‧‧‧‧‧‧‧‧‧‧‧‧‧‧‧‧‧10
2 Assembly instructions Assembly steps Assembling the right handlebar and left handlebar Assembling the console Assembling the stem assy. and the platform assy. Assembling the straps and connecting the power cord. Step 1 Assembling the right handlebar and left handlebar The tool L-wrench (Cross-screwdriver) G or T-wrench H Photo 1 Assembling the right handlebar and left handlebar D Whirling the rubber coves D1... - Page 13 Step 2. Assembling the console The tool L-wrench (Cross-screwdriver) G Photo 2 Assembling the console assy. C and the stem assy. B Connecting two sets of console wires on the console assy. C with the wires in the stem assy. B . Using the L-wrench (Cross-screwdriver) G to fasten 4pcs of cross-screws ,M5x15L J and then you can set the console C on the stem assy.
- Page 14 Step 3. Assembling the stem assy. and the platform assy. The tool L-wrench (Cross-screwdriver) G or T-wrench H Photo 3 Assembling the stem assy. B and the platform assy. A Connecting two sets of console wires on the stem assy. B with the console wires on the platform assy.
- Page 15 Step 4 left and right handlebar console stem and platform strap and power cord Photo 4 connect strap F and plug power cord L Refer the diagram to connect strap F (user depends on the their height to adjust the length) and plug power cord L...
- Page 16 Operation Info Complete Product Assembling. OPERATING INSTRUCTION -Console -Stem Minor Control Panel Item Description Display LED Display Time ‧ Start/ Stop the machine, back to Start/ Stop exercise mode. ‧ To get into Manual Mode...
- Page 17 1. Programs operating 1.1 HOME 1.1.1 Press “HOME” to get back to (Home screen) when you are not in exercise 1.1.2 Press “HOME” when you are in exercise that screen show the inquiry menu to confirm it and get back to the Home Screen. 1.2 BACK 1.2.1 Press key to return to the previous screen.
- Page 18 1.8 Time Adjustment 1.8.1 During the Manual mode, press to set the time. Pre-set the time with “60sec” and you can adjust the range below 30s, 45s, 60s, 1m30s, 2m, 2m30s, 3m, 3m30s, 4m, 4m30s, 5m, 6m, 7m, 8m, 9m, 10m, 11m, 12m, 13m, 14m, 15m 1.8.2 During the User Edit to press time adjustment to set the exercise period the range is setting from 30Sec to 90Sec.
-
Page 19: Operating Instruction ‧‧‧‧‧‧‧‧‧‧‧‧‧‧‧‧‧‧‧‧‧‧‧‧‧16
References 2. Operating Instructions 2.1 Power On & Home screen 2.1.1 Turn on the power by flipping the switch at the base. The Safety Warning disclaimer screen will appear. 2.1.2 Confirm your understanding and acceptance of the Safety Warning disclaimer to advance to the “Home screen”... - Page 20 References 2.2 General operation 2.2.1 Press “Home” key to return to the “Home Screen” or “Main menu” 2.2.2 Press key to return to the previous screen. 2.2.3 Press High\Low key to adjust the vibration strength. The user can toggle between H\L before starting the vibration, or while the vibration is on. 2.2.3.1 Most workouts are pre-set with“Low”...
- Page 21 References 2.3.2.1.1 Time format with “mm:ss” Time is pre-set at 60sec. The range is from 30s to 15. The increments are 30s, 45s, 60s, 1m30s, 2m, 2m30s, 3m, 3m30s, 4m, 4m30s, 5m, 6m, 7m, 8m, 9m, 10m, 11m, 12m, 13m, 14m, 15m. 2.3.2.1.2 Frequency is pre-set at 25HZ.
- Page 22 References 2.3.3 Auto mode 2.3.3.1 5 different Auto programs are included (Auto 1~Auto 5) 2.3.3.2 Select “Auto 1~5” to enter the desired auto mode. Information Diagrams Operating 2.3.3.2.1 DISPLAY 2.3.3.2.1.1 Total Time with the format “mm:ss” 2.3.3.2.1.2 Segment Time with ‘ss”. A count down of seconds remaining in each segment is displayed.
- Page 23 References 2.4 Body Area mode 2.4.1 Enter “Body Area mode” there are 3 keys for selections. Pres-set with “Program” category. 2.4.1.1 Program Upper Body, Lower Body, Core Training, Whole Body Pre-set with “Upper Body” program. Selections Information 2.4.1.2 Type (Strength, Relax) Pre-set with “Strength” type. 2.4.1.3 Level (Beginner, Intermediate, Advanced) Pre-set with “Beginner”...
- Page 24 References 2.4.2 “ Information area” display on right side of screen press any key then the display will show it immediately. 2.4.3 Press your selections and enter the screen you selected. 2.4.4 When you completed the setting for these 3 category press ‘OK’ to start the working out.
- Page 25 References 2.5 User mode 2.5.1 Press key to edit the exercise programs 2.5.1.2 Select “User 1~12” to save the user programs. When the file existed, you will view the screen with illustration of file folder. 2.5.1.3 Enter the screen to edit the exercise program 2.5.1.3.1.1 Press key to select the muscle group with the options of “upper body”...
- Page 26 References 2.5.1.3.1.3 Press key to select the exercising postures. To complete the “Posture” and press the “Time & Frequency” key to set up the time and frequency. 2.5.1.3.2 ‧ Press key to set up the exercising time. ‧ Press key to set up the exercising frequency. ‧...
- Page 27 References 2.5.1.4 If there are files existed in the program? 2.5.1.4.1 Choose overwrite to clean the original files 2.5.1.4.2 Choose modify to edit the original files 2.5.1.5.1 ‧ Press key to review the programs you edited. ‧ Press “Modify” key to modify the programs. ‧...
- Page 28 References 2.5.1.7 ‧ Press “Clear” key to clear the words you entered. ‧ Press “Save” key to save the programs and complete the edits. 2.5.2 Press key to delete the program you edited ‧ Select the file you need to delete, press “Yes” key to delete it. 2.5.3 Press key to enter the exercises mode.
-
Page 29: Exercise Instruction ‧‧‧‧‧‧‧‧‧‧‧‧‧‧‧‧‧‧‧‧‧‧‧‧‧‧‧‧29
References 3 Exercise instruction... - Page 30 References...
- Page 31 References...
-
Page 32: Machine Transportation ‧‧‧‧‧‧‧‧‧‧‧‧‧‧‧‧‧‧‧‧‧‧‧‧‧‧‧32
Machine transportation Please remove the machine as per the picture illustration. For safety, we suggest 2 persons to move it together. Warning Remove the machine carefully in order to prevent any injury during the movement. -
Page 33: Maintenance Procedure ‧‧‧‧‧‧‧‧‧‧‧‧‧‧‧‧‧‧‧‧‧‧‧‧33
References Maintenance procedure 1. Maintenance timing and items Wipe Check Clean(vacuum cleaner) Item Daily Weekly Monthly Quarter 6-Month Yearly Frame Console wipe Handlebar Platform check Stem Assembly hardware Platform Assembly hardware Base plate Assembly hardware Power cord Motor Assembly check hardware Base cushion Motor base plate... -
Page 34: Check List
2 check list Item Items to Check Frame Check the nose, or the stem for stability 1.If the display is flashing or the scren is readable Console 2.If the console assembly hardware is tightly fastened to the vertical beam Check if the handlebar is tight and if the material is not Handlebar torn. - Page 35 References Commercial Warranty Valid Period Warranty starts from the time of purchase. Keep your receipt. Proof of purchase is required at time of warranty validation. Warranty Parts Quantity (PC) Time Period Electronic Components 2 years DC Motor 2 years Main Frame 2 years Warranty Limitations The forgoing warranty shall not be applied to the following:...
- Page 36 References 5. Academic Researche • Baseball Players’ Vertical Jump Performance - National College of Physical Education and Sports – Test Report (2006) Conclusion vibration training proved significant in dynamic contraction performance improvement enhancing the strength and explosive power performance in a short period of time. Test indicates that vibration training does effectively improve human vertical jump ability.
- Page 37 • The Effects of Whole Body Vibration on Bone Metabolism in Young Females Conclusion A single bout of whole-body vibration at the frequency of 50Hz temporarily increased both bone formation and bone resorption. Whole body vibration performed at 50Hz may have an anabolic effect on bone metabolism in young females.
- Page 38 References 6. References U.S. & European References ardinale J Wakeling (2005) – Whole body vibration exercise are vibrations good for you? J. Mester H. KLEINODER, Z. Yue (2005) – Vibration Training: benefits and risk V.B. Issurin (2005)–Vibrations and their applications in sport–A review. Jin Luo Brian McNamara and Kieran Moran (2005) –...
- Page 39 20. W. Rohmert, H. Wos, S. Norlander, and R. Helbig(1989) – Effects of vibration on arm and shoulder muscles in three body postures. 21. M. Roelants, C Delecluse, M. Goris, S. Verschueren (2004) – Effects of 24 Weeks of Whole Body Vibration Training on Body Compositin and Muscle Strength in Untraining Females.
- Page 40 PowerVibe LLC 1595 North Central Expressway, Richardson, TX 75080 TEL: 888‐608‐8423 Fax: 972‐499‐1033 E‐mail: support@powervibeusa.com www.powervibeusa.com ...
Need help?
Do you have a question about the Zen Pro TVR?6920FE and is the answer not in the manual?
Questions and answers