
Subscribe to Our Youtube Channel
Related Manuals for SmartWitness SVC1080-LCA


Summary of Contents for SmartWitness SVC1080-LCA
-
Page 1: User Guide
VEHICLE CCTV AND SAFETY SYSTEMS Full HD (1080P) Vehicle Accident Camera SVC1080-LCA User Guide... -
Page 2: Table Of Contents
10. Software User Guide ............Settings ................About ................Viewing Settings .............. File Loadng ..............Playback Screen ............. Log File Playback ............Google Maps ..............Save JPEG & AVI File ............. Print Image ..............Backup Files ..............Cloud Backup ..............www.smartwitness.com... - Page 3 Grading Criteria Settings ..........Grading Method ............... Graph Display Settings ............ 11. Specifications ............... Appendices Appendix 1 - Mac OS Playback Software ......... Appendix 2 - Recording Timetable ........... Appendix 3 - Firmware Upgrade ..........Appendix 4 - SD Card Maintenance .......... www.smartwitness.com...
- Page 4 When malfunction occurs, the product may not save all videos and the sensor may not recognise shock impacts. WARNING: DO NOT EXPOSE PRODUCT TO RAIN OR MOISTURE www.smartwitness.com...
-
Page 5: Gps Function
6) If GPS signal reception is poor, it may take longer to locate your current position when the vehicle is moving than when it is stationary. www.smartwitness.com... -
Page 6: Overview
1. OVERVIEW The SVC1080-LCA is a Vehicle Accident camera with Full HD (1080P) recording. In addition to this, the camera is equipped with a 3 Axis Shock Sensor & GPS for measuring braking, acceleration, driving style and recording location. The camera includes alarm outputs for telematics integration and permanent wiring. -
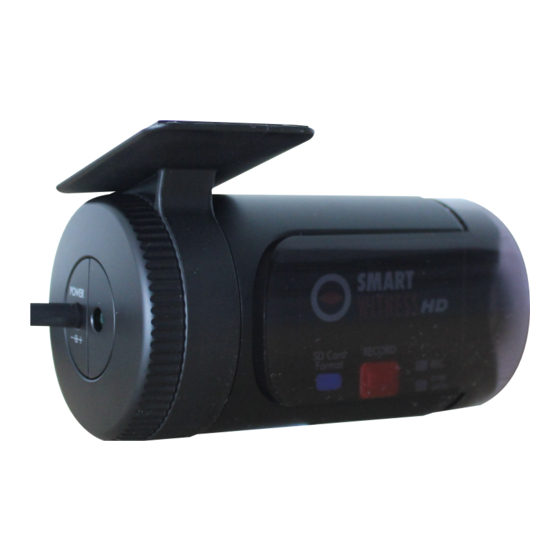
Page 7: Introduction
Camera Lens Stick adhesive tape here Tamper Resistant Locking Case RIGHT LEFT Key Lock Protects SD Card Slot DC Power Input Connected with permanent wiring REAR Record Button Record LED Blue LED Overwrite LED SD Card Format Red LED Button www.smartwitness.com... -
Page 8: Unit Parts
UNIT PARTS Main Unit Bracket Holder Transparent Locking Case WIRING DESCRIPTION Remote SW+ Remote SW- Battery - Alarm Out 1 Alarm Out 2 Battery+ (Connect to ignition) www.smartwitness.com... -
Page 9: Contents
3. CONTENTS 1x SVC1080-LCA Vehicle Accident Camera with locking case 1x 3m Mounting Sticky Pad 1x Power Cable 1x Locking Case Keys 1x User Manual www.smartwitness.com... -
Page 10: Led Guide
RED LED (Warning LED) The Red LED will turn on to indicate a system failure on the unit. Buzzer The buzzer will sound when the event recording begins. This can be turned off if required using the settings on the SVC1080-LCA software. www.smartwitness.com... - Page 11 0.5 Second off System Fault Beep Twice SD Unmount Beep Twice SD Reset SD Format 2 Second on SD Card Full 2 Second off Beep once Auto Calibration for 1 Sec 8 Seconds on Parking Mode 1 Second off Power Off www.smartwitness.com...
-
Page 12: Functions
5. FUNCTIONS Automatic Booting Once the SVC1080-LCA has been wired to your car power source, the unit will automatically turn on when the car’s ignition is switched on. The system boot up will take around 1 minute before the unit is ready to record. If there is no SD card, the unit will beep and both LEDs will flash. - Page 13 For this function, please check the G-sensor and calibration functions using the settings on the software. Built-in Power Backup (Super Capacitor) In the event of the power failing on the unit, the SVC1080-LCA will remain on to create the last data file using the internal super capacitor. Time and Date The SVC1080-LCA gets the time and date information from the GPS satellites, so there is no need to set this manually.
-
Page 14: Installation
6. INSTALLATION CAMERA INSTALLATION 1. Attach the double sided adhesive 2. Secure the SVC1080-LCA to the tape to the unit. windscreen behind the rear view mirror. Please make sure that the surface is clean and dry before attaching. Tip: Hold in position... - Page 15 1. Connect the red Fuse Cable (+) to the Fuse box in the vehicle. This should be connected to a battery circuit. We recommend that the SVC1080-LCA is wired so that it is only powered when your ignition is turned on. If you wish to power permanently, then please use our SVCSPWK as this will help to reduce battery drain.
-
Page 16: Sd Card Functions
7. SD CARD FUNCTIONS The SD card can be removed in the SVC1080-LCA using 2 different methods; 1. Turn the ignition off and remove the SD card 2. Take out the SD card when the unit is on using the safe SD card removal mode. -
Page 17: Software Installation
Install 55MB or higher HDD Free Space Backup 4GB or higher Display 1024 x 768 pixel / True Colour or higher (Depending on SD Card) If the PC does not meet the minimum system requirements, the Analysis Software may not function properly. www.smartwitness.com... - Page 18 The SVC1080-LCA software will come supplied on the SD card (if you have purchased one) in the ‘software’ folder. Or you can download it from our website www.smartwitness.com. 1. Plug the SD card into your computer. 2. Open the ‘FHDREC1’ file.
-
Page 19: Sd Card Initialise
Blank Card Pre Initialised Card Then, choose a card to initialise. When selected, click the ‘OK’ button. On the following screen, select the ‘Quick Format’ button and uncheck the ‘Backup Configuration File’. Click the ‘Start’ button to begin initialisation. www.smartwitness.com... -
Page 20: Software User Guide
Adjust the resolution on the recorder from VGA (640x480), 720P (1280x720), HD (1440x1080) or 1080P HD (1920x1080). Frame Rate Adjust the frame rate from 30fps, 15fps, 10fps, 1fps. Password Enter 4 numbers from 1000 to 9999 as a password (This is for the SD Card). www.smartwitness.com... -
Page 21: Audio Recording
When in Parking mode the SVC1080-LCA will record at a low frame rate until it detects movement then it will increase the frames for smooth recording, ultimately saving storage space on the SD card. - Page 22 For example, vehicles that drive slower will have lower G-Sensor threshold and therefore a custom setting would be more beneficial. To set the G-Sensor to custom, check the “Custom” option and select the threshold levels. This is shown on the following page. www.smartwitness.com...
-
Page 23: About
Initialise SD Card When the settings have been adjusted, you can initialise the SD Card to save the settings and transfer to the SVC1080-LCA. Please backup all the data files that you wish to keep before doing this. Delete Recorded Files Click this option to delete all recorded files on the SD card. -
Page 24: Viewing Settings
VIEWING SETTINGS This setting is for the SmartWitness software. To set the SVC1080-LCA unit, please refer to page 20. The speed unit and date formats will be set automatically according to the PC window settings. To change these, click on the drop down menu and choose a different option. -
Page 25: File Loadng
Check the Event or Normal recorded data file from the list using your mouse or click ‘All’ button. Then, click the ‘load’ button. After you have clicked the ‘load’ button, the ‘file list’ tab will change to the playlist (shown on the following page). www.smartwitness.com... - Page 26 When Record Method is set to ‘Continuous record’ Select this file to playback Check this button Return to the File to playback all files List Event data search in the playback file www.smartwitness.com...
-
Page 27: Playback Screen
Displays accelerometer values on graph Graph Display and sound Select display to be continuous or frame by controls frame and sound level Shows location and route using Google Maps Select files to view: Data File List Continuous, panic, shock, Photo www.smartwitness.com... -
Page 28: Log File Playback
[Switch] or [G Sensor] mark will be displayed on list. G sensor X value: Front & Back (like Quick brake or Quick Start) G sensor Y value: Left & Right (like Quick Turn) G sensor Z value: Up & Down (like prominence and depression) www.smartwitness.com... -
Page 29: Google Maps
The blue markings show the route taken. Double click the blue mark to change the video playback position to that point. The camera icon indicates that there is a recorded file. www.smartwitness.com... -
Page 30: Save Jpeg & Avi File
Pause the playback and click ‘Save JPG’ icon to make a JPG file. ‘Save JPG’ Icon Click the ‘...’ to choose a save location Click ‘Save AVI’ icon to make a AVI file. ‘Save AVI’ Icon Click the ‘...’ to choose a save location www.smartwitness.com... -
Page 31: Print Image
Choose to print the current image or select another image from the same file you are in by searching the time and date. See a preview of the printed image and alter the printer settings to change paper size/orientation etc. www.smartwitness.com... -
Page 32: Backup Files
‘Backup Event/Log Files’ Icon Select ‘Continuous, ‘Panic’, ‘Shock’ or ‘Photo’ and then select the backup folder location. To begin, click the ‘start’ button. To backup the whole data from the SD card to the PC, check the ‘Backup All’ option. www.smartwitness.com... -
Page 33: Cloud Backup
CLOUD BACKUP SmartWitness offers a Cloud backup service allowing you to store backed up footage. To do this, simply create an AVI file back up as shown on the previous page and press the ‘Cloud Upload’ button (shown below). Save AVI... - Page 34 When completed, you will see a pop-up confirming the upload is finished as well as an email (shown below). PLEASE NOTE The video footage will only be stored on our servers for 7 days from the upload date. www.smartwitness.com...
-
Page 35: Gps Log To Kml Converter
STEP 3. Click the Google Earth button Select the folder location for the KML file. Then, click ‘OK’ and the route will be shown on Google Earth For this function to run properly, we recommend that you use Google Earth version 5.0 or above. www.smartwitness.com... -
Page 36: Driver Reporting
A summary of information can be found on the top of the window including; vehicle ID, user ID, total duration and total distance. In addition to this, you can analyse the number of over-accelerations, over-decelerations, sharp turns, over-speeding, over-RPMs that exceeded the pre-set limit. www.smartwitness.com... - Page 37 This will bring up the pop up menu (shown below). Here, you can set the limits for G-sensor, permitted speeding, excessive RPM. Eco-speeding can be set under the ‘Analysis’ tab and ranges for the two graphs can be set under the ‘Component’ tab. www.smartwitness.com...
-
Page 38: Analysis Criteria Settings
Set the limit for excessive RPM. The RPM limit can be set from 0-9999 RPM and the time can be set by selecting the drop down menu. In the example above the limit has been set to 2400 RPM for 30 seconds. If this limit is exceeded, it will count as excessive. www.smartwitness.com... -
Page 39: Grading Criteria Settings
F for fail. Each criteria can be given a different weight depending on the importance you place on each one but all weights must add up to 100. To get into this menu, enter the ‘Settings’ menu, and click the ‘Grading Criteria Settings’. www.smartwitness.com... - Page 40 0.5 and based on the settings in the image on the previous page, they would be graded as B. This criteria is used in both safety and eco grading, but the weights can be set separately. www.smartwitness.com...
- Page 41 The value can be set from 0-999km/h. The assessment of this criteria is based on the speed limit option in the ‘Analysis Criteria Setting’. This criteria is used for safety grading. www.smartwitness.com...
- Page 42 4 times, their score for this criteria would be 0.5 and based on the image on page 39, they would be graded as B. The assessment of this criteria is based on the RPM limit option in the ‘Analysis Criteria Setting’. This criteria is used for eco grading only. www.smartwitness.com...
-
Page 43: Grading Method
Once the grading criteria settings has been adjusted and saved, it can be exported into an ‘ini’ file and then imported into another version of the analysis software. This means that you can set each SVC1080-LCA quicker than manually adjusting the settings in each version of the software. www.smartwitness.com... - Page 44 The total score is an average of the safety and eco scores. Below is an example of how scores can be calculated for each criteria. www.smartwitness.com...
-
Page 45: Graph Display Settings
Zoom Window Display Time: This sets the time period, in minutes, displayed on the zoom graph. The graph settings will be applied to the following window displays: Manual Mode, Data Search, Driving Data and the Zoom Graph. Default settings are: Max Speed (100 km/h), Max G-Sensor (+-1G), Max RPM (3000). www.smartwitness.com... -
Page 46: Specifications
Buzzer Recording Start, Error 2 LEDs (Record, Overwrite) PC Software Available from the Smart Witness Website DC 12V to 24V Power Input Permanent Wiring Camera Power Consumption 3.6W Size (WxHxD) in mm 88x50x50 Weight 0.10 KG Operation Temp -10°C~60°C www.smartwitness.com... -
Page 47: Appendix 1 - Mac Os Playback Software
If you wish to configure the settings, this needs to be done using the Windows software. To install the Mac version of the software, please follow the steps below: 1. Download the software from the SmartWitness website. 2. Open your downloads folder and double click the icon to be presented with the installation setup. - Page 48 SD card. 7. Click the icon on the software to choose the SD card and click ‘Open’. Refer to the section ‘File Load’ on page 24, for details on how to play back and other features. www.smartwitness.com...
-
Page 49: Appendix 2 - Recording Timetable
If the unit records more than 1,000 files, there is a possibility that the booting time will be more than 1 minute. Therefore, the number of files are limited to a maximum of 1,000. So, the maximum recording time is 167 hours (1,000 files x 10 minutes = 10,000 minutes = 167 hours www.smartwitness.com... -
Page 50: Appendix 3 - Firmware Upgrade
Copy “SVC1080_X.X.X.bin” file in to the SD card [program] folder. 2. Upgrade SVC1080-LCA Insert the prepared SD card to SVC1080-LCA and turn on the power. The Blue & Red LED will be blinking together during upgrading. There willl be a continuous “Beep” sound during upgrading. - Page 51 Run the setup.exe and follow the instructions to install the new analysis software. PLEASE NOTE After installing the new SmartWitness Software, you will need to initialise the new SD card. The new softare will automatically be copied to the software folder on the SD card.
-
Page 52: Appendix 4 - Sd Card Maintenance
Once a month Once a year Once a year Twice a year Every 3 16GB Once a month Once a year Twice a year months Every 3 32GB Once a month Once a year Once a month months www.smartwitness.com... - Page 53 This product is supplied with a 1 year Warranty. The Warranty excludes products that have been misused, (including accidental damage) and damage caused by normal wear and tear. In the unlikely event that you encounter a problem with this product, it should be returned to the place of purchase. www.smartwitness.com...
- Page 54 Manufactured Exclusively for: VEHICLE CCTV AND SAFETY SYSTEMS www.smartwitness.com Smart Witness, Unit 2 Valley Point, Beddington Farm Road, Croydon, Surrey, CR0 4WP www.smartwitness.com...
Need help?
Do you have a question about the SVC1080-LCA and is the answer not in the manual?
Questions and answers