
Subscribe to Our Youtube Channel
Related Manuals for Skymaster DCI 9210


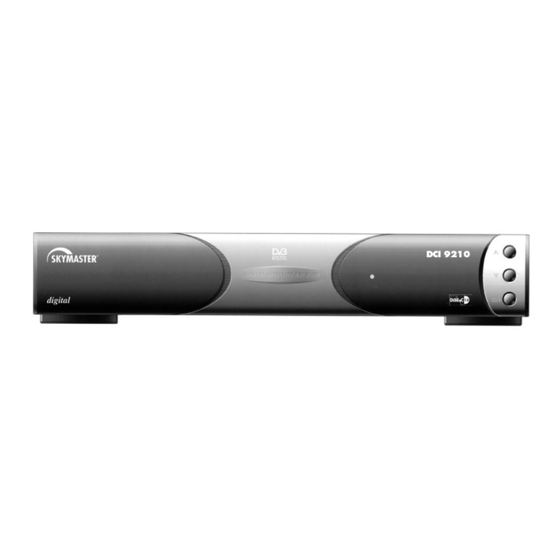
Summary of Contents for Skymaster DCI 9210
- Page 1 BEDIENUNGSANLEITUNG U S E R M A N U A L P A G E 2 9 Digital Satelliten- Receiver...
- Page 2 User Manual DIGITAL SATELLITE RECEIVER DCI 9210...
-
Page 3: Table Of Contents
CONTENTS 1. Features __________________________________________________ 31 2. Front & Rear View ___________________________________________ 32 3. Remote Control Unit (RCU) ____________________________________ 33 4. Getting Started _______________________________________________ 34 5. Operation and Menu Program __________________________________ 35 6. Specifications ________________________________________________ 45 Trade Mark of the DVB Digital Video Broadcasting Project (1700) -
Page 4: Features
1. Features 1. MPEG-II video(MP@ML) 2. MPEG-I audio Layer 1, Layer 2 3. MPEG-II digital & fully DVB compliant 4. Capable of scanning the frequency for SMATV –IF system 5. Plug & Play installing program set-up 6. On-screen display with 256-color full resolution 7. -
Page 5: Front & Rear View
2. Front & Rear View FRONT PANEL Channel Up/Down 2 CAM slot To turn the receiver on/off (stand by) REAR PANEL AC power cord LNB input Antenna input RF output connector to TV Note) All cables used for connecting the receiver should be well-shielded type cable. -
Page 6: Remote Control Unit (Rcu)
3. Remote Control Unit (RCU) Switches the Receiver ON/OFF. Switches the sound ON/OFF. The EPG key shows program information of the selected channel. (EPG : Electronic Program Guide) Shows Subtitle menu to select the subtitle language. Shows program information provided by the broadcaster. Direct choice of TV / Radio channel and other commands by numeric keys. -
Page 7: Getting Started
4. Getting Started Please do NOT PLUG the receiver into Mains until you finish making all connections to the unit. Connect the coaxial cable from the satellite dish to the LNB IN socket of the receiver. (Connector should be adapted finger-tight.) Receiver to TV with SCART “TV”... -
Page 8: Operation And Menu Program
5. Operation and Menu Program Main Menu Main Menu 1. TV Channels Press on the remote control unit (RCU). 2. Radio Channels (or press /I on the front panel of the receiver) 3. Parental Control Press MENU to display Main Menu on the screen. 4. -
Page 9: Auto Search
Program Satellites Program Satellites Satellite 019.2E ASTRA 1 LNB Type Type 1 Refer to the Signal Quality bar and the Signal Level TP/POL 1023/H bar at the bottom of the screen. It is recommended Symbol Rate 27500 that the signal is at the Medium level or higher. Position NO Set If it is not , please adjust your satellite dish. -
Page 10: Local Time Setting
User’s Setting Language Setting User’s Setting Menu Language English 1.Language Setting English Main Audio Language 2 Local Time Setting English 2nd Audio Language 3. A/V Output Setting Subtitle Language English 4.Unit Information To return to the previous Menu, press MENU You can select the desired language for the OSG (On-Screen Graphics) display using the keys when the “Menu Language”... - Page 11 A/V Output Setting Aspect A/V Output Setting Please select your TV format. 4:3 for normal screen TV Aspect 16:9 for wide screen TV Banner [ 3sec ] Sub.backg. You can select OSG viewing time of the information Banner about the current channel & program among AC 3 Out 2/3/4/5/6/8/10secs by using volume up/down keys.
-
Page 12: Change Pin Code
Parental Control Parental Control Parental Control Change PIN Code 1. Change PIN Code Current PIN code Enter PIN code [ 0000 ] 2. TV Channel Lock [ ? ? ? ? ] [ ? ? ? ? ] 3. Radio Channel Lock New PIN code 4. - Page 13 TV CH : A SIASAT2 TV Channels 1. Saudi CH1 1 2. Henan 1 You can select the channel you would like to watch either 3. Henan 2 by pressing the numeric keys for the channel number or by moving the highlighted bar to the channel of your choice 4.
-
Page 14: Edit Tv Channel
Edit TV Channel Edit TV Channel ASTRA TV Channels 11. Paris Premere 12. Voyage You can move to the channel that you want to edit by 13. Contact TV using the keys. 14 .LC I Also you can move to the highlighted bar directly by 15. -
Page 15: Edit Satellite
Edit Satellite Edit Satellite Satellite Name * Longitude : xxxxxxxxx To delete a satellite, press the when the * Transponder : xx highlighted bar is located at the transponder you * TV Channels : xx want to delete. * Radio Channels :xx To add a satellite, press the SAT key. - Page 16 TV Guide TV Guide While watching or listening to any channel, if you want to know more information regarding 1. Henan 1 No Information No Time the program shown, press the GUIDE key on the 2. Henan 2 No Information No Time remote control to display the “TV Guide”...
-
Page 17: Software Upgrade
Edit LNB Local Frequency Edit LNB Local Frequency LNB Local Freq 0..9 10678 You can edit up to 8 local frequencies by using numeric keys. * LNB Local Freq. Editing = Numeric key * Change = And if you want to save newly edited frequency, * Save = OK key press OK. -
Page 18: Specifications
6. Specifications 1. Tuner & Channel Input Connector 1 x F type with Loopthrough 1 x F type 75 Ohm IF signal out Output Connector Frequency Range 950MHz to 2150MHz 75 Ohm Input Impedance Signal Level -25 to -65dBm 480MHz IF Frequency IF Bandwidth 36MHz... - Page 19 4. A/V & Data In/Out SCART TV x 1, VCR x 1 RGB Video Out TV x 1 (SCART socket) S/PDIF Out RCA X 1 RCA x 2 (L-CH x 1, R-CH x 1) Analog Audio Out 2 x SCART socket(TV, VCR) Resolution 16bit DAC Output Level 2Vrms Max.
- Page 20 3972/10/2001...
Need help?
Do you have a question about the DCI 9210 and is the answer not in the manual?
Questions and answers