Table of Contents
Advertisement
Advertisement
Table of Contents

Related Manuals for Pride J6


Summary of Contents for Pride J6
- Page 2 S A F E T Y G U I D E L I N E S WARNING! An authorized Pride Provider or a qualified technician must perform the initial setup of this power chair and must perform all of the procedures in this manual.
- Page 3 C O N T E N T S INTRODUCTION ..........................4 SAFETY ..............................5 III. YOUR POWER CHAIR ........................17 IV. ASSEMBLY ............................21 COMFORT ADJUSTMENTS ......................24 VI. BATTERIES AND CHARGING ....................29 VII. CARE AND MAINTENANCE ......................33 APPENDIX I - SPECIFICATIONS ......................40 J6 Series...
- Page 4 Pride to enhance or preserve the safe use of this product.
- Page 5 Do not connect an extension cord to the AC/DC converter or the battery charger. Removal of grounding prong can create electrical hazard. If necessary, properly install an approved 3-pronged adapter to an electrical outlet having 2-pronged plug access. J6 Series...
- Page 6 Do not mix AGM and GEL-Cell batteries. Always use batteries of the same type and chemistry. Do not use batteries with different amp-hour (Ah) capacities. Do not mix old and new batteries. Always replace both batteries at the same time. J6 Series...
- Page 7 Do not use a cell phone, walkie/talkie, or other radio transmitter while operating. Disposal and recycling - Contact your authorized Pride Provider for information on proper disposal and recycling of your Pride product and its packaging. Locked and in drive mode.
- Page 8 Battery charger for indoor use only. Do not place power chair in freewheel mode on a decline. Do not place power chair in freewheel mode on an incline. Contains lead. Class II Equipment. Manufactured in SHROUD Power chair information label J6 Series...
-
Page 9: General Guidelines
Pride products. Pre-Ride Safety Check Get to know the feel of your power chair and its capabilities. Pride recommends that you perform a safety check before each use to make sure your power chair operates smoothly and safely. - Page 10 MANDATORY! Stay within the specified weight capacity of your power chair. Exceeding the weight capacity voids your warranty. Pride will not be held responsible for injuries and/or property damage resulting from failure to observe weight limitations.
- Page 11 Doing so could cause instability in your power chair. Pride recommends that the maximum slope of an incline you attempt to safely ascend or descend on your power chair does not exceed 5° (8.7%). See figure 1.
- Page 12 Your power chair is designed to provide optimum stability under normal driving conditions—dry, level surfaces composed of concrete, blacktop, or asphalt. However, Pride recognizes that there will be times when you will encounter other surface types. For this reason, your power chair is designed to perform admirably on packed soil, grass, and gravel.
- Page 13 Motor Vehicle Transport Pride recommends that you do not remain seated in your power chair while traveling in a motor vehicle. The power chair should be stowed in the trunk of a car or in the back of a truck or van with batteries removed and properly secured.
- Page 14 Pride recommends that the power chair user determine his/her personal limitations and practice bending and reaching in the presence of a qualified healthcare professional.
- Page 15 Always have an attendant or healthcare professional present while learning to prop- erly transfer yourself. To eliminate the possibility of injury, Pride recom- mends that you or a trained attendant perform the fol- lowing tasks before attempting a transfer: Turn off the power to the controller.
- Page 16 WARNING! Pride strongly recommends that you do not smoke cigarettes while seated in your power chair, although the power chair has passed the necessary testing requirements for cigarette smoking.
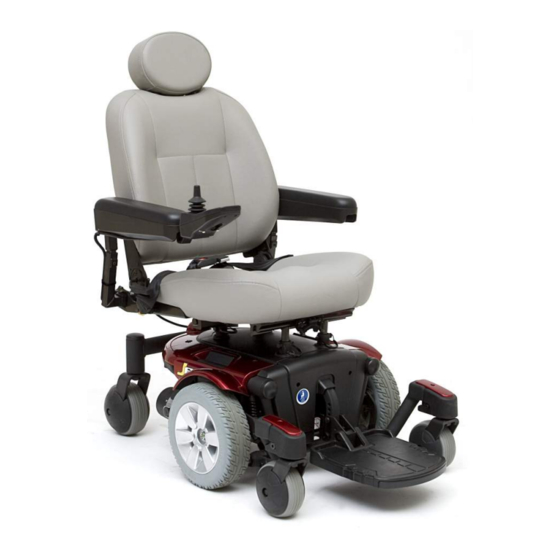
- Page 17 I I I . Y O U R P O W E R C H A I R THE J6 The J6 has two main assemblies: the seat assembly and the power base assembly. See figure 5. Typically, the seat assembly includes the armrests, seatback, and seat base. The power base assembly includes two motor/brake assemblies, two drive wheels, four caster wheels, two batteries, and wiring harnesses.
- Page 18 TRAPEZE BARS FRONT COVER MOTOR/BRAKE ASSEMBLY Figure 6. The J6 Power Base Electrical Components The electrical components are located inside the power base. The main circuit breaker is located on the front of the battery tray. The controller connector(s) are located inside the power base. See figure 7.
- Page 19 If the circuit trips, allow your power chair to “rest” for approximately one minute. Next, push in the circuit breaker button, turn on the controller, and continue normal operation. If the main circuit breaker continues to trip repeatedly, contact your authorized Pride Provider. TO CONTROLLER...
- Page 20 If a lever is difficult to move in either direction, slightly rock the power chair back and forth. The lever should then move to the desired position. WARNING! Do not use the freewheel lever handles as tie-down points to secure this product. Figure 8. Drive Mode (Drive Engaged) Figure 9. Freewheel Mode (Drive Disengaged) J6 Series...
- Page 21 Replacement nylon insert lock nuts are available at local hardware stores or through your authorized Pride Provider. ARMREST ANGLE ADJUSTMENT SEAT INSTALLATION SEAT HEIGHT ADJUSTMENT CONTROLLER POSITION FOOT PLATFORM ADJUSTMENT Figure 10. J6 Assembly View J6 Series...
- Page 22 Use correct tie-down points controller harness prevent harness from getting caught in the drive tires, pinched in the seat frame, Figure 12. Controller Routed on a Synergy Seat or damaged when passing through doorways. J6 Series...
- Page 23 I V . A S S E M B L Y 9. Secure the controller harness to the armrest receiver with wire ties. See figure 13. Power Seat Option Installation WIRE TIES Your power chair may be equipped with the power seat option.
- Page 24 WARNING! The center of gravity of your power chair was factory set to a position that meets the needs of the demographic majority of users. Your authorized Pride Provider has evaluated your power chair and made any necessary adjustments to suit your specific requirements. Do not change your seating configuration without first contacting Pride Mobility Products or your authorized Pride Provider.
- Page 25 To adjust the seatback angle: Figure 18. Seatback Angle Adjustment 1. Remove the adjusting screws from each seat hinge. See figure 18. 2. Set the seatback at the desired angle. 3. Reinstall the adjusting screws to each seat hinge and tighten. J6 Series...
- Page 26 11. Route the controller harness to the back of the power base and plug in the controller. 12. Replace the rear shroud and tighten the fasteners. 13. Secure the controller harness to the armrest with wire ties. See figure 13. J6 Series...
- Page 27 2. Turn the nut clockwise until it is snug. 3. Rotate the lever until it is in the fully closed position. NOTE: If the lever will not rotate to the fully closed position, then turn the nut counterclockwise one- quarter or one-half turn. J6 Series...
- Page 28 NOTE: For more information on operating the power ele- vating seat through the controller,refer to the controller manual supplied with your power chair or contact your authorized Pride Provider. WARNING! The power elevating seat option is intended for use on a level surface only.
- Page 29 V I . B A T T E R I E S A N D C H A R G I N G BATTERIES AND CHARGING The J6 uses two long-lasting, 12-volt, deep-cycle batteries. These batteries are sealed and maintenance free. Since they are sealed, there is no need to check the electrolyte (fluid) level. Deep-cycle batteries are designed to handle a longer and deeper discharge.
- Page 30 We do not recommend using other types of chargers (e.g., an automotive battery charger). NOTE: Your power chair’s charger will not operate after the batteries have been discharged to nearly zero voltage. If this happens, call your authorized Pride Provider for assistance. How often must I charge the batteries? Many factors come into play when deciding how often to charge the batteries.
- Page 31 We work closely with our battery manufacturer to provide a battery that best suits your power chair’s specific demands. Fresh batteries arrive regularly at Pride and are promptly shipped with a full charge. During shipping, the batteries encounter temperature extremes that may influence initial performance. Heat robs the charge from the battery, and cold slows the power available and extends the time needed to recharge the battery (just as with a car battery).
- Page 32 What about shipping? If you wish to use a freight company to ship your power chair to your final destination, repack your power chair in the original shipping container and ship the batteries in separate boxes. J6 Series...
-
Page 33: Care And Maintenance
V I I . C A R E A N D M A I N T E N A N C E CARE AND MAINTENANCE Your J6 is a sophisticated power chair. Like any motorized vehicle, it requires routine maintenance checks. You can perform some of these checks, but others require assistance from your authorized Pride Provider. Preventive maintenance is very important. - Page 34 Check the rubber boot around the base of the joystick for damage. Visu- ally inspect the boot. Do not handle or try to repair it. See your authorized Pride Provider if there is a problem.
- Page 35 Your power chair must be disposed of according to applicable local and national statutory regulations. Contact your local waste disposal agency or your authorized Pride Provider for information on proper disposal of power chair packaging, metal frame components, plastic components, electronics, batteries, neoprene, silicone, and poly- urethane materials.
- Page 36 13. Reinstall the drive wheel nut and washer to the axle and tighten. WARNING! Make sure both the nut and washer are reinstalled and secured properly. 14. Inflate pneumatic tires to the psi/bar/kPa air pressure rating indicated on each tire. 15. Remove the power chair from the blocks. J6 Series...
- Page 37 V I I . C A R E A N D M A I N T E N A N C E REAR SHROUD FASTENERS REAR SHROUD BATTERY WIRING DIAGRAM LABEL FRONT BATTERY REAR BATTERY Figure 28. Battery Installation J6 Series...
- Page 38 WARNING! The batteries in your power chair should only be serviced or replaced by an authorized Pride Provider or a qualified technician. WARNING! Do not replace batteries when seat is occupied. WARNING! Power chair batteries are heavy. See specifications table. If you are unable to lift that much weight, be sure to get help.
- Page 39 When to See Your authorized Pride Provider for Service The following symptoms could indicate a serious problem with your power chair. If necessary, contact your authorized Pride Provider. When calling, have the model number, serial number, nature of the problem, and the error code if available.
- Page 40 A P P E N D I X I - S P E C I F I C A T I O N S J6 SPECIFICATIONS Active-Trac Extreme (ATX) Suspension: 10 in. (25.4 cm), pneumatic and solid available Drive Wheels: 5 in.
- Page 41 A P P E N D I X I - S P E C I F I C A T I O N S LENGTH 39 in. (99 cm) 34.5 in. (87.63 cm) 21.25 in. (53.98 cm) WIDTH 23.25 in. (59 cm) TURNING RADIUS 2.25 in. (5.72 cm) GROUND CLEARANCE Figure 29. J6 Dimensions and Ground Clearance J6 Series...