Yamaha TMax XP500 Owner's Manual
Hide thumbs
Also See for TMax XP500:
- Service manual (559 pages) ,
- Owner's manual (104 pages) ,
- Technical manual (46 pages)
Table of Contents
Advertisement
Advertisement
Chapters
Table of Contents
Troubleshooting

Related Manuals for Yamaha TMax XP500


Summary of Contents for Yamaha TMax XP500
- Page 1 Ofrecido por www.electromanuales.com OWNER’S MANUAL XP500 5GJ-28199-E2...
- Page 2 Ofrecido por www.electromanuales.com...
- Page 3 INTRODUCTION Welcome to the Yamaha world of motorcycling! As the owner of the XP500, you are benefiting from Yamaha’s vast experience and newest technolo- gy regarding the design and manufacture of high-quality products, which have earned Yamaha a rep- utation for dependability.
-
Page 4: Important Manual Information
8 This manual should be considered a permanent part of this scooter and should remain with it even if the scooter is subsequently sold. 8 Yamaha continually seeks advancements in product design and quality. Therefore, while this manual contains the most current product information available at the time of printing, there may be minor discrepancies between your scooter and this manual. - Page 5 Ofrecido por www.electromanuales.com IMPORTANT MANUAL INFORMATION EW000002 PLEASE READ THIS MANUAL CAREFULLY AND COMPLETELY BEFORE OPERATING THIS SCOOTER.
- Page 6 Ofrecido por www.electromanuales.com EAU04229 XP500 OWNER’S MANUAL ©2002 by Yamaha Motor Co., Ltd. 1st edition, August 2002 All rights reserved. Any reprinting or unauthorized use without the written permission of Yamaha Motor Co., Ltd. is expressly prohibited. Printed in Japan.
-
Page 7: Table Of Contents
Ofrecido por www.electromanuales.com EAU00009 TABLE OF CONTENTS 1 GIVE SAFETY THE RIGHT OF WAY 2 DESCRIPTION 3 INSTRUMENT AND CONTROL FUNCTIONS 4 PRE-OPERATION CHECKS 5 OPERATION AND IMPORTANT RIDING POINTS 6 PERIODIC MAINTENANCE AND MINOR REPAIR 7 SCOOTER CARE AND STORAGE 8 SPECIFICATIONS 9 CONSUMER INFORMATION INDEX... - Page 8 Ofrecido por www.electromanuales.com...
-
Page 9: Give Safety The Right Of Way
Ofrecido por www.electromanuales.com GIVE SAFETY THE RIGHT OF WAY GIVE SAFETY THE RIGHT OF WAY ..........1-1 Further safe-riding points ..............1-2... - Page 10 Ofrecido por www.electromanuales.com EAU00021 Q GIVE SAFETY THE RIGHT OF WAY Scooters are fascinating vehicles, which can give you an unsurpassed feeling of power and freedom. However, they also impose certain limits, which you must accept; even the best scooter does not ignore the laws of physics.
- Page 11 Ofrecido por www.electromanuales.com Q GIVE SAFETY THE RIGHT OF WAY EAU03099 Further safe-riding points Safe-riding points 8 Be sure to signal clearly when making turns. 8 Braking can be extremely difficult on a wet road. Avoid hard braking, because the scooter could slide.
- Page 12 Ofrecido por www.electromanuales.com...
-
Page 13: Description
Ofrecido por www.electromanuales.com DESCRIPTION Left view ....................2-1 Right view ..................2-2 Controls and instruments ..............2-3... -
Page 14: Left View
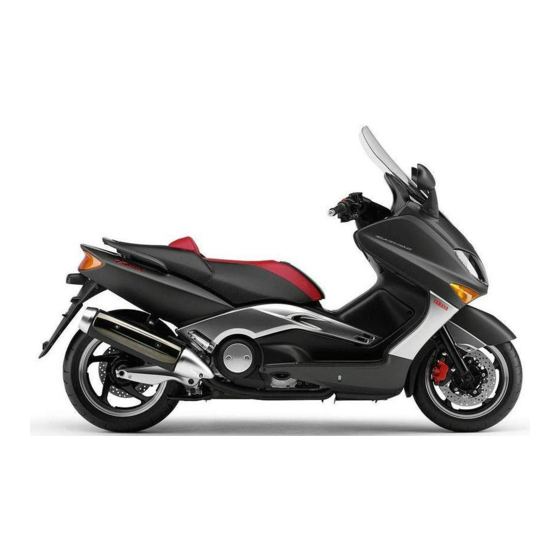
Ofrecido por www.electromanuales.com EAU00026 DESCRIPTION Part locations Left view 9 8 7 6 1. Fuel tank cap (page 3-9) 7. V-belt air filter element (left) 2. Rear storage compartment (page 3-14) 8. Engine oil drain bolt (page 6-13) 3. Helmet holder (page 3-13) 9. -
Page 15: Description
Ofrecido por www.electromanuales.com DESCRIPTION Right view 11. Battery, Fuses (page 6-32, 6-34) 16. Radiator 12. Owner’s tool kit (page 6-1) 17. Coolant level check window (page 6-17) 13. Front storage compartment (page 3-14) 18. V-belt air filter element (right) 14. Windshield 19. -
Page 16: Controls And Instruments
Ofrecido por www.electromanuales.com DESCRIPTION Controls and instruments 1. Rear brake lever (page 3-9) 6. Fuel gauge (page 3-4) 2. Left handlebar switches (page 3-6) 7. Right handlebar switches (page 3-7) 3. Clock (page 3-5) 8. Front brake lever (page 3-9) 4. -
Page 17: Instrument And Control Functions
Ofrecido por www.electromanuales.com INSTRUMENT AND CONTROL FUNCTIONS Main switch/steering lock ..............3-1 Indicator lights ...................3-2 Speedometer unit ................3-4 Fuel gauge ..................3-4 Coolant temperature gauge ...............3-5 Clock ....................3-5 Self-diagnosis device .................3-6 Anti-theft alarm (optional) ..............3-6 Handlebar switches ................3-6 Front brake lever ................3-9 Rear brake lever ................3-9 Fuel tank cap ..................3-9 Fuel ....................3-10... -
Page 18: Instrument And Control Functions
Ofrecido por www.electromanuales.com EAU00027 INSTRUMENT AND CONTROL FUNCTIONS To unlock the steering NOTE: Push the key in, and then turn it to The headlight comes on automatical- “OFF” while still pushing it. ly when the engine is started and OPEN stays on until the key is turned to PUSH EW000016... -
Page 19: Indicator Lights
1,000 km, then at 5,000 km and 3. If the indicator light does not wise the battery may discharge. every 5,000 km thereafter to indicate come on, have a Yamaha dealer that engine should check the electrical circuit. - Page 20 1. Turn the key to “ON” and make sure that the engine stop switch is set to “#”. 2. If the indicator light does not come on, have a Yamaha dealer check the electrical circuit.
-
Page 21: Speedometer Unit
Ofrecido por www.electromanuales.com INSTRUMENT AND CONTROL FUNCTIONS Pushing the “Trip” button switches the display between the odometer mode “ODO” and the tripmeter mode “TRIP”. To reset the tripmeter, enter the “TRIP” mode, and then hold down the “Trip” button for at least one sec- ond. -
Page 22: Coolant Temperature Gauge
Ofrecido por www.electromanuales.com INSTRUMENT AND CONTROL FUNCTIONS NOTE: To set the clock after the power source has been cut, first set the time to 1:00 AM, and then set the clock to the correct time. 1. Coolant temperature gauge 1. Digital clock 2. -
Page 23: Self-Diagnosis Device
This model is equipped with a self- This scooter can be equipped with an diagnosis device for the throttle posi- optional anti-theft alarm by a Yamaha tion sensor, the speed sensor, and dealer. Contact a Yamaha dealer for the overturn switch. If any of those more information. - Page 24 Ofrecido por www.electromanuales.com INSTRUMENT AND CONTROL FUNCTIONS EAU03826 Hazard switch “0” Hazard switch With the key in the “ON” or “ ” posi- tion, use this switch to turn on the hazard light (simultaneous flashing of all turn signal lights). The hazard light is used in case of an emergency or to warn other drivers when your scooter is stopped where...
- Page 25 Ofrecido por www.electromanuales.com INSTRUMENT AND CONTROL FUNCTIONS EAU00136 Headlight variations Headlight variations 3 : High beam light on 2 : Low beam light on 1 : Light off : Auxiliary light on Bulb to be used Left Right Destination Germany, Belgium, Switzerland, Spain Halogen France, Greece, Italy, Netherlands, 60/55W...
-
Page 26: Front Brake Lever
Ofrecido por www.electromanuales.com INSTRUMENT AND CONTROL FUNCTIONS 1. Front brake lever 1. Rear brake lever 1. Lid EAU03882 EAU00163 EAU03881 Front brake lever Rear brake lever Fuel tank cap Brake lever, front Brake lever, rear Fuel tank The front brake lever is located on The rear brake lever is located on the To remove the fuel tank cap the right handlebar grip. -
Page 27: Fuel
Ofrecido por www.electromanuales.com INSTRUMENT AND CONTROL FUNCTIONS EAU00185 Immediately wipe off spilled fuel with a clean, dry, soft cloth, since fuel may deteriorate painted sur- faces or plastic parts. 1. Match marks 1. Fuel tank filler tube 2. Fuel level To install the fuel tank cap EAU03753 1. -
Page 28: Seat
Ofrecido por www.electromanuales.com INSTRUMENT AND CONTROL FUNCTIONS EAU04284 Your Yamaha engine has been designed to use regular unleaded Recommended fuel: gasoline with a research octane num- REGULAR UNLEADED ber of 91 or higher. If knocking (or OPEN GASOLINE ONLY pinging) occurs, use a gasoline of a... -
Page 29: Adjusting The Rider Backrest
Ofrecido por www.electromanuales.com INSTRUMENT AND CONTROL FUNCTIONS To close the seat 1. Fold the seat down, and then push it down to lock it in place. 2. Remove the key from the main switch if the scooter will be left unattended. -
Page 30: Shock Absorber
2. Pass the helmet holding cable this will result in poor damp- through the buckle on the helmet ing performance. strap as shown, and then hook 8 8 Always have a Yamaha dealer the cable loop over the helmet service the shock absorber. holder. 3-13... -
Page 31: Storage Compartments
Ofrecido por www.electromanuales.com INSTRUMENT AND CONTROL FUNCTIONS EAU00330 Rear storage compartment Sidestand A helmet can be stored in the com- Sidestand The sidestand is located on the left partment under the seat. (See page side of the frame. Raise the side- 3-11 for seat opening and closing stand or lower it with your foot while procedures.) -
Page 32: Ignition Circuit Cut-Off System
Therefore, check this system Periodically check the operation of regularly as described below and the ignition circuit cut-off system have a Yamaha dealer repair it if it according to the following procedure. does not function properly. EW000045 If a malfunction is noted, have a Yamaha dealer check the system before riding. - Page 33 Does the engine start? The sidestand switch may be defective. The scooter should not be ridden until checked by a Yamaha dealer. With the engine still off: 6. Move the sidestand up. 7. Keep the front or rear brake applied.
- Page 34 Ofrecido por www.electromanuales.com...
-
Page 35: Pre-Operation Checks
Ofrecido por www.electromanuales.com PRE-OPERATION CHECKS Pre-operation check list ..............4-1... -
Page 36: Pre-Operation Check List
• If necessary, add recommended coolant to specified level. 6-17–6-18 • Check cooling system for leakage. • Check operation. • If soft or spongy, have Yamaha dealer bleed hydraulic system. Front brake • Check fluid level in reservoir. 3-9, 6-25–6-28 •... - Page 37 • Make sure that operation is smooth. • Check cable free play. Throttle grip 6-22, 6-29 • If necessary, have Yamaha dealer adjust cable free play and lubricate cable and grip housing. • Check for damage. • Check tire condition and tread depth.
- Page 38 Ofrecido por www.electromanuales.com...
-
Page 39: Operation And Important Riding Points
Ofrecido por www.electromanuales.com OPERATION AND IMPORTANT RIDING POINTS Starting the engine ................5-1 Starting off ..................5-2 Acceleration and deceleration ............5-2 Braking ....................5-3 Tips for reducing fuel consumption ............5-3 Engine break-in .................5-4 Parking ....................5-4... -
Page 40: Starting The Engine
See page 5-4 for engine break-in their functions before riding. 3. Start the engine by pushing the instructions prior to operating the Consult Yamaha dealer start switch while applying the vehicle for the first time. regarding any control or func- front or rear brake. -
Page 41: Starting Off
Ofrecido por www.electromanuales.com OPERATION AND IMPORTANT RIDING POINTS 4. Check for oncoming traffic, and then slowly turn the throttle grip (on the right) in order to take off. 5. Switch the turn signal off. 1. Grab bar EAU00433 EAU00434 Starting off Acceleration and deceleration Starting... -
Page 42: Braking
Ofrecido por www.electromanuales.com OPERATION AND IMPORTANT RIDING POINTS EW000057 EAU04755 Tips for reducing fuel consumption 8 8 Avoid braking hard or sudden- Fuel consumption, tips reducing Fuel consumption depends largely on ly (especially when leaning your riding style. Consider the follow- over to one side), otherwise ing tips to reduce fuel consumption: the scooter may skid or over-... -
Page 43: Engine Break-In
1,600 km and beyond ing must be avoided. The vehicle can now be operated normally. EC000049 If any engine trouble should occur during the engine break-in period, immediately have a Yamaha dealer check the vehicle. - Page 44 Ofrecido por www.electromanuales.com...
-
Page 45: Periodic Maintenance And Minor Repair
Ofrecido por www.electromanuales.com PERIODIC MAINTENANCE AND MINOR REPAIR Owner’s tool kit ............6-1 Checking the steering ..........6-31 Periodic maintenance and lubrication chart ...6-3 Checking the wheel bearings .......6-31 Removing and installing cowlings and panels ..6-6 Battery ..............6-32 Checking the spark plugs ........6-9 Replacing the fuses ..........6-34 Engine oil and oil filter cartridge ......6-12 Replacing a headlight bulb ........6-35... -
Page 46: Owner's Tool Kit
WEATHER, TERRAIN, wise rapid engine wear may result. opening and closing procedures.) GEOGRAPHICAL LOCATION, AND Consult a Yamaha dealer for prop- The service information included in INDIVIDUAL USE, THE MAINTE- er maintenance intervals. this manual and the tools provided in NANCE INTERVALS MAY NEED TO the owner’s tool kit are intended to... - Page 47 PERIODIC MAINTENANCE AND MINOR REPAIR NOTE: If you do not have the tools or experi- ence required for a particular job, have a Yamaha dealer perform it for you. EW000063 Modifications not approved by Yamaha may cause loss of perfor- mance and render the vehicle unsafe for use.
-
Page 48: Periodic Maintenance And Lubrication Chart
8 8 The annual checks must be performed every year, except if a kilometer-based maintenance is performed instead. 8 From 50,000 km, repeat the maintenance intervals starting from 10,000 km. 8 Items marked with an asterisk should be performed by a Yamaha dealer as they require special tools, data and technical skills. - Page 49 Ofrecido por www.electromanuales.com PERIODIC MAINTENANCE AND MINOR REPAIR ODOMETER READING (× 1,000 km) ANNUAL ITEM CHECK OR MAINTENANCE JOB CHECK • Check operation, fluid level and vehicle for fluid leakage. √ √ √ √ √ √ (See NOTE on page 6-5.) Rear brake •...
- Page 50 Ofrecido por www.electromanuales.com PERIODIC MAINTENANCE AND MINOR REPAIR ODOMETER READING (× 1,000 km) ANNUAL ITEM CHECK OR MAINTENANCE JOB CHECK √ 4,000 km after initial 1,000 km • Change. (See page 3-2 and 6-15 for more information When the oil change indicator light comes on about the oil change indicator light.) Engine oil (every 5,000 km)
-
Page 51: Removing And Installing Cowlings And Panels
Ofrecido por www.electromanuales.com PERIODIC MAINTENANCE AND MINOR REPAIR 1. Panel A 1. Panel D 1. Screw (×3) 2. Panel B 2. Cowling B EAU03878 3. Panel C 3. Panel E Panels A and D 4. Cowling A 4. Cowling C 5. - Page 52 Ofrecido por www.electromanuales.com PERIODIC MAINTENANCE AND MINOR REPAIR 1. Screw (×3) 1. Screw (×4) To install the panel Panel B Panels C and E Place the panel in the original posi- To remove the panel To remove one of the panels tion, and then install the screws.
- Page 53 Ofrecido por www.electromanuales.com PERIODIC MAINTENANCE AND MINOR REPAIR 1. Screw (×2) 1. Screw (×2) 1. Bolt (×2) 2. Nut (×4) 2. Screw (×2) Panel F Cowling A Cowling B To remove the panel To remove the cowling To remove the cowling Remove the panel screws.
-
Page 54: Checking The Spark Plugs
Ofrecido por www.electromanuales.com PERIODIC MAINTENANCE AND MINOR REPAIR EAU03816 Checking the spark plugs Spark plugs, checking The spark plugs are important engine components, which are easy to check. Since heat and deposits will cause any spark plug to slowly erode, the spark plugs should be removed and checked in accordance with the periodic maintenance and lubrication... - Page 55 Ofrecido por www.electromanuales.com PERIODIC MAINTENANCE AND MINOR REPAIR 1. Spark plug cover 1. Spark plug cap 1. Spark plug wrench To remove a spark plug 3. Remove the spark plug cap. 4. Remove spark plug 1. Remove cowling B. (See page shown with spark...
- Page 56 Instead, specification. have a Yamaha dealer check the Spark plug gap: scooter. 0.7–0.8 mm 3. Check each spark plug for elec- 2. Clean the surface of the spark trode erosion and excessive car-...
-
Page 57: Engine Oil And Oil Filter Cartridge
Ofrecido por www.electromanuales.com PERIODIC MAINTENANCE AND MINOR REPAIR EAU04621 Engine oil and oil filter cartridge Engine filter cartridge The engine oil level should be checked before each ride. In addition, the oil must be changed and the oil filter cartridge replaced at the inter- vals specified in the periodic mainte- nance and lubrication chart. - Page 58 An oil filter wrench is available at a off. Yamaha dealer. 2. Place an oil pan under the engine to collect the used oil. 5. Apply a thin coat of engine oil to 3.
- Page 59 Ofrecido por www.electromanuales.com PERIODIC MAINTENANCE AND MINOR REPAIR ECA00133 8. Add the specified amount of the recommended engine oil, and 8 8 In order to prevent clutch slip- then install and tighten the oil page (since the engine oil also filler cap.
-
Page 60: Chain Drive Oil
Ofrecido por www.electromanuales.com PERIODIC MAINTENANCE AND MINOR REPAIR NOTE: If the engine oil is changed before the oil change indicator light comes on (i.e. before the periodic oil change interval has been reached), the indi- cator light must be reset after the oil change for the next periodic oil change to be indicated at the correct time. - Page 61 Ofrecido por www.electromanuales.com PERIODIC MAINTENANCE AND MINOR REPAIR ECA00078 4. Install the chain drive oil drain bolt, and then tighten it to the Make sure that no foreign material specified torque. enters the chain drive case. Tightening torque: Chain drive oil drain bolt: 20 Nm (2.0 m·kgf) 5.
-
Page 62: Coolant
Ofrecido por www.electromanuales.com PERIODIC MAINTENANCE AND MINOR REPAIR EAU04964 Coolant To check the coolant level 1. Place the scooter on a level sur- face and hold it in an upright position. NOTE: 8 The coolant level must 1. Coolant reservoir cover 1. - Page 63 8 8 If water has been added to the Coolant reservoir capacity coolant, have a Yamaha dealer (up to the maximum level mark): check the antifreeze content of 0.35 L the coolant as soon as possi-...
-
Page 64: Cleaning The Air Filter Element
Ofrecido por www.electromanuales.com PERIODIC MAINTENANCE AND MINOR REPAIR EAU03877 Cleaning the air filter element filter element, cleaning The air filter element should be cleaned at the intervals specified in the periodic maintenance and lubrica- tion chart. Clean the air filter element more frequently if you are riding in unusually wet or dusty areas. - Page 65 Ofrecido por www.electromanuales.com PERIODIC MAINTENANCE AND MINOR REPAIR EC000082 8 8 Make sure that the air filter ele- ment is properly seated in the air filter case. 8 8 The engine should never be operated without the air filter element installed, otherwise the pistons and/or cylinders 1.
-
Page 66: Adjusting The Carburetors
Therefore, checked and, if necessary, adjusted most carburetor adjustments should as follows at the intervals specified in be left to a Yamaha dealer, who has the periodic maintenance and lubrica- the necessary professional knowl- tion chart. edge and experience. The adjust-... -
Page 67: Adjusting The Throttle Cable Free Play
To prevent this from occurring, the valve clear- 4. Install the panel. ance must be adjusted by a Yamaha dealer at the intervals specified in the periodic maintenance and lubrication a. Throttle cable free play chart. -
Page 68: Tires
Ofrecido por www.electromanuales.com PERIODIC MAINTENANCE AND MINOR REPAIR EAU04403 sories does not exceed the Tire air pressure Tires (measured on cold tires) specified maximum load for Tires To maximize the performance, dura- Load* Front Rear the vehicle. bility, and safe operation of your 200 kPa 225 kPa 8 8 Do not carry along loosely... - Page 69 Ofrecido por www.electromanuales.com PERIODIC MAINTENANCE AND MINOR REPAIR EAU00683 Tire information This scooter is equipped with cast 8 8 Have a Yamaha dealer replace wheels and tubeless tires. excessively worn tires. EW000078 Besides being illegal, operat- ing the scooter with exces-...
-
Page 70: Cast Wheels
There should be no free play at the deformed or cracked wheel must brake lever ends. If there is free play, be replaced. have a Yamaha dealer inspect the 8 The wheel should be balanced brake system. whenever either the tire or wheel has been changed or replaced. -
Page 71: Checking The Front And Rear Brake Pads
To check the brake pad wear, check the wear indicator grooves. If a brake pad has worn to the point that the wear indicator grooves have almost disappeared, have a Yamaha dealer replace the brake pads as a set. 6-26... -
Page 72: Checking The Brake Fluid Level
A low less than 0.8 mm, have a brake fluid level may indicate worn Yamaha dealer replace brake pads and/or brake system brake pads as a set. -
Page 73: Changing The Brake Fluid
Changing the brake fluid fluid. Mixing fluids may result in a Brake fluid, changing Have a Yamaha dealer change the harmful chemical reaction and brake fluid at the intervals specified in lead to poor braking perfor- the NOTE after the periodic mainte- mance. -
Page 74: Checking And Lubricating The Throttle Grip And Cable
EW000114 Recommended lubricant: Lithium-soap-based grease If the centerstand or sidestand (all-purpose grease) does not move up and down smoothly, have a Yamaha dealer check or repair it. 6-29... -
Page 75: Checking The Front Fork
EC000098 If any damage is found or the front fork does not operate smoothly, have a Yamaha dealer check or repair it. 6-30... -
Page 76: Checking The Steering
Yamaha 1. Place a stand under the engine dealer check the wheel bearings. to raise the front wheel off the ground. -
Page 77: Battery
1. Battery 2. Battery cover To charge the battery To access the battery Have a Yamaha dealer charge the 1. Open the seat. (See page 3-11 battery as soon as possible if it for seat opening and closing pro- seems to have discharged. Keep in cedures.) - Page 78 9 INTERNAL: Drink large quan- battery charger, have 3. Fully charge the battery before tities of water or milk and Yamaha dealer charge your installation. immediately call a physician. battery. 9 EYES: Flush with water for 15 minutes and seek prompt medical attention.
-
Page 79: Replacing The Fuses
Ofrecido por www.electromanuales.com PERIODIC MAINTENANCE AND MINOR REPAIR 1. Battery 1. Negative battery lead 1. Signaling system fuse 2. Main fuse box 2. Headlight fuse EAU04978 3. Fuse box 3. Ignition fuse Replacing the fuses 4. Radiator fan fuse Fuses, replacing 3. -
Page 80: Replacing A Headlight Bulb
3. Turn the key to “ON” and turn on light bulb cover. the electrical circuit in question to check if the device operates. 4. If the fuse immediately blows again, have a Yamaha dealer check the electrical system. 6-35... -
Page 81: Troubleshooting
3. Place a new bulb into position, ment parts. Imitation parts may look and then secure it with the bulb like Yamaha parts, but they are often holder. inferior, have a shorter service life and can lead to expensive repair bills. -
Page 82: Troubleshooting Charts
Remove the spark plugs and check the electrodes. The engine does not start. Have a Yamaha dealer check the vehicle. Check the battery. 4. Battery The engine turns over The battery is good. - Page 83 Start the engine. If the engine overheats again, have a The coolant level Yamaha dealer check and repair the cooling system. is OK. NOTE: If coolant is not available, tap water can be temporarily used instead, provided that it is changed to the recommended coolant as soon as possible.
- Page 84 Ofrecido por www.electromanuales.com...
-
Page 85: Scooter Care And Storage
Ofrecido por www.electromanuales.com SCOOTER CARE AND STORAGE Care ....................7-1 Storage ....................7-4... -
Page 86: Scooter Care And Storage
Ofrecido por www.electromanuales.com EAU03873 SCOOTER CARE AND STORAGE Before cleaning Cleaning Care Care 1. Cover the muffler outlet with a ECA00011 While the open design of a scooter plastic bag after the engine has reveals the attractiveness of the tech- 8 8 Avoid using strong... - Page 87 Ofrecido por www.electromanuales.com SCOOTER CARE AND STORAGE 8 8 Do not use any harsh chemical 8 8 For scooters equipped with a After riding in the rain, near the sea products on plastic parts. Be windshield: Do not use strong or on salt-sprayed roads sure to avoid using cloths or cleaners or hard sponges as...
- Page 88 NOTE: 8 8 Before operating the scooter ing chrome- and nickel-plated, Consult a Yamaha dealer for advice test its braking performance surfaces. on what products to use. and cornering behavior. 4. Use spray oil as a universal cleaner to remove any remaining dirt.
- Page 89 Ofrecido por www.electromanuales.com SCOOTER CARE AND STORAGE Storage Long-term a. Remove the spark plug caps Before storing your scooter for sever- and the spark plugs. Storage al months: b. Pour a teaspoonful of engine Short-term 1. Follow all the instructions in the oil into the spark plug bores.
- Page 90 Ofrecido por www.electromanuales.com SCOOTER CARE AND STORAGE 5. Lubricate all control cables and 8. Remove the battery and fully the pivoting points of all levers charge it. Store it in a cool, dry and pedals as well as of the place and charge it once a sidestand/centerstand.
-
Page 91: Specifications
Ofrecido por www.electromanuales.com SPECIFICATIONS Specifications ..................8-1 Conversion table ................8-5... -
Page 92: Specifications
Ofrecido por www.electromanuales.com EAU01038 SPECIFICATIONS Specifications Engine oil Specifications Model XP500 Type SAE 10W-30 or 10W-40 Dimensions Recommended engine oil Overall length 2,235 mm classification API Service SE, SF, SG Overall width 775 mm type or higher Overall height 1,410 mm Seat height 795 mm In order to prevent clutch slippage (since the engine oil also... - Page 93 Ofrecido por www.electromanuales.com SPECIFICATIONS Radiator capacity Chassis (including all routes) 1.5 L Frame type Diamond Air filter Dry element Caster angle 28° Fuel Trail 95 mm Type REGULAR UNLEADED Tires GASOLINE ONLY Front Fuel tank capacity 14 L Carburetor Type Tubeless Manufacturer MIKUNI...
- Page 94 Ofrecido por www.electromanuales.com SPECIFICATIONS Wheels Suspension Front Front Telescopic fork Type Cast wheel Rear Swingarm 14 M/C × MT3.50 Size Spring/shock absorbers Rear Front Coil spring/oil damper Type Cast wheel Rear Coil spring/gas-oil damper 14 M/C × MT4.50 Size Wheel travel Brakes Front 120 mm...
- Page 95 Ofrecido por www.electromanuales.com SPECIFICATIONS 12 V, 5/21 W × 2 Tail/brake light 12 V, 5/21 W × 2 Front turn signal light 12 V, 21 W × 2 Rear turn signal light 12 V, 5 W × 2 Auxiliary light 12 V, 5 W ×...
-
Page 96: Conversion Table
Ofrecido por www.electromanuales.com SPECIFICATIONS EAU04513 Conversion table Conversion table Conversion table METRIC SYSTEM TO IMPERIAL SYSTEM All specification data in this manual are listed in SI and Metric unit Conversion factor Imperial unit METRIC UNITS. × m·kgf 7.233 ft·lbf × m·kgf 86.794 in·lbf... -
Page 97: Consumer Information
Ofrecido por www.electromanuales.com CONSUMER INFORMATION Identification numbers ...............9-1 Key identification number ..............9-1 Vehicle identification number .............9-1 Model label ..................9-2... -
Page 98: Identification Numbers
Record the key identification number, vehicle identification number and model label information in the spaces provided below for assistance when ordering spare parts from a Yamaha dealer or for reference in case the vehicle is stolen. 1. KEY IDENTIFICATION 1. Key identification number 1. -
Page 99: Consumer Information
1. Model label EAU03757 Model label Model label The model label is affixed to the loca- tion shown. Record the information on this label in the space provided. This information will be needed when ordering spare parts from a Yamaha dealer. - Page 100 Ofrecido por www.electromanuales.com INDEX Acceleration and deceleration ....5-2 Front and rear brake levers ....6-25 Key identification number .......9-1 Air filter element, cleaning ....6-19 Front and rear brake pads, checking ..6-26 Anti-theft alarm (optional) .......3-6 Front fork, checking ......6-30 Fuel ............3-10 Fuel consumption, tips for reducing ..5-3 Main switch/steering lock .......3-1 Battery ..........6-32...
- Page 101 Ofrecido por www.electromanuales.com INDEX Throttle cable free play, adjusting ..6-22 Throttle grip and cable, checking and lubricating ..........6-29 Tires .............6-23 Tool kit ............6-1 Troubleshooting ........6-36 Troubleshooting charts ......6-37 Valve clearance, adjusting ....6-22 Vehicle identification number ....9-1 Wheel bearings, checking ....6-31 Wheels ..........6-25...
- Page 102 Ofrecido por www.electromanuales.com...
- Page 103 Ofrecido por www.electromanuales.com...
- Page 104 Ofrecido por www.electromanuales.com YAMAHA MOTOR CO., LTD. PRINTED ON RECYCLED PAPER PRINTED IN JAPAN 2002.9-0.5x1 !