Table of Contents
Advertisement
Advertisement
Table of Contents

Related Manuals for Clavitech GDP-1100


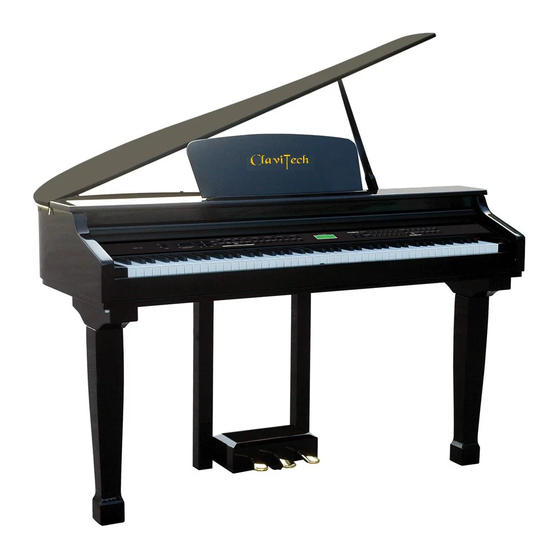
Summary of Contents for Clavitech GDP-1100
-
Page 3: Safety Precautions
Precaution Thank you for purchasing this digital instrument.For perfect operation and security,please read the manual carefully and keep it for future reference. Safety Precautions CAUTION RISK OF ELECTRIC SHOCK DO NOT OPEN The lightning flash with arrowhead symbol within an equilateral triangle is in tended to alert the user to the presence of uninsulated dangerous voltage within the product s enclosure that may be of sufficient magnitude to constitute a... - Page 4 Thanks For Using Our Digital Piano Your digital piano is a high-quality digital piano with 88 standard touch sensitivity keyboard and combines the most advanced PCM tone generation technology. This digital piano lets you record your performances and Registration settings to a USB Disk. Each user song lets you record up to sixteen independent tracks.
-
Page 5: Table Of Contents
Contents ........ 3 ......Panel Control Full Keyboard ..............Connectors Tap/Tempo ............. Using AC Power Jack Metronome ............Using Headphones User Style ............. Using Foot Pedals Function ............Using MIDI IN/OUT Jack ......Using Line IN/OUT Jack Reverb and Chorus Depth ...... -
Page 7: Panel Control
Panel Contents 1. POWER ON/OFF 10. USB FUNCTION 2. MASTER VOLUME fader [STORE/BANK] button BRIGHTNESS fader [M1]-[M5] buttons 4. MULTI DISPLAY [SAVE] button 5. ACCOMPANIMENT CONTROL [FILE] button [ ACCOMP. ] button [RECORD] button [TAP/TEMPO] button [PLAY/LOAD] button [METRONOME] button [TRACK] button [O.T.S] button [FILTER] button... -
Page 8: Connectors
Connectors Using AC Power Jack Connect the power cable to the AC power jack on the rear panel of the piano body. AC POWER AC POWER CAUTION CAUTION Plug the power cable into an AC power outlet. Caution 1.Ensure the piano is turned off when connecting and disconnecting the power. 2.Turn the volume switch to reach the minimum level before turning on the power Using Headphones... - Page 9 1. Damper Pedal (Right) It performs the same function as the damper pedal on an actual acoustic piano, letting you sustain the sound of the voices even after releasing your fingers from the keys. SUSTAIN 2. Sostenuto Pedal (Center) If you play a note or chord on the keyboard and press the sostenuto pedal while the notes are held, those notes will be sustained as long as the pedal is held, but all subsequently played notes will not be sustained.
-
Page 10: Using Midi In/Out Jack
Using MIDI IN/OUT Jack MIDI (Musical Instrument Digital Interface) is a world-standard communica- tion interface which allows electronic musical instruments to communicate with each other, by sending and receiving compatible note, program change and other types of MIDI data. MIDI IN MIDI OUT MIDI OUT MIDI IN... -
Page 11: Using Usb-Midi
Using USB-MIDI This product allows the transfer of MIDI over USB. There is a specific way in which the MIDI signals are routed for maximum flexibility. In a standard Digital Piano, the built-in keyboard sends MIDI signals to the internal sound bank as well as the 5-pin MIDI output. -
Page 12: Basic Operation
Basic Operation Power Switch Turn the power on by pressing the [POWER] switch, the panel LCD display will light. POWER Adjust the Volume Use [MASTER VOLUME] control to adjust the volume to your desired level. MASTER VOLUME MASTER VOLUME Demo Play There are 6 preset piano songs that you can play individually. - Page 13 2. Stop Playing Press [DEMO] button again to stop playing. CHORUS CHORUS DEMO DEMO Adjusting the sound The [TREBLE] fader can be used to adjust the sound of the piano. If the TREBLE fader is pushed to the far left the high frequency of the sound will be decreased, if it is pushed to the right, the high frequency will be increased.
-
Page 14: Selecting A Voice
Voice Selecting a Voice Your instrument has 128(01-128) GM standard voices. 10(129-138) different drum percussion kits and 1 set of sound effect that you can select and play. When [VOICE/STYLE] button is lit, the voice mode is selected and the current voice number and the name will display on the LCD Display section. -
Page 15: Split Mode
1. Select Dual Voice Press [DUAL] button , the Dual indicator is flashing, use the number [0]-[9] or [+] and [-] button to select the second voice. SPLIT SPLIT DUAL DUAL 2. Setting the Dual Voice Volume Reference: Adjusting Keyboard Volume(P.13). NOTE To change the dual voice Pan, Octave and Reverb/Chorus Depth, please see the details in [FUNCTION] section (P.26). -
Page 16: Playing Portable Grand Piano
SPLIT SPLIT DUAL DUAL 2. Changing the Split Point Hold down the [SPLIT] button for about 2 second, then play any of the keys on the keyboard to select the split point. 3. Setting the Split Voice Volume Reference: Adjusting Keyboard Volume(P.13). NOTE To change the split voice Pan, Octave and Reverb/Chorus Depth, please see the details in [FUNCTION] section (P.26). - Page 17 Adjusting Keyboard Volume Use this function can adjust the Split Voice Volume, Dual Voice Volume and the Main Voice Volume. 1. Split Voice Volume In Split mode, when the Split indicator is flashing, press [KB.VOL / ] button can adjust the split voice volume, while the spilt indicator is lit. KB.VOL KB.VOL 2.
-
Page 18: Effect
Effect Digital Effect This function allows you to perform the overall sound in a realistic style. 1. Reverb The [REVERB] button selects a number of digital reverb effects that you can use for extra depth and expressive power. Press [REVERB] button can turn off or turn on the reverb effect. Press [REVERB] button, use number button or [+] and [-] button to select reverb type. -
Page 19: Touch Button
The chorus types in the list below can be selected from the chorus display. Chorus1 Chorus2 Chorus3 Chorus4 Feedback Flanger ShtDelay FbDelay NOTE Press [CHORUS] button repeatedly to turn on or turn off the chorus effect. Adjusting Chorus Depth Reference: Reverb and Chorus Depth(P.26). Touch Button The touch function provides four different types of keyboard touch sensitivity that can be selected to match different playing styles. -
Page 20: Transpose
Setting Fixed Touch Value Hold down [TOUCH] button, LCD will display:TouchFixed:100. TOUCH TOUCH Use [+] and [-] button or [0-9] number buttons to select the touch sensitivity defaul value . When touch is selecting, press [+] and [-] button simultaneously to reset the touch to default value (100). -
Page 21: Twin Mode
Octave Mode You can set the main voice octave, the dual voice octave and the split voice octave by pressing [OCTAVE / ] button. Range: -2~2 OCTAVE OCTAVE Main Voice Octave: In main voice mode, press [OCTAVE / ] button to set the main voice octave value. -
Page 22: Auto Accompaniment
Auto Accompaniment Your instrument has 100 accompaniment styles which can be used to provide Fully-orchestrated Auto Accompaniment. When the Auto Accompaniment function is turned ON, this instrument creates fully-orchestrated rhythm, bass and chord accompaniment based on chords you play with the left hand in the Auto Accompaniment section of the keyboard(i.e. -
Page 23: Synchro Start
Synchro Start Press the [SYNCHRO] button, then the accompaniment will start when you play the first chord on the AUTO ACCOMPANIMENT section of the keyboard. CHORD CHORD SYNCHRO SYNCHRO INTRO/ENDING INTRO/ENDING START/STOP START/STOP Starting the Accompaniment with an Introduction If you press this button before you start the rhythm, synchro function will work automatically. -
Page 24: Stopping The Accompaniment
Stopping the Accompaniment An accompaniment progress can be stopped immediately by pressing the [START/STOP] button and also can be stopped with an appropriate ending by pressing the [INTRO/ENDING] button. INTRO/ENDING INTRO/ENDING START/STOP START/STOP FILL IN FILL IN Adjusting the Accompaniment Volume Press [ACCOMP. -
Page 25: One Touch Setting
One Touch Setting This function is actually a convenient feature which automatically selects a suitable voice for you when you select a style. In addition, various panel settings (such as voice, effect, Tempo, etc.) that match the selected style can be recalled with just a single button [O.T.S.]. -
Page 26: Chord Function
Chord Function Turn on this mode, the specified left-hand section of the keyboard becomes Auto Accompaniment section, and chords played in this section are automatically detected and used as a basis for fully automatic accompaniment with the selected style CHORD CHORD SYNCHRO SYNCHRO... -
Page 27: Metronome
Metronome Metronome is a convenient feature for practice, and it can also provide a solid rhythmic guide when recording. The metronome sound is alternately turned on and turned off by pressing [METRO] button. The time signature of the metronome can be set by using [+] and [-] button while turning on the metronome function. - Page 28 Press [PLAY/LOAD] button. PLAY/LOAD PLAY/LOAD TRACK TRACK Press [VOICE/STYLE] button, use number buttons to select 101 User Rhy . Now the RINGWAY Style or YAMAHA Style can be used as usual by pressing Rhythm Control buttons. VOICE/STYLE VOICE/STYLE NOTE Some YAMAHA Styles have four variations (Main A, Main B, Main C and Main D), only two variations (Main A and Main B) will be recognized by your instrument.
-
Page 29: Function
Function Press [FUNCTION] button to enter the menu of function. The default option of the menu is Midi In .press [FUNCTION] button repeatedly to select the option to be set. Turn the dial or use [+] and [-] button to set the parameter. The option and the parameters are as the follows: Option LCD Display... -
Page 30: Pan
In this fun ction you c an set the stereo position of each orchestration part to create a board stereo image of your sound. Press [FUNCTION] button to select Main Pan? , Use [+] and [-] button to select Spilt Pan? Dual PAN? . -
Page 31: Master Tune
Press [ENTER] button to confirm, use [+] and [-] button or number buttons (0-9) to adjust the value: 00-63 ENTER ENTER Master Tune This function makes it possible to tune the pitch of your instrument to match other instruments. The tune range is from -64(down one semitone) through 0 (normal pitch) to 63 (up one semitone). -
Page 32: Midi Out
Press [ENTE R] button to confirm, and use [+]and[-] button or the dial to turn on or turn off this track. ENTER ENTER Midi Out MIDI OUT----Transmits MIDI data to another MIDI device. Press [FUNCTION] button to select MidiOut MCH?. Use [+] and [-] button to select MidiOut SCH? MidiOut DCH? - Page 33 LOCAL ON---- Normal operation. Keyboard and Controllers are sent to the Sound Engine. LOCAL OFF -- There will be no sound produced by the brain's tone generator. MIDI function can work as usual. If you press [FUNCTION] button to select All Local ? , and you press the [+] and [-] buttons you can select the following Local Functions: KBD Local? This configuration will set Local Control for the keyboard only.
-
Page 34: Autotrack
Auto Track Here you can turn on or turn off AUTO TRACK function for recording mode. And the setting will be saved automatically when the power is off. Press [FUNCTION] button repeatedly to select AutoTrack? . FUNCTION FUNCTION Press [ENTER] button to confirm, and use [+] and [-] button to select AutoTrkOn AutoTrkOff ENTER... -
Page 35: Play Mode Style
Press [ENTER] button to confirm, and use [+] and [-] button to select USBPlay:Single USBPlay:Loop ENTER ENTER Single: the selected song will be played after the Play button is pressed and will stop at the end of it. Loop: the selected song will be played after the Play button is pressed and will automatically play all the following songs without stopping until the [PLAY] button will not be pressed again. -
Page 36: Registration Memory
Registration Memory Your instrument registration memory can be used to store five sets of voice and auto accompaniment settings that can be recalled during you playing at the touch of one single button. Memorizing the Settings 1. Select the Desired Bank Press the [STORE/BANK] button repeatedly to select the bank [MemoryBank01] -[MemoryBank04]. -
Page 37: Recalling The Settings
Recalling the Settings 1. Select the Appropriate Registration Memory Bank Press the [STORE/BANK] button repeatedly to select the bank [MemoryBank01] -[MemoryBank04]. STORE/BANK STORE/BANK 2. Press the Desired Registration Memory Preset [M1]-[M5] Button The settings stored to a REGISTRATION MEMORY button can be recalled simply by pressing the appropriate button [M1]-[M5]. -
Page 38: Use Registration Data From Usb
Press [SAVE] button, a message xREGSTxxx (x indicates this file's sequence Num in UDisk. xxx indicates registration file number ) appears, indicating your Registration Memory Settings are saved to USB Disk, with 20 Registrations stored to a single file. SAVE SAVE Use Registration Data from USB Insert the USB Disk into the USB terminal. -
Page 39: Song Recording
Song Recording This digital piano lets you record your performances and Registration settings to a USB Disk. Each user song lets you record up to sixteen independent tracks. These include not only the voices for the keyboard performance, but also the auto accompaniment parts. - Page 40 3. Stop Recording Press [RECORD] button again to stop recording. Recording stops and your performance is written to the song. The song to which your performance is recorded is automatically named SONG_xxx (xxx indicates the recording file number). You can edit the song as desired by computer or midi edit soft.
- Page 41 Multi Track Recording Multi track recording provides two ways to record: 1.Use Auto Track Assignment. 2.Select Tracks by yourself. 1. Use Auto Track Assignment 1.1 Insert the USB disk into the USB terminal 1.2 Turn the Auto Track On Reference: Function Auto Track(P.30). 1.3 Start Recording Press the [RECORD] button to wait recording.
- Page 42 When the recording is finished, the recording file will be saved as a new file named SONG_002 . FILE FILE RECORD RECORD MULTI MULTI 1.6 Use the same operation as step 5 to record more tracks. The name of the new file will be saved in sequence.
- Page 43 2.3 Select Recording Track Press [TRACK] button repeatedly can select three voice mode, you can use [+] and [-] button to select the track(01-16) in each mode. PLAY/LOAD PLAY/LOAD TRACK TRACK Main. RecTrk------to select the Main Voice track(01-16, OFF) Split. RecTrk------to select the Split Voice track(01-16, OFF) Dual.
-
Page 44: Delete Song
The performance will be recorded to the desired track on the basic of SONG_001 . When the recording is finished, the recording file will be saved as a new file named SONG_002 . FILE FILE RECORD RECORD MULTI MULTI 2.7 Use the same operation as step 3 and step 6 to record more tracks. the name of the new file will be saved in sequence. -
Page 45: Multi Track Recording
File Button Use this button you can switch to USB mode immediately even the keyboard is in any of other mode. FILE FILE RECORD RECORD MULTI MULTI Filter Button Use this function you can turn on or turn off any tracks and change the metronome s tempo before song playing or recording. -
Page 46: Factory Set
Factory Set 1. Turn off the power. POWER 2. Hold down [+] and [-] button, then turn the power on, it can restore all internal settings to factory set. POWER... -
Page 47: Appendix
Appendix Auto Accompaniment Fingering SINGLE Mode SINGLE Mode fingering makes it simple to produce beautifully orchestrated accompaniment using major , seventh , minor and minor-seventh chords by pressing a minimum number of keys in the Auto Accompaniment section of the keyboard . -
Page 48: Fingered Mode
Fingered Mode Fingered Mode is ideal if you already know how to play chords on a keyboard, since it allows you to supply your own chords for the Auto Accompaniment feature. The instrument will recognize the following chord type: Example for c chords Name Normal Voicing... -
Page 49: Voice List
Voice List Acoustic Grand Piano Bright Acoustic Piano Electric Grand Piano Honky-Tonk Piano Electric piano 1 Electric Piano 2 Harpsichord Clavi Celesta Glockenspiel Music Box Vibraphone Marimba Xylophone Tubular Bells Dulcimer Drawbar Organ Percussive Organ Rock Organ Church Organ Reed Organ Accordion Harmonica Tango Accordion... -
Page 50: Style List
Style List STYLE NAME STYLE NAME STYLE NAME 8 BEAT LATIN DISCO MAMBO DISCO SALSA 8BEAT MODERN MERSEY BEAT DISCO PARTY BEGUINE DISCO FEVER SURF POP REGGAE NEWYORK DISCO 8BEAT SWINGY REGGAE SWING&JAZZ BALLROOM 60'S ROCK HARD ROCK BIG BAND FAST DANCE BAND BIG BAND MID ROCK SHUFFLE... -
Page 51: Percussion Voice List
Percussion Voice List Note# Note Standard(0) Room(8) Power(16) Electronic(24) Synth(25) Dance(26) Jazz(32) Brush(40) Classic(48) Drum(56) Effects(56) Seq Click H Brush Tap Brush Swirl L Brush Slap Brush Swirl H Rever se Cymbal Rever se Cymbal Snare Roll Castanet Hi-Q Hi-Q Snare L SD Elec H2 Snare L... -
Page 52: Midi Implementation Chart
MIDI Implementation Chart F u n c t i o n T r a n s m i t t e d R e c o g n i z e d R e m a r k s Basic Default (*1) 1-16CH... -
Page 53: Specifications
Specifications Keyboard: Midi: 88 Keys With Touch Sensitivity Transmit Settings Display: Receive Settings LCD Display Local Control Voice: USB MIDI Connectors: Polyphony: MIDI In/Out, Pedal, Line In/Out, Phones, USB So cket Voice Control: Speakers: Dual, Transpose, Split, Twin, YD134-9A: 4Ù 10W 2 Touch Dimensions(W Pedals:... -
Page 54: Assembly Instructions
Assembly Instructions Before moving the piano to a new location, always remember to raise the level of the Pedal Board support so that it is not touching the floor. Once the piano is in place, you can adjust it so it is in firm contact with the floor again.
Need help?
Do you have a question about the GDP-1100 and is the answer not in the manual?
Questions and answers