Table of Contents
Advertisement
Quick Links
®
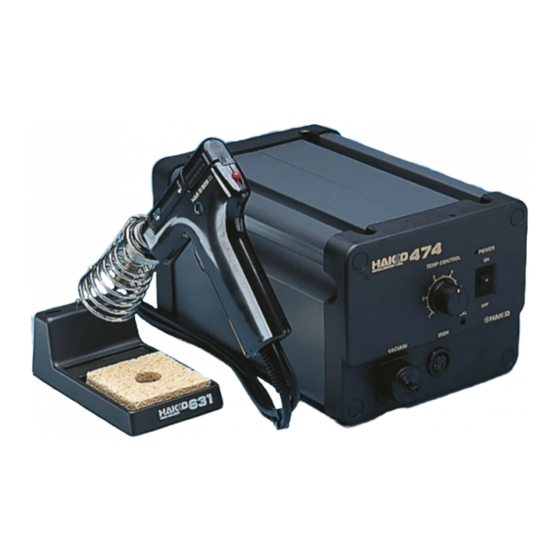
Thank you for purchasing the HAKKO 474 Desolder-
ing Tool.
Please read this manual before operating the HAKKO
474.
Keep this manual readily accessible for reference.
CAUTION
Remove the pump securing screw (M4×25
marked red) from the bottom of the station.
Failure to do so may result in serious prob-
lems.
Table of Contents (English)
1. Packing List ......................................................... 1
2. Specifications ...................................................... 1
3. Precautions ......................................................... 2
4. Part Names (Desoldering Gun/Station) ............ 3
5. Operation
(Preparation-
Assembly and Connection) .... 4 • 5
(Desoldering) ........................... 5 • 6
(Cleaning during Operation) ......... 7
(Problems during Desoldering) . 7• 8
(Post-operation Maintenance) ...... 8
(Troubleshooting Guide) ............... 8
6. Maintenance (Desoldering Gun) ................. 9 • 10
(Station) .......................................11
7. Replacement Parts
(Replacing Heating Element) ..... 12
8. Parts List
(Station) ............................... 13 • 14
(Desoldering Gun) ...................... 15
9. Replacement Parts ............................................ 15
10. Wiring ................................................................ 16
Instruction Manual
使用說明書
日本白光牌
●
●
吸錫槍
承蒙惠顧 , 謹致謝忱。
使用 HAKKO 474 之前 , 請詳閱本使用說明書 , 正
確使用。
閱後請妥為收存 , 以備日後查閱。
使用之前必須除去機身底下的泵拴緊螺絲
(M4×25 紅色記號 ), 否則可能導致嚴重後
果。
1. 包裝清單 ......................................................................... 17
2. 規格 .................................................................................. 17
3. 安全及使用上的注意事項 ........................................... 18
4. 部件名稱 (吸錫槍/控制臺) ..................................... 19
(準備 --- 裝配和連接) .......................20.21
(吸錫) ..................................................21.22
(使用時 , 進行清理工作) ......................... 23
(除錫時發生故障) ....................................... 23
(使用後的保養) ......................................... 24
(排除故障指南) ......................................... 24
6. 保養
(吸錫槍) ..............................................25.26
(控制臺) ...................................................... 27
7. 更換部件 ......................................................................... 28
8. 部件清單 (控制臺) ..............................................29.30
(吸錫槍) ...................................................... 31
10. 電路圖 ............................................................................. 16
●
●
注意
目錄 ( 中文 )
Advertisement
Table of Contents

Subscribe to Our Youtube Channel
Related Manuals for Hakko Electronics 474


Summary of Contents for Hakko Electronics 474
-
Page 1: Instruction Manual
® 吸錫槍 Instruction Manual 使用說明書 日本白光牌 ● ● Thank you for purchasing the HAKKO 474 Desolder- 承蒙惠顧 , 謹致謝忱。 ing Tool. 使用 HAKKO 474 之前 , 請詳閱本使用說明書 , 正 Please read this manual before operating the HAKKO 確使用。 474. 閱後請妥為收存 , 以備日後查閱。... - Page 3 ● Do not modify the unit. ● Use only genuine HAKKO replacement parts. ● Do not wet the unit or use the unit when your hands are wet. ● Set the ceramic paper filter (S) for the filter retainer (station), and the ceramic paper filter (L) for the filter pipe (gun).
-
Page 4: Part Names
4. Part Names (Refer to p.19, 20 & 21 for part nos.) ● Desoldering Gun Nozzle Transmits heat for melting solder, En- Filter Pipe trance for melted solder. Set the ceramic paper filter (L) (No.A1033). Expendable part. Contains melted solder and flux using filters. Filters are expendable parts. -
Page 5: Operation
5. Operation Spring Iron Holder Preparation-Assembly and Connection (No.B1094) Assemble the HAKKO 474 on a flat surface. Cleaning Pin Holder (No.B1095) 1. Remove the pump securing screw (M4 × 25 marked red) from the bottom of the station. Tube(red) Securely insert the cleaning pin holder. -
Page 6: Power Switch
We recommend the HAKKO 191 thermometer or HAKKO 192 soldering tester for measuring the nozzle tem- perature. • The temperature control knob can be secured by tightening the tem- perature control set screw clamp (“+” screw) at the top of the HAKKO 474 unit. - Page 7 2. Clean the tip of the nozzle. • Keep the solder-plated section of the nozzle a shiny white by coating it with a small amount of solder. If the tip of the nozzle is coated with oxide, the nozzleʼs heat conductivity will be lowered.
-
Page 8: Replacing The Filter
P.W.B. is not melted. CAUTION The indicator on the HAKKO 475 reads in a different way. For instruction on the reading the 3 Replace the entire filter pipe HAKKO 475 indicator, please refer to with he provided backup filter pipe. -
Page 9: Troubleshooting Guide
■ Clean the tip of the nozzle with the cleaning sponge, then coat the tip form the following maintenance procedures with a fresh layer of solder to protect the solder plating. immediately after using the HAKKO 474 unit. Troubleshooting Guide WARNING : If the power cord is damaged, it must be replaced by the manufacturer, its service agent or similarity qualified person... -
Page 10: Maintenance
6. Maintenance (Desoldering Gun) Properly maintained, the HAKKO 474 desoldering gun should provide years of good service. Efficient desoldering depends upon the temperature, and the quality and quantity of the solder and flux. Per- form the following service procedures as dictated by the conditions of the gunʼs usage. -
Page 11: Replace The Filters
4. Replace the filters. Front Holder • Turn the power switch OFF, • When the filter pipe is cool to the touch, push down the release knob at the back of the gun and remove the filter pipe. Spring Filter Ceramic Paper Filter (L) CAUTION... - Page 12 6. Maintenance (Station) Cleaning the inside of the Filter Case 1. Replace the ceramic paper VACUUM filter (No.A1009). Remove the ceramic paper filter and inspect it. If it is stiff with flux, replace it. Apply silicone grease to the O-ring (S20) and securely tighten the vacuum outlet cap to prevent air leakage.
-
Page 13: Replacement Parts
7. Replacement Parts Replacing the Heating Element WARNING Unplug the power cord before starting this procedure. The resistance value of a working heating element is 2-4Ω at 23°C (73° Remove the filter pipe. F). If the value you get is outside this range, replace the heating element. -
Page 14: Parts List
8. Parts List (Station) Note: Spare or repair parts do not include mounting screws, if they are not listed on the description. Item No. Part No. Part Name Specifications B1029 Vacuum outlet cap A1009 Ceramic paper filter (S) 10 pcs. B1063 Filter retainer B1031... - Page 15 Pan Head Screw with Washer M4×8 (2) External Tooth Lock Washer nominal size 4 Pan Head Screw M3×55 Tapping Screw M2.6×6 (2) Tapping Screw M2.6×6 (4) Pan Head Screw with Washer M3×6 (2) Pan Head Screw with Washer M4×30 Pan Head Screw with Washer Pan Head M4×8 (2)
- Page 16 8. Parts List (Desoldering Gun) Pan Head Screw (Sus) M2.6×7 (3) Item No. Part No. Part Name Specifications A1314 Front holder Tapping Screw A1030 Spring filter Set of 10 M3×5 A1033 Ceramic paper filter (L) Set of 10 B2073 Filter pipe W/front holder &...
- Page 17 10. Wiring P.W.B. TRANS TRANS Motor Black Receptacle Power Switch White Transformer Power Cord Fuse Holder 10. 電路圖 印刷電路板 TRANS TRANS 馬達 黑色 插座 電源開關 白色 變壓器 電源線 保險絲套...
- Page 20 4. 部件名稱 請查閱第 29,30,31 頁之部件編號。 ●吸錫槍 吸嘴 傳熱以熔化焊錫。 過濾管 焊錫的入口。 裝有陶瓷過濾紙 ( 大 )( 編號 A1033) 是耗損部件。 過濾管內部是放置所吸入的焊錫和助焊劑。 是耗損部件。 後握器組件 拴緊過濾管。 鬆開鈕 壓下可取出過濾管。 發熱元件 內部需要清理。 指示器 指示吸嘴和發熱元件需要 清理 , 過濾管需要更換。 扳機 ( 請參閱第 23 頁 ) 擠壓時即可吸錫。 吸錫未達到高熱時 , 切勿拉動扳機。 軟管...
- Page 21 5. 使用 彈簧式吸錫槍支架 準備 --- 裝配和連接 ( 編號 B1094) 在平面臺上裝配 HAKKO 474。 清潔針插架 ( 編號 B1095) 1 請鬆開控制臺底下的泵拴緊螺 絲 (M4×25 紅色記號 )。 管子 ( 紅色 ) 2 裝配吸錫槍支架 插緊清潔針插架 . 裝彈簧式支架和清潔針插架插入基 座。 . 裝清潔海綿浸在水中 , 取出擠乾。 清潔海綿 注意 海綿是壓縮體 , 濕水後會膨脹。應移去...
- Page 22 . 為了更精確調節溫度 , 先用焊鐵溫度 切勿將清潔針插入溫控定位螺絲夾的孔徑裡 , 這會損壞吸錫槍。 計測量吸錫溫度 , 然後依此調節溫控 鬆開 鈕的溫度。 注意 使用十字帽螺絲起子 , 切勿將清潔針插入溫控定位螺絲夾的孔徑裡 , 拴緊溫控定位螺絲夾。 這會損壞吸錫槍。 我們建議使用 HAKKO 191 溫度計 , 或 HAKKO 192 焊鐵測試器 , 以測 量吸嘴溫度。 . 拴緊 HAKKO 474 控制臺頂端的溫控 定位螺絲夾 ( +字帽螺絲 ), 以鎖定溫 控鈕。...
- Page 23 2 清理吸嘴 . 以少量焊錫在吸嘴的焊錫鍍層部份 塗上保持吸嘴有光澤。 如果吸嘴覆蓋有氧化劑 , 導電能力 便減弱。在吸嘴頭鍍上少量新焊 錫 , 可發揮最大導電功能。 利用海綿中央位置的孔徑 , 以清除吸嘴上的氧化劑或舊焊錫。 3 熔化焊錫 . 將吸嘴觸及所要熔化的焊錫部位。 注意 切勿讓吸嘴觸及印刷電路板。 吸嘴 . 確定焊錫已被熔化 注意 印刷電路板 要確定焊錫是否已完全被熔化 , 可觀察 焊錫 孔徑內和印刷電路板的背面。 引線 如果有困難 , 則可用吸嘴稍搖動引線腳 , 如果可以移動 , 則表示焊錫已被熔化。 4 吸除焊錫 .確定焊錫已完全被熔化後...
- Page 24 如果吸力顯著減弱 , 應以清潔針清理吸嘴和發熱元件。 注意 如果吸嘴孔堵塞 , 或者印刷電路板孔徑內 的焊錫未被熔化 , 指示燈操作便不準確。 注意 HAKKO 475 的查讀法不同。請查閱 3 以所提供的備用過濾管來 HAKKO 475 使用說明書 , 以了解如何查 更換整條過濾管。 2 拉出 讀 HAKKO 475 指示燈。 2 更換過濾管 更換過濾管過程請參照 1 ∼ 3。 工作進行時 , 過濾管非常炙熱 , 須等 待過濾管冷切時 , 才可更換過濾管。...
- Page 25 吸嘴接觸點和發熱元件 d. 軟管 b. 過濾管前端蓋及其周圍部件 e. 真空出口蓋 c. 後握器的圓環 f. 連接電線裝配及其周圍部件 使用後的保養 使用 HAKKO 474 吸錫槍後 , 應依照右列程 .清除吸嘴內和發熱元件的焊錫。 序進行保養 , 以確保經久耐用。 .用清潔海綿清理吸嘴後 , 在吸嘴頭鍍上一層新焊錫 , 以保護鍍吸層。 排除故障指南 警告 如果電源線損壞 , 應請製造商 , 或其代理商 , 或合格人士更換 , 以 免發生傷人或損壞機身事故。...
- Page 26 6. 保養 ( 吸錫槍 ) 妥善保養 HAKKO 474 吸錫槍 , 保持高性能 , 可使用多年。 吸錫效率視溫度 , 焊錫和助焊劑的質量和數量而定。請根據吸錫槍的使用條件 , 依照下列維修程 序進行保養。 警告 吸錫槍可達到極高溫度 , 應小心使用。除了清潔吸嘴及發熱元件以外 , 必須維持電源線是關的。 當進行任何保養之前電源插頭必須是未連接的。 吸錫槍維修 以清潔針清理吸嘴 注意 吸錫槍十分炙熱 , 維修時 , 應戴上手套 , 小心工作。 1 檢查和清理吸嘴 清潔針完全貫通吸嘴孔徑 . 將插頭插入電源插座 , 電源開關...
- Page 27 前端蓋 4 更換過濾管 . 電源開關按 " 關 "。 . 當過濾管冷卻而可用手觸摸時 , 按下 吸錫槍背面的鬆開鈕 , 取出過濾管。 注意 過濾管非常炙熱。 彈簧過濾管 陶瓷過濾紙 ( 大 ) ( 編號 A1033) . 檢視前端蓋。 更換 僵硬且裂開。 . 檢視彈簧過濾管。 更換 彈簧過濾管積儲三分之二焊錫時。 . 檢視陶瓷過濾管 ( 大 ) 更換 ( 編號 A1033) 陶瓷過濾紙因淤積焊錫和助焊劑而僵硬。...
- Page 28 6. 保養 ( 控制臺 ) 清理過濾管內部 1 更換陶瓷過濾紙 ( 編號 A1009) VACUUM 取出陶瓷過濾紙檢視 , 如果塞滿助焊 劑而僵硬 , 應更換。 將圓環 (S20) 抹上硅脂潤滑劑 , 旋緊真 空出口蓋 , 防止空氣泄漏。 2 重裝過濾管內部 注意 以陶瓷過濾紙 ( 小 ) 裝入 ( 控制臺 ) 濾槽 護圈。 旋緊真空出口蓋 若錯以陶瓷過濾紙...
- Page 29 7. 更換部件 更換發熱元件 警告 先拔下電源插頭 , 才開始更換程序。 正常發熱元件於 23℃時 , 其電阻值是 2 ∼ 4Ω。如果超出這個範圍 , 應更換發 熱元件。 取出過濾管 1 拆開發熱元件 護艙 2 打開護艙 3 拔開終端 , 取出發熱元件 鬆開螺絲 4 置入新的發熱元件 , 重新回裝 ( 發熱元件 24V-50W) 解開終端 玻璃管 注意 在重新封合前 , 應確定接頭部份必須完 全置入玻璃管內。...
- Page 30 8. 部件清單 ( 控制臺 ) 註 : 安裝螺絲如果在說明表內沒有記載時 , 請另外訂購。 圖號 部件編號 部件名稱 規格 B1029 真空出口蓋 A1009 陶瓷過濾紙 ( 小 ) 10 個 B1063 過濾紙護圈 B1031 真空出口護圈 包括圓環 (S20) B1034 圓環 (S20) B1038 拴緊螺絲護罩 1 套 4 件 B1036 插座 B1028 旋鈕...
- Page 31 大柱頭螺釘 附有墊圈 M4×8(2) 外用齒 鎖墊圈公稱 尺寸 4 大柱頭螺釘 M3×55 攻絲頭螺釘 M2.6×6(2) 攻絲頭螺釘 M2.6×6(4) 大柱頭螺釘 附有墊圈 M3×6(2) 大柱頭螺釘 附有墊圈 M4×30 大柱頭螺釘 附有墊圈 M4×8 大柱頭螺釘 附有墊圈 M4× 8 隔離管公稱 尺寸 4×25 Pan Head Screw M5×10 (4) 彈簧墊圈公稱尺寸 大柱頭螺釘 4(4) M5×10(4) 六角螺帽 M4(4) 圖號...
Need help?
Do you have a question about the 474 and is the answer not in the manual?
Questions and answers