Table of Contents
Advertisement
Quick Links
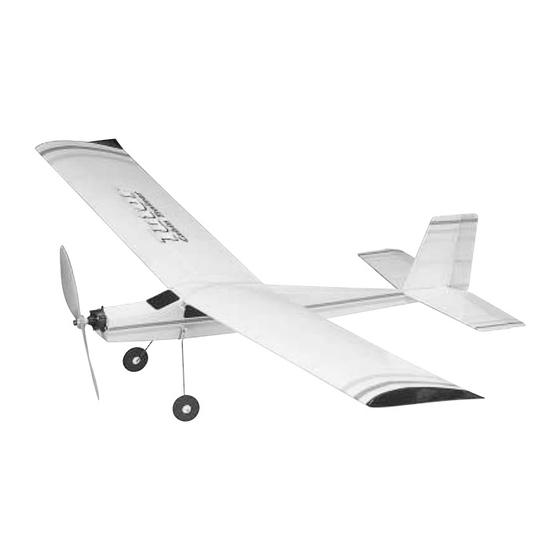
Wing Span - 44-3/4 in
Wing Area - 305.7 sq in
Weight - 9.5 – 13.5 oz
Wing Loading - 4.5 – 6.4 oz/sq ft
Fuse Length - 28-5/8 in
®
Great Planes
Model Manufacturing Co. guarantees this kit to be free from defects in both materials and workmanship
at the date of purchase. This warranty does not cover any component parts damaged by use or modification. In no case
shall Great Planes' liability exceed the original cost of the purchased kit. Further, Great Planes reserves the right
to change or modify this warranty without notice.
In that Great Planes has no control over the final assembly or material used for final assembly, no liability shall be
assumed nor accepted for any damage resulting from the use by the user of the final user-assembled product. By the act
of using the user-assembled product, the user accepts all resulting liability.
If the buyers are not prepared to accept the liability associated with the use of this product, they are advised to
return this kit immediately in new and unused condition to the place of purchase.
READ THROUGH THIS MANUAL FIRST. IT
CONTAINS IMPORTANT INSTRUCTIONS AND
WARNINGS CONCERNING THE ASSEMBLY
AND USE OF THIS MODEL.
© Copyright 2002
INSTRUCTION MANUAL
WARRANTY
P.O. Box 788
Urbana, IL 61803
WWW.GREATPLANES.COM
™
(217) 398-8970
ADTRP03 for GPMA0002 V1.1
Advertisement
Table of Contents

Subscribe to Our Youtube Channel
Related Manuals for GREAT PLANES Tutor Trainer


Summary of Contents for GREAT PLANES Tutor Trainer
-
Page 1: Instruction Manual
In that Great Planes has no control over the final assembly or material used for final assembly, no liability shall be assumed nor accepted for any damage resulting from the use by the user of the final user-assembled product. By the act of using the user-assembled product, the user accepts all resulting liability. -
Page 2: Table Of Contents
DECISIONS YOU MUST MAKE ...............3 Radio Equipment ................3 Speed Control..................3 The Tutor Trainer is a slow flying, high-wing model that is Motor System..................3 about as simple to build as they get. However, if you have Battery Recommendations ..............3 never flown an R/C model before, learning to fly the Tutor all Chargers ....................4... -
Page 3: Decisions You Must Make
If any parts are missing, broken or defective, or if you have any questions about building or flying this The Tutor is designed to use the Great Planes ElectriFly airplane, please call us at (217) 398-8970 or e-mail us at: T-280GD ESC motor system and gear drive for electric flight (GPMG0430). -
Page 4: Chargers
MonoKote film. Opaque MonoKote film is not charges the batteries until they are fully charged, then recommended for the Tutor because it is too heavy and automatically switches to a trickle charge mode. The Great Planes shrinks too tightly for the structure to withstand. ElectriFly ™... -
Page 5: Important Building Notes
Use the included CA applicator tips to control CA Applicator tips (GPMR6033) and pinpoint the amount of CA that comes from the bottle. Great Planes 5-1/2" [140mm] Bar Sander (GPMR6169) When the tip becomes clogged, cut the tip off and continue. and 150-grit adhesive back sandpaper (GPMR6183) -
Page 6: Patterns
PATTERNS Metric Conversions 1/64" = .4mm 3/16" = 4.8mm 1" = 25.4mm 18" = 457.2mm 1/32" = .8mm 1/4" = 6.4mm 2" = 50.8mm 21" = 533.4mm 1/16" = 1.6mm 3/8" = 9.5mm 3" = 76.2mm 24" = 609.6mm 3/32" = 2.4mm 1/2"... -
Page 7: Build The Tail Surfaces
1. Unroll the plan sheets. Reroll them inside-out so they will lie flat. Place the fin/rudder portion of the fuse plan over your flat building board, then cover it with Great Planes Plan Protector or waxed paper so glue will not adhere to the plan. -
Page 8: Build The Wing
Build the Wing Panels Start by building the left wing panel first so your progress matches the photos. 1. Cover the left wing panel plan with Great Planes Plan Protector. 5. Starting at the wing tip, glue the seven laser-cut 1/16"... - Page 9 8. Cut one of the 1/8" x 24" [3.2 x 610mm] hardwood dowels so that it fits in the notches at the front of the wing 11. From a 1/32" x 3/4" x 24" [.8 x 19 x 610mm] balsa ribs, from the root to the tip rib.Save the leftover dowel for sheet, cut and glue shear webs, horizontally, to the top and the fuselage.
-
Page 10: Join The Wing Panels
2. Using a hobby knife, carefully cut a 1/16" [1.6mm] slot in ribs W-1A, just behind the main spar. Test fit the dihedral 15. Remove the wing from your building board and brace in the slots. carefully sand off any glue blobs. From the remaining 1/32" x 3"... -
Page 11: Build The Ailerons
7. Glue one wing tip to each end of the wing. Round the C. Make the final bend, then cut the wire to the length corners slightly as shown on the plan. shown on the plan. Be certain the horizontal portion of the torque rod is perpendicular to the vertical portion of the rod If you plan to fly your Tutor with rudder only, proceed to that goes into the aileron. -
Page 12: Build The Fuselage
B. Hold the wire in the pliers as shown. Build the Formers 1. Cover the fuselage former drawings on the plan with Great Planes Plan Protector. C. Make the second 90° bend downward. 2. Use the remaining 1/8" x 1/8" x 24" [3.2 x 3.2 x 610mm] balsa sticks to build formers F2 through F6 over the plan. -
Page 13: Frame The Aft End Of The Fuselage
Frame the Aft End of the Fuselage 1. Cover the top view of the fuse plan with Plan Protector. 5. Cut the forward pushrod exit slot in the right fuse side where shown on the plan. Cut the aft pushrod exit slot in the other laser-cut 1/16"... -
Page 14: Frame The Front End Of The Fuselage
board. Glue the dowel into position. Note: If you will be adding ailerons to your Tutor, do not use the aft holes. Drill two holes directly behind the top of F3. Glue the dowel into these holes. 4. Use T-pins to hold two balsa blocks or something similar to the building board, aligning the aft end of the fuse over the plan. -
Page 15: Cover The Model
9. Drill 1/16" [1.6mm] holes through the marks in F1 and 3. Determine what material you will be covering the the balsa strips. model with. If using Top Flite EconoKote ® , the model is ready to cover. If using Coverite ™... -
Page 16: Final Assembly
FINAL ASSEMBLY Join the Tail Surfaces 1. Use a small pin to poke several holes through the covering in the top of the stab along the center rib. These holes will absorb the CA that will be used to glue the fin to the stab and will make for a stronger glue joint. -
Page 17: Hook Up The Controls
2. Use a tissue dampened with denatured alcohol or other suitable solvent to clean the servo cases so the mounting tape will adhere. Use double-sided foam mounting tape (GPMQ4440, not included) to mount the elevator and rudder servos to the fuse sides where shown on the plan. 4. -
Page 18: Mount The Landing Gear
11. Slide the pushrod end in or out of the pushrod tube until the elevator is centered when the servo is centered. Follow these assembly instructions for the Great Planes Use cellophane tape to hinge the elevator to the stab as ElectriFly ™... -
Page 19: Prepare The Model For Flying
control. Temporarily position the receiver inside the fuse and lay the antenna along the outside of the fuse over the stab. 6. Mount the propeller to the motor using the prop adapter. If necessary, enlarge the spacer in the prop with a 3/16"... -
Page 20: Set The Control Throws
Lift the model at the balance the charged battery to the speed control. Turn on the point or place it on a Great Planes C.G. Machine. If the tail transmitter, then follow the instructions that came with your drops, the model is “tail heavy”. -
Page 21: Preflight
3. If necessary, remove the servo arms from the servos, Identify Your Model then remount them so they are centered. No matter if you fly at an AMA sanctioned R/C club site or if 4. Now that the servos and the servo arms are centered, you fly somewhere on your own, you should always have center the rudder and elevator by adjusting the position of your name, address, telephone number and AMA number... -
Page 22: Examine The Propeller
propeller attached until the propeller turns slowly. Charge momentum; therefore, if you touch the propeller while it is and discharge the battery 3 or 4 more times on the ground spinning it may inflict severe injury. Respect the motor and before flying. -
Page 23: Find A Safe Place To Fly
Until you have the Tutor properly trimmed for level flight, we FIND A SAFE PLACE TO FLY recommend having an assistant hand-launch the model instead of taking off from the ground. Of course, experienced modelers can hand-launch the model themselves. Though the Tutor is a “Park Flyer,”... -
Page 24: Landing
extend the flight time by several minutes, especially if you fly After you have trimmed the Tutor for flight and have become into a rising air current. familiar with its flight characteristics, you may execute ROG takeoffs. With the model on the runway and pointing into the wind, gently apply power.
Need help?
Do you have a question about the Tutor Trainer and is the answer not in the manual?
Questions and answers