
Related Manuals for AJA ROI


Summary of Contents for AJA ROI
- Page 1 Mini-Converter Installation & Operation Guide Version 2.1 Published: May 12, 2014 ®...
-
Page 2: Table Of Contents
USB Control and Setup—Using AJA MiniConfig ........ -
Page 3: Notices
All other trademarks are the property of their respective holders. Copyright Copyright © 2014 AJA Video, Inc. All rights reserved. All information in this manual is subject to change without notice. No part of the document may be reproduced or transmitted in any form, or by any means, electronic or mechanical, including photocopying or recording, without the express written permission of AJA Inc. -
Page 4: Chapter 1
Default audio setup passes 8-channel HDMI audio. To realize the full power of ROI, however, you will use the supplied USB cable and AJA’s MiniConfig application (included on your CD) to select SDI output format and perform a host of region-of-interest and output display scaling operations. -
Page 5: Features
• Convert DVI/HDMI inputs to 3G/HD/SD-SDI output • User-adjustable “region of interest” • 4:3/16:9 conversion modes supported • Setup via PC/Mac using USB port and supplied USB cable (AJA MiniConfig software application supplied on CD) • Frame-rate conversion • Automatic configuration to input video raster and frame rate •... -
Page 6: Block Diagram
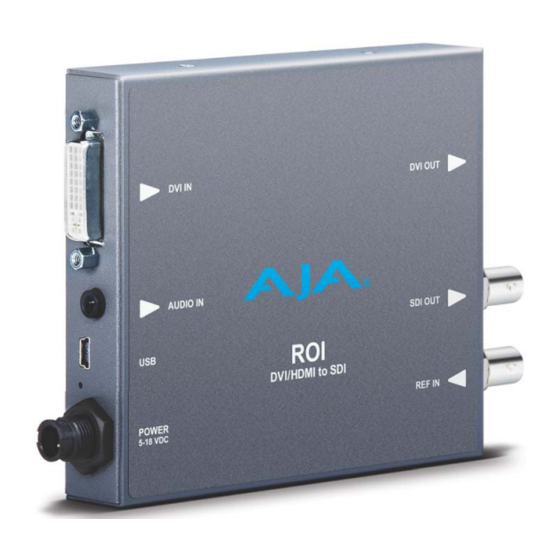
DVI/HDMI Input: Connects to your Computer or single-link source device. To connect an HDMI video input to the ROI DVI input connector, use a passive DVI-to- HDMI adapter (user-supplied). You can also use a cable adapter that has a DVI connector on one end of the cable and an HDMI connector on the other. -
Page 7: Typical Roi Configurations
Blackburst or HD tri-level sync. Typical ROI Configurations Three typical configurations for using the ROI for scaling of desktop region-of-interest video are illustrated in the following figures. In these configurations, the pass-through monitor is used to view the subject desktop video and use the MiniConfig application’s Screen Picker function to select the desired region for output to SDI (see “Variable... -
Page 8: Installation
Typically, ROI installation consists of the following steps: 1. Ensure the ROI is disconnected from power. 2. Connect your computer or video console (DVI/HDMI) monitor output to the ROI DVI input connector. 3. Connect the ROI DVI output connector to a second computer monitor (optional). - Page 9 7. The converter will now run using the default factory settings. If you wish to alter the factory settings, you’ll need to: • Install the AJA MiniConfig software (supplied on CD) onto your computer. • Attach the converter via USB cable (included).
-
Page 10: Chapter 2: Operation
USB Control and Setup—Using AJA MiniConfig The ROI can be used right out of the box for some applications since it is designed to recognize inputs and perform standard actions automatically by default. However, to use its full capability, you must use AJA’s MiniConfig software application for PCs and Macs. -
Page 11: Running Miniconfig
If you do, press Cancel—this alert can be ignored. PC Startup: To run MiniConfig on a PC, find the AJA MiniConfig in the program list and locate the AJA folder and the MiniConfig application inside. Mac Startup: To run MiniConfig on a Mac, double-click the Applications folder and locate the AJA MiniConfig application. - Page 12 Screens are virtually the same on both PC and Mac, with subtle differences that reflect the general look of the platform environment. Running Multiple Mini- MiniConfig can manage multiple AJA Mini-Converters connected via USB—even when Converters: they are of differing types. However it only connects to one at a time. You can choose which Mini-Converter you wish to control using the pulldown menu in the upper right hand corner.
-
Page 13: Tabbed Screens
Input Region of Interest Tab Screen Click on the Input Region of Interest tab to view and make changes to the converter’s input settings. Any changes made are immediately applied. AJA ROI Converter v2.1 www.aja.com... - Page 14 Using this pulldown menu you can choose a selection mode for Input Region of Interest: • Auto: selects the entire DVI/HDMI signal detected at the input to the ROI • Variable: allows user-adjustable selection of all or a portion of the input signal •...
- Page 15 Forces region-of-interest to have the same aspect ratio as current SDI Out Format setting. Fixed Aspect - DV: Forces region-of-interest to have the same aspect ratio as DV video. Fixed Aspect - NTSC: Forces region-of-interest to have the same aspect ratio as NTSC video. AJA ROI Converter v2.1 www.aja.com...
- Page 16 Center Button If you choose anything other than a full-sized image (Auto) in the ROI Select menu, you will have complete control of where the region of interest selection is placed. To quickly and precisely center the region-of-interest, click the Center button.
-
Page 17: Output Tab Screen
Output Tab Screen Use the Output Tab to adjust the following parameters. ROI Out Scaling Use the ROI Out Scaling pulldown menu to select one of the following: Figure 9. ROI Out Scaling Menu Auto: Automatically scales region-of-interest to maximum size with fixed aspect ratio defined by input format. - Page 18 You can enable flicker filtering with this control. This can be useful where vertical detail (horizontal lines) may strobe with the refresh rate of the display. Flicker filtering can help with interlaced outputs, and when a detailed image is scaled down into a smaller area. Default setting is Off. AJA ROI Converter v2.1 www.aja.com...
-
Page 19: Genlock Tab Screen
• HDMI – Lock to the DVI/HDMI Input (if valid video rate) NOTE: Currently, ROI can only lock to HDMI formats that have a SMPTE raster and frame rate and are within 50 ppm of the SDI output format. NOTE: The actual resultant Genlock status is reported to the right of the selection menu. -
Page 20: Audio Tab Screen
HDMI Conversion: The Convert Rate button enables ROI to convert incoming HDMI audio between 32 kHz to 96 kHz to 48 kHz (the ROI native audio standard). If you don’t want to convert, choose Pass Through. AJA ROI Converter v2.1... -
Page 21: Update Tab Screen
This indicator bar shows the progress of software being installed. Software Update 1. Check the AJA website for new MiniConfig software for your Mini-Converter. If new Procedure software is found, download it and uncompress the file archive (zip). Here is the URL to use when checking: http://www.aja.com/en/products/mini-converters/mini-config-software... -
Page 22: Info Tab Screen
Assembly: This is the factory assembly number. Serial Number: This is the factory set unique serial number of your ROI. If you ever call AJA Support for service, you may be asked for this number. AJA ROI Converter v2.1 www.aja.com... -
Page 23: Appendix A: Specifications
• 1080p 50, 59.94, 60 - SMPTE 425-1 Level A Mapping structure 1 (1920X1080 4:2:2 10-bit YCbCr) HDCP • ROI does not encode the HDMI output with HDCP encryption. • ROI does not accept HDCP input. AJA ROI Converter v2.1... -
Page 24: Audio
• 5.765" x 4.020" x 0.9" (146.431mm x 102.108mm x 22.86mm) Power • 5-18VDC Regulated, 13 Watts, Power Supply Required (included with purchase) User Controls • USB port used with supplied cable and MiniConfig software application to configure device via Mac or Windows AJA ROI Converter v2.1 www.aja.com... -
Page 25: Appendix B: Safety & Compliance
Cet appareil numérique respecte les limites de bruits radioélectriques visant les appareils numériques de classe B prescrites dans le Règlement sur le brouillage radioélectrique du ministère des Communications du Canada. Cet appareil numérique de la Classe B est conforme à la norme NMB-003 du Canada. AJA ROI Converter v2.1 www.aja.com... -
Page 26: European Union And European Free Trade Association (Efta)
Benutzer für entsprechende Gegenmaßnahmen verantwortlich ist. Attention! Ceci est un produit de Classe B. Dans un environnement domestique, ce produit risque de créer des interférences radioélectriques, il appartiendra alors à l?utilisateur de prendre les mesures spécifiques appropriées. AJA ROI Converter v2.1 www.aja.com... -
Page 27: Korea Kcc Compliance Statement
Install and use the equipment according to the instruction manual. Translated caution statements, warning conventions & messages The following caution statements, warning conventions, and warning messages apply to this product and manual. AJA ROI Converter v2.1 www.aja.com... -
Page 28: Before Operation Please Read These Instructions
¡Advertencia! No utilice este dispositivo cerca del agua y límpielo solamente con un paño seco. Aviso! Não utilize este dispositivo perto da água e limpe-o somente com um pano seco. Avviso! Non utilizzare questo dispositivo vicino all'acqua e pulirlo soltanto con un panno asciutto. AJA ROI Converter v2.1 www.aja.com... - Page 29 Aviso! Não instale perto de nenhuma fonte de calor tal como radiadores, saídas de calor, fogões ou outros aparelhos (incluindo amplificadores) que produzam calor. Avviso! Non installare vicino a fonti di calore come termosifoni, diffusori di aria calda, stufe o altri apparecchi (amplificatori compresi) che emettono calore. AJA ROI Converter v2.1 www.aja.com...
- Page 30 Lo spinotto largo o il terzo polo sono forniti per motivi di sicurezza. Se la spina fornita non si inserisce nella presa di corrente, contattare un elettricista per la sostituzione della presa obsoleta. AJA ROI Converter v2.1 www.aja.com...
- Page 31 Avviso! Proteggere il cavo di alimentazione in modo che nessuno ci cammini sopra e che non venga schiacciato soprattutto in corrispondenza delle spine e del punto in cui esce dal dispositivo. AJA ROI Converter v2.1 www.aja.com...
- Page 32 è stato rovesciato del liquido è stato rovesciato o qualche oggetto è caduto nel dispositivo, il dispositivo è stato esposto a pioggia o umidità, non funziona correttamente o è caduto. AJA ROI Converter v2.1 www.aja.com...
- Page 33 Warning! Do not open the chassis. There are no user-serviceable parts inside. Opening the chassis will void the warranty unless performed by an AJA service center or licensed facility. Avertissement! Ne pas ouvrir le châssis. Aucun élément à l’intérieur du châssis ne peut être réparé...
- Page 34 ¡Advertencia! Cuando mueva la unidad desenchufe de la red eléctrica el/los cable(s) de la fuente de alimentación CA tipo brick. Advertência! Remova os cabos CA de alimentação brick da rede elétrica ao mover a unidade. Avvertenza! Scollegare il cavo dell’alimentatore quando si sposta l’unità. AJA ROI Converter v2.1 www.aja.com...
-
Page 35: Warranty Information
AJA Video, with shipping charges prepaid. AJA Video shall pay for the return of the product to the Customer if the shipment is to a location within the country in which the AJA Video service center is located. -
Page 36: Index
Installation on Mac 10 Installation on PC 10 Operation 11 Running Multiple Converters 12 Screen Description 12 Startup 11 MiniConfig Overview 5 MiniConfig Screen Audio 20 Genlock 19 Info 22 Input Region of Interest 13 AJA ROI Converter v2.1 www.aja.com...
Need help?
Do you have a question about the ROI and is the answer not in the manual?
Questions and answers