Table of Contents
Advertisement
Quick Links
Advertisement
Chapters
Table of Contents

Subscribe to Our Youtube Channel
Related Manuals for Kathrein UFC 960sw


Summary of Contents for Kathrein UFC 960sw
- Page 1 Operating Manual English UFC 960sw...
-
Page 2: Preface
We want you a good reception and hope you will enjoy using your new HDTV receiver. Your KATHREIN team The difference between PAL and HDTV “High defi nition television” is characterised by a signifi cantly higher number of picture lines on the TV set. -
Page 3: Table Of Contents
List of contents Preface............................ 2 List of contents ........................3 Safety instructions - Important Information ................ 4 Important Information ......................6 Receiver features/scope of supply ..................8 Features..........................9 Connection and setup ......................10 General operating instructions ..................24 Basic operation in TV or Radio mode (live operation) ............. 26 EPG (Electronic Programme Guide) .................. -
Page 4: Safety Instructions - Important Information
Safety instructions - Important Information These two pages contain important information about operation, installation location and connection of the unit. Read these instructions carefully before setting up the unit. Mains cable Moisture, direct sunlight, heat, naked fl ames Make sure that the mains cable (power Protect the unit against moisture, supply cable) is not damaged. - Page 5 Safety instructions - Important Information Repairs Installation location Ensure that any repairs to your unit All electronic equipment generates are carried out by qualifi ed personnel. heat, However, the heating of this Opening the unit and attempting to unit lies within the permissible range. Caution! repair it yourself voids all warranty Sensitive...
-
Page 6: Important Information
If the receiver is not shipped correctly the guarantee/warranty on the hard disk will be voided. Any modifi cations to the receiver software, or the use of applications not provided by Kathrein, will invalidate the warranty! You will have to bear the costs yourself for shipping and repairing any receiver that requires attention due to modifi... - Page 7 This unit makes use of legally protected technologies, which are protected by patents in the USA and also by other intellectual property rights in other countries. KATHREIN-Werke KG has obtained licences from Audio MPEG Inc. and Societa‘ Italiana per lo sviluppo dell‘elettronica, S.I.SV.EL, S.P.A to use these technologies. These licences carry certain restrictions, which apply also to you as the customer.
-
Page 8: Receiver Features/Scope Of Supply
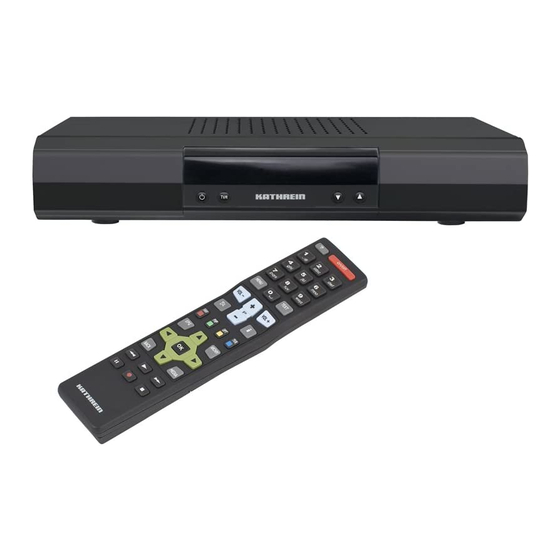
Receiver features/scope of supply The UFC 960sw DVB-C-HDTV receiver is suitable for the reception of digital (cable) TV and radio programmes. The Conax 5.0 decoding system is pre-installed. In addition one CA module Common Interface is provided for additional Pay-TV channels. -
Page 9: Features
12-character alphanumeric display for Convenient timer programming via EPG programme names (Electronic Programme Guide) Kathrein Convenience EPG with timer Suitable for software downloading from a programming ¹ PC and USB stick Built-in Smartcard reader ² Automatic date and time generation via DVB data stream Conax 5.0 decoding system embedded... -
Page 10: Connection And Setup
Connection and setup Topic Page View of rear panel ........................ 10 View of front panel (flap folded down) .................. 11 Connecting the receiver ...................... 12 Connection example ......................13 TV and VCR connection ...................... 14 Audio connection ......................... 14 Optical digital output ......................14 Inserting batteries into the remote control ................ - Page 11 Connection and setup Common Interface for one CA module for TV/R button (switching between TV and Pay-TV cards *) radio mode) Smartcard reader for CONAX 5.0 encrypted 12-character alphanumeric display Smartcards *) 6/7. Channel selection buttons Stand-by button (On/Off) *) CA modules and Smartcards are not included with this product LED in the front panel display: The LED lights up: The receiver is in stand-by mode or a recording is running which was started from stand-by...
- Page 12 Connection and setup Connect the RF 1 input of the receiver to the antenna socket. Use a coaxial cable with a standard IEC connector. If the IEC connector is not yet fi tted to the cable, strip the insulation from the cable as shown in the following illustration and carefully fi...
- Page 13 Connection and setup Dolby Digital system Network PC/Laptop Hi-fi system External hard disk...
- Page 14 Connection and setup Connect the satellite receiver (HDMI or alternatively TV Scart socket) and the TV set using an HDMI or Scart cable (see “Connection example”). If your TV is stereo, you can receive the sound in stereo via the HDMI or Scart connection. For system reasons, the same video signals are to be found at the TV Scart socket as at the video cinch output.
- Page 15 First switch your TV set on and select the AV channel slot you have used to connect the UFC 960sw to your TV set. Start up the UFC 960sw by switching on the power switch at the rear of the unit. The following...
- Page 16 Connection and setup The following display appears: Use the buttons here to select the basic settings for the video and audio output from the receiver to the TV set. For this, refer to the operating manual for your TV set and take care to select only those settings that your TV set can process.
- Page 17 Connection and setup Audio format via HDMI TV-Scart-Output Here you can select the type of audio signal that Select the type of video signal at the TV Scart is transmitted by the HDMI interface. Select the socket here. Select the signal that your TV set can signal that your TV set can process: process.
- Page 18 Connection and setup The individual items are selected using the buttons. Changes to the current settings can be made using the buttons. If you do not want to perform a channel search, press the (green) button and continue with the chapter “Date and Time”. If you want to perform a channel search, use the buttons to select “Yes”.
- Page 19 Connection and setup Network Search Use the buttons (On/Off) to select whether a Network Search should be performed. If the “Network Search On” is selected, the networking of the transmission channels enables additional transmission channels that have not yet been saved to be located. They are then saved and searched for new channels in the same way as the existing channels.
- Page 20 Connection and setup The individual items are selected using the buttons. Changes to the current settings can be made using the buttons. Time Mode Here you can select whether the time information should be obtained by the receiver automatically from a specifi...
- Page 21 Connection and setup Here you can select the channel from which the receiver should obtain the time information. Press the button to call up a channel list from which you can select the channel you want using the cursor ) buttons. Confi rm your selection with the button.
- Page 22 Connection and setup In order to perform recordings using the timeshift and archive recording function on the UFC 960, and to allow the receiver the facility to save EPG data, you must connect an external hard disk at the rear of the receiver (USB or eSATA) port) and set it up as explained below.
- Page 23 Connection and setup following display appears (see screenshot on the right). Now set the respective capacities for the various areas (media centre and timeshift). The respective lines are selected using the buttons. Make the settings using buttons. The storage volume that you assign to each area is dependent on the size of the hard disk being used.
-
Page 24: General Operating Instructions
In this chapter we would like to offer you a few basic tips and explanations about using the UFC 960sw. These are not specifi c to any one menu, rather they can be used as help and orientation in practically all menus. - Page 25 General operating instructions 1 x space 2 x 0 Last character is deleted Switch between upper case and lower case letters Confi rm the term input Cancel input without saving Cancel input without saving After you have input the desired expression, press the button in order to load the name/search expression or the...
-
Page 26: Basic Operation In Tv Or Radio Mode (Live Operation)
Basic operation in TV or Radio mode (live operation) Topic Page Remote control for live operation (TV/Radio) ..............26 Switch between TV and Radio operation ................27 Adjusting the volume ......................27 Channel selection ........................ 27 Channel Information ......................30 Calling up the options channel .................... - Page 27 Basic operation in TV or Radio mode (live operation) Call up the recording archive Call up EPG (Electronic Programme Guide) = Navigation/channel or change channel option Select last channel called up, = Call up Channel List, exit displays/menus step by step Confi...
- Page 28 Basic operation in TV or Radio mode (live operation) Press the button to open the channel list. The following display appears: Information on selecting favourites lists: You can also call up the favourites lists directly from TV screen, using the (red) button.
- Page 29 Basic operation in TV or Radio mode (live operation) Now use the respective coloured button to select the category in which you wish to open a channel list: (red) button: Call up the “Favourites lists” category Contains the following channel lists: - Favourites lists 1-8 (green) button: Call up the “Complete list”...
- Page 30 Basic operation in TV or Radio mode (live operation) Channel information is shown for a few seconds each time the channel is changed (this can be changed under “Settings”, “User-Defi ned Settings”, “Customize Screen Menu”) or displayed continuously by pressing the button.
- Page 31 Basic operation in TV or Radio mode (live operation) If the channel OSD contains the following icon , this is a portal channel. Press the (yellow) button, use the buttons to select “Channel Options” and press the button to confi rm your selection. The following display then appears (example): Use the buttons to select your desired channel option, and press the...
- Page 32 Basic operation in TV or Radio mode (live operation) If the channel banner displays 1/3 in front of the symbol for the selected soundtrack, this tells you that you have currently selected the fi rst of the three available soundtracks. Press the (yellow) button, use buttons to select “Select Audio track”...
- Page 33 Basic operation in TV or Radio mode (live operation) The picture-in-picture function permits simultaneous viewing of two programmes. This allows you to see when a programme you want to watch begins without having to leave the programme you are currently watching. The PIP window is however only small, since it is intended for monitoring purposes and not for viewing programmes in the normal way.
- Page 34 Basic operation in TV or Radio mode (live operation) This symbol in the channel information shows you whether Teletext is available for the selected channel. When you press the button, the receiver processes the videotext/Teletext service data for your TV set to display, even when the signal is encrypted. During the search, the page which is being searched for is displayed in the top left-hand corner with the time and date displayed at the top right.
- Page 35 Basic operation in TV or Radio mode (live operation) The UFC 960sw provides a special function here. As soon as you switch to a channel, the receiver automatically starts recording the programme you are viewing to the hard disk in the background. When you change channel again, this stored data is deleted and background recording begins again.
- Page 36 Basic operation in TV or Radio mode (live operation) To start recording directly to the hard disk, press the (red dot) button. The following display appears (example): Use the buttons to select the lines to be changed; make the changes using buttons.
-
Page 37: Epg (Electronic Programme Guide)
EPG (Electronic Programme Guide) Topic Page Calling up the EPG ......................38 Selection options (remote control buttons in the EPG) ............39 Views using the EPG ......................40 Extras menu ........................43 Search function ........................44 Recording settings (programming the timer) ............... 46 Reminder function (switch over to programme) .............. - Page 38 EPG (Electronic Programme Guide) The EPG is opened by pressing the button. You will automatically see the view you selected in the menu (“Settings”, “User-Defi ned Settings”, “EPG Settings”) - irrespective of which view you selected last time before exiting the EPG. The following display appears (example): Note: If you selected a favourites list before opening the EPG, the EPG will only show the data for the channels that are included in this favourites list.
- Page 39 EPG (Electronic Programme Guide) (red) button Open the timer list (display of all pre-programmed recordings/reminders) button Navigation in the individual views (e.g. 15 minutes skip forward in the “Current” view) (yellow) button Open a preview of the currently selected channel (programme listings) (blue) button Open the category selection (sorting the programs by categories such as movies, sport, series ...)
- Page 40 EPG (Electronic Programme Guide) The “Current” view can be called up at any time in EPG by pressing the (green) button. In the “Current” view you can see all channels displayed in the order of the overall channel list. Provided that EPG data has been supplied by the channel provider, the receiver shows for each channel the current program being shown, with start time, fi...
- Page 41 EPG (Electronic Programme Guide) The “Preview” view can be called up at any time in EPG by pressing the (yellow) button. In the “Preview” view you will see all the programmes that will be shown on the channel previously selected in the “Current”...
- Page 42 EPG (Electronic Programme Guide) The “Categories” view can be called up at any time in EPG by pressing the (blue) button. In the “Categories” view you can see all programmes sorted by category and starting time. The following categories are available for selection: My picks (see “Extras”), Movies, Series, Chat shows, Sport, News, Children's TV, Music, Special interests,...
- Page 43 EPG (Electronic Programme Guide) The “Extras” menu is opened in the EPG by pressing the button. In this menu you are offered an additional sorting/ search facility: - My hints Press the button to access the menu. You can create your own categories within this section.
- Page 44 EPG (Electronic Programme Guide) The search function can be called up in EPG at any time by pressing the button. The following display appears (see screenshot on the right). You have the following search options: - Further programme times currently selected programme the example on the right “Elephant,...
- Page 45 EPG (Electronic Programme Guide) following display appears (see example on the right): Now use the cursor ( ) buttons to select the fi rst letter of the word by which you want to search the available EPG information. At the start of the selection process, press the button.
- Page 46 EPG (Electronic Programme Guide) (red dot) button allows you to set a programme for recording at any time. The programme to be recorded can be selected in any of the EPG views, provided (red dot) button appears at the bottom of the screen display. Note: You can set the automatic lead-in and run-on times for your recordings in the...
- Page 47 EPG (Electronic Programme Guide) Programme not in EPG: Select any programme on the channel on which the desired programme is to be broadcast at a later date, and press (red dot) button. The following display appears (example): As there is no EPG data, you must enter the data (date, start, end) manually.
- Page 48 EPG (Electronic Programme Guide) As described in the “Recording archive” chapter, it is possible to create folders for your recordings and to store them in these folders. If folders have already been created for recordings, you have the option of specifying a folder as the destination when scheduling recordings in the EPG. It makes no difference which recording mode you choose after selecting the folder (e.g.
- Page 49 EPG (Electronic Programme Guide) Use the buttons to select the “once” recording mode (see screenshot on the right). Use the buttons to switch to the “Date” fi eld and use the buttons to select the desired recording day. Use the buttons to switch to the “Start”...
- Page 50 EPG (Electronic Programme Guide) Remember that the day of the week for the desired programme is loaded in the timer list and you can make no further manual corrections to it! Therefore, before press- button, select the programme on the day of the week that you will want to make the weekly recording in future.
- Page 51 EPG (Electronic Programme Guide) Use the buttons to switch to the “End” and fi eld use the buttons or the numeric keypad to select the desired recording end time. When all settings have been made, press the button to save the recording settings. Use the buttons to select the “Series recording”...
- Page 52 EPG (Electronic Programme Guide) If you want to be reminded that a programme is about to start, you can activate the reminder function for the desired programme. The reminder function is set up in exactly the same way as programming recording.
- Page 53 EPG (Electronic Programme Guide) The “Timer list” view can be called up at any time in EPG by pressing the (red) button. The following display appears (example): The timer list view shows you all the recordings reminders that scheduled (marked green). buttons allow recordings to be sorted into “once-only”...
- Page 54 EPG (Electronic Programme Guide) Editing options for the reminder function: • Reminder is deleted • Edit the reminder When editing a recording, you can change all parameters apart from the recording mode. Make the changes using the cursor ) buttons and the numeric keypad. Press the button to confi...
-
Page 55: Edit The Channel List
Edit the channel list Topic Page Calling up the „Edit TV Channellist“ menu ................55 Select the channel list/favourites list to be edited ..............57 Selecting the channels to be edited ..................58 Editing channels (channel lists) ................... 58 Editing channels (favourites lists) ..................61 None of the changes to the channel lists and favourites lists which you can make as described in the following chapter are saved by the receiver unless when you exit the menu by pressing the... - Page 56 Edit the channel list The following display appears: The receiver notifi es you that the editing options in the “Edit channel list” menu can be called up using the button. If you do not want to see this notifi cation again when next you call it up, press button.
- Page 57 Edit the channel list Now use the relevant coloured button to select the desired channel list category (refer to the “Basic operation in TV or Radio mode (live operation)”, “Channel selection from the channel list” chapters for details). The following display appears (example):...
- Page 58 Edit the channel list Select a channel in the selected channel list/favourites list using the cursor ( buttons (see example screenshot on the right). To select several channels to be edited at the same time, if they are not listed directly following each other in the selected channel list, use the cursor ) buttons to select the fi...
- Page 59 Edit the channel list Use the buttons to select “Move” and confi rm your selection with the button. The following display appears (see example screenshot on the right): Now use the cursor ( ) buttons or the numeric keypad to select the new channel memory position(s), then confi...
- Page 60 Edit the channel list Use the buttons to select “Lock” and confi rm your selection with the button. To lock the channel you must now enter your four-digit PIN code (factory setting: 0000). The following display appears (see example screenshot on the right): The locked channel is now displayed in the channel list with a padlock on the...
- Page 61 Edit the channel list Use the buttons to select “Start Blockselection” and confi rm your selection with the button. You can now use the buttons to start block selection at the previously selected channel. This selects the channels in the sequence in which they appear in the previously selected channel list and applies a coloured...
- Page 62 Edit the channel list See “Edit channels (channel lists)” “Lock”. See “Edit channels (channel lists)” “Start Blockselection”. buttons select “Rename favoritelist” confi rm your selection with the button. You can now rename the favourites list you selected. The following display appears (see example screenshot on the right).
-
Page 63: Recording Archive (Play Back/Edit Recordings)
Recording archive (play back/edit recordings) Topic Page Calling up the recording archive ..................63 Selection options (remote control buttons in the recording archive) ........64 Views of the recording archive (sorting the recordings) ............65 Folders in the recording archive ..................66 Playback of a recording ....................... - Page 64 Recording archive (play back/edit recordings) Recordings which have not yet been viewed (in part or in full) are fl agged as “New” (see screenshot above). As soon as part of the recording has been viewed, the last screen of the recording before the playback stop is displayed in front of the name of the recording.
- Page 65 Recording archive (play back/edit recordings) Navigation within each view of the recording archive is always performed using the cursor buttons ). The buttons allow you to select individual recordings, and the buttons allow you to scroll from page to page in the currently selected list. Pressing the or the button exits the recording archive and returns to the TV picture.
- Page 66 (red) button Chapter view (see “Chapter view” section in this chapter) The UFC 960sw offers you the facility to create folders in the recording archive. You can give these folders the names of your choice and add recordings to them.
- Page 67 Recording archive (play back/edit recordings) following display appears (see example screenshot on the right): The receiver always suggests the recording that was selected when you switched to the edit menu automatically as the folder name. You can press the button to delete the name suggested by the receiver.
- Page 68 Recording archive (play back/edit recordings) Use the buttons to select the desired recording. Confi rm selection of the desired recording by pressing the button. Pressing the button again exits the recording archive and allows the desired recording to be viewed in full-screen mode. Playback starts at the last playback position. If playback is started by pressing the button, playback of the recording starts from the beginning and in full-screen mode.
- Page 69 Recording archive (play back/edit recordings) Cursor button Each time the cursor button (left arrow) is pressed, the playback point in the (left arrow) recording skips 30 seconds backwards Fav (red) button Call up chapter view/close chapter view Opt (yellow) Call up option selection (sound selection, subtitles, HDMI/YUV format ...) button Call up the recording archive during playback.
- Page 70 Recording archive (play back/edit recordings) To select a recording, select the desired recording in the selected sort list, using the cursor ( ) buttons (see example screenshot on the right). If the relevant recording is stored in one of the folders you have created, fi...
- Page 71 Recording archive (play back/edit recordings) Deleted recordings are irrevocably deleted and can only be restored by re-recording the programme! Use the buttons to select “Delete” and confi rm your selection with the button. The selected recording(s) will be deleted. Use the buttons to select “Lock”...
- Page 72 Recording archive (play back/edit recordings) Use the buttons to select “Change category”. Now use the buttons to select the desired category (see example screenshot on the right), to which the recording(s) should be assigned. Confi rm your selection with the button.
- Page 73 Recording archive (play back/edit recordings) See “Folders in recording archive”, “Creating folders”. You can use this function to move the recording selected before calling up the edit menu to a folder you have created. Use the buttons to select “Move to folder...”.
- Page 74 Recording archive (play back/edit recordings) The “Decrypt” option is only displayed if a recording was made from an encrypted channel with the “Decrypt: No” setting. Press the button to decrypt the recording. The symbol for an encrypted recording (key) is crossed out (see screen in bottom right).
-
Page 75: Main Menu
Main Menu Topic Page Main Menu ..........................75 Calling up the main menu and introduction ................. 76 Menu overview ........................77 Main menu - Channel search ....................78 Automatic Channel Search ....................78 Manual Channel Search ...................... 80 Expert Channel Search ....................... 81 Main menu - Service menu .................... -
Page 76: Main Menu
Main Menu The main menu is opened by pressing the button. The following display appears: The programme showing on the currently selected channel always appears in the top right-hand corner of the main menu. The selected menus, sub-menus and items, as well as the parameters to be set, are each marked in colour. - Page 77 Main Menu...
-
Page 78: Main Menu - Channel Search
Main menu - Channel search After calling up the menu you will see the following display: You have three different search options: - Automatic Channel Search - Manual Channel Search - Expert Channel Search Use the buttons to select the desired search type and confi... - Page 79 Main menu - Channel search During the search you will see the following message (example): The new channels found are identifi ed by the suffi x “New” (see example screenshot on the right). Note: You can cancel the search at any time by pressing the button.
- Page 80 Main menu - Channel search After calling up the menu you will see the following display: buttons allow you to select different sets of parameters for the search. In this menu you can selective search for a frequency range for the new channels. Start Frequency Use the buttons to select the start frequency for the search.
- Page 81 Main menu - Channel search After calling up the menu you will see the following display: buttons allow you to select different sets of parameters for the search. Frequency Using the buttons, select the frequency to be searched. Symbol rate Use the button or the numeric keypad to enter the related symbol rate.
-
Page 82: Main Menu - Service Menu
USB device under the following directory structure: Main folder: kathrein Subfolder: ∟ ufc960 You can also download the updates from the Internet. The address is: http://www.kathrein.de You will fi nd the software at “Service” → “Software and Download” → “Receiver” → “UFC 960”... - Page 83 Main menu - Service menu First connect your USB device (with the new operating software) to the receiver, using a free USB port on the receiver. Then select the “Software Update” fi eld and confi rm the start of the update by pressing button.
- Page 84 Main menu - Service menu After calling up the menu you will fi rst see the following display: You can here restore the channel list and the installation settings to the factory settings. You can use the buttons to select the components to be restored to their factory settings.
-
Page 85: Main Menu - Settings
Main menu - Settings After calling up the menu you will see the following display: You can choose between various different menus: - First installation - Basic Settings - User Defi ned Settings Use the buttons to select the desired menu and confi rm your selection using the button. - Page 86 Main menu - Settings After calling up the menu you will see the following display (depending on the selected signal output): For output of the TV picture via the HDMI For output of the TV picture via the Scart-TV output: output: The individual items are selected using the buttons.
- Page 87 Main menu - Settings Show 4:3 Event - Automatic (only for “16:9”) or - Always 16:9 (only for “16:9”) Here you can select the type of screen display mode for 4:3 broadcasts on a 16:9 TV set. Either - Normal (Pillar Box) - Stretched (Full Screen) or - Zoomed in (Pan &...
- Page 88 Main menu - Settings After calling up the menu you will see the following display: The individual items are selected using buttons. Changes to the current settings can be made using buttons. Preferred Audio Language Select here your preferred audio language. You can choose between the following languages: German, English, French, Italian, Spanish, Czech, Dutch, Polish, Turkish or Russian.
- Page 89 Main menu - Settings After calling up the menu you will see the following display: The individual items are selected using buttons. Changes to the current settings can be made using buttons. Time Mode Here you can select whether the time information should be obtained by the receiver automatically from a specifi...
- Page 90 UFC 960sw units) using the same remote control. You can assign each receiver its own remote control code. This pre-supposes that the receiver was supplied with the RC 670 remote control (e.g. UFC 960sw) or with the RC 660 remote control (e.g. UFS 910).
- Page 91 3 for remote control code 4 If you have a further Kathrein receiver in use that was supplied with the RC 660 remote control, you can use the UFC 960sw remote control to operate that other receiver also.
- Page 92 Main menu - Settings After calling up the menu you will see the following display: You can choose between various different menus: - Parental Lock - Customize Screen Menu - EPG Setup - PVR Setup - Mediacenter Setup - Automatic channel name Use the buttons to select the desired menu and confi...
- Page 93 Main menu - Settings Lock Mainmenu Select here whether the main menu should be locked. If the main menu is locked, the four-digit PIN code will be requested when it is called up. Without the four-digit PIN code (factory setting: “0000”), the main menu cannot be viewed and no changes can be made to the device settings.
- Page 94 Main menu - Settings After calling up the menu you will see the following display: The individual items are selected using buttons. The changes to the current settings can be made using the buttons or the numeric keypad. Sleep Timer You can use the “Sleep Timer”...
- Page 95 Main menu - Settings Front Display Brightness Set the front display brightness here. Select the most comfortable setting for your ambient lighting. Your available options are: - Bright - Medium - Dull or - Off (display is not switched on/lit during operation) Front Display in Standby Select here whether the front display is illuminated in standby mode.
- Page 96 Main menu - Settings EPG Grabbing Time Select here the time at which the receiver's EPG data should be updated (the EPG updating must be set to “SI”). Since updating can take up to 75 minutes it is recommended that the updating time should be during the night when the receiver is not being used.
- Page 97 Main menu - Settings After calling up the menu you will see the following display: The individual items are selected using buttons. Changes to the current settings can be made using buttons. Automatic Timeshift Select here whether automatic time-shifting is enabled or disabled. If this is set to “On”, the receiver automatically (in the background) starts recording the programme you are viewing as soon as you switch to the channel.
-
Page 98: Main Menu - Interfaces (Ci, Hard Disk And Network)
Main menu - Interfaces (CI, hard disk and network) After calling up the menu you will see the following display: You can choose between various different menus: - Common Interface - HDD Management - Ethernet settings Use the buttons to select the desired menu and confi... - Page 99 CA module, except that in this case the chip contacts point downwards. You can fi nd out which Conditional Access module is in the CI slot of the UFC 960sw and which Smartcard is in which CA module from the “Main menu” under “Interfaces”, and the “Common Interface” menu.
- Page 100 Main menu - Interfaces (CI, hard disk and network) Press the button to access the menu generated by the CA module: From this menu, your card and your PIN code allow you to access various channels from your Pay-TV provider. “CryptoWorks”...
- Page 101 Main menu - Interfaces (CI, hard disk and network) Information for Conax, SECA, Viaccess and CryptoWorks users: Note that with monthly activation intervals, the channel providers have different procedures for activating pay TV cards. Activation may therefore be a few days before or after the beginning of a new month.
- Page 102 Main menu - Interfaces (CI, hard disk and network) Format Media Archive Pressing the button irrevocably deletes all music (MP3) and images (JPEG) fi les currently stored on the hard disk connected to the receiver. As a security feature you are asked to confi rm again by pressing the button that you really want to delete these fi...
- Page 103 Main menu - Interfaces (CI, hard disk and network) DHCP “Off” DHCP “On” (Hub/Switch/Direct (DHCP server/router) connection to PC or laptop) The individual items are selected using the buttons. Changes to the current settings can be made using the buttons or the numeric keypad. Make the settings for your network as required.
- Page 104 Note: Refer to our network function connection examples at the end of this manual and the instructions on this subject available on the Internet under “www.kathrein.de” “Service” → “Software and Downloading” → “Receiver” → “UFC 960sw”. When connecting the receiver to a suitable FTP program, note the following:...
-
Page 105: Main Menu - Applications
This is available by downloading from the satellite or from the Internet (www.kathrein.de). This menu displays the applications that are installed on your UFC 960sw. This menu allows you to start and stop these applications. To do this, follow the instructions displayed and the explanations on the menu. -
Page 106: Applications
Main menu - Applications When connecting the receiver to a suitable FTP program, note the following: User name: root Password: 0000 You require both of these components to obtain access to the receiver via your FTP program. The password is the receiver’s PIN code. This is set in the “Parental Lock” menu. The factory setting is “0000”. -
Page 107: Main Menu - Language Settings
Main menu - Language settings After calling up the menu you will see the following display: Use the buttons to select the desired menu language and confi rm your selection using the button. The following languages are available for selection: German, English, French, Italian, Spanish, Czech, Dutch, Polish, Turkish and Russian. -
Page 108: Multimedia
UpnP client/server functionality (UPnP = Universal Plug and Play) ........109 Playing media files (selecting source directory) ..............110 In addition to the recording functionality, the receiver offers the following multimedia functions. UPnP server functionality (e.g. streaming of UFC 960sw recordings to external devices) MP3 playback JPEG display... - Page 109 Streaming from the UFC 960sw to Exit Open Medium external devices To use these functions, the correct settings must be made for the fi rewall running on the PC/notebook. You may need to add the UFC 960sw to the fi rewall exclusion list.
- Page 110 NTFS formatted) Exit Open Medium - UPnP servers in the network and detected (e.g. XMBC server, Twonky Media Server, other UFC 960sw units etc.) Use the buttons to select the fi rst picture in your slide show. Press the button to start the slide show.
- Page 111 Multimedia To change the settings for the slide show, press the (yellow) button after selecting the fi rst picture. The following display appears (example): Use the buttons to select the setting to be changed and make the changes using the buttons.
- Page 112 Multimedia During playback, you have the following control options: Pause Start playback after pause Next/previous track Skip 30 seconds forwards or backwards Cancels MP3 playback and displays the Media Centre To change the settings for the MP3 player, press the (yellow) button after selecting the fi...
- Page 113 The recording to be played back does not necessarily have to have been made on the UFC 960sw. The UFC 960sw can be used to play back recordings made using the Kathrein UFS 910, UFS 902, UFS 822 and UFS 821 receivers.
- Page 114 Playback of XVID fi les functions in the same way as playback of an external recording (see “Playback of external recordings”). The integrated UPnP server in the UFC 960sw enables the media fi les stored on the UFC 960sw (MP3s, JPEGs and recordings) to be provided to external devices and streamed via the network using UPnP.
-
Page 115: Operation Without The Remote Control
Operation without the remote control Topic Page Backup Operation ....................... 115 Software updating via the USB port ................... 116 If you have misplaced your remote control, or if the batteries are fl at, you can still operate your receiver from the front panel. There are four buttons on the front of the receiver. - Page 116 ∟ ufc960 You can also download the updates from the Internet. The address is: http://www.kathrein.de You will fi nd the software at “Service” → “Software and Download” → “Receiver” → “UFC 960” 1. Use the remote control to switch the receiver into standby mode 2.
-
Page 117: Troubleshooting
Troubleshooting In the event of a malfunction, fi rst check all the cable connections and operating states: 1. Receiver and TV set power plugs are connected to wall socket 2. Antenna cables are connected to the receiver input 3. Receiver and TV set are correctly connected to each other by a HDMI or Scart or cinch cable 4. -
Page 118: Technical Appendix
Technical appendix Type UFC 960sw Order no. 26210228 Colour Black RF section Input frequency range 47-862 Input level band dBµV 44-83 Modulation type QAM 16, 32, 64, 128, 256 TV system, video Modulation, FEC, demultiplexer DVB-C standard CCIR 601 (720 x 576 lines), 576p, 720p,... - Page 119 Technical appendix Data interface Common Interface/decoding system 1/Conax 5.0 integrated USB 2.0 2 x on the rear panel RS 232 LAN port RJ-45, Ethernet 10/100BaseT General Information Ambient temperature °C Max. +5 to +40 Unit dimensions (W x H x D) 342 x 67 x 273 Weight Approx.
- Page 120 Technical appendix DHCP (Receiver): OFF IP address: IP-Adresse: 192.168.0.11 192.168.0.11 Crossed over network cable Gekreuztes Netzwerkkabel IP-Adresse: IP address: 192.168.0.10 192.168.0.10 PC/Laptop...
- Page 121 Technical appendix DHCP (Receiver): OFF TCP/IP address: TCP/IP-Adresse: 192.168.0.12 192.168.0.12 Network cable Netzwerkkabel Switch/HUB Network cable Network cable Netzwerkkabel Netzwerkkabel PC/Laptop PC/Laptop TCP/IP address: TCP/IP address: TCP/IP-Adresse: TCP/IP-Adresse: 192.168.0.10 192.168.0.11 192.168.0.11 192.168.0.10...
- Page 122 Technical appendix DHCP (Receiver): OFF TCP/IP address: TCP/IP-Adresse: TCP/IP address: TCP/IP-Adresse: 192.168.0.12 192.168.0.13 192.168.0.12 192.168.0.13 Network cable Network cable Netzwerkkabel Netzwerkkabel DHCP server, router DHCP-Server, Router (z. B. Fritzbox) (e.g. Fritzbox) Network cable Network cable Netzwerkkabel Netzwerkkabel PC/Laptop PC/Laptop TCP/IP address: TCP/IP-Adresse: TCP/IP address: TCP/IP-Adresse:...
- Page 123 Technical appendix DHCP (Receiver): ON TCP/IP-Adresse: TCP/IP address: automatisch automatic Network cable Netzwerkkabel DHCP-Server, Router DHCP server, router (e.g. Fritzbox) (z. B. Fritzbox) Broadcast path Funkstrecke PC/Laptop...
-
Page 124: Comprehensive Index
Comprehensive index Inhalt Preface............................ 2 Difference between PAL and HDTV ..................2 List of contents ........................3 Safety instructions - Important Information ................ 4 Important Information ......................6 Receiver features/scope of supply ..................8 Receiver features ........................8 Scope of supply ........................8 Features.......................... - Page 125 Comprehensive index One-Touch Recording (OTR) ....................36 EPG (Electronic Programme Guide) .................. 37 Calling up the EPG ......................38 Selection options (remote control buttons in the EPG) ............39 Views using the EPG ......................40 “CURRENT” View ..........................40 “Preview” view (programme listings) ....................41 Categories view ..........................
- Page 126 Comprehensive index Folders in the recording archive ..................66 Creating folders ..........................66 Editing folders (delete/rename) ......................67 Playback of a recording ....................... 68 Playback functions ......................68 Creating chapters ........................ 69 Selecting the recordings to be edited .................. 70 Editing recordings ........................
- Page 127 MP3 player settings ......................... 112 Playing external recordings ......................113 XVID playback ..........................114 Streaming from the UFC 960sw to external devices ................ 114 Operation without the remote control ................115 Backup operation ....................... 115 Performing the software update ....................... 116 Software updating via the USB port ...................
-
Page 128: Short Technical Guide
Short technical guide AC 3 Output for Dolby Digital signal FEC is the abbreviation for Forward Error Correction. A technique for reducing the error rate AV programme pos. of data transmission. Additional bits are inserted Preferred programme slot on TV set for external into the data stream, so that error-correction connections such as Scart and HDMI algorithms can be used on reception. - Page 129 Short technical guide MPEG-4 QAM - Quadrature-Amplitude-Modulation A further development of MPEG-2 with even Digital modulation process with phase shift higher data compression, intended for HDTV keying, which is used for transmissions in cable transmissions. networks. Receivers The channel identifi cation number is also referred Satellite receiver to as the Network ID or NID.
-
Page 130: Service
If, despite studying this operating manual, you still have questions about getting started with the unit or using it correctly, or if unexpected problems occur, please contact your specialist dealer. The Kathrein customer hotline is also at your disposal. Phone: +49 900 1122240 * * (0.49 EUR per minute on Deutsche Telekom AG land lines, calls from mobile phones may... -
Page 131: For Your Notes
For your notes... - Page 132 Internet: http://www.kathrein.de KATHREIN-Werke KG • Anton-Kathrein-Straße 1 - 3 P.O. Box 100 444 • 83004 Rosenheim • GERMANY...
Need help?
Do you have a question about the UFC 960sw and is the answer not in the manual?
Questions and answers