
Related Manuals for Silvercrest KH 4300


Summary of Contents for Silvercrest KH 4300
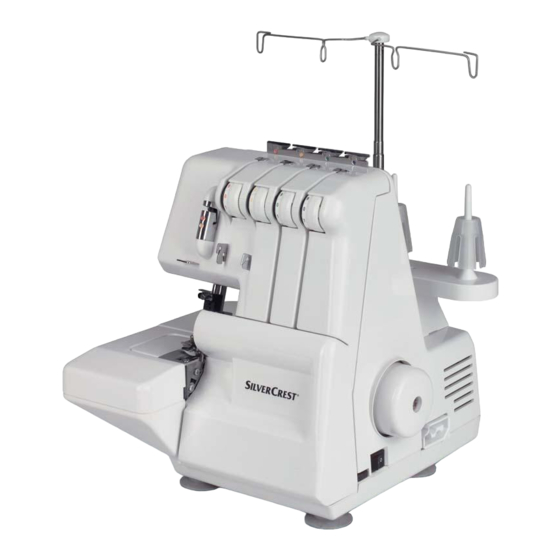
- Page 1 Overlock Sewing Machine KH 4300 Overlock Sewing Machine Operating instructions KOMPERNASS GMBH · BURGSTRASSE 21 · D-44867 BOCHUM www.kompernass.com ID-Nr.: KH4300-03/09-V3...
- Page 2 KH 4300...
-
Page 3: Table Of Contents
CONTENT Intended Usage Safety instructions Technical Data Items supplied Description of the appliance Preparation Adjusting the thread tree ...5 Bobbin supports...5 Bobbin caps ...6 Connecting the foot pedal ...6 Controlling the sewing speed...6 Safety switch ...6 Fitting the waste container ...6 Handwheel...6 Front flap ...6 Opening the free arm ...7... - Page 4 Close and broad sewing with three threads Sewing freehanded Adjusting the sewing foot Hemstitch and edging Sewing hemstitch Sewing narrow edging Differential feed motion Manner of operation ...18 Setting the differential feed motion ...18 Uneven material edges and smoothness...19 Avoid ruffles by stretching...19 Troubleshooting Cleaning and care Storage...
-
Page 5: Intended Usage
OVERLOCK SEWING MACHINE KH 4300 Intended Usage This overlock sewing machine is intended ... – for use as a portable machine, – for the trimming of material edges (sewing) of typical household textiles, and ... – only for domestic household use. -
Page 6: Technical Data
78dB(A). Foot pedal Use only the foot pedal originally supplied with this sewing machine: - ELECTRONIC FDM Speed Controller - Type KD-2902 Items supplied Overlock Sewing Machine Waste container Accessory box Operating instructions Replacement (upper blade) 2 Needles Nr. 11 4 Needles Nr. -
Page 7: Description Of The Appliance
Foot pedal j Power plug k Waste container Preparation Place the overlock sewing machine on a stable and level surface. Ensure there is sufficient illumination at your workplace. Adjusting the thread tree Completely withdraw the thread tree 1 before threading. -
Page 8: Bobbin Caps
Note: Always turn the handwheel 6 towards yourself, that is, in the same direction as with a domestic sewing machine. Front flap To open the front flap 8, slide it as far as possible to the right and, at the same time, draw it towards yourself. -
Page 9: Opening The Free Arm
Opening the free arm For threading the yarns the free arm 0 must be opened. 1. Pull the arm support 9 off to the side. 2. Open the front flap 8. 3. Press the release lever "PUSH" f and, at the same time, pull the free arm 0 downwards. -
Page 10: Threading Yarns Into The Needle
Thread tension selector 2 e 4. Pull the end of the thread about 10 cm (4”) out from the looper eyelet. 5. Lift the sewing foot o and slide the thread under it; then lower the sewing foot o back down. The lever for lifting and lowering the sewing foot o is located at the rear of the machine, above the sewing lever rod system. -
Page 11: Trial Run
Note: The yarn must lie correctly between the two discs of the thread tension selector. Thread tension selector q w Thread routing on from the thread guide plate 8 further thread routing 3. Guide the yarn, as shown, from front to back through the eyes of the needles. -
Page 12: Setting The Thread Tension
Lay the material for a trial run under the sewing foot o and slowly start to sew. The material will be automatically fed through. When the task is complete, continue sewing until an approximately 5cm (2") long length of threads has formed at the end of the material. -
Page 13: Adjusting Thread Tension On The Needle Threads
Adjusting thread tension on the needle threads The tread tension on the left needle is too loose. Adjust tension on the left thread. The tread tension on the right needle is too loose. Adjust tension on the right thread. Adjusting thread tension on the looper threads The lower looper thread is firm and/or the upper looper thread is loose. -
Page 14: Overview Of The Machine Adjustments
Overview of the machine adjustments The most appropriate thread tension adjustment for one type of material is not necessarily the ideal adjust- ment for a different material. The thread tensions required are dictated by the pliability and thickness of the material as well as the type and thickness of the thread. -
Page 15: Changing Threads (Binding Together)
Changing threads (binding together) With the following procedure, changing threads is quite simple: 1. Cut the yarn above the spindle and knot the ends of the new and the old thread together. 2. Place the thread tension selector 2/q/w/e at "0" and lift the sewing foot o. 3. -
Page 16: Setting The Cutting Width
Setting the cutting width The appropriate cutting width is, from material to material, variable. Each time test the seams and adjust the cutting width as follows: 1. Turn the handwheel 6 towards yourself until the needles are in the lowest position. 2. -
Page 17: Replacing Bulbs
Replacing bulbs Risk of electric shock When changing bulbs, ALWAYS remove the plug j from the mains power socket! 1. Remove the small round cover with a needle or something similar. 2. Unscrew the screw completely. 3. Remove the lamp cover. 4. -
Page 18: Close And Broad Sewing With Three Threads
Close and broad sewing with three threads When sewing with this machine you can adjust from four to three threads. Remove either the left or the right needle (see section "Exchanging needles") and the appropriate thread. The machine is now ready for sewing with three threads. -
Page 19: Hemstitch And Edging
Hemstitch and edging For these two tasks proceed as follows: 1. In the section "Adjusting the sewing foot" reread the instructions for adjusting the sewing foot o. 2. Turn the handwheel 6 to yourself until the needles stand fully at the top. 3. -
Page 20: Differential Feed Motion
Important: If necessary, adjust the stitching length and cutting width. Hem stitching Edging Differential feed motion With the differential feed motion uneven seams are avoided in knitted materials, as well as the slippage of textile positions. Additionally, the seams cause no wrinkles in very light materials. -
Page 21: Uneven Material Edges And Smoothness
Uneven material edges and smoothness To obtain precise flat edges when sewing elasticated materials, the front toothed rack feeders must push forward faster than the rear ones, so that the material is not stretched. For smoothness the front toothed rack feeders must also work faster than the rear ones. -
Page 22: Troubleshooting
Troubleshooting Problem • Needles are bent, blunt or da- Needles break • Needles are not correctly inserted. • You have pulled the material too • Yarn has not been correctly Thread breaks • Thread tension is too high. • Needles are not correctly inserted. •... -
Page 23: Cleaning And Care
Cleaning and care Attention: ALWAYS remove the plug j from the mains power socket before cleaning or lubricating the machine. Otherwise there is the risk of you receiving an electric shock! To ensure that your machine works faultlessly at all times, it must occasionally be cleaned with a brush. -
Page 24: Warranty And Service
Units 14-15 Bilston Industrial Estate Oxford Street Bilston WV14 7EG Tel.: 0870/787-6177 Fax: 0870/787-6168 e-mail: support.uk@kompernass.com Kompernass Service Ireland Tel: 1850 930 412 (0,082 EUR/Min.) Standard call rates apply. Mobile operators may vary. e-mail: support.ie@kompernass.com Importer KOMPERNASS GMBH BURGSTRASSE 21 44867 BOCHUM, GERMANY www.kompernass.com...