Samsung Galaxy Tab S User Manual
Hide thumbs
Also See for Galaxy Tab S:
- User manual (164 pages) ,
- Important information manual (88 pages) ,
- Basic manual (46 pages)
Table of Contents
Advertisement
Quick Links
Download this manual
See also:
User Manual
Advertisement
Table of Contents

Related Manuals for Samsung Galaxy Tab S


Summary of Contents for Samsung Galaxy Tab S
- Page 1 Available applications and services are subject to change at any time.
-
Page 2: Table Of Contents
Table of Contents Get Started Your Tablet at a Glance Set Up Your Tablet Turn Your Tablet on Activate Your Tablet Complete the Setup Tablet Basics Your Tablet’s Layout Key Functions Turn Your Tablet On and Off Turn Your Screen On and Off Touchscreen Navigation Your Home Screen Create Shortcuts Add and Remove Widgets Manage Home Screens Wallpapers Status Bar Recent Apps Notification Panel Quick Connect S Finder Quick Settings Multi Window Enable Multi Window Display Multi Window Use Multi Window Customize the Multi Window Apps Features Screen Capture Smart Screen Enter Text Touchscreen Keyboards... - Page 3 Text Input Methods Google Voice Typing Samsung Keyboard Swype Edit Text Contacts Get Started with Contacts Add a Contact Edit a Contact Add or Edit Information Assign a Photo to a Contact Link a Contact Separate Linked Contacts Delete a Contact Add Contacts to Your Favorites Share a Contact Groups Create a New Group Add a Contact to a Group Send an Email or Gmail to Group Members Accounts and Messaging Google Create a Google Account Access Gmail Send a Gmail Message Read and Reply to Gmail Messages Email Add an Email Account Add a Microsoft Exchange ActiveSync Account Compose and Send Email View and Reply to Email Manage Your Email Inbox Edit Email Settings Delete an Email Account Social Networking Accounts Google+ Hangouts...
- Page 4 YouTube Apps and Entertainment Businessweek+ eBay Evernote Flipbook Hancom Office Viewer Google Play Store Find and Install an App Create a Google Wallet Account Open an Installed App Uninstall an App Google Play Books Google Play Games Google Play Newsstand Google Photos Google Play Movies & TV Google Play Music Google Maps Music Player NYTimes Paper Garden Samsung Apps Sprint Music Plus Sprint Zone WatchON WebEx Web and Data Internet Chrome Lumen Toolbar Data Services General Information (Sprint Spark LTE and 3G Networks) Sprint Spark LTE Your User Name Data Connection Status and Indicators Wi-Fi Turn Wi-Fi on and Connect to a Wi-Fi Network...
- Page 5 Wi-Fi Direct Sprint Hotspot Turn Sprint Hotspot On or Off Connect a Device to Your Sprint Hotspot Allowed Device List Sprint Hotspot Settings Bluetooth Turn Bluetooth On or Off Pair with a Bluetooth Device Reconnect to a Bluetooth Device Disconnect or Unpair from a Bluetooth Device Send Information Using Bluetooth Receive Information Using Bluetooth Bluetooth Settings Virtual Private Networks (VPN) Prepare Your Tablet for VPN Connection Set a Screen Lock Add a VPN Connect to a VPN Memory Card Install a microSD Card Remove a microSD Card View the microSD Card’s Available Memory Format a microSD Card Unmount a microSD Card Camera and Video Camera Take Pictures Record Videos Camera Settings Gallery View Photos and Videos Zoom In or Out on a Photo Work with Photos Share Photos and Videos Video Player Tools and Calendar...
- Page 6 Calculator Calendar Add an Event to the Calendar Add a Task to the Calendar View Events Delete Events Clock Dropbox Google Search Google Settings Help My Files Remote PC S Voice SideSync 3.0 Sprint ID Settings Wi-Fi Settings Bluetooth Settings Hotspot and Tethering Sprint Hotspot Settings USB Tethering and Bluetooth Tethering Airplane Mode Data Usage Location Settings More Networks Mobile Networks Ethernet Roaming Nearby Devices Printing Screen Mirroring Sound Settings Sound Mode Volume Vibration Intensity...
- Page 7 Notifications Touch Sounds Screen Lock Sound Haptic Feedback Samsung Applications Settings Samsung Keyboard Settings Display Settings Font Brightness Screen Rotation Smart Stay Screen Timeout Screen Mode Reading Mode Auto Adjust Screen Mode Daydream Touch Key Light Duration Increase Touch Sensitivity Wallpaper Lock Screen Multi Window Notification Panel Toolbox Motions Accessibility Settings Blocking Mode Users Private Mode Fingerprint Scanner Accounts Settings Add an Account Cloud Use Your Samsung Account Use Your Dropbox Account Back Up and Reset Settings Language and Input Settings Choose a Default Language...
- Page 8 Default Input Method Samsung Keyboard Swype Settings Google Voice Typing Voice Search Text-to-Speech Options Pointer Speed Date and Time Settings Accessories Battery Settings Power Saving Mode Storage Security Settings Encryption Make Passwords Visible Device Administration Security Update Service Credential Storage Activate This Device System Update Settings About Device Application Manager Manage Applications Running Services Memory Use Default Applications Copyright Information Index...
-
Page 9: Get Started
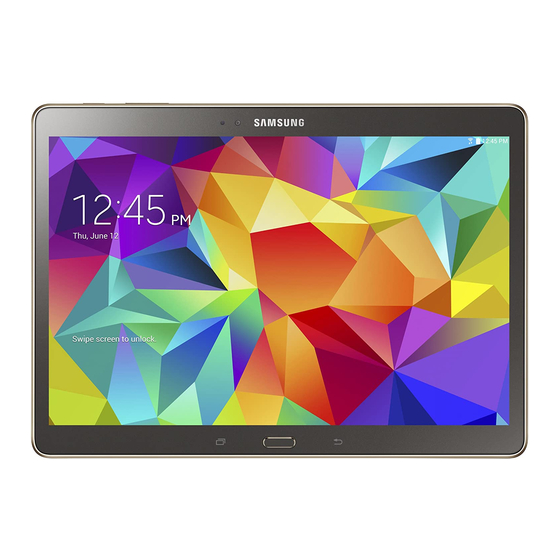
Get Started The following topics give you all the information you need to set up your tablet the first time. Your Tablet at a Glance The following illustration outlines your tablet’s primary external features and buttons. Set Up Your Tablet Prior to using the tablet, it is necessary to insert the SIM card and charge the battery. An optional microSD™ memory card (not included) can also be installed at this time. Install the SIM Card Your SIM card contains your account details, such as your PIN, available optional services, and many others features. Warning: The SIM card information and its contacts can be easily damaged by scratching or bending, so be careful when handling, inserting, or removing the card. Keep all SIM cards out of reach of small children. 1. Open the SIM card slot cover on the side of the tablet. 2. Make sure the gold contacts of the SIM card face downward and that the notched corner of the card faces as shown. Get Started... - Page 10 3. Carefully slide the SIM card into the SIM card slot (as shown) until the card locks into place. 4. Close the SIM card slot cover. Install a microSD Card Use the following procedure to install an optional microSD card (not included) in your tablet. For more information, see Storage. 1. Open the microSD card slot cover. 2. With the gold contacts facing down, carefully slide the memory card into the slot, pushing gently until it clicks into place. 3. Replace the microSD card slot cover. Get Started...
-
Page 11: Turn Your Tablet On
Important: You can easily damage the microSD card and card slot by improper operation. Please be careful when inserting, removing, or handling it. Do not over-insert the card as this can damage the contact pins. Charge the Battery You will need to charge the battery before using your tablet. 1. Plug the USB cable into the USB Charger/Accessory Port on the side of the tablet. 2. Plug the USB cable into the charging head, and then plug the charging head into an electrical outlet. Turn Your Tablet on Use the Power/Lock Key to turn your tablet on. Press and hold the Power/Lock Key to turn the tablet on. If your tablet is activated, it will turn on, search for Sprint service, and begin the setup application. If your tablet is not yet activated, see Activate Your Tablet for more information. Activate Your Tablet Follow the instructions below to activate your tablet if it has not already been activated. Depending on your account or how and where you purchased your tablet, it may be ready to use or you may need to activate it on your Sprint account. Get Started... -
Page 12: Complete The Setup
If you purchased your tablet at a Sprint Store, it is probably activated and ready to use. If you received your tablet in the mail and it is for a new Sprint account or a new line of service, it is designed to activate automatically. When you turn the tablet on for the first time, you should see a Hands Free Activation screen, which may be followed by a PRL Update screen and a Firmware Update screen. Follow the onscreen instructions to continue. If you received your tablet in the mail and you are activating a new tablet for an existing number on your account, you can activate on your computer online or directly on your tablet. Activate on your computer: Go to sprint.com/activate and complete the online instructions to activate your tablet. Activate on your tablet: Turn on your new tablet. Your tablet will automatically attempt Hands-Free Activation. Tap Activate to override auto-activation and start the manual activation wizard. Follow the on-screen prompts to complete the activation process. If your tablet is still not activated, visit sprint.com/support for assistance. If you do not have access to the Internet, call Sprint Customer Service at 1-888-211-4727. Tip: Do not press the Power key while the tablet is being activated. Pressing the Power key cancels the activation process. Note: If you are having any difficulty with activation, visit sprint.com/support. Complete the Setup After you turn on your device and activate it, your device displays a Welcome screen. From the ... - Page 13 Samsung Account: Your Samsung Account is used for access to Samsung apps and services, such as Samsung Hub, Samsung Apps, Samsung Link, and much more. Complete the steps to sign in to your current Samsung Account, or sign up for a new Samsung Account. 2. Tap Finish to complete setup. Get Started...
-
Page 14: Tablet Basics
Tablet Basics Your tablet is packed with features that simplify your life and expand your ability to stay connected to the people and information that are important to you. The following topics will introduce the basic functions and features of your tablet. Your Tablet’s Layout The following illustration outlines your tablet’s basic layout. Key Functions The following list defines the features listed in the above illustrations. 3.5 mm Headset Jack allows you to plug in an optional headset. Back Key lets you return to the previous screen, or close a dialog box, options menu, the Notifications panel, or on-screen keyboard. Back Camera lets you take pictures and record videos. Flash adds extra illumination when taking pictures and recording videos in dim light. Front Camera allows you to take pictures and videos of yourself. Home Key returns you to the Home screen. Press and hold to access Google Now. Infrared Transmitter controls external devices such as TVs. Light Sensor detects the presence of objects near the tablet, and light conditions. microSD Card Slot uses microSD to add additional storage to your tablet. Tablet Basics... -
Page 15: Turn Your Tablet On And Off
Power/Lock Key lets you turn the device on or off, turn the screen on or off, or lock the screen. Press and hold for a Device options menu, where you can turn the tablet off or restart it, or for easy access to Airplane mode, Data network mode, and to Mute and Sound modes. Recent Apps Key displays apps you have. SIM Card Slot stores the tablet’s SIM Card. CAUTION! The SIM Card should never be removed unless you are instructed to remove it by authorized service personnel. Speaker plays notification tones and sounds. Volume Key adjusts the volume of your tablet’s sounds. From the Home screen, press to adjust master volume. USB Charger/Accessory Port allows you to connect the charger/USB cable (included) and other optional accessories (not included). CAUTION! Inserting an accessory into the incorrect port may damage the tablet. Turn Your Tablet On and Off The instructions below explain how to turn your tablet on and off. Turn Your Tablet on Press and hold the Power/Lock Key. -
Page 16: Touchscreen Navigation
Turn the Screen on and Unlock It 1. To turn the screen on, press the Power/Lock Key. 2. Swipe the screen in any direction to unlock the screen. If you have set up a screen lock, you will be prompted to draw the pattern or enter the password or PIN. For more information, see Lock Screen. Touchscreen Navigation Your tablet’s touchscreen lets you control actions through a variety of tap gestures. When you want to type using the on-screen keyboard, select items on-screen such as application and settings icons, or press on-screen buttons, simply tap them with your finger. Touch and Hold To open the available options for an item (for example, a contact or link in a Web page), touch and hold the item. Tablet Basics... - Page 17 Swipe or Slide To swipe or slide means to quickly drag your finger vertically or horizontally across the screen. Drag To drag, touch and hold your finger with some pressure before you start to move your finger. While dragging, do not release your finger until you have reached the target position. Tablet Basics...
- Page 18 Flick Flicking the screen is similar to swiping, except that you need to swipe your finger in light, quick strokes. This finger gesture is always in a vertical direction, such as when flicking the contacts or message list. Tablet Basics...
-
Page 19: Your Home Screen
Rotate For most screens, you can automatically change the screen orientation from portrait to landscape by turning the tablet sideways. When entering text, you can turn the tablet sideways to bring up a bigger keyboard. Note: Screen rotation needs to be enabled for the screen orientation to automatically change. Tap and drag down the Notification Panel, then tap Screen rotation. Pinch and Spread “Pinch” the screen using your thumb and forefinger to zoom out or “spread” the screen to zoom in when viewing a picture or a Web page. (Move fingers inward to zoom out and outward to zoom in.) Tip: Pinching any Home screen will let you see thumbnails of all Home screens. Tap a thumbnail to go straight to another Home screen. Your Home Screen The home screen is the starting point for your tablet’s applications, functions, and menus. You can customize your home screen by adding application icons, shortcuts, folders, widgets, and more. Your home screen extends beyond the initial screen. Swipe the screen left or right to display additional screens. Note: You can keep swiping in one direction and make it back to the main Home screen. The small circles toward the bottom of the screen let you know your current screen position. Tip: Press to return to the main home screen from any other screen. Create Shortcuts Learn how to add, move, or remove items from the home screen. Tablet Basics... -
Page 20: Add And Remove Widgets
Add Items from the Applications Menu 1. Press , and then tap Apps. 2. Touch and hold an application icon, and then drag it to a Home screen. 3. Release the shortcut in its new position on the Home screen. Remove a Shortcut 1. Press to display the Home screen. 2. Touch and hold the desired shortcut, and then drag it to Remove. Note: This action does not delete the application; it simply removes the shortcut from the Home screen. Add and Remove Widgets Widgets are self-contained applications that reside either in your Widgets tab or on the main or extended Home screens. Unlike a shortcut, the Widget appears as an on-screen application. Widgets can include Contacts shortcuts, bookmarks, music playlists, Gmail and email accounts, and many other types of apps. Add a Widget 1. Press to display the Home screen. 2. Touch and hold an empty area of the Home screen, and then tap Widgets. 3. ... -
Page 21: Wallpapers
– or – Touch and hold an empty space on the screen. 2. Use these options to manage screens: Add a screen: Scroll to the end of the screens, and then tap Add. Remove a screen: Touch and hold on a screen, and then drag it to Remove. Set a screen as the main home screen: Tap Main Home Screen at the top of a screen. This screen display when you press the Home Key. Change the order of screens: Touch and hold on a screen, and then drag to a new position. Wallpapers You can choose a picture to display on the Home Screen, Lock screen, or on both the Home and Lock screens. Choose from preloaded wallpaper images or select a photo you have downloaded or taken with the Camera. 1. From a Home screen, pinch the screen. – or –... -
Page 22: Recent Apps
Icon Description Mute Network (full signal) 3G data service: The tablet is connected to a 3G network. The rays spin when data is being transferred. Sprint Spark Enhanced LTE data service. The rays spin when data is being transferred. Airplane mode Alarm set Battery (full charge shown) ... -
Page 23: Notification Panel
Notification Panel The Notification Panel displays information about connections, alerts, new messages, and more. It also has Quick settings buttons which allow you to quickly access and change common system settings. Settings: Access System settings. For more information, see Settings. Quick Settings (Grid): Display Quick setting buttons in a grid. Quick Settings (Scrolling): Display Quick setting buttons in a scrollable list. Brightness Control: Adjust the brightness of the display. Tap Auto to have the screen automatically adjust its brightness based on your surroundings. Sound Control: Adjust the system volume. Clear All Notifications: Remove all notifications. Notifications: Display notifications, such as new email and software updates. Access the Notifications Panel 1. Tap and slide downward from the top of the screen to display the Notification Panel. Slide the Notification Panel upward to close it. 2. Tap a notification to view details or to launch the related app or feature. Tablet Basics... -
Page 24: Quick Connect
Clear Notifications Tap and slide an item left or right to clear it. – or – Tap Clear to remove all notifications. Quick Connect View a list of all nearby devices. Quickly connect to a device to share data or media, or all them to connect to your device. 1. Tap and slide downward from the top of the screen to display the Notification Panel. 2. Tap Quick Connect. S Finder Find content on your device using filters such as media type, date, tag, or location. Your search can also be extended to the Internet. 1. Tap and slide downward from the top of the screen to display the Notification Panel. 2. Tap S Finder. Quick Settings Quickly enable/disable common system settings for your tablet. 1. Tap and slide downward from the top of the screen to display the Notification Panel. 2. Tap a Quick setting button to enable (green) or disable (grey). (To view all Quick setting buttons, tap , or slide the Quick setting buttons to the left.) Wi-Fi: Enable Wi-Fi connections. For more information, see Wi-Fi Settings. Location: Enable or disable location services. For more information, see Location Settings. Sound/Vibrate/Mute: Enable or mute system sounds, or enable haptic feedback (vibration). ... -
Page 25: Multi Window
Adaptive display: Optimize the screen based on what is being displayed. For more information, see Screen Mode. U. power saving: Use Ultra power saving mode. For more information, see Power Saving Mode. Multi window: Enable the Multi window feature. For more information, see Multi Window. Toolbox: Enable the Toolbox feature. For more information, see Toolbox. Screen Mirroring: Share your device’s screen with another device using an optional AllShare Cast accessory (not included). For more information, see Screen Mirroring. Sync: Synchronize contacts, email, etc. with the network. Reading Mode: Optimize the screen for reading with selected applications. Smart stay: Set the screen to stay on as long as you are looking at it. For more information, see Smart Stay. Smart pause: Pause video playback when you look away from the screen. Power saving: Activate Power saving mode. For more information, see Power Saving Mode. Blocking mode: Disable notifications for selected features. For more information, see Blocking Mode. Airplane mode: Disable all wireless connections. For more information, see Airplane Mode. ... -
Page 26: Enable Multi Window
Enable Multi Window Enable Multi window in the Display settings. 1. Press , and then tap Apps > Settings > Device tab. 2. Tap the ON/OFF switch next to Multi window to enable the option. Display Multi Window The Multi window tray normally automatically hides itself with not in use. Swipe from the right side of the screen to display the Multi window Apps tray. Use Multi Window After enabling Multi Window, you can use it to run two apps at the same time. You can launch apps from Multi window, or drag an app to the screen to run multiple apps at the same time. The apps display together on a split screen. You can switch between the apps, and adjust the size of their display on the screen. You can also use these Multi Window options: Launch Multiple Apps: When you drag an app from Multi window on top of an open app, both apps display in a split window. Tablet Basics... -
Page 27: Customize The Multi Window Apps
While using one app, tap the tab to display Multi Window, and then tap and drag an app to the screen. Adjust the Size of Apps in Multi Window: While using Multi Window, you can adjust the size of the two apps on the screen. Tap and drag to a new position. Recent apps: Replace the current window with a recently used app. Tap > Switch Multi Window App Positions: While using Multi Window, you can switch the position of the app windows on the screen. Tap > Drag content from one app to the other: In selected apps, you can you can drag text or images between apps. -
Page 28: Features
To restore an app, touch and hold an app icon until it detaches from the storage tray, and then drag it onto the Multi window tray. Features Discover new features for controlling and interacting with your tablet. Screen Capture Capture an image of the current screen at any time. Touch and hold the Power/Lock Key and the Home Key simultaneously to create an image of the current screen. The screen border flashes briefly indicating a screen capture. The screen capture is automatically saved to the Gallery in an Album labeled Screenshots. A copy of the screen capture is also saved to the clipboard. Smart Screen Smart screen features allow you to have your tablet automatically detect when you are looking at the screen. Smart stay: The screen will not time out as long as you are looking at it. Smart stay uses the front camera to detect when you are facing the screen. Some factors that may affect the ability of the front camera to detect your face are: When the tablet is not docked (dock not included) or held upright, for example when placed on a table. When the front camera cannot detect your face and eyes. When the front camera is being used for the current application. When the source of light is behind you, or when using the tablet in the dark. Configure Smart Stay Enable the Smart stay feature. 1. ... -
Page 29: Enter Text
Enter Text You can type on your tablet using the available touchscreen keyboards. Touchscreen Keyboards Touchscreen keyboard entry can be done in either Portrait or Landscape orientations. The Landscape orientation provides more space and results in slightly bigger on-screen keys. If you find that you prefer to enter text via the on-screen keyboard, and need bigger keys, use this orientation. Text Input Methods Your tablet offers several text input methods. Google voice typing: Enter text by speaking. Samsung keyboard: Enter text by touching keys on a virtual QWERTY keyboard. Samsung keyboard includes optional predictive text, which matches your key touches to common words so you can select a word to insert it into your text. Swype keyboard: Enter text by sliding your finger across letters to spell words. Select a Default Text Input Method You can select a default Text Input Method from Settings, or choose one at any time while entering text. From Settings: Press and tap Apps > Settings > General tab > Language and input >... -
Page 30: Samsung Keyboard
Configure Google Voice Typing Set Google Voice Typing options. Press and tap Apps > Settings > General tab > Language and input, and then tap next to Google voice typing. Samsung Keyboard With Samsung Keyboard, it's easy to enter text, symbols, and numbers. Use Samsung Keyboard to Enter Text 1. From a screen where you can enter text drag down from the top of the screen to open the Notifications panel, and then tap Select input method > Samsung keyboard. 2. Tap keys to enter text. While entering text, use these options: If you make a mistake, tap to delete incorrect characters. Touch and hold to delete a whole word or field. By default, Samsung Keyboard starts with a capital at the beginning of text. Tap ... -
Page 31: Swype
Tap to view Samsung Keyboard settings. Tap Choose between the Normal keyboard, a Floating keyboard which can be moved around the screen, or a Split keyboard. Use Predictive Text By using Predictive text, you can have next-letter prediction and regional error correction, which compensates for tapping the wrong keys on the keyboard. While entering characters, potential word matches display in the Predictive text area above the keyboard. Tap a word to insert it into your text. Tap to display more words. Configure Samsung Keyboard You can configure options for Samsung keyboard. For more information, see Samsung Keyboard. Press and tap Apps > Settings > General tab > Language and input, and then tap next to Samsung keyboard. Swype Swype lets you enter words by tracing over the letters on the virtual QWERTY keyboard. Instead of tapping each key, use your finger to trace over each letter of a word. You can also tap letters to enter words. Swype provides next-letter prediction and regional error correction, which can compensate for tapping the wrong keys on the virtual QWERTY keyboards. Tablet Basics... -
Page 32: Edit Text
Use Swype to Enter Text 1. From a screen where you can enter text drag down from the top of the screen to open the Notification panel, and then tap Choose input method > Swype. 2. Swipe your finger continuously over the letters to form a word. As you swipe over letters, words matching your pattern display at the top of the Swype keyboard. To enter a word, lift your finger, or tap a word at the top of the keyboard. 3. While entering text, use these options: If you make a mistake, tap to delete a single character. Touch and hold to delete an entire word or field. By default, Swype starts with a capital at the beginning of text. Tap to start with a capital letter, or tap twice to enter all capitals. Tap to switch to a symbols keyboard, and then tap keys to enter symbols. Configure Swype Press and tap Apps > Settings > General tab > Language and input, and then tap ... - Page 33 2. Tap and drag to a better position, if necessary. 3. Enter additional text, or delete text by tapping Copy, Delete, or Replace Text 1. Touch and hold the text or word you want to select. The selected text is highlighted between selection cursors . 2. Tap and drag either cursor to select more or less text. 3. On the pop-up menu, tap: Select all to highlight all text in the field. Cut to remove the selected text. Copy to save the selected text to the clipboard. Paste to paste previously copied text. Clipboard to display the text saved to the clipboard. 4. Enter text by typing or speaking to replace the selected text. Tap to delete the selected text. Paste Text 1. Tap the text at the point you want to edit. The selection cursor displays at the point you touched. 2. Tap and drag to a better position, if necessary. 3. ...
-
Page 34: Contacts
Get Started with Contacts Before using Contacts, it’s best to learn a few basics. Your tablet automatically sorts the Contacts entries alphabetically. Contacts can be stored in device memory. You can also create contacts that sync with an account—such as a Google contact or a Corporate (Microsoft Exchange ActiveSync) contact. When you create a new contact, you will be asked where you want to store the contact. Some options are: Device contacts are stored in device memory. Google contacts are shared with your Google Account. Samsung account contacts are shared with your Samsung account. Microsoft Exchange ActiveSync contacts are shared with your Exchange account. Access Contacts Press and tap Apps > Contacts. Add a Contact You can add contacts directly into the Contacts application. Enter details such as name, tablet numbers, email addresses, mailing addresses, and more. 1. Press and tap Apps > ... -
Page 35: Edit A Contact
Picture: Tap the picture icon to assign a picture to the new entry. Name: Enter the name. Tap next to the Name field to display additional name fields. Phone: Enter a phone number. Email: Enter an email address. Groups: Assign the contact to a group. Add another field: Add new field(s) for the contact. 4. Tap Save to save the new contact. Edit a Contact Once you’ve added a contact, you can add or edit any of the information in the entry. Add or Edit Information You can modify existing contact information to keep your information up-to-date. 1. Press and tap Apps > Contacts. 2. Tap a contact to display it, and then tap 3. Tap any field you want to change or add. 4. Add or edit the information, and then tap Save. Assign a Photo to a Contact Adding a photo to a contact entry creates a more personal and easily recognized entry. For example, ... -
Page 36: Link A Contact
Link a Contact When you have contacts from various sources (Gmail, device, Facebook, etc.), you may have multiple similar entries for a single contact. Your tablet’s Contacts application lets you link multiple entries into a single contact. 1. Press and tap Apps > Contacts. 2. Tap a contact to display it, and then tap > Link contact. 3. Tap another entry to link it to the original contact. Separate Linked Contacts You can separate linked contacts back into separate contacts. 1. Press and tap Apps > Contacts. 2. Tap a contact to display it, and then tap > Separate contact. 3. Tap next to a contact to separate it from the original contact. Delete a Contact You can delete a contact from the contacts details page. 1. Press and tap Apps > ... -
Page 37: Share A Contact
Note: To remove a contact from your Favorites tab, tap Share a Contact You can quickly share contacts using Bluetooth, Google Drive, Wi-Fi Direct, and other sharing methods. 1. Press and tap Apps > Contacts. 2. Tap a contact to display it, and then tap > Share name card via. Tap a sharing method and follow the prompts. – or – To share name cards for multiple contacts, tap Select. After selecting contacts, tap , select a sharing method, and follow the prompts. Groups This feature allows you to add a new or existing contact to a group. This group can be one of the already present groups (Family, Friends, or Work) or a user-created group. Create a New Group You can create new groups and add members. 1. Press and tap Apps > Contacts > Groups tab. 2. Tap 3. Enter information about the group: Tap the Group name field and enter a name for the new group. -
Page 38: Send An Email Or Gmail To Group Members
1. Press and tap Apps > Contacts > Groups tab. 2. Tap a group to display it, and then tap Add member. 3. From the list of contacts, tap the contact(s) you want to add. 4. Tap Done to add the contact to the group. Send an Email or Gmail to Group Members You can send an email or Gmail to all or selected members of a group. 1. Press and tap Apps > Contacts > Groups tab. 2. Tap an existing group and then tap > Send email. 3. Select the recipients of the new message and then tap Done. 4. Tap Email or Gmail, then tap Always to use this as the default sending method, or Just once to be asked each time which service to use. Compose and send your email. For more information, see Compose and Send Email or Send a Gmail Message. Contacts... -
Page 39: Accounts And Messaging
Accounts and Messaging Set up accounts on your tablet to synchronize information between your tablet and accounts. Google Many of your tablet’s applications, such as Gmail, Google Hangouts, and the Google Play Store, require a Google Account. To use these applications, you must set up your Google Account on your tablet. Setting up your account on your tablet syncs your tablet and your online Google Account. Create a Google Account If you do not already have a Google Account, you can create one using your tablet. Note: Although you need a Gmail account to use certain features of your tablet, such as Google Play Store, you do not need to use Gmail as the default account for your tablet. 1. Press , and then tap Apps > Settings > General tab. 2. Tap Add account > Google > New. 3. Follow the on-screen prompts to create your free account. Access Gmail Below are procedures for accessing your Gmail account. 1. Press and tap Apps > Gmail. 2. Do any of the following: View more email messages: If the Inbox is full, swipe your finger up the screen to view more messages and conversations. -
Page 40: Send A Gmail Message
Send a Gmail Message Below are procedures for sending a Gmail. 1. Press and tap Apps > Gmail. 2. From the Inbox, tap Enter the message recipient’s email address in the To field. You can add multiple recipients. Note: To send a carbon copy (CC) or a blind carbon copy (BCC) of the email to other recipients, tap +CC/BCC. Tap Subject and enter the email subject. Tap Compose email and compose your message. To add an attachment, tap . To send the message, tap Send. To save the current email as a draft, tap > Save draft. To later view your draft email messages, from the Inbox, tap Drafts. To delete the current email message, tap > Discard. Read and Reply to Gmail Messages Below are procedures for reading and replying to Gmail messages. -
Page 41: Email
Email Use the Email application to send and receive email from your webmail or other accounts. You can also access your Exchange ActiveSync email on your tablet. Add an Email Account Email allows you to send and receive email using various email services. You can also receive text message alerts when you receive an important email. 1. Press , and then tap Apps > Settings > General tab. 2. Tap Add account and select an email service provider. 3. Follow the on-screen prompts to set up and configure your account. Add a Microsoft Exchange ActiveSync Account The Email application also provides access to your Microsoft Exchange account from your tablet. If your company uses Microsoft Exchange Server 2003, 2007, or 2010 as the corporate email system, you can use this email application to wirelessly synchronize your email, Contacts, and Task information directly with your company’s Exchange server. Use the following procedure to synchronize your tablet with a corporate email account. Note: You can set up multiple Microsoft Exchange ActiveSync accounts on your tablet. 1. Press , and then tap Apps > Settings > General tab. 2. Tap Add account > Microsoft Exchange ActiveSync. -
Page 42: View And Reply To Email
1. Press and tap Apps > Email. 2. From the Inbox, tap Tap the To field and enter the recipient’s email address in the To field. You can add as many message recipients as you want. To send a copy of the message to yourself, tap +Me. To send a carbon copy (Cc) or a blind carbon copy (Bcc) of the current email to other recipients, add their email addresses in the Cc/Bcc field. Tap the Subject field and enter the email subject. 3. Tap the text area to compose your email. To add an attachment, tap 4. To send the message, tap View and Reply to Email Reading and replying to email on your tablet is as simple as on your computer. 1. Press and tap Apps > Email. 2. From the email account Inbox, tap a message to view it. 3. Tap Reply, Reply All to reply to the original recipient list, or tap Forward to ... -
Page 43: Edit Email Settings
Refresh an Email Account Whatever your automatic synchronization settings are, you can also synchronize your sent and received email messages manually at any time. 1. Press and tap Apps > Email. 2. Select an email account. If you are already in an email account, tap the account name field (top left corner) to list all of your email accounts. Select an available email account. 3. Tap Refresh. Filter Email Messages 1. Press and tap Apps > Email. 2. From the email account Inbox, tap > Filter by. 3. Select from the options to filter email messages by: date received (most recent or oldest), by sender, read/unread status, attachments, starred favorites, priority, subject, flag, request, meeting requests, or size. (Not all options are available for all email accounts.) Delete an Email Message 1. ... -
Page 44: Delete An Email Account
Edit General Preferences 1. Press and tap Apps > Email. 2. Tap > Settings > General settings to configure settings for all accounts of this type. Available settings depend on the type of email account. See your service provider for more information. Edit Account Settings You can edit settings for your individual email accounts, such as email address and password, name display and signature, frequency of retrieval, and more. 1. Press and tap Apps > Email. 2. Tap > Settings, and then tap an account to configure settings. Available settings depend on the type of email account. See your service provider for more information. Delete an Email Account If you no longer want an email account on your tablet, you can delete it through the email settings menu. 1. Press and tap Apps > ... -
Page 45: Hangouts
Google+ uses your Google Account. If you don’t already have a Google Account set up on your tablet, you can set one up. For more information, see Create a Google Account. Press and tap Apps > Google+. Hangouts Hangouts is an online place to meet friends and family, share photos, and host video calls. Conversation logs are automatically saved to a Chats area in your Gmail account. Hangouts uses your Google Account. If you don’t already have a Google Account set up on your tablet, you can set one up. For more information, see Create a Google Account. Press and tap Apps > Hangouts. YouTube YouTube is a video sharing website on which users can upload and share videos. The site is used to display a wide variety of user-generated video content, including movie clips, TV clips, and music videos, as well as video content such as video blogging, informational shorts, and other original videos. Note: YouTube is a data-intensive feature. Check your data plan to avoid additional data charges. Press and tap Apps > YouTube. Accounts and Messaging... -
Page 46: Apps And Entertainment
Apps and Entertainment All your tablet’s features are accessible through the Apps list. Businessweek+ Read Bloomberg Businessweek+ weekly for all the content of the print edition of the magazine along with exclusive content and interactive features that enrich the reading experience. Visit bloomberg.com/mobile/businessweek to learn more. Press and tap Apps > Businessweek+. eBay At eBay we work hard every day to build a world-class online shopping experience on Android the eBay app is packed full of features that make it easy to browse, buy, sell, and manage your eBay experience whenever and wherever you are. Press and tap Apps > eBay. Evernote Create, synchronize, and share multimedia notes. You can add tags to the notes, or sort the notes into a notebook so that you can manage your ideas efficiently. Visit evernote.com to learn more. Press and tap Apps > Evernote. Flipbook Use this application to access your personalized magazines. Visit flipboard.com to learn more. Press and tap Apps > Flipboard. Apps and Entertainment... -
Page 47: Hancom Office Viewer
Hancom Office Viewer Open and manage Hancom Office Hanword (*.hwp) and Hanshow (*.show) documents. Visit hancom.com to learn more. Press and tap Apps > Hancom Office Viewer. Google Play Store The Google Play Store is the place to go to find new Android apps, games, movies, music, and books for your tablet. Choose from a wide variety of free and paid apps ranging from productivity apps to games. When you find an app you want, you can easily download and install it on your tablet. To access the Google Play Store you must have a Google Account set up on your tablet. Important! Third-party applications may access your personal information or require your service provider to disclose your customer information to the third-party application provider. To find out how a third-party application will collect, access, use, or disclose your personal information, check the application provider’s policies, which can usually be found on their website. If you aren’t comfortable with the third-party application’s policies, don’t use the application. Find and Install an App When you install apps from the Google Play Store app and use them on your tablet, they may require access to your personal information (such as your location, contact data, and more) or access to certain functions or settings of your tablet. Download and install only apps that you trust. Note: You need a Google Wallet account to purchase items from the Google Play Store app. 1. Press and tap Apps > Play Store. 2. Browse through the categories, find an app you're interested in, and tap the name. 3. ... -
Page 48: Create A Google Wallet Account
Create a Google Wallet Account You must have a Google Wallet account associated with your Google Account to purchase items from the Google Play Store app. Do one of the following: On your computer, go to google.com/wallet. – or – The first time you use your tablet to buy an item from the Google Play Store app, follow the prompts to enter your billing information and set up a Google Wallet account. Warning! When you’ve used Google Wallet once to purchase an item from the Google Play Store app, the tablet remembers your information, so you don’t need to enter it the next time. For this reason, you should secure your tablet to prevent others from using it without your permission. (For more information, see Security Settings.) Open an Installed App Open a newly installed app via the apps menu. Press and tap Apps and then tap the app icon. Uninstall an App You can uninstall any app that you have downloaded and installed from Google Play. You cannot uninstall apps that are preloaded on your tablet. 1. Press and tap Apps > Settings > Applications tab > Application manager > Downloaded tab. 2. Tap the app you want to uninstall, and then tap Uninstall. 3. ... -
Page 49: Google Play Games
Press and tap Apps > Play Books. Google Play Games Google Play Games is the easiest way for you to discover new games, track achievements and scores, and play with friends around the world. It brings all your gaming on Google Play together in a unified Android experience. Visit play.google.com/about/games to learn more. Press and tap Apps > Play Games. Google Play Newsstand Enjoy free and paid news, magazine subscriptions, and much more all in one place. Visit play.google.com/store/newsstand to learn more. Press and tap Apps > Play Newsstand. Google Photos Keep all your photos backed up and organized with Google+ Photos. Press and tap Apps > Photos. Google Play Movies & TV The Google Play Movies & TV application allows you to connect to the Google Play Store and ... -
Page 50: Google Maps
automatically stored in your Google Music library and instantly ready to play or download. Visit play.google.com/store/music to learn more. Press and tap Apps > Play Music. Google Maps Use the Google Maps application to find directions, location information, business addresses, etc. Determine your current location with or without GPS, get driving and transit directions and get tablet numbers and addresses for local businesses. Note: Google Maps may require you to turn on Location. For more information about location settings, see Location Settings. Press and tap Apps > Maps. Music Player The Music Player is an application that can play music files. Launching the Music Player allows you to navigate through your music library, play songs, and create playlists (music files bigger than 300 KB are displayed). 1. Press and tap Apps > Music. 2. Tap a library category to view the available music files. 3. Scroll through the list of songs and tap an entry to begin playback. NYTimes Read the latest Web edition of The New York Times newspaper with your subscription. Visit nytimes.com to learn more. Press and tap Apps > ... -
Page 51: Samsung Apps
Press and tap Apps > Paper Garden. Samsung Apps Connect to Samsung Apps and make your tablet even smarter. Simply and easily download an abundance of applications to your tablet such as games, news, reference, social networking, navigation, and more. Note: Access to this feature requires that you already be logged in to your Samsung account application. 1. Press and tap Apps > Samsung Apps. 2. Follow the on-screen download and installation instructions. Sprint Music Plus With Sprint Music Plus and the Music Store, Ringtone Store, and Ringback Tone Store, you can purchase, download, and play music on your device. Install the Sprint Music Plus App on Your Device Before you use Sprint Music Plus on your device, you must download and install the app from the Google Play Store. 1. From home, tap Apps > ... -
Page 52: Sprint Zone
4. Follow the onscreen instructions to preview or purchase the song. Touch at any time to display the Sprint Music Plus menu. Tip: For ringtones or ringback tones, touch Ringtone Store or Ringback Tone Store from the Sprint Music Plus main menu. Sprint Zone Access your Sprint account, get device information and help, find recommended apps, and more. 1. Press and tap Apps > Sprint Zone. 2. Touch My Account to sign in to and manage your Sprint account, My Device to access information about your device, or touch any other category to explore additional options, such as Apps, Games, Sprint News, TV & Movies, Music & Tones, and more. Note: Sprint Zone categories and options are subject to change. Check back frequently for new content and updates. WatchON Use the Samsung WatchON application to use your device as a remote control for your TV, set top box, DVR, Blu-Ray/DVD, stereo or other device. 1. Press and tap Apps > WatchON. 2. Follow the prompts to configure WatchON options, such country/region, TV service provider, channel list setup, etc. Apps and Entertainment... -
Page 53: Webex
WebEx Schedule, host, and attend meetings. View shared content and see who’s in the meeting. Meet face- to-face with two-way video. Join Cisco WebEx Training Center meetings. Visit webex.com to learn more. Press and tap Apps > WebEx. Apps and Entertainment... -
Page 54: Web And Data
Web and Data The following topics address your tablet’s data connections and the built-in Web browser. Additional data-related features can be found in Accounts and Messaging, Apps and Entertainment, and Tools and Calendar. Your tablet’s data capabilities let you wirelessly access the Internet or your corporate network through a variety of connections, including: Internet Your tablet’s Web browser gives you full access to both mobile and traditional websites on the go, using your tablet’s 3G, 4G, or Wi-Fi data connections. Press and tap Apps > Internet. Chrome Use Chrome for Mobile to browse fast and sign in to bring your Chrome experience from your computer, anywhere you go. For more information, visit google.com/intl/en/chrome/browser/mobile. Press and tap Apps > Chrome. Lumen Toolbar The Lumen Toolbar makes the mobile Web more social and more useful than ever before. Extensions like Facebook, Twitter, Related Apps, Offers, Readability and many more allow you to stay connected, find deals, browse apps and save browsed content for later—all without leaving the page you’re currently on. Press and tap Apps > Lumen Toolbar. Web and Data... -
Page 55: Data Services General Information (Sprint Spark Lte And 3G Networks)
Data Services General Information (Sprint Spark LTE and 3G Networks) The following topics will help you learn the basics of using your data services, including managing your user name, launching a data connection, and navigating the Web with your device. Sprint Spark LTE The Sprint Spark enhanced LTE network provides your device with wireless Internet access over greater distances than Wi-Fi and delivers data transfer rates of up to 60 Mbps. To connect your device to Sprint Spark, you need to be in an area covered by the Sprint Spark enhanced LTE network. For more information about the availability of Sprint Spark in your location, visit sprint.com/coverage. Note: The availability and range of the network depends on a number of factors, including your distance to the base station and infrastructure and other objects through which the signal passes. Set Your Network Options 1. Press and tap Apps > Settings > Connections tab > More networks > Mobile networks > Network mode. 2. Select LTE/CDMA or CDMA. The device will scan for the best available Sprint network and will automatically connect to it. When your device is connected to the Sprint Spark enhanced LTE network, the Sprint Spark icon appears in the status bar. -
Page 56: Data Connection Status And Indicators
Update Your User Name If you choose to change your user name and select a new one online, or make any changes to your services, you must then update the profile on your device. 1. Press and tap Apps > Settings > General tab > System Update. 2. Touch Update Profile. Data Connection Status and Indicators Your device displays the current status of your data connection through indicators at the top of the screen. The following symbols are used: Icon Description 3G Coverage: The device is connected to the Sprint 3G network. The icon spins when your device is scanning and connecting. Sprint Spark LTE Coverage: The device is connected to the Sprint Spark enhanced LTE network. The icon spins when your device is scanning and connecting. Wi-Fi Wi-Fi provides wireless Internet access. To use your tablet’s Wi-Fi features, you need access to a wireless access point or “hotspot.” The availability and range of the Wi-Fi signal depends on a number of factors, including infrastructure and other objects through which the signal passes. Turn Wi-Fi on and Connect to a Wi-Fi Network Turning on Wi-Fi allows your tablet to discover and connect to compatible in-range Wi-Fi networks ... -
Page 57: Wi-Fi Direct
Note: You can also turn Wi-Fi on or off from Notifications. Drag down from the top of the screen, then tap the Wi-Fi Quick settings button. Scan and Connect to a Wi-Fi Network 1. Press and then tap Apps > Settings > Connections tab > Wi-Fi. 2. Tap the ON/OFF switch to turn Wi-Fi on. 3. Wi-Fi automatically begins scanning for available networks. Scan to begin a new scan. 4. The network names of detected Wi-Fi networks are displayed. When you select an open network, you will be automatically connected to the network. When you select a secured network, you will need to enter the wireless password to connect to the network. Enter the password and tap Connect. You can use the show password option to display the password as you enter it. Manually Add a New Wi-Fi Connection 1. Press and then tap Apps > Settings > Connections tab > Wi-Fi. 2. Tap the ON/OFF switch to turn Wi-Fi on. 3. ... -
Page 58: Sprint Hotspot
4. After scanning for devices, select a device, then follow the prompts to complete the connection. – or – Tap Multi-connect to create a connection to devices that support multi-connect. Tap Scan to search for available multi-connect devices, then select the devices and follow the prompts to complete the connection. Sprint Hotspot Use Sprint hotspot to share your device’s Internet connection with a PC or other device via Wi-Fi, using your device as a mobile hotspot. Note: Sprint hotspot requires a Hotspot service subscription. See your service plan for details. 1. Press and then tap Apps > Settings > Connections tab > Hotspot and Tethering > Sprint hotspot. 2. Tap the ON/OFF switch to turn Sprint hotspot on. Turn Sprint Hotspot On or Off Activate your device’s Sprint Hotspot application to allow other devices to use your device’s Internet connection. 1. Press and then tap Apps > Settings > Connections tab > Hotspot and Tethering > Sprint hotspot. 2. Tap the ON/OFF switch to turn Sprint hotspot on. Connect a Device to Your Sprint Hotspot Use the other device’s Wi-Fi control to connect to your device’s mobile hotspot. -
Page 59: Allowed Device List
Allowed Device List Control whether devices connect to your Sprint hotspot with the Allowed device list. After you add devices to the list, they can scan for your device and connect using your device’s Sprint hotspot name and password. Caution! Using your device as a mobile hotspot consumes battery power and uses data service. While Sprint hotspot is active, your device’s applications will use the mobile hotspot data service. Roaming while using your device as a mobile hotspot will incur extra data charges. 1. Press and then tap Apps > Settings > Connections tab > Hotspot and Tethering > Sprint hotspot. 2. Tap the ON/OFF switch to turn Sprint hotspot on. 3. Tap Allowed devices, and then tap to enter the other device’s Device name and MAC address. 4. Tap OK to add the device. Sprint Hotspot Settings For information about configuring Sprint hotspot, see Sprint Hotspot Settings. Bluetooth Bluetooth is a short-range communications technology that allows you to connect wirelessly to a number of Bluetooth devices, such as headsets and hands-free car kits, and Bluetooth-enabled handhelds, computers, printers, and wireless devices. The Bluetooth communication range is usually approximately 30 feet. Turn Bluetooth On or Off The following procedures will guide you through turning on and turning off Bluetooth. -
Page 60: Pair With A Bluetooth Device
Note: Turn off Bluetooth when not in use to conserve battery power, or in places where using a wireless device is prohibited, such as aboard an aircraft and in hospitals. Pair with a Bluetooth Device Pairing initiates a connection between your tablet and the target device, usually by using a passcode or PIN. After pairing, your tablet and the target device recognize each other and exchange information without having to enter a passcode or PIN. 1. Press and then tap Apps > Settings > Connections tab > Bluetooth. 2. Tap the Bluetooth ON/OFF slider to turn Bluetooth on. 3. Make sure that the target device is discoverable, so that your tablet can find it. Refer to the instructions that came with the target device to find out how to set it to discoverable mode. 4. Tap Scan. Your tablet will start to scan for Bluetooth devices within range. 5. When you see the name of the target device displayed in the Bluetooth devices section, tap the name. Your tablet then automatically tries to pair with the target device. If automatic pairing fails, enter the passcode supplied with the target device. The pairing and connection status is displayed below the target device in the Bluetooth devices section. When you are communicating with the target device, displays in the status bar. Note: Due to different specifications and features of other Bluetooth-compatible devices, display and operations may be different, and functions such as transfer or exchange may not be possible with all Bluetooth-compatible devices. Reconnect to a Bluetooth Device When you have paired your tablet with another device, you should be able to reconnect it automatically by turning on Bluetooth on your tablet. -
Page 61: Disconnect Or Unpair From A Bluetooth Device
Disconnect or Unpair from a Bluetooth Device Follow these instructions to disconnect or unpair your tablet from a Bluetooth device. Disconnect from a Bluetooth Device 1. Press and then tap Apps > Settings > Connections tab > Bluetooth. 2. Tap the Bluetooth ON/OFF slider to turn Bluetooth on. 3. Tap the connected device, and then tap OK to disconnect. Unpair from a Bluetooth Device You can make your tablet forget its pairing connection with another Bluetooth device. To connect to the other device again, you may need to enter or confirm a passcode again. 1. Press and then tap Apps > Settings > Connections tab > Bluetooth. 2. Tap the Bluetooth ON/OFF slider to turn Bluetooth on. 3. In the Bluetooth devices section, tap next to the device, and then tap Unpair. -
Page 62: Receive Information Using Bluetooth
2. On your tablet, open the application that contains the information or file you want to send. 3. Follow the steps for the type of item you want to send: Photos and videos (in Gallery). On the Albums tab, tap an album, tap an item, and then tap > Bluetooth. Calendar event: In the Calendar’s Day view, Agenda view, or Week view, tap the event and then tap Menu > Share via > Bluetooth. Music track: This feature is available through the Music Player. With the track displayed on the Now playing screen, tap Menu > Via Bluetooth. 4. Tap the name of the receiving device. 5. If prompted, accept the connection on the receiving device, and enter the same passcode on both your tablet and the other device, or confirm the auto-generated passcode. Receive Information Using Bluetooth Your tablet is capable of receiving a wide variety of file types with Bluetooth, including photos, music tracks, and documents such as PDFs. 1. Press and then tap Apps > Settings > Connections tab > Bluetooth. 2. Tap the Bluetooth ON/OFF slider to turn Bluetooth on. 3. ... -
Page 63: Prepare Your Tablet For Vpn Connection
Prepare Your Tablet for VPN Connection Depending on the type of VPN, you may be required to enter your login credentials or install security certificates before you can connect to your company’s local network. You can get this information from your network administrator. To connect to a VPN, you must have Mobile data enabled, or your tablet must be connected to a Wi- Fi network. For information about setting up and using these connections on your tablet, see Mobile Networks and Turn Wi-Fi on and Connect to a Wireless Network. Set a Screen Lock Before setting up a VPN, you must set a screen lock to prevent access to your tablet by unauthorized users. PIN or password screen locks provide sufficient security to set up trusted credential storage. For more information, see Lock Screen. Add a VPN The following procedures outline the method to use when adding a VPN connection. 1. Press and then tap Apps > Settings > Connections tab > More networks > VPN. 2. Tap Add, and then enter the information for the VPN you want to add. Consult your network administrator for more details. 3. When finished, tap Save. Connect to a VPN The following describes how to connect to a VPN. 1. ... -
Page 64: Memory Card
Memory Card You can install an optional microSD memory card (not included), to add storage for images, videos, music, documents, and other files on your tablet. Install a microSD Card Use the following procedures to install an optional microSD card (not included) in your tablet. 1. Open the microSD Card Slot cover and turn to expose the slot. 2. With the gold contacts facing down, carefully slide the memory card into the slot, pushing gently until it clicks into place. 3. Replace the microSD Card Slot cover. Important! You can easily damage the microSD card and card slot by improper operation. Please be careful when inserting, removing, or handling it. Do not over-insert the card as this can damage the contact pins. Remove a microSD Card Use the following procedures to remove an optional installed microSD card (not included) from your tablet. Important! When you need to remove an installed microSD card, you must unmount the card first to prevent corrupting the data stored on it or damaging the card. Web and Data... -
Page 65: View The Microsd Card's Available Memory
1. Press and then tap Apps > Settings > General tab > Storage. 2. Tap Unmount SD card, then tap OK. 3. Open the microSD Card Slot cover and turn to expose the slot. 4. Gently press in on the microSD card so that it pops out from the slot, then carefully pull the card out. 5. Replace the microSD Card Slot cover. Important! You can easily damage the memory card and card slot by improper operation. Please be careful when inserting, removing, or handling it. View the microSD Card’s Available Memory Use the following procedure to view used and available memory on an optional microSD card (not included). Press and then tap Apps > Settings > General tab > Storage. Format a microSD Card Formatting permanently removes all files stored on an optional microSD card (not included). Note: The formatting procedure erases all the data on an installed card, after which the files cannot be retrieved. To prevent the loss of important data, please check the contents before you format a card. 1. Press and then tap ... -
Page 66: Camera And Video
Camera and Video Take photos and record videos using the camera and camcorder features. View your photos and videos using the Gallery and Video Player apps. Camera Use the Camera to take and share pictures and videos. Take Pictures Launch the Camera app to take pictures. Important Do not take photos of people without their permission. Do not take photos in places where cameras are not allowed. Do not take photos in places where you may interfere with another person’s privacy. 1. Press and tap Apps > Camera. 2. Using the display as a viewfinder, compose your picture by aiming the lens at the subject. You can rotate the tablet to any position, and the screen controls rotate to make taking pictures easy. 3. As you compose a picture, you can: “Pinch” or “stretch” the screen to zoom in or out. Configure Camera options. For more information, see Camera Settings. 4. To take the picture, tap the Capture button. Camera and Video... -
Page 67: Record Videos
Record Videos Use the Camera to record video. Important Do not take videos of people without their permission. Do not take videos in places where cameras are not allowed. Do not take videos in places where you may interfere with another person’s privacy. 1. Press and tap Apps > Camera. 2. Tap Record Video to begin recording. 3. Using the display as a viewfinder, compose your video by aiming the lens at the subject. You can rotate the tablet to any position, and the screen controls rotate to make video recording easy. While recording, you can use these options: “Pinch” or “spread” the screen to zoom in or out. Tap the Pause button to temporarily stop recording. Tap the Stop button to stop recording. Camera Settings Set options for the Camera. 1. Press and tap Apps > Camera. 2. Tap Settings to configure options: Camera and Video... - Page 68 Picture size: Select a resolution. Use higher resolution for higher quality. Higher resolution photos take up more memory. Burst shots: Take a series of photos of moving subjects. Picture stabilization: Activate or deactivate anti-shake. Anti-shake helps focus when the camera is moving. Face detection: Set the device to recognize people’s faces and help you take photos of them. ISO: Select an ISO value. This controls camera light sensitivity. It is measured in film- camera equivalents. Low values are for stationary or brightly-lit objects. Higher values are for fast-moving or poorly-lit objects. Metering modes: Select a metering method. This determines how light values are calculated. Center-weighted measures background light in the center of the scene. Spot measures the light value at a specific location. Matrix averages the entire scene. Tap to take pics: Tap anywhere on the screen to take a picture. Save as: Set the device to delete the original photo when taking photos with rich tone mode. Video size: Select a resolution. Use higher resolution for higher quality. Higher resolution videos take up more memory. Recording mode: Select Normal, Limit for email, or Fast motion mode. ...
-
Page 69: Gallery
Exposure value: Change the exposure value. This determines how much light the camera’s sensor receives. For low light situations, use a higher exposure. Grid lines: Display viewfinder guides to help composition when selecting subjects. Volume Key: Use the Volume key as the Capture key. Voice control: Set the camera to take photos with voice commands. Help: View information on using the camera and camcorder. Reset settings: Reset the camera settings. Gallery Using the Gallery application, you can view pictures and watch videos that you’ve taken with your tablet’s camera, downloaded, or copied to an optional memory card (not included). For pictures stored on an optional memory card, you can do basic editing such as rotating and cropping. You can also set a picture as your contact picture or wallpaper and share pictures with your friends. While viewing pictures in the Gallery, scroll up the screen to view more albums. Simply tap an album to view the photos or videos in that album. If you have pictures or videos stored on an optional memory card (not included), they will be displayed in the folders they are stored in, and folders are treated as albums. The folder names will be used as the album names. 1. Press and tap Apps > Gallery. 2. Browse files stored in your tablet’s memory, or on an optional installed memory card (not included). From the main Gallery screen, you have these options: Tap a picture or video to display it in full screen view. Tap ... -
Page 70: View Photos And Videos
Create album: Create a new album. Reorder albums: Touch and drag albums to rearrange them. Sort by oldest/latest: Sort items by date. Content to display: Select which content to display. Options are All content, Content in device, Content in Dropbox, Content in Facebook, and Content in Picasa. Slideshow: Choose options to create a slideshow for viewing your pictures and videos. Studio: Edit photos and videos with Studio. Settings: Configure Gallery settings. Help: Get help using Gallery. View Photos and Videos You can browse the photos and videos, and then tap a photo or video to view it in full screen. 1. Press and tap Apps > Gallery. 2. While viewing thumbnails, the follow options are available: Select: Select one or more items. Delete: Delete one ore more items. Slideshow: Start a slideshow with the images in the current folder. -
Page 71: Zoom In Or Out On A Photo
Copy to clipboard: Place a copy on the clipboard. Rotate left: Rotate counter-clockwise. Rotate right: Rotate clockwise. Crop: Resize the frame to crop and save the image in it. Rename: Rename the file. Slideshow: Start a slideshow with the images in the current folder. Set as: Set the image as wallpaper or a contact image. Print: Print the image via a USB or Wi-Fi connection. Some printers may not be compatible with the device. Settings: Configure Gallery settings: Accounts: Manage your Google Account information. SNS data management: Enable Sync only via Wi-Fi to only sync photos and videos when connected to a Wi-Fi network. Tags: Enable Tag buddy and Face tag. Tag buddy identifies each photo with information such as the weather, location, people in the photo, or date created. Face tag scans each photo to detect people’s faces, which you can then tag with their name. Zoom In or Out on a Photo There are two ways you can zoom in or out of a photo. -
Page 72: Share Photos And Videos
3. Tap > Rotate left or Rotate right. Crop a Photo The crop your photos, follow the below procedures. 1. Press and tap Apps > Gallery. 2. Tap an image to view your picture. 3. Tap > Crop. 4. To adjust the crop box size, touch and hold the edge of the box. When directional arrows appear, drag your finger inward to or outward to resize the crop box. 5. To move the crop box to the part of the photo that you want to crop, drag the crop box to the desired position. 6. Tap Done to apply the changes to the picture. The cropped picture is saved along with the original copy in your default storage location. Share Photos and Videos The Gallery application lets you send photos and videos using Gmail or email. You can share photos on your social networks (such as Facebook, Google+, Hangouts, and so on) and share videos on YouTube. You can also send them to another device or your computer using Bluetooth, Wi-Fi Direct, and more. Send Photos or Videos by Gmail or Email You can send several photos, videos, or both in an Gmail or email message. They are added as file ... -
Page 73: Share Videos On Youtube
Send Photos or Videos Using Bluetooth You can select several photos, videos, or both and send them to someone’s device or your computer using Bluetooth. 1. Press and tap Apps > Gallery. 2. Tap the album that contains the photos or videos you want to send. 3. Select the photos or videos you want to send. 4. Tap the screen and then tap > Bluetooth. In the next few steps, you’ll be asked to turn on Bluetooth on your tablet and connect to the receiving Bluetooth device so the files can be sent. For more information, see Bluetooth. Share Photos or Videos on Google+ 1. Press and tap Apps > Gallery. 2. Tap the album that contains the photos or videos you want to send. 3. Tap the photo or video you want to send. 4. Tap the screen and then tap > Google+. 5. ... -
Page 74: Video Player
1. Press and tap Apps > Gallery. 2. Tap the album that contains the videos you want to share. 3. Select the video you want to share. 4. Tap the screen and then tap > YouTube. 5. Enter the prompted information, such as description and tags, and select a privacy option. 6. Tap UPLOAD. Video Player The Video Player application plays video files stored on your tablet, or on an optional installed memory card (not included). Press and tap Apps > Video. Camera and Video... -
Page 75: Tools And Calendar
Tools and Calendar Learn how to use many of your tablet’s productivity-enhancing features. Calculator Your tablet comes with a built-in calculator. 1. Press and tap Apps > Calculator. 2. Enter numbers by tapping the on-screen keyboard. Tap C to clear all numbers. Calendar Use Calendar to create and manage events, meetings, and appointments. Your Calendar helps organize your time and reminds you of important events. Depending on your synchronization settings, your tablet’s Calendar stays in sync with your Calendar on the Web, Exchange ActiveSync calendar, and Outlook calendar. Add an Event to the Calendar Add events to your Calendar to help you organize your time and remind you of important events. Note: To synchronize calendar events among your Google and Corporate accounts, make sure they are being managed by your tablet. See Accounts and Messaging for more information. 1. Press and tap Apps > Calendar. 2. Tap a date, tap , and then tap the Event tab. Tap the Calendar field to assign the new event to an account, or save it to the tablet. Enter a title for the event. ... -
Page 76: Add A Task To The Calendar
Reminder: Select an alarm time. Participants: Add participants to the event. Tap to add a contact. Show me as: List yourself as Busy or Available for the event. Privacy: Set the privacy level for this event. Repeat: Select a recurrence schedule for the event. Description: Enter a description for the event. Icon: Add an icon for the event. Time zone: Select a time zone for the event. Tap Done to save the new event. Add a Task to the Calendar Add tasks to your Calendar to help you organize your time and remind you of important activities. Note: To synchronize calendar tasks among your Google and Corporate accounts, make sure they are being managed by your tablet. See Accounts and Messaging for more information. 1. Press and tap Apps > Calendar. 2. Tap a date, tap , and then tap the Task tab. ... -
Page 77: View Events
View Events The following procedure helps you view your calendar events. 1. Press and tap Apps > Calendar. 2. Change the calendar view by tapping a View tab, such as Month or Day. 3. Tap the day for which you would like to view events. (Your tablet lists events in chronological order.) 4. To display an event’s details, tap it from the current screen. Delete Events The following procedures show you how to delete your calendar events. 1. Press and tap Apps > Calendar. 2. In any Calendar view, touch and hold the event, then tap Delete event. – or – While viewing the event, tap > Delete. Clock Remind yourself of important events. Create an Alarm 1. Press and tap Apps > Clock. 2. Tap , and then enter information for the alarm. -
Page 78: Dropbox
Dropbox Dropbox works to provide access to your desktop files directly from your tablet. This app allows you to bring your files with you when you're on the go, edit files in your Dropbox from your tablet, upload photos and videos to Dropbox, and share your selected files freely with family and friends. The app works in conjunction with a partner program placed on a target computer using an active Internet connection. Dropbox creates a folder that automatically synchronizes its contents across all of your connected devices on your account. Update a file to your Dropbox on your computer, and it’s automatically updated to the same folder on your other devices. 1. Press and tap Apps > Dropbox. 2. Follow the prompts to set up and use Dropbox. Google Search Use Google Search to search the Internet. Press and tap Apps > Google. Google Settings Use Google Settings to manage your Google apps and account settings. Press and tap Apps > Google Settings. Help Help provides online information to help with your questions. Press and tap Apps > Help. Tools and Calendar... -
Page 79: My Files
My Files My Files allows you to manage your manage sounds, images, videos, Bluetooth files, Android files, and files stored on your tablet, or on an optional installed memory card (not included). You can open a file if the associated app is already on your tablet. 1. Press and tap Apps > My Files. 2. The following folders display: Device storage: View the files saved in your tablet’s internal memory. SD memory card: View all of the files saved to an optional installed memory card (not included). Note: Different folders may appear depending on how your tablet is configured. Remote PC Remotely access and control your computer via the Internet. Visit remotepc.rview.com to learn more. Press and tap Apps > Remote PC. S Voice Your tablet’s S Voice is a voice recognition application used to activate a wide variety of functions on your tablet. This is a natural language recognition application. This goes beyond the Google Search Voice Actions feature that simply recognizes Google commands and search terms. You can ask it questions (Is it raining in Dallas?) or give it commands (Show me where to find cheap gas). 1. Press and tap ... -
Page 80: Sidesync 3.0
SideSync 3.0 SideSync is a PC to Mobile solution that enables the screens, windows, and data to be shared easily between a PC and Samsung Android Device. Press and tap Apps > SideSync 3.0. Sprint ID An ID is a pack of applications and content that you can download to your device. IDs add another set of home screens to your device. You can quickly switch between IDs by tapping the ID button on the Apps screen. 1. Press and tap Apps > Sprint ID. 2. Follow the prompts to download and install additional IDs. Tools and Calendar... -
Page 81: Settings
Settings The following topics provide an overview of items you can change using your tablet’s Settings menus. Wi-Fi Settings Wi-Fi provides wireless Internet access over distances of up to 300 feet. To use your tablet’s Wi-Fi, you need access to a wireless access point or “hotspot.” For more information about using Wi-Fi, see Wi-Fi. 1. Press and then tap Apps > Settings > Connections tab > Wi-Fi. 2. Tap the ON/OFF switch to turn Wi-Fi on. Wi-Fi must be on to configure settings. 3. Tap to configure these settings: Advanced: Network notification: Send a notification when an open Wi-Fi network is available. Passpoint: Connect to passpoint-enabled Wi-Fi networks automatically. Sort by: Choose a sorting order for Wi-Fi networks on the Wi-Fi screen. Keep Wi-Fi on during sleep: Specify when to switch from Wi-Fi to mobile data for data communications, when the tablet goes to sleep (when the backlight goes out). This setting can affect data usage, since the data connection will remain active even when the tablet screen is off. Always allow scanning: Allow Google location service and other apps to scan for networks, even when Wi-Fi is turned off. -
Page 82: Bluetooth Settings
WPN PIN entry: View the PIN used by your tablet to set up a PIN-secured connection to a Wi-Fi router or other equipment. (Not configurable.) Help: Get help using Wi-Fi. Bluetooth Settings Bluetooth is a short-range communications technology that allows you to connect wirelessly to a number of Bluetooth devices, such as headsets and hands-free car kits, and Bluetooth-enabled handhelds, computers, printers, and wireless devices. For more information about using Bluetooth, see Bluetooth. 1. Press and then tap Apps > Settings > Connections tab > Bluetooth. 2. Tap the ON/OFF switch to turn Bluetooth on. Bluetooth must be on to configure settings. 3. From the Bluetooth screen, configure these settings: Tap your tablet’s name to enable or disable visibility to other Bluetooth devices. When your tablet is visible, other devices can find your tablet during a Bluetooth scan. Your tablet remains visible for the period of time set in the Visibility timeout setting. Tap a paired device to connect to it, or tap beside a device to change its settings. Tap for more settings: Visibility timeout: Set the length of time your tablet is visible to other devices when you turn on visibility. Received files: View files transferred to your tablet via Bluetooth. Rename device: Change the name your tablet uses to identify itself when you make ... -
Page 83: Usb Tethering And Bluetooth Tethering
1. Press and then tap Apps > Settings > Connections tab > Hotspot and Tethering > Sprint hotspot. 2. Tap to configure settings: Timeout settings: Turn off Sprint hotspot if there is no connection for a selected time period. LAN settings: Configure your LAN settings. Tap an item to change it. USB Tethering and Bluetooth Tethering Share your device’s Internet connection with a computer that connects to your device using a USB cable or via Bluetooth. 1. Press and then tap Apps > Settings > Connections tab > Hotspot and Tethering. 2. Choose a tethering method: USB tethering: Connect the device to a computer using the USB cable, and then touch USB tethering to turn tethering on. ... -
Page 84: Data Usage
Data Usage Monitor data usage and control your tablet’s connection to mobile data service. Note: Data is measured by your tablet. Your service provider may account for data usage differently. 1. Press and then tap Apps > Settings > Connections tab. 2. Tap Data usage to configure options: Mobile data: Enable or disable Mobile data. You can also control Mobile data via the Notification Panel. Limit mobile data usage: When enabled, your mobile data connection will be disabled when the specified limit is reached. After enabling the setting, drag the red limit line on the graph below to set the data usage limit. Alert me about data usage: When enabled, your tablet will alert you when mobile data usage reaches the warning limit you set. After enabling the setting, drag the orange warning line on the graph below to set the data usage warning limit. Data usage cycle: Tap the menu, and then choose a time period for data usage. Data usage for the period displays on the graph, along with usage by application below. 3. Tap to set options: ... -
Page 85: Location Settings
Location Settings Control apps’ access to your location, and configure location sources. Some apps may require one or more location services be turned on for full app functionality. GPS signals may be affected by your surroundings, including: Buildings Tunnels or underground structures Weather conditions High-voltage or electromagnetic fields Tinted windows 1. Press and then tap Apps > Settings > Connections tab. 2. Tap Location for options: Tap the ON/OFF switch to turn location services on or off. When on, you are allowing Google’s location service to collect anonymous location data. Some data may be stored on your device, and collection may occur even when no apps are running. After you turn Location on, you can configure settings: Mode: Choose the method your device uses to determine your location. High accuracy: When enabled, your device uses GPS information, Wi-Fi, and mobile networks to estimate your location. Power saving: When enabled, your device uses Wi-Fi and mobile networks to estimate your location. GPS only: When enabled, your device only uses GPS information to estimate your location. -
Page 86: More Networks
More Networks The More networks menu provides additional wireless and network options. Mobile Networks Control your tablet’s access to networks, including mobile data service. 1. Press and then tap Apps > Settings > Connections tab. 2. Tap More networks > Mobile networks. 3. Configure options: Mobile data: When enabled, your tablet connects to the mobile data network. Network mode: Choose a preferred network mode. Connections optimizer: When enabled, it helps you manage and enhance your data experience by finding and connecting to remembered Wi-Fi networks on your tablet, and, if applicable, to 4G network service. Set up and manage Virtual Private Networks (VPN). Note: VPN settings include storage of login credentials on your tablet. You must configure a PIN or password screen lock before setting up a VPN. 1. Press and then tap Apps > Settings > Connections tab. 2. Tap More networks > VPN > , and enter your log in information. -
Page 87: Roaming
1. Press and then tap Apps > Settings > Connections tab. 2. Tap More networks > Ethernet. 3. Follow the onscreen instructions to connect to an Ethernet network. Roaming Set options for roaming, network, and APNs. 1. Press and then tap Apps > Settings > Connections tab. 2. Tap More networks > Roaming for options: Tap Roaming network to select a roaming network (Home or Automatic). Tap Roaming settings to enable data roaming (domestic and international). Additional charges may apply. See your service plan for details. Tap Roaming guard to restrict data roaming (domestic and international). Nearby Devices Share files with devices via Wi-Fi, Wi-Fi Direct, or Mobile Hotspot. Note: Use care when enabling file sharing. When enabled, other devices can access data on your tablet. 1. Press and then tap Apps > Settings > Connections tab > Nearby devices. 2. ... -
Page 88: Printing
Printing You can print from your device, via Wi-Fi, to an optional compatible printer (not included). Your device and the optional printer must be connected to the same Wi-Fi network. Turn Print Services On or Off Before you can print from your device, a print service must be turned on. The print service communicates with the printer when you select something to print. 1. Press and then tap Apps > Settings > Connections tab. 2. Tap Printing, and then choose a print service from the list. The Samsung Print Service Plugin is available by default. Additional print services may be downloaded from the Google Play Store. 3. Tap the ON/OFF switch to turn the service on or off. The service must be on to configure settings or print. Add a Printer Before you can print to a printer, you must set it up on your device. You’ll need to know the IP address of the printer; consult the printer’s documentation for this information. 1. Press and then tap Apps > Settings > Connections tab. 2. Tap Printing. 3. Choose a print service from the list, and then tap the ON/OFF switch to turn the service on or off. The service must be on to add a printer. 4. Tap > Add printer > ... -
Page 89: Screen Mirroring
Screen Mirroring With Screen mirroring, you can share your device’s screen with another device, using an optional AllShare Cast accessory (not included). 1. Press and then tap Apps > Settings > Connections tab > Screen Mirroring. 2. Tap the ON/OFF switch to turn Screen mirroring on. 3. Tap an available device and follow the prompts to connect. Sound Settings Use Sound settings to control your tablet’s audio, alerts, and notifications. Sound Mode Set the sound mode to Sound, Vibrate, or Mute mode. 1. Press and then tap Apps > Settings > Device tab. 2. Tap Sound > Sound mode and select Sound, Vibrate, or Mute. Volume You can adjust the volume settings to suit your needs and your environment. Note: You can quickly adjust the volume by pressing the Volume Key. 1. Press and then tap Apps > Settings > Device tab. 2. Tap Sound > Volume. 3. ... -
Page 90: Vibration Intensity
Vibration Intensity Set the level for vibration to accompany notifications, and feedback for your screen touches, also known as haptic feedback. 1. Press and then tap Apps > Settings > Device tab. 2. Tap Sound > Vibration intensity. 3. Drag the sliders to set the vibration intensity for Notifications and Haptic feedback. Notifications Choose a sound for notifications, such as for new messages and event reminders. 1. Press and then tap Apps > Settings > Device tab. 2. Tap Sound > Notifications. 3. Tap a notification sound to select it. When you tap a sound, a sample plays. 4. Tap OK to assign the ringtone. Touch Sounds Tones play when you tap or touch the screen to make selections. 1. Press and then tap Apps > Settings > Device tab. 2. Tap Sound > Touch sounds to enable the option. Screen Lock Sound Play tones when you tap the screen to lock or unlock it. -
Page 91: Haptic Feedback
Haptic Feedback Set the device to vibrate when you tap the Menu and Recent apps keys, and for certain screen interactions. 1. Press and then tap Apps > Settings > Device tab. 2. Tap Sound, and then tap Haptic feedback to enable. Samsung Applications Settings Configure options for selected apps on your device. 1. Press and then tap Apps > Settings > Device tab. 2. Tap Sound, and then tap each app for options: Email: Configure email sounds. Calendar: Configure calendar sounds. Samsung Keyboard Settings You can choose whether sounds play or the device vibrates when you tap keys on the Samsung Keyboard while entering text. 1. Press and then tap Apps > Settings > Device tab. 2. Tap Sound > Sound when tapped to enable the option. -
Page 92: Brightness
1. Press and then tap Apps > Settings > Device tab. 2. Tap Display > Font for options: Font style: Choose a font style. Tap Download to access new fonts in the Google Play Store. Font size: Choose a text size. Brightness Adjust your screen’s brightness to suit your surroundings. 1. Press and then tap Apps > Settings > Device tab. 2. Tap Display > Brightness. 3. Tap and drag the Brightness level slider to manually adjust the screen brightness, or tap Automatic brightness. Screen Rotation Rotate the screen display whenever the device is rotated. In addition, the Smart rotation feature can use the front camera to rotate the screen based on the orientation of your face. 1. Press and then tap Apps > Settings > Device tab. 2. Tap Display > Screen rotation. 3. ... -
Page 93: Screen Mode
1. Press and then tap Apps > Settings > Device tab. 2. Tap Display > Screen timeout, and then tap a time setting. Screen Mode Choose a screen mode to match your type of viewing. You can choose to have the device automatically adapt the display depending on the type of image being displayed, and other criteria such as battery level. 1. Press and then tap Apps > Settings > Device tab. 2. Tap Display > Screen mode, and then choose a screen mode. To have your device automatically optimize the display to match the type of image being displayed and other criteria, such as battery level, tap Adaptive display. To choose a specify type of display, enable AMOLED cinema, AMOLED photo, or Basic. Reading Mode Optimize the screen for reading with selected applications. 1. Press and then tap Apps > Settings > Device tab. 2. Tap Display > Reading mode. 3. Tap the ON/OFF switch to enable. 4. ... -
Page 94: Touch Key Light Duration
1. Press and then tap Apps > Settings > Device tab. 2. Tap Display > Daydream. 3. Tap the ON/OFF switch to turn Daydream on. 4. Tap each setting for options: Colors: Display colorful screens. Desk home screen: Customize the screen when the tablet when using a docking station (not included). Tap for o ptions. Flipboard: Display content from Flipboard. Tap for options. Google Photos: Display pictures from your Google+ Photos account. Tap to choose pictures. Photo frame: Display pictures in a photo frame. Tap to choose pictures. Photo table: Display pictures in a grid. Tap to choose pictures. Tap Preview to view your Daydream settings. Touch Key Light Duration Set the length of time the Recent apps key and Back key remain lit after you tap them. -
Page 95: Lock Screen
1. Press and then tap Apps > Settings > Device tab. 2. Tap Wallpaper, and then tap a screen to customize: Home screen, Lock screen, or Home and lock screens. 3. Tap an image to preview it, and then tap Set wallpaper. Tap More images for additional wallpapers. Lock Screen Configure settings for locking the screen to improve security. 1. Press and then tap Apps > Settings > Device tab. 2. Tap Lock screen > Screen lock to select a new screen lock. Then configure the options for that screen lock. Swipe: Unlock the tablet by swiping your finger across the screen. This is the default screen lock, and offers no security. Lock screen card: Display up-to-date information on your lock screen. Clock widget options: Customize your clock. Shortcuts: Select application shortcuts to display on your Lock screen. - Page 96 Lock instantly with power key: Pressing the Power/Lock key locks the screen instantly. PIN: Enter a numeric PIN (Personal Identification Number) to unlock the tablet. Lock screen card: Display up-to-date information on your lock screen. Clock widget options: Customize your clock. Owner information: Display the device’s owner information on the Lock screen. Lock automatically: Choose whether the screen will lock automatically immediately after the screen turns off (dims), or choose a time interval to delay locking. During the time interval, your device will still be unlocked, but the screen will be dim. Lock instantly with power key: Pressing the Power/Lock key locks the screen instantly. Password: Enter an alphanumeric password to unlock the tablet. Lock screen card: Display up-to-date information on your lock screen. Clock widget options: Customize your clock. ...
-
Page 97: Multi Window
Multi Window Multi window allows you to use two apps on the same screen, in separate, resizable windows. Tip: You can also turn Multi window on and off through the Notifications panel. Drag the Notifications panel down and tap the Multi window Quick settings button. 1. Press and then tap Apps > Settings > Device tab. 2. Tap the ON/OFF switch to turn Multi window on. Tap Open in multi window view to automatically view content in Multi window when you open files from My Files or Video, or attachments from emails in full screen mode. Notification Panel Customize the Notification panel. 1. Press and then tap Apps > Settings > Device tab. 2. Tap Notification panel for options: Brightness and volume: Display screen brightness and volume controls on the Notification panel. Recommended applications: Display a selection of app shortcuts on the Notification panel according to your actions. For example, when you connect a headset, Music and other ... -
Page 98: Motions
Tap the ON/OFF switch to turn Toolbox on or off. Toolbox must be turned on to configure settings. Tap Edit to choose up to five apps to display in Toolbox. Use the Toolbox When Toolbox is turned on, you can use these options: 1. Press and then tap Apps > Settings > Device tab. 2. Tap Toolbox. To access a toolbox app, tap Toolbox , and then tap the app you want to run. To reposition Toolbox, touch and hold on Toolbox, and then drag it to another position on the screen. To turn Toolbox off, touch and hold on Toolbox, and then drag it to the Delete icon. To quickly access Toolbox settings, touch and hold on Toolbox, and then drag it to the Edit icon. Motions Use your palm and side of your hand to control your device. 1. Press and tap Apps > Settings > Device tab. 2. Tap Motions for options. Tap the ON/OFF switch to turn each option on. ... - Page 99 Text-to-speech options: Configure options for converting text to speech. For more information, see Text-to-speech Options. Hearing Flash notification: Set your camera light to blink whenever you receive a notification. Turn off all sounds: Mute every sound made by the tablet during touches, selections, notifications, etc. Samsung subtitles (CC): Display Samsung subtitles where available. Tap the ON/OFF switch to turn the feature on, and then tap Samsung subtitles to configure options. Google subtitles (CC): Display Google subtitles where available. Tap the ON/OFF switch to turn the feature on, and then tap Google subtitles to configure options. Sound balance: Control the signal sent to the left and right when using earphones. Mono audio: Compress stereo audio into a single mono audio stream for use with a single earphone. Dexterity and interaction...
-
Page 100: Blocking Mode
Assistant menu: Improve device accessibility by providing quick access to a menu of important functions. Tap the ON/OFF switch to turn the feature on, and then tap Assistant menu for options. Press and hold delay: Choose how long your tablet waits during a touch and hold gesture on the screen, before continuing with the touch and hold action. Interaction control: Set options for controlling tap and other device interactions. Tap the ON/OFF switch to turn the option on, and then tap Interaction control for options. Direct Access: Open your accessibility settings by pressing the Home Key three times in quick succession. Notification reminder: Beep at set intervals to remind you of any unread notifications. Single tap mode: Tap to stop/snooze alarms and calendar events. Manage accessibility: Save your accessibility settings to a file, import settings from a file, or share your settings with another device. Blocking Mode When Blocking mode is enabled, notifications for selected features are blocked, and you only receive the notifications you choose. You can choose to block notifications by feature or contact, and choose blocking all the time, or during a specific time period. 1. Press and then tap Apps > ... -
Page 101: Private Mode
tablet settings such as Wi-Fi that affect everyone. To use the device with a user profile, select a profile at the top of the locked screen. There are two types of user accounts: Users: Allow the user to access their own apps and content. Restricted profile: Allow the user limited access to apps and content. Add a New User 1. Press and tap Apps > Settings > Device tab. 2. Tap Users. 3. Tap , and then choose User or Restricted profile. If the new user is able to set up their space now, tap Set up now. (Tapping Not now will create an empty user account which can be modified later.) Follow the prompts to set up the tablet with the new user’s preferences. The photo and name each user uses in their personal Contact entry (listed under ME at the top of their Contacts list) is used as their User ID and name. To change their ID photo and name, each user much edit their personal Contact entry. For more information, see Edit a Contact. Delete a User Only the device owner can delete other user accounts. -
Page 102: Fingerprint Scanner
Use fingerprint recognition as an alternative to entering passwords in certain apps. 1. Press and tap Apps > Settings > Device tab. 2. Tap Fingerprint Scanner for options: Fingerprint manager: Register additional fingerprints. Change alternative password: Modify the password you set to back up your fingerprints. Screen lock: Select a screen lock. Verify Samsung account: Choose to verify your identity using your fingerprints when logging in to your Samsung account. Accounts Settings When you set up accounts on your tablet, such as your Google or Samsung accounts, email or social networking accounts, you can synchronize account information between your tablet and the account. Types of information you can synchronize include contacts, pictures, videos, and other types of files. Add an Account Add an account to your tablet to share information between your tablet and the account. 1. Press and tap Apps > Settings > General tab. 2. Tap Accounts > ... -
Page 103: Cloud
Cloud Back up your personal data using your Samsung account or Dropbox account. Use Your Samsung Account Use your Samsung account to back up your personal data. 1. Press and tap Apps > Settings > General tab. 2. Tap Cloud. 3. Tap Add Samsung account to manage your sync settings and backup options. Use Your Dropbox Account User your Dropbox account to back up your data. For more information, visit dropbox.com. 1. Press and tap Apps > Settings > General tab. 2. Tap Cloud. 3. Tap Link Dropbox account to manage your sync settings and backup options. Back Up and Reset Settings Set up a backup account on your tablet to save information from your tablet to the account, and ... -
Page 104: Language And Input Settings
Settings > General tab > Language and input. 2. Tap Default to select a text entry method. Note: You can change the input method while you’re entering text. Swipe your finger down from the status bar to display Notifications, and then tap Select input method. Samsung Keyboard The Samsung Keyboard is an on-screen QWERTY keyboard, so you can enter text by “typing” on the keyboard. Samsung keyboard is enabled by default, and you can choose options for using it. 1. Press and tap Apps > Settings > General tab > Language and input. 2. Tap next to Samsung keyboard to configure these options: Select input languages: Choose language(s) for use with Samsung keyboard. When you have more than one language enabled, you can slide your finger on the space bar while entering text to switch languages. Predictive text: Predictive text suggests words matching your text entries, and optionally, complete common words automatically. Tap the ON/OFF switch to turn predictive text on. Tap Predictive text to configure options: Settings... - Page 105 Live word update: When enabled, Samsung keyboard automatically updates with popular new words every day. Personalized data: When enabled, predictive text uses personal language data you have entered to make better predictions. Learn from Facebook: Log into Facebook to allow your tablet to learn your Facebook style. Learn from Gmail: Log into Gmail to allow your tablet to learn from your Gmail email. Learn from Twitter: Log into Twitter to allow your tablet to learn from your Twitter postings. Learn from Contacts: Allow your tablet to learn from your Contacts entries. Clear server data: Remove all anonymous data stored on the personalization server. Clear personal data: Remove all personalized data you have entered. Privacy policy: View information about privacy policies for personalization. Auto replacement: Complete or replace the word you are typing with the most probable ...
-
Page 106: Swype Settings
More settings: Reset settings: Return settings to the defaults. Swype Settings Swype is a new way to enter text on touchscreens. Instead of tapping each key individually, use your finger to trace over the letters of a word. For each word, place your finger on the first letter and glide to the subsequent letters, lifting on the last letter. 1. Press and tap Apps > Settings > General tab > Language and input. 2. Tap next to Swype to configure these options: Settings: Set Swype options: Vibrate on keypress: When enabled, the device vibrates for your Swype touches. Sound on keypress: When enabled, the device plays sounds for your Swype touches. Pop-up on keypress: When enabled, the characters display briefly as you tap keys. Long-press delay: Choose a period for the keyboard to wait before interpreting a touch as a press and hold. -
Page 107: Google Voice Typing
Living Language: When enabled, Swype will automatically update with popular new words. Social integration: Log into your favorite social networking sites to use your entries there to update Swype, Edit my dictionary: Modify words added to Swype. Clear language data: Delete all the words you’ve added to the Swype dictionary. Contribute usage data: Allow Nuance to collect usage data to provide better text prediction. Cellular data: When enabled, Swype can use your device’s connection to the wireless data network for updates, language downloads, and other Swype Connect features. Languages: Choose the current language for Swype, and download new languages to use with Swype. Gestures: Learn about shortcuts you can use on the keyboard to quickly accomplish common tasks. Help: Learn about using Swype. How to Swype: Learn about using Swype. Show helpful tips: When enabled, tips display on the screen as you enter text. ... -
Page 108: Voice Search
Bluetooth headset: Record audio through a Bluetooth headset (not included). Text-to-Speech Options Text-to-speech (TTS) provides audible readout of text. 1. Press and tap Apps > Settings > General tab > Language and input. 2. Tap Text-to-speech options to configure: Preferred TTS engine: Select Samsung text-to-speech engine, or Google Text-to- speech Engine. Tap to configure options. Speech rate: Choose a rate for text readouts. Listen to an example: Play an example of speech used for readouts. Default language status: View how fully supported the default language is. Pointer Speed Adjust the speed of the pointer, when you use your finger to enter text. -
Page 109: Date And Time Settings
1. Press and tap Apps > Settings > General tab > Language and input. 2. Tap Pointer speed, and then drag the slider to set the pointer speed. Date and Time Settings Your tablet obtains its time and date information by using the network-provided date, time, and time zone. These values can be manually altered. 1. Press and tap Apps > Settings > General tab. 2. Tap Date and time for options: Automatic date and time: Receive date and time updates from the network. Set date: Enter the current date (only available when Automatic date and time is disabled). Set time: Enter the current time (only available when the Automatic setting is disabled). Automatic time zone: Receive the current time zone from the network. ... -
Page 110: Power Saving Mode
When the battery level becomes critically low, the tablet plays a tone, displays a critical charge icon in the Status bar. If you continue using the tablet without charging, the tablet will turn off automatically when the charge level becomes too low to continue operating. Use the battery settings menu to view apps or processes that are using battery power. 1. Press and tap Apps > Settings > General tab. 2. Tap Battery for options: Tap Show battery percentage to display the percentage of total battery power available on the battery icon in the Status bar. Tap an item for more information, or to configure options for managing power use Power Saving Mode Configure Power saving mode settings to conserve battery power. Power Saving Mode This mode limits basic services to save battery power. 1. Press and tap Apps > Settings > General tab. 2. Tap Power saving for options: Tap ON/OFF to turn Power saving mode on Restrict background data: Do not allow content to be downloaded form the Internet or Google Play Store, View streaming multimedia, or send/receive multimedia messages. -
Page 111: Storage
Storage Manage the use of memory resources in your tablet’s memory, and on an optional installed memory card (not included). 1. Press and tap Apps > Settings > General tab. 2. Tap Storage to view information about memory usage, and for other options: Device memory: View memory usage for the different types of information stored on your tablet’s memory. Tap an item for more information. SD card: View memory usage for the different types of information stored on an optional installed memory card (not included). Total space: Display the total amount of usable space on the memory card. This option is only available if an optional memory card is installed and mounted. Available space: Display the amount of free space on the memory card. This option is only available if an optional memory card is installed and mounted. Mount SD card: Prepare the memory card for use as storage in the tablet. This option is only available if an memory card is installed, and is not already mounted. Normally, your tablet mounts a memory card as soon as you install it. Unmount SD card: Prepare an installed memory card for safe removal or formatting. Format SD card: Permanently remove all content from an installed memory card. After formatting, the content cannot be retrieved. -
Page 112: Make Passwords Visible
Before Encrypting Your Tablet Important: Charge the battery to at least 80%, and plug the tablet into the charger to ensure that the battery remains charged. Note: Set a Screen lock password of at least 6 characters, including at least one number. 1. Press and tap Apps > Settings > General tab. 2. Tap Security for options: Tap Encrypt device to encrypt data stored in your tablet’s internal memory. Tap Encrypt external SD card to encrypt data stored on an optional memory card (not included). Make Passwords Visible Display password characters briefly as you enter them. 1. Press and tap Apps > Settings > General tab. 2. Tap Security > Make passwords visible to enable the option. Device Administration Some applications, such as Corporate email, may require you allow access to your tablet by device administrators in certain circumstances, such as if your tablet is lost or stolen. These applications enforce remote or local device security policies. Some of the features a device ... -
Page 113: Security Update Service
Security Policy Updates You can keep your security policies up to date by updating security policies often. You can set options for automatic updates, to ensure your device always receives the latest updates. 1. Press and tap Apps > Settings > General tab. 2. Tap Security > Security policy updates to configure options: Automatic updates: When enabled, your device will automatically update security policies when it is connected to preferred networks. Use the Preferred networks setting to specify networks your device will consider as preferred. Preferred networks: Choose Wi-Fi networks only to restrict your device to only updating security policies when it’s connected to a Wi-Fi network. Choose Wi-Fi or mobile networks to allow your device to update security policies any time it’s connected to Wi-Fi, or to the wireless network. Depending on your service plan, updating the security policies over the wireless network may result in additional charges for downloading the policy data. Check for updates: Check for and install available security policy updates. Send Security Reports Your device can send security reports to Samsung, to assist in keeping security policies up to date. If you enable this option, security reports are only sent when your device is connected to a Wi-Fi network. Settings... -
Page 114: Credential Storage
1. Press and tap Apps > Settings > General tab. 2. Tap Security > Send security reports to enable the option. When enabled, your device will automatically send security reports to Samsung when it’s connected to Wi-Fi. Credential Storage You can install credentials from an optional installed memory card (not included), and use the Credential storage settings to allow applications to access the security certificates and other credentials. 1. Press and tap Apps > Settings > General tab. 2. Tap Security for options: Storage type: Select a storage type for credentials. Trusted credentials: Display a list of credentials you’ve installed. Install from device storage: Install encrypted certificates from an optional installed memory card (not included). Clear credentials: Remove stored credentials and reset the password (only available when credentials are installed). Activate This Device Connect to the network and activate your tablet. If your tablet is already activated, use this option to ... -
Page 115: About Device
Apps > Settings > General tab. 2. Tap About device, and then tap items for more details: Software version: View the tablet’s software version. Hardware version: View the tablet’s hardware version. Status: View information about your tablet’s current status. Legal information: Display open source licenses, Google legal information, Samsung legal information, and Privacy Alert. Report diagnostic info: Improve the quality and performance of Samsung products and services by providing diagnostic and usage data. Device name: View or edit your tablet’s name. Model number: View your tablet’s model number. Android version: View the firmware version of your tablet. Baseband version: View the baseband version of your tablet. Kernel version: View the kernel version of your tablet. Build number: View the build number of your tablet. -
Page 116: Application Manager
Application Manager You can download and install applications from the Google Play Store or Samsung Apps and install them on your tablet. Use Application manager to manage applications on your tablet. Warning! Because this tablet can be configured with system software not provided by or supported by Google or any other company, end-users operate these devices at their own risk. Manage Applications Use the Application manager menu to quickly erase selected content and uninstall third-party applications stored in your tablet. 1. Press and tap Apps > Settings > Applications tab. 2. Tap Application manager. 3. Tap the Downloaded tab, SD Card tab, Running tab, or All tab to view the status of apps and services. Tap an app or service for more information, and for app options such as stopping and uninstalling. Running Services This service efficiently manages power consumption and processor/memory resources. Processes can be stopped until the tablet is restarted. 1. Press and tap Apps > Settings > Applications tab. 2. Tap Application manager. -
Page 117: Memory Use
Memory Use View storage used by currently running applications. 1. Press and tap Apps > Settings > Applications tab. 2. Tap Application manager. 3. The bottom of the screen displays the amount of RAM used by all running services. Default Applications If you have installed multiple apps that perform the same kind of task, you can choose the app you want to use as the default. 1. Press and tap Apps > Settings > Applications tab. 2. Tap Default applications to configure options: Home: Choose a default home screen mode. This option is available if you have more than one home screen configuration installed. Settings... -
Page 118: Copyright Information
Copyright Information ©2014 Samsung Telecommunications America, LLC. ©2014 Sprint. Sprint and the logo are trademarks of Sprint. Other marks are trademarks of their respective owners. The actual available capacity of the internal memory is less than the specified capacity because the operating system and default applications occupy part of the memory. The available capacity may change when you upgrade the device. Copyright Information... -
Page 119: Index
Index Lumen Toolbar 46 Businessweek+ 38 4G 47 Calculator 67 About Device 107 Calendar 67 Accessibility Settings 90 Add Event 67 Account Add Task 68 Add 94 Delete Events 69 Accounts 31 View Events 69 Email 33 Camera 6, 58 Gmail 31 Settings 59 Google 31 Viewing Pictures 61 Social Network 36 Chrome 46 Accounts and Sync 94 Clock 69 Activation 3, 106 Cloud 95 Airplane Mode 75 Contacts 26 Alarm and Timer 69 Accessing 26 Allowed Device List 51 Add 26 Application Manager 108 Add or Edit Information 27 Apps 38 Add to Your Favorites 28 Auto Adjust Screen Mode 85 Assign a Photo 27 Basics 26 Delete 28 Edit 27 Back Key 6... - Page 120 Hangouts 37 Ethernet 78 Haptic Feedback 83 Evernote 38 Headset Jack 6 Help 70 Home Key 6 Home Screen 11 Features 20 Manage 12 Fingerprint Scanner 94 Shortcuts 11 Flick 10 Wallpapers 13 Flipbook 38 Widgets 12 Front camera 6 Hotspot 50 Hotspot and Tethering 74 Gallery 61 Edit Photos 63 Increase Touch Sensitivity 86 Sharing Photos and Videos 64 Infrared Transmitter 6 View Photos and Videos 62 Internet 46 Zooming 63 Gestures 8 Gmail 31 Read and Reply to Messages 32 Key Functions 6 Send Message 32 Keyboard 98 Google Samsung 96, 98 Gmail 31 Touchscreen 21 Google+ 36 Hangouts 37 Index...
- Page 121 Predictive Text 23 Display 18 Printing 80 Enable 18 Private Mode 93 Settings 89 Use 18 Multi Window Apps Quick Connect 16 Customize 19 Quick Settings 16 Music Google Play Music 41 Music Player 42 Reading Mode 85 Music Player 42 Recent Apps My Files (App) 71 Accessing 14 Remote PC 71 Roaming 79 Navigation Rotate 11 Maps 42 Running Services 108 Nearby Devices 79 Notification Icons 14 Notification Panel 15 S Finder 16 Quick Connect 16 S Voice 71 Quick Settings 16 Samsung Account S Finder 16 Use 95 Settings 89 Samsung Applications Settings 83 NYTimes 42 Samsung Apps 43 Index...
- Page 122 Samsung Keyboard 98 Haptic Feedback 83 Predictive Text 23 Hotspot and Tethering 74 Settings 96 Increase Touch Sensitivity 86 Using 22 Language and Input 96 Samsung Keyboard Settings 83 Location 77 Screen Mobile Networks 78 Turn Off 7 More Settings 78 Turn On 8 Motions 90 Screen Capture 20 Multi Window 89 Screen Lock 55 Nearby Devices 79 Screen Lock Settings 87 Notification Panel 89 Screen Lock Sound 82 Pointer Speed 100 Screen Mirroring 81 Power Saving Mode 102 Screen Mode 85 Reading Mode 85 Screen Rotation 84 Roaming 79 Screen Timeout 84 Samsung Keyboard 96 Search (Google) 70 Screen Lock 87 Security Screen Lock Sound 82 Screen Lock 87 Screen Mirroring 81 Settings 103 Screen Mode 85 Security Update Service 105...
- Page 123 Social Networking 31 Turn Device On and Off 3 Sound Turn Tablet Off 7 Settings 81 Turn Tablet On 7 Sound Mode 81 Typing 21 Speaker 7 Spread and Pinch 11 Sprint 3G and 4G 47 Ultra Power Saving Mode 102 Sprint Hotspot 50 Uninstall an App 40 Connect a Device 50 USB Charger/Accessory Port 7 Settings 74 USB Tethering 75 Turn On or Off 50 Users Sprint Hotspot Settings 51 Settings 92 Sprint ID 72 Sprint Music Plus 43 Sprint Zone 44 Vibration Intensity Setting 82 Status Bar 13 Video Status Icons 13 Record 59 Storage Sharing 64 Settings 103 Video Player 66 Swipe 9 Voice Search Swype 23 Settings 100 System Update 106 Voice Typing Using 22 Volume 81 Tablet...
- Page 124 Zoom 11 Index...