
Related Manuals for Eaton PXG600E


Summary of Contents for Eaton PXG600E
- Page 1 User & Installation Manual IM02603003E Rev. 5.03:3835 May 2012 Power Xpert Gateway 600E...
- Page 2 We reserve the right to make any change at any time. Power Xpert, PowerChain Management, Eaton Electrical trademark and Eaton Electrical (EMBLEM) are federally registered trademarks of Eaton Corporation in the U.S. and other countries. Please note that the screen shots shown in this manual are typical for the firmware that was current at the time this manual was published.
-
Page 3: Product Registration
Product Model or Version Number: _____________________________ Product Serial or License Number: ______________________________ Company: _____________________________________________________ Your Name: ___________________________________________________ Address 1: ____________________________________________________ Address 2: ____________________________________________________ City: __________________________________ State: _____ Zip:________ Email: ________________________________________________________ Today’s Date: __________________________________________________ Phone: ________________________________________________________ Eaton GO Number (if known) ___________________________________... - Page 4 This Page Intentionally Left Blank EATON PXG600E User Manual • IM02603003E Rev 5, 11-May-2012 • Firmware Version 5.03:3835...
-
Page 5: Table Of Contents
PXG600E Theory of Operation ........ - Page 6 PXG600E Configuration Web Page ........
- Page 7 Accessing the PXG600E Bus Device Web Page ........
- Page 8 Accessing the PXG600E from Eaton Software Products ........
- Page 9 Appendix F: Glossary........... EATON PXG600E User Manual • IM02603003E Rev 5, 11-May-2012 • Firmware Version 5.03:3835...
- Page 10 TABLE OF CONTENTS RETURN This Page Intentionally Left Blank EATON PXG600E User Manual • IM02603003E Rev 5, 11-May-2012 • Firmware Version 5.03:3835...
-
Page 11: Safety Precautions
FAILURE TO GROUND THE PXG600E MAY RESULT IN INJURY, DEATH OR EQUIPMENT DAMAGE. Properly ground the PXG600E during installation. EATON PXG600E User Manual • IM02603003E Rev 5, 11-May-2012 • Firmware Version 5.03:3835... - Page 12 CHAPTER 1- SAFETY PRECAUTIONS RETURN This Page Intentionally Left Blank EATON PXG600E User Manual • IM02603003E Rev 5, 11-May-2012 • Firmware Version 5.03:3835...
-
Page 13: Technical Data
Regulatory and Standards Compliance Subpart B, Sections 15.107b and 15.109b • EN55022: 1994 Class A, Information Technology Equipment • EN 61000-6-2:2001 Electromagnetic Compatibility (EMC) Party 6-2: Immunity for Industrial Environments EATON PXG600E User Manual • IM02603003E Rev 5, 11-May-2012 • Firmware Version 5.03:3835... -
Page 14: Mac Address For Pxg600E
CHAPTER 2 - TECHNICAL DATA RETURN MAC Address for PXG600E Each PXG600E has a label affixed to the top. The MAC address for the PXG600E is noted on the label. Note the MAC address here for your convenience. MAC Address Serial Number for PXG600E Each PXG600E has a label affixed to the top. -
Page 15: Com1 And Com2A Rs-485 Connection Chart
Refer to the TD17513 wiring specifications for B (+) the actual device marking for the “B (+ Wire). ” * QCPort designators as shown on D77-QPLR terminator module. EATON PXG600E User Manual • IM02603003E Rev 5, 11-May-2012 • Firmware Version 5.03:3835... -
Page 16: Com2B Rs-232 Connection Chart
Receive Pin 2 Pin 3 Signal Ground Pin 5 Pin 5 The pinout for the COM2B connector on the PXG600E is shown in Figure PXG600E_002 Figure 1 EATON PXG600E User Manual • IM02603003E Rev 5, 11-May-2012 • Firmware Version 5.03:3835... -
Page 17: Pxg600E Kit Contents
DIN rail adapter mounting hardware kit. • 0.5 x 3 mm (0.02 x 0.12 in) (thickness x width) Flathead Screwdriver - Required for the Phoenix wiring connectors. EATON PXG600E User Manual • IM02603003E Rev 5, 11-May-2012 • Firmware Version 5.03:3835... - Page 18 CHAPTER 2 - TECHNICAL DATA RETURN This Page Intentionally Left Blank EATON PXG600E User Manual • IM02603003E Rev 5, 11-May-2012 • Firmware Version 5.03:3835...
-
Page 19: Introduction
Eaton Power Xpert Architecture is comprised of both software and hardware components including meters, gateways and connectivity devices. EATON PXG600E User Manual • IM02603003E Rev 5, 11-May-2012 • Firmware Version 5.03:3835... -
Page 20: Power Monitoring In A Networked World
As an integral part of the Eaton Power Xpert Architecture, which provides end-to-end power system management, the PXG600E provides a central point to connect up to 96 devices to the Ethernet network. The gateway may be used as a standalone device to view one system or location, or it can be easily integrated into a large, multi-location system. -
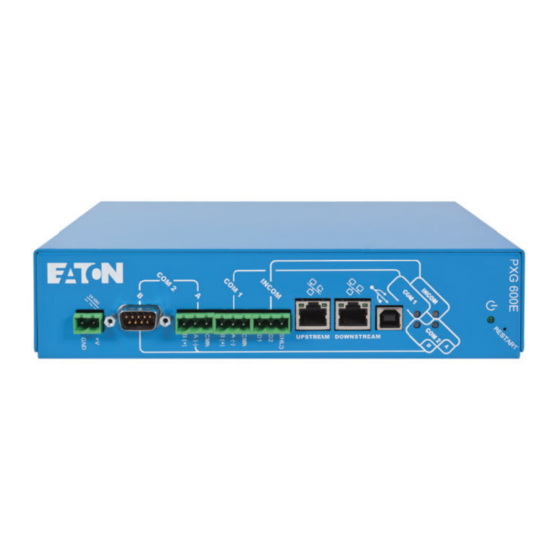
Page 21: Pxg600E Overview
COM1 / INCOM / COM2A / COM2B traffic indicator. If indicator does not blink it means that no devices have been entered into the PXG600E device list for this port. If indicator blinks green it means that devices entered into the PXG600E device list are connected, but not responding, or the physical connection is intermittent. - Page 22 CHAPTER 4 - PXG600E OVERVIEW RETURN This Page Intentionally Left Blank EATON PXG600E User Manual • IM02603003E Rev 5, 11-May-2012 • Firmware Version 5.03:3835...
-
Page 23: Pxg600E Theory Of Operation
This section explains how the PXG600E works and provides information that will help you configure, install and integrate the product successfully. The PXG600E allows you to access and view data from multiple devices on a mix of downstream industrial networks via multiple clients on an Ethernet Local Area Network (LAN). -
Page 24: Supported Downstream Networks
The PXG600E can simultaneously support INCOM, QCPort and Modbus RTU networks. The COM1 and COM2 networks must be configured during set-up to support either QCPort or Modbus RTU. The PXG600E can support a total of 96 devices at a time between the three ports. Individual port limits: •... -
Page 25: Supported Downstream Devices
Integration on page 169. The PXG600E can support multiple types of clients accessing the data at the same time such as looking at the data via a web browser while exchanging data with the Power Xpert Software. The PXG600E can also support multiple instances of a type of client, such as accessing data via two web browsers at the same time. -
Page 26: Connecting A Pxg600E To The Ethernet Lan
NOT have anything to do with devices that are connected “downstream” to the PXG600E via the serial Modbus or INCOM networks. Two 10/100 Base T, RJ-45 connectors are provided on each PXG600E. One is labeled “Upstream” (Figure 4, A) and the other is labeled “Downstream”... -
Page 27: Home Page
PXG600E. Figure 5 shows the three levels of data display. Home Page Buses Page Device Pages (Up to 96 Device Pages) PXG600E_263 Figure 5 EATON PXG600E User Manual • IM02603003E Rev 5, 11-May-2012 • Firmware Version 5.03:3835... -
Page 28: Home Web Page
PXG. If you rollover the offline indicator, it will display how many connected devices are currently offline. • No Devices (gray) - there are no devices configured EATON PXG600E User Manual • IM02603003E Rev 5, 11-May-2012 • Firmware Version 5.03:3835... -
Page 29: Buses Page
The key parameters that are reported on the Buses page differ depending on the type of device. In this example, power meters are connected to the PXG600E, and the currents and percent current capacity are “bubbled up” to the Buses screen. -
Page 30: Accessing The Pxg600E On The Ethernet Lan
205. Configuring the PXG600E via the USB You can also configure the PXG600E by connecting it through its USB port. When you connect your Windows computer to the USB port, you will be able to access the same web interface that you can see from the LAN. This can be useful in cases where the address on the LAN is not known, or when a LAN port connection is not available. -
Page 31: Pxg Real Time Clock
INCOM devices to the real time clock in the PXG600E. The list of devices that support this feature can be found on the PXG600E device data map. Please refer to the device data map at www.eaton.com/pxg. -
Page 32: Device Events
Device Configuration Tabs The PXG600E allows more flexibility in how you set up and configure your devices. Use the tabs during device configuration to set up your PXG600E and devices to better suit your needs: •... -
Page 33: Security
NOTICE: To ensure the security of your system, use the SSL connection to the PXG600E web UI by entering HTTPS://192.168.1.1 (if using default IP address) in your web browser. EATON PXG600E User Manual • IM02603003E Rev 5, 11-May-2012 • Firmware Version 5.03:3835... -
Page 34: Access Control / Trusted Host List
Modbus TCP data access. The PXG600E provides the ability to turn off all access to Modbus TCP even when you have allowed access to trusted hosts or open access to the other protocols listed in the previous section. -
Page 35: Installation Of Pxg600E
Ø0.187 (6) 0.560 0.800 4.300 2.750 3.230 1.375 0.240 0.750 0.510 1.025 0.250 0.600 PXG600E_009 Figure 10 Example of PXG600E Mounted with Low Profile Mounting Hardware (Optional) EATON PXG600E User Manual • IM02603003E Rev 5, 11-May-2012 • Firmware Version 5.03:3835... - Page 36 (Can be used in conjunction with Standard or Low Profile Mounting Hardware) Figure 12 shows a typical installation using a combination of the standard panel mounting hardware and the DIN rail adapter. PXG600E_260 Figure 12 EATON PXG600E User Manual • IM02603003E Rev 5, 11-May-2012 • Firmware Version 5.03:3835...
-
Page 37: Grounding The Pxg600E
Refer to the TD17513 wiring specifications for B (+) the actual device marking for the “B (+ Wire). ” * QCPort designators as shown on D77-QPLR terminator module. EATON PXG600E User Manual • IM02603003E Rev 5, 11-May-2012 • Firmware Version 5.03:3835... -
Page 38: Com2B Rs-232 Connection Chart
Receive Pin 2 Pin 3 Signal Ground Pin 5 Pin 5 The pinout for the COM2B connector on the PXG600E is shown in Figure PXG600E_013 Figure 14 EATON PXG600E User Manual • IM02603003E Rev 5, 11-May-2012 • Firmware Version 5.03:3835... -
Page 39: Wiring Connections
/ or (Figure 15, I) COM2 port of the PXG600E to the Modbus RTU and / or QCPort network that includes the desired “downstream” devices. For more information on wiring a Modbus RTU or QCPort network see www.eaton.com/pxg. NOTICE: Observe connection polarity. See the information on... - Page 40 CHAPTER 6 - INSTALLATION OF PXG600E RETURN This Page Intentionally Left Blank EATON PXG600E User Manual • IM02603003E Rev 5, 11-May-2012 • Firmware Version 5.03:3835...
-
Page 41: Accessing The Pxg600E
It is recommended that you use the USB connection only for initial device configuration and validation of the PXG600E. Use this procedure to connect the PXG600E USB port to a USB port on your Windows computer and login. Note that you can also login to the PXG600E by using the Ethernet LAN port on the PXG600E. - Page 42 Enter the login and click OK. PXG600E_018 Figure 19 The home web page should appear. See a description of the home web page in PXG600E Home Web Page Details on page 150. EATON PXG600E User Manual • IM02603003E Rev 5, 11-May-2012 • Firmware Version 5.03:3835...
-
Page 43: Using An Ethernet Lan Connection
Review the requirements for configuring the Ethernet LAN in Connecting to an Ethernet LAN on page 205. Connect one end of an Ethernet LAN cable to the PXG600E Ethernet LAN port (Figure 20, A) and the other end to an empty Ethernet LAN port on the network or on your computer. - Page 44 NOTICE: To establish a secure connection, you must install the root certificate for the PXG600E. Refer to the procedures listed in the Root Certificate Authority Installation on page 207. EATON PXG600E User Manual • IM02603003E Rev 5, 11-May-2012 • Firmware Version 5.03:3835...
- Page 45 Enter the login and click OK. PXG600E_021 Figure 22 The home web page should appear. See a description of the home web page in PXG600E Home Web Page Details on page 150. EATON PXG600E User Manual • IM02603003E Rev 5, 11-May-2012 • Firmware Version 5.03:3835...
- Page 46 CHAPTER 7 - ACCESSING THE PXG600E RETURN This Page Intentionally Left Blank EATON PXG600E User Manual • IM02603003E Rev 5, 11-May-2012 • Firmware Version 5.03:3835...
-
Page 47: Pxg600E Configuration Web Page
Figure 23. The device list displays a list of all of the Mains that are configured by the PXG600E and a list of all of the Bus Devices that are configured for each Main. Accessing the PXG600E Configuration Web Page... -
Page 48: Pxg600E Configuration Web Page Links
INCOM • COM1 • COM2 Application Servers • Modbus TCP • Access Control • SNMP • Email • BACnet/IP Time Settings • Date/Time Diagnostics • Device Logs EATON PXG600E User Manual • IM02603003E Rev 5, 11-May-2012 • Firmware Version 5.03:3835... -
Page 49: Common Pxg600E Configuration Functions
Figure 26 The following message (Figure 27) appears. Click OK to save the data to the PXG600E or CANCEL to ignore the save data request. PXG600E_026 Figure 27 EATON PXG600E User Manual • IM02603003E Rev 5, 11-May-2012 • Firmware Version 5.03:3835... - Page 50 “Prevent this page from creating additional dialogs. ” this dialog MUST display for the PXG600E to function properly. PXG600E_027 Figure 28 EATON PXG600E User Manual • IM02603003E Rev 5, 11-May-2012 • Firmware Version 5.03:3835...
-
Page 51: Viewing Configuration Changes
After you click on the VIEW CHANGES link, a screen similar to Figure 30 appears. Note that the screen shows the parameters before and after the COM1 change. PXG600E_029 Figure 30 EATON PXG600E User Manual • IM02603003E Rev 5, 11-May-2012 • Firmware Version 5.03:3835... -
Page 52: Discarding Configuration Changes
This will delete all changes that are listed in the “These Variables Have Changed” screen (Figure 30). PXG600E_272 Figure 31 EATON PXG600E User Manual • IM02603003E Rev 5, 11-May-2012 • Firmware Version 5.03:3835... -
Page 53: Configuration Of Downstream Communication Ports
(Figure 32, D) (format aaa.bbb.ccc.ddd). If the PXG600E is used as an EMINT in a PowerNet device server, enter the IP address of the PowerNet device server in this field. This will ensure that the PXG600E will only respond exclusively to that PowerNet device server broadcast messages. -
Page 54: Com1 Configuration
COM1 port when you change the PROTOCOL. If there are devices connected, you will get the error message shown in Figure 34 when you try to save the value. PXG600E_033 Figure 34 EATON PXG600E User Manual • IM02603003E Rev 5, 11-May-2012 • Firmware Version 5.03:3835... - Page 55 You can SAVE ALL SETTINGS, VIEW CHANGES or DISCARD CHANGES that you have made. For details on how to use these functions, see Common PXG600E Configuration Functions on page EATON PXG600E User Manual • IM02603003E Rev 5, 11-May-2012 • Firmware Version 5.03:3835...
-
Page 56: Com2 Configuration
COM2 port when you change the PROTOCOL. If there are devices connected, you will get the error message shown in Figure 36 when you try to save the value. PXG600E_033 Figure 36 EATON PXG600E User Manual • IM02603003E Rev 5, 11-May-2012 • Firmware Version 5.03:3835... - Page 57 Enter the COM2 Timeout value (Figure 35, F). The Timeout value is expressed in milliseconds. NOTICE: The default value of the COM2 Timeout value is 2000 ms. EATON PXG600E User Manual • IM02603003E Rev 5, 11-May-2012 • Firmware Version 5.03:3835...
- Page 58 You can SAVE ALL SETTINGS, VIEW CHANGES or DISCARD CHANGES that you have made. For details on how to use these functions, see Common PXG600E Configuration Functions on page EATON PXG600E User Manual • IM02603003E Rev 5, 11-May-2012 • Firmware Version 5.03:3835...
-
Page 59: Bacnet/Ip
(Figure 38, Wait 10-30 seconds and then click the Refresh link (Figure 38, The following WARNING message (Figure 39, A) appears, click OK (Figure 39, PXG600E_323 Figure 39 EATON PXG600E User Manual • IM02603003E Rev 5, 11-May-2012 • Firmware Version 5.03:3835... - Page 60 BACnet/IP MAC Address - (Figure 41, E) This value is automatically generated by the PXG600E and cannot be modified. PXG800E_427 Figure 41 EATON PXG600E User Manual • IM02603003E Rev 5, 11-May-2012 • Firmware Version 5.03:3835...
- Page 61 This value is used as a template in generating the separate BACnet/IP Mac address (Figure 42, F) as a BACnet/IP-capable device is added to the PXG600E. PXG600E_279 Figure 42 EATON PXG600E User Manual • IM02603003E Rev 5, 11-May-2012 • Firmware Version 5.03:3835...
- Page 62 Check the Device Object-Name (Figure 44, A) for the BACnet/IP-capable device and edit if required. The BACnet/IP Mac address (Figure 44, C) cannot be altered. PXG600E_281 Figure 44 EATON PXG600E User Manual • IM02603003E Rev 5, 11-May-2012 • Firmware Version 5.03:3835...
-
Page 63: Adding Downstream Devices
PXG screen. The user can scroll up or down to view all of the devices installed on the system. EATON PXG600E User Manual • IM02603003E Rev 5, 11-May-2012 • Firmware Version 5.03:3835... - Page 64 Main feed is 1000A. There are four feeder circuits connected to the power Bus coming from the Main. Each of these circuits is protected by an Eaton Optim 550 at INCOM address 02 through 05. Each feeder circuit has a capacity of 100A.
- Page 65 You can SAVE ALL SETTINGS, VIEW CHANGES or DISCARD CHANGES that you have made. For details on how to use these functions, see Common PXG600E Configuration Functions on page PXG600E_282 Figure 46 EATON PXG600E User Manual • IM02603003E Rev 5, 11-May-2012 • Firmware Version 5.03:3835...
- Page 66 You can SAVE ALL SETTINGS, VIEW CHANGES or DISCARD CHANGES that you have made. For details on how to use these functions, see Common PXG600E Configuration Functions on page PXG600E_284 Figure 47 EATON PXG600E User Manual • IM02603003E Rev 5, 11-May-2012 • Firmware Version 5.03:3835...
- Page 67 You can SAVE ALL SETTINGS, VIEW CHANGES or DISCARD CHANGES that you have made. For details on how to use these functions, see Common PXG600E Configuration Functions on page PXG600E_285 Figure 48 EATON PXG600E User Manual • IM02603003E Rev 5, 11-May-2012 • Firmware Version 5.03:3835...
- Page 68 (Configuring Modbus TCP Feature on page 97), Access Control (Access Control on page 118), SNMP (SNMP on page 120) and Email (Configuring Email Reports on page 122). EATON PXG600E User Manual • IM02603003E Rev 5, 11-May-2012 • Firmware Version 5.03:3835...
-
Page 69: Adding A New Main - Step-By-Step
(Figure 52, A). Note that if there are no Buses installed on the PXG600E, “Main” and Bus” are the only devices you will find on the drop-down menu. If there is at least one Bus installed on the PXG600E, there will be a variety of devices listed on the “Create Which Device”... - Page 70 5, proceed to Step Click on the button (Figure 53, C) to go back to Step 1 if you wish to change the selection. PXG600E_290 Figure 53 EATON PXG600E User Manual • IM02603003E Rev 5, 11-May-2012 • Firmware Version 5.03:3835...
- Page 71 10. Click on the button (Figure 54, C) to go back to Step 1 if you wish to change the selection. EATON PXG600E User Manual • IM02603003E Rev 5, 11-May-2012 • Firmware Version 5.03:3835...
- Page 72 11, proceed to Step 13. Click on the button (Figure 55, C) to go back to Step 1 if you wish to change the selection. PXG600E_292 Figure 55 EATON PXG600E User Manual • IM02603003E Rev 5, 11-May-2012 • Firmware Version 5.03:3835...
- Page 73 19. Click on the button (Figure 57, C) to go back to Step 1 if you wish to change the selection. EATON PXG600E User Manual • IM02603003E Rev 5, 11-May-2012 • Firmware Version 5.03:3835...
- Page 74 (Figure 58, B) – Enter the current carrying capacity in amps for the Main you are adding. The PXG600E uses this value to calculate the percentage of current capacity that is used by a particular device. It is not used to provide an alarm. The default value is 1000 A.
- Page 75 For more details and a description on how to use this feature go to Trends on page 138. NOTICE: After you complete Device Configuration Tabs Saving the Entries on page 66 to save the entries. PXG600E_296 Figure 59 EATON PXG600E User Manual • IM02603003E Rev 5, 11-May-2012 • Firmware Version 5.03:3835...
- Page 76 (INCOM or Modbus) as the Main that you added will go offline for a short time. The Buses web page will show when the devices come back online. EATON PXG600E User Manual • IM02603003E Rev 5, 11-May-2012 • Firmware Version 5.03:3835...
-
Page 77: Adding A New Bus - Step-By-Step
Click on the button (Figure 62, C) to go back to Step 1 if you wish to change the selection. PXG600E_299 Figure 62 EATON PXG600E User Manual • IM02603003E Rev 5, 11-May-2012 • Firmware Version 5.03:3835... - Page 78 Click on the button (Figure 63, D) to go back to Step 1 if you wish to change the selection. EATON PXG600E User Manual • IM02603003E Rev 5, 11-May-2012 • Firmware Version 5.03:3835...
- Page 79 (INCOM or Modbus) as the Bus that you added will go offline for a short time. The Buses web page will show when the devices come back online. EATON PXG600E User Manual • IM02603003E Rev 5, 11-May-2012 • Firmware Version 5.03:3835...
-
Page 80: Adding Additional Devices To An Existing Bus - Step-By-Step
(except pulse counters) (See “Devices That Connect Directly to PXG600E” on page 71.) • Devices that connect to the PXG600E via a submaster that in turn is connected to INCOM (See “Procedure for Submaster” on page 76.) • IQMESII Meter points (See “Procedure for IQMESII Meter Point”... - Page 81 Click on the button (Figure 66, C) to go back to Step 1 if you wish to change the selection. PXG600E_303 Figure 66 EATON PXG600E User Manual • IM02603003E Rev 5, 11-May-2012 • Firmware Version 5.03:3835...
- Page 82 10. Click on the button (Figure 68, C) to go back to Step 1 if you wish to change the selection. PXG600E_305 Figure 68 EATON PXG600E User Manual • IM02603003E Rev 5, 11-May-2012 • Firmware Version 5.03:3835...
- Page 83 (Figure 69, C) – Enter the current carrying capacity in amps for the Main you are adding. The PXG600E uses this value to calculate the percentage of current capacity that is used by a particular device. It is not used to provide an alarm. The default value is 1000 A.
- Page 84 Trends on page 138. NOTICE: After you complete Device Configuration Tabs Saving the Entries on page 75 to save the entries. PXG600E_307 Figure 70 EATON PXG600E User Manual • IM02603003E Rev 5, 11-May-2012 • Firmware Version 5.03:3835...
- Page 85 (INCOM or Modbus) as the Main that you added will go offline for a short time. The Buses web page will show when the devices come back online. EATON PXG600E User Manual • IM02603003E Rev 5, 11-May-2012 • Firmware Version 5.03:3835...
- Page 86 INCOM network data. Click on the button (Figure 72, A) in the device list of the PXG600E configuration web page. PXG600E_309 Figure 72 EATON PXG600E User Manual • IM02603003E Rev 5, 11-May-2012 • Firmware Version 5.03:3835...
- Page 87 Click on the button (Figure 74, C) to go back to Step 1 if you wish to change the selection. EATON PXG600E User Manual • IM02603003E Rev 5, 11-May-2012 • Firmware Version 5.03:3835...
- Page 88 10. Click on the button (Figure 75, C) to go back to Step 1 if you wish to change the selection. PXG600E_312 Figure 75 EATON PXG600E User Manual • IM02603003E Rev 5, 11-May-2012 • Firmware Version 5.03:3835...
- Page 89 NOTICE: If you are not configuring Device Configuration Tabs Saving the Entries on page 81 to save the entries. PXG600E_313 Figure 76 EATON PXG600E User Manual • IM02603003E Rev 5, 11-May-2012 • Firmware Version 5.03:3835...
- Page 90 Trends on page 138. NOTICE: After you complete Device Configuration Tabs Saving the Entries on page 81 to save the entries. PXG600E_314 Figure 77 EATON PXG600E User Manual • IM02603003E Rev 5, 11-May-2012 • Firmware Version 5.03:3835...
- Page 91 (INCOM or Modbus) as the Main that you added will go offline for a short time. The Buses web page will show when the devices come back online. EATON PXG600E User Manual • IM02603003E Rev 5, 11-May-2012 • Firmware Version 5.03:3835...
- Page 92 PXG600E(s) that will monitor the IQMESII(s). That is the only way you will understand what the meter points represent when you review reports from the PXG600E. EATON PXG600E User Manual • IM02603003E Rev 5, 11-May-2012 • Firmware Version 5.03:3835...
- Page 93 Click on the button (Figure 80, C) to go back to Step 3 if you wish to change the selection. PXG600E_317 Figure 80 EATON PXG600E User Manual • IM02603003E Rev 5, 11-May-2012 • Firmware Version 5.03:3835...
- Page 94 12. Click on the button (Figure 82, C) to go back to Step 3 if you wish to change the selection. PXG600E_319 Figure 82 EATON PXG600E User Manual • IM02603003E Rev 5, 11-May-2012 • Firmware Version 5.03:3835...
- Page 95 (Figure 83, D) – Enter the current carrying capacity in amps for the Main you are adding. The PXG600E uses this value to calculate the percentage of current capacity that is used by a particular device. It is not used to provide an alarm. The default value is 1000 A.
- Page 96 Trends on page 138. NOTICE: After you complete Device Configuration Tabs Saving the Entries on page 87 to save the entries. PXG600E_321 Figure 84 EATON PXG600E User Manual • IM02603003E Rev 5, 11-May-2012 • Firmware Version 5.03:3835...
- Page 97 (INCOM or Modbus) as the Main that you added will go offline for a short time. The Buses web page will show when the devices come back online. EATON PXG600E User Manual • IM02603003E Rev 5, 11-May-2012 • Firmware Version 5.03:3835...
- Page 98 Click on the button (Figure 87, C) to go back to Step 1 if you wish to change the selection. PXG600E_325 Figure 87 EATON PXG600E User Manual • IM02603003E Rev 5, 11-May-2012 • Firmware Version 5.03:3835...
- Page 99 10. Click on the button (Figure 89, C) to go back to Step 1 if you wish to change the selection. PXG600E_327 Figure 89 EATON PXG600E User Manual • IM02603003E Rev 5, 11-May-2012 • Firmware Version 5.03:3835...
- Page 100 NOTICE: If you are not configuring Device Configuration Tabs Saving the Entries on page 92 to save the entries. PXG600E_328 Figure 90 EATON PXG600E User Manual • IM02603003E Rev 5, 11-May-2012 • Firmware Version 5.03:3835...
- Page 101 Pulse Counting on page 141. NOTICE: After you complete Device Configuration Tabs Saving the Entries on page 92 to save the entries. PXG600E_329 Figure 91 EATON PXG600E User Manual • IM02603003E Rev 5, 11-May-2012 • Firmware Version 5.03:3835...
- Page 102 (INCOM or Modbus) as the Main that you added will go offline for a short time. The Buses web page will show when the devices come back online. EATON PXG600E User Manual • IM02603003E Rev 5, 11-May-2012 • Firmware Version 5.03:3835...
-
Page 103: Edit Downstream Devices
The device list shown in Figure 93 is part of the PXG600E configuration web page. PXG600E_110 Figure 93 EATON PXG600E User Manual • IM02603003E Rev 5, 11-May-2012 • Firmware Version 5.03:3835... - Page 104 Point. The steps to define and edit the parameters are the same. To edit pulse counters start at Step 11 of the Procedure for Pulse Counter. The steps to define and edit the parameters are the same. EATON PXG600E User Manual • IM02603003E Rev 5, 11-May-2012 • Firmware Version 5.03:3835...
-
Page 105: Delete Downstream Devices
PXG600E configuration web page. PXG600E_111 Figure 94 After you click on the device you want to delete, a screen similar to Figure 95 appears. PXG600E_112 Figure 95 EATON PXG600E User Manual • IM02603003E Rev 5, 11-May-2012 • Firmware Version 5.03:3835... - Page 106 Main, Bus or device that was deleted will go offline for a short time. The Buses web page will show when the devices come back online. EATON PXG600E User Manual • IM02603003E Rev 5, 11-May-2012 • Firmware Version 5.03:3835...
-
Page 107: Configuring Modbus Tcp Feature
(Figure 96, E). Range is 0 to 10000 milliseconds. Note that the “Timeout” value is the amount of time allotted before the PXG600E stops processing a command. EATON PXG600E User Manual • IM02603003E Rev 5, 11-May-2012 • Firmware Version 5.03:3835... - Page 108 You can SAVE ALL SETTINGS, VIEW CHANGES or DISCARD CHANGES that you have made. For details on how to use these functions, see Common PXG600E Configuration Functions on page EATON PXG600E User Manual • IM02603003E Rev 5, 11-May-2012 • Firmware Version 5.03:3835...
-
Page 109: Configuration Of Password
(Figure 98, D) will disappear after you re-enter the password in the “re-enter” box (Figure 98, C) and you then you click outside of the “re-enter” (Figure 98, EATON PXG600E User Manual • IM02603003E Rev 5, 11-May-2012 • Firmware Version 5.03:3835... -
Page 110: Admin Password
(Figure 99, D) will disappear after you re-enter the password in the “re-enter” box (Figure 99, C) and you then you click outside of the “re-enter” (Figure 99, EATON PXG600E User Manual • IM02603003E Rev 5, 11-May-2012 • Firmware Version 5.03:3835... -
Page 111: Saving The Entries
Common PXG600E Configuration Functions on page NOTICE: After you change the “Admin Password” you will be asked to use the new password to login to the PXG600E configuration web page. EATON PXG600E User Manual • IM02603003E Rev 5, 11-May-2012 • Firmware Version 5.03:3835... -
Page 112: Ip Address Setup
“Netmask, ” “Gateway” and “Name Server” fields shown in Figure 101 will be “grayed out. ” Click the refresh button (Figure 101, C) to display the current address. EATON PXG600E User Manual • IM02603003E Rev 5, 11-May-2012 • Firmware Version 5.03:3835... -
Page 113: Manually Enter Ipv4 Address
You can SAVE ALL SETTINGS, VIEW CHANGES or DISCARD CHANGES that you have made. For details on how to use these functions, see Common PXG600E Configuration Functions on page EATON PXG600E User Manual • IM02603003E Rev 5, 11-May-2012 • Firmware Version 5.03:3835... -
Page 114: Manually Enter Ipv6 Address
You can SAVE ALL SETTINGS, VIEW CHANGES or DISCARD CHANGES that you have made. For details on how to use these functions, see Common PXG600E Configuration Functions on page EATON PXG600E User Manual • IM02603003E Rev 5, 11-May-2012 • Firmware Version 5.03:3835... -
Page 115: Personalization
NOTICE: The file should be a “ .JPG, ” “JPEG” or a “ .GIF” and must not be larger than 100 Kb. Click on the START UPLOAD button (Figure 105, PXG600E_340 Figure 105 EATON PXG600E User Manual • IM02603003E Rev 5, 11-May-2012 • Firmware Version 5.03:3835... - Page 116 You can SAVE ALL SETTINGS, VIEW CHANGES or DISCARD CHANGES that you have made. For details on how to use these functions, see Common PXG600E Configuration Functions on page EATON PXG600E User Manual • IM02603003E Rev 5, 11-May-2012 • Firmware Version 5.03:3835...
-
Page 117: Remote Reboot
After you click on the REBOOT GATEWAY button, the following message (Figure 108) appears. Click OK. NOTICE: The format of this message will vary according to the browser you are using. PXG600E_343 Figure 108 EATON PXG600E User Manual • IM02603003E Rev 5, 11-May-2012 • Firmware Version 5.03:3835... - Page 118 After you click OK, the “Gateway rebooting, please wait... ” (Figure 109, A) message appears. PXG600E_344 Figure 109 The home web page will refresh when the reboot is complete; this will take approximately two minutes. EATON PXG600E User Manual • IM02603003E Rev 5, 11-May-2012 • Firmware Version 5.03:3835...
-
Page 119: Save And Restore
The path for the folder will appear in the field shown (Figure 110, Click OK (Figure 110, EATON PXG600E User Manual • IM02603003E Rev 5, 11-May-2012 • Firmware Version 5.03:3835... - Page 120 Click on the SAVE THE CONFIGURATION button (Figure 111, PXG600E_346 Figure 111 A confirmation of the downloaded file will appear similar to the one shown in Figure 112. PXG600E_347 Figure 112 EATON PXG600E User Manual • IM02603003E Rev 5, 11-May-2012 • Firmware Version 5.03:3835...
-
Page 121: Saving The Configuration - Internet Explorer
Click on the SAVE THE CONFIGURATION button (Figure 113, PXG600E_348 Figure 113 Click on the SAVE button (Figure 114, Click on the SAVE AS button (Figure 114, PXG600E_349 Figure 114 EATON PXG600E User Manual • IM02603003E Rev 5, 11-May-2012 • Firmware Version 5.03:3835... - Page 122 The file is saved to the location you selected in Step 5. A message similar to the one shown in Figure 116 will display. PXG600E_351 Figure 116 EATON PXG600E User Manual • IM02603003E Rev 5, 11-May-2012 • Firmware Version 5.03:3835...
-
Page 123: Restoring The Configuration
Click on the BROWSE button (Figure 117, PXG600E_352 Figure 117 Select the file you want to upload to restore the configuration (Figure 118, Click OPEN (Figure 118, PXG600E_353 Figure 118 EATON PXG600E User Manual • IM02603003E Rev 5, 11-May-2012 • Firmware Version 5.03:3835... - Page 124 This will cause the affected device to display improperly. After the restore has completed, make sure you edit the EDS with the correct parameter and alarm attribute values. EATON PXG600E User Manual • IM02603003E Rev 5, 11-May-2012 • Firmware Version 5.03:3835...
-
Page 125: Product Support
Product Support allows the user to establish the location and contact information for the person responsible for the PXG600E in their organization. Also, a link to the Eaton Power Xpert web page is provided for convenience. Click on the PRODUCT SUPPORT link... - Page 126 A list of helpful troubleshooting suggestions is also available on the support page. Click on the SUPPORT button (Figure 123, A) and then click on the HELP FILE link (Figure 123, PXG600E_358 Figure 123 EATON PXG600E User Manual • IM02603003E Rev 5, 11-May-2012 • Firmware Version 5.03:3835...
- Page 127 (Figure 124, B). Download the EPICS file for the device you need help with by clicking on the download link for the device (Figure 124, PXG600E_359 Figure 124 EATON PXG600E User Manual • IM02603003E Rev 5, 11-May-2012 • Firmware Version 5.03:3835...
-
Page 128: Access Control
NOTICE: To ensure the security of your system, if you ARE using any of the previously listed protocols, AND you can identify the client IP addresses, leave (set) access control enabled and enter the trusted host IP addresses. EATON PXG600E User Manual • IM02603003E Rev 5, 11-May-2012 • Firmware Version 5.03:3835... - Page 129 When you are done adding all of the trusted hosts, you can SAVE ALL SETTINGS, VIEW CHANGES or DISCARD CHANGES that you have made. For details on how to use these functions, see Common PXG600E Configuration Functions on page EATON PXG600E User Manual • IM02603003E Rev 5, 11-May-2012 • Firmware Version 5.03:3835...
-
Page 130: Snmp
Meter MIB (Power-Meter index) Proper configuration of the PXG600E and NMS requires that there be a community string match before requested MIB data is returned from the PXG600E. EATON PXG600E User Manual • IM02603003E Rev 5, 11-May-2012 • Firmware Version 5.03:3835... - Page 131 14. When you are done adding all of the trusted hosts, you can SAVE ALL SETTINGS, VIEW CHANGES or DISCARD CHANGES that you have made. For details on how to use these functions, see Common PXG600E Configuration Functions on page EATON PXG600E User Manual • IM02603003E Rev 5, 11-May-2012 • Firmware Version 5.03:3835...
-
Page 132: Configuring Email Reports
CHAPTER 8 - PXG600E CONFIGURATION WEB PAGE RETURN Configuring Email Reports The PXG600E has the capability of sending an email when the PXG detects a native device event or a user-defined device event. Please refer to the device data map at www.eaton.com/pxg... -
Page 133: Email Parameters For All Recipients
The address can be up to 40 alpha numeric characters. Special characters include the “@” symbol and “_” underline. The default value is “PowerXpert.Gateway@eaton.com. ” EATON PXG600E User Manual • IM02603003E Rev 5, 11-May-2012 • Firmware Version 5.03:3835... -
Page 134: Email Parameters For Individual Recipients
10. When you are done adding all of the email parameters, you can SAVE ALL SETTINGS, VIEW CHANGES or DISCARD CHANGES that you have made. For details on how to use these functions, see Common PXG600E Configuration Functions on page EATON PXG600E User Manual • IM02603003E Rev 5, 11-May-2012 • Firmware Version 5.03:3835... -
Page 135: Examples Of Event Emails
MAC address, its location, URL and model number. Note that the location shown in the email was selected on the Product Support web page; see Product Support on page 115. PXG600E_363 Figure 128 EATON PXG600E User Manual • IM02603003E Rev 5, 11-May-2012 • Firmware Version 5.03:3835... -
Page 136: Examples Of Periodic Status Emails
MAC address, its location, URL and model number. Note that the location shown in the email was selected on the Product Support web page; see Product Support on page 115. PXG600E_364 Figure 129 EATON PXG600E User Manual • IM02603003E Rev 5, 11-May-2012 • Firmware Version 5.03:3835... -
Page 137: Time Settings
Not Running Started, not synchronized Synchronizing with NTP server Synchronized to aaa.bb.cc, NTP stratum 1 (where “aaa.bb.cc” is the address of the NTP server) EATON PXG600E User Manual • IM02603003E Rev 5, 11-May-2012 • Firmware Version 5.03:3835... - Page 138 NTP Server IP/host name #2 (Figure 130, F) NTP Server IP/host name #3 (Figure 130, G) You can select the time zone where the PXG600E is located using the “Time Zone” drop-down menu (Figure 130, H). This selection affects logs, web display and setting time on connected devices.
- Page 139 CHAPTER 8 - PXG600E CONFIGURATION WEB PAGE RETURN This Page Intentionally Left Blank EATON PXG600E User Manual • IM02603003E Rev 5, 11-May-2012 • Firmware Version 5.03:3835...
- Page 140 CHAPTER 8 - PXG600E CONFIGURATION WEB PAGE RETURN EATON PXG600E User Manual • IM02603003E Rev 5, 11-May-2012 • Firmware Version 5.03:3835...
-
Page 141: Device Configuration Tabs
While you are adding a downstream device or editing it a screen similar Figure 132 appears. Click on the Parameters Tab (Figure 132, A) to select which parameters you wish to disable. PXG600E_367 Figure 132 EATON PXG600E User Manual • IM02603003E Rev 5, 11-May-2012 • Firmware Version 5.03:3835... - Page 142 Click another tab to continue customizing the parameters for the device. If you have completed customizing the parameters go to Saving the Entries on page 142. EATON PXG600E User Manual • IM02603003E Rev 5, 11-May-2012 • Firmware Version 5.03:3835...
-
Page 143: User Events
While you are adding a downstream device or editing it a screen similar Figure 135 appears. Click on the User Events Tab (Figure 135, A) to configure user-defined events for the device. PXG600E_370 Figure 135 EATON PXG600E User Manual • IM02603003E Rev 5, 11-May-2012 • Firmware Version 5.03:3835... - Page 144 E). The default text is “Too High. ” You can enter alpha-numeric characters or the following special characters. Maximum character limit is 25. Special characters @$^()-_=;~ PXG600E_371 Figure 136 EATON PXG600E User Manual • IM02603003E Rev 5, 11-May-2012 • Firmware Version 5.03:3835...
- Page 145 Click another tab to continue customizing the parameters for the device. 10. If you have completed customizing the parameters go to Saving the Entries on page 142. PXG600E_372 Figure 137 EATON PXG600E User Manual • IM02603003E Rev 5, 11-May-2012 • Firmware Version 5.03:3835...
-
Page 146: Native Events
PXG600E_373 Figure 138 Select the native event parameter (Figure 139, A) you are configuring the priority for. PXG600E_374 Figure 139 EATON PXG600E User Manual • IM02603003E Rev 5, 11-May-2012 • Firmware Version 5.03:3835... - Page 147 Click another tab to continue customizing the parameters for the device. If you have completed customizing the parameters go to Saving the Entries on page 142. PXG600E_375 Figure 140 EATON PXG600E User Manual • IM02603003E Rev 5, 11-May-2012 • Firmware Version 5.03:3835...
-
Page 148: Trends
Step To disable interval logs for all parameters follow the instructions in Step Select individual parameters (Figure 142, PXG600E_378 Figure 142 EATON PXG600E User Manual • IM02603003E Rev 5, 11-May-2012 • Firmware Version 5.03:3835... - Page 149 NOTICE: You must select at least one trait if Interval Log Enable (Figure 143, A) has a check-mark for the parameter. d. Repeat Step 3 to enable/disable interval logs for additional parameters. PXG600E_379 Figure 143 EATON PXG600E User Manual • IM02603003E Rev 5, 11-May-2012 • Firmware Version 5.03:3835...
- Page 150 Figure 145 Click another tab to continue customizing the parameters for the device. If you have completed customizing the parameters go to Saving the Entries on page 142. EATON PXG600E User Manual • IM02603003E Rev 5, 11-May-2012 • Firmware Version 5.03:3835...
-
Page 151: Pulse Counting
Up to four meters can be monitored by the DIM KYZ. Select the units (Figure 147, A) used for each meter. Select the scale factor (units/pulse) (Figure 147, B) used for each meter. PXG600E_383 Figure 147 EATON PXG600E User Manual • IM02603003E Rev 5, 11-May-2012 • Firmware Version 5.03:3835... -
Page 152: Saving The Entries
For details on how to use these functions, see Common PXG800E Configuration Functions on page After you save the entries you should review the entries that you made (Figure 148, PXG600E_384 Figure 148 EATON PXG600E User Manual • IM02603003E Rev 5, 11-May-2012 • Firmware Version 5.03:3835... - Page 153 Figure 149 Configure the email feature (see Configuring Email Reports on page 130) to send an email to a designated email address when an event activates or clears. EATON PXG600E User Manual • IM02603003E Rev 5, 11-May-2012 • Firmware Version 5.03:3835...
- Page 154 CHAPTER 9 - DEVICE CONFIGURATION TABS RETURN This Page Intentionally Left Blank EATON PXG600E User Manual • IM02603003E Rev 5, 11-May-2012 • Firmware Version 5.03:3835...
-
Page 155: Pxg600E Web
RETURN Chapter 10 PXG600E Web Pages The PXG600E web pages provide an easy way to view the status of a power distribution system. A number of screens are available that provide a summary or detailed information about system operation. Accessing PXG600E Web Pages... - Page 156 “Main” link (Figure 152, PXG600E_146 Figure 152 To access a “Main” web page from a “Bus” web page, click on a “Main” link (Figure 153, PXG600E_149 Figure 153 EATON PXG600E User Manual • IM02603003E Rev 5, 11-May-2012 • Firmware Version 5.03:3835...
-
Page 157: Accessing The Pxg600E Bus Web Page
To access a “Bus” web page from the home web page, click on a “Bus” link (Figure 154, PXG600E_150 Figure 154 To access a “Bus” page from any other page, click on the BUSES button (Figure 155, PXG600E_151 Figure 155 EATON PXG600E User Manual • IM02603003E Rev 5, 11-May-2012 • Firmware Version 5.03:3835... -
Page 158: Accessing The Pxg600E Bus Device Web Page
Access the associated “Bus” web page (Figure 156, PXG600E_151 Figure 156 Click on the link for the device you want to display (Figure 157, PXG600E_152 Figure 157 EATON PXG600E User Manual • IM02603003E Rev 5, 11-May-2012 • Firmware Version 5.03:3835... -
Page 159: Accessing The Device Summary Web Page
Click on the DEVICE SUMMARY link (Figure 158, A) in the toolbar of the PXG600E configuration web page. PXG600E_153 Figure 158 EATON PXG600E User Manual • IM02603003E Rev 5, 11-May-2012 • Firmware Version 5.03:3835... -
Page 160: Pxg600E Home Web Page Details
Personalization on page 105. Web UI Alert Symbol (Figure 159, H) – This means that the Web UI has lost communications with the PXG600E. PXG600E_154 Figure 159 EATON PXG600E User Manual • IM02603003E Rev 5, 11-May-2012 • Firmware Version 5.03:3835... -
Page 161: Pxg600E Home Web Page Events
Occurred at: Monday, May 07, 2012 4:30:27 PM Native Events IQ230M - 1/Summary Alarm (0) - Device is in Alarm Status Occurred at: Monday, May 07, 2012 4:29:17 PM EATON PXG600E User Manual • IM02603003E Rev 5, 11-May-2012 • Firmware Version 5.03:3835... - Page 162 Events Box (Figure 160, A) is “auto- closed” so it does not appear in the Events Box (Figure 160, All events are recorded in the event log. EATON PXG600E User Manual • IM02603003E Rev 5, 11-May-2012 • Firmware Version 5.03:3835...
-
Page 163: Pxg600E Main Web Page Details
“Bus” that you selected. A typical “Bus” page is shown in Figure 163. Note the navigation bar (Figure 163, A) on the left side of the screen allows easy access to other “Main” pages. PXG600E_159 Figure 163 EATON PXG600E User Manual • IM02603003E Rev 5, 11-May-2012 • Firmware Version 5.03:3835... -
Page 164: Pxg600E Bus Device Web Page Details
164. Note the navigation bar (Figure 164, A) on the left side of the screen allows easy access to other Mains, Buses and Bus devices. PXG600E_160 Figure 164 EATON PXG600E User Manual • IM02603003E Rev 5, 11-May-2012 • Firmware Version 5.03:3835... -
Page 165: Pxg600E Device Summary Web Page Details
A print screen (Figure 166) appears on the screen. Click the print button (Figure 166, A) to print the device summary. PXG600E_161 Figure 165 PXG600E_162 Figure 166 EATON PXG600E User Manual • IM02603003E Rev 5, 11-May-2012 • Firmware Version 5.03:3835... -
Page 166: Trend Viewing
Power Xpert Software and it will not be populated in the data log. The list of devices that support this feature can be found on the PXG600E device data map. Please refer to the device data map at www.eaton.com/pxg. - Page 167 While the data is being compiled, an screen similar to (Figure 168, A) will be displayed. Uploading trend data..PXG600E_164 Figure 168 EATON PXG600E User Manual • IM02603003E Rev 5, 11-May-2012 • Firmware Version 5.03:3835...
- Page 168 Hover the mouse cursor over one of the points (Figure 169, D) view the exact value of the trend data on a specific date. PXG600E_165 Figure 169 EATON PXG600E User Manual • IM02603003E Rev 5, 11-May-2012 • Firmware Version 5.03:3835...
-
Page 169: Event And Interval Logs
XLS. Click on the ERASE THE EVENT LOG button (Figure 170, C) to clear all of the stored event data out of the database. PXG600E_173 Figure 170 EATON PXG600E User Manual • IM02603003E Rev 5, 11-May-2012 • Firmware Version 5.03:3835... -
Page 170: Viewing The Event Log With Microsoft ® Excel ® 2003
Select Data menu (Figure 172, A) at the top of the page. PXG600E_175 Figure 172 Select Filter (Figure 172, Select AutoFilter (Filter in some versions) (Figure 172, EATON PXG600E User Manual • IM02603003E Rev 5, 11-May-2012 • Firmware Version 5.03:3835... - Page 171 12. Click the OK button (Figure 173, E) to run the filter. ® ® 13. The resulting Microsoft Excel spreadsheet is shown in Figure 174. PXG600E_177 Figure 174 EATON PXG600E User Manual • IM02603003E Rev 5, 11-May-2012 • Firmware Version 5.03:3835...
-
Page 172: Viewing The Event Log With Microsoft
(Figure 175, B) above the column header (Figure 175, PXG600E_178 Figure 175 The column is now highlighted (Figure 175, EATON PXG600E User Manual • IM02603003E Rev 5, 11-May-2012 • Firmware Version 5.03:3835... - Page 173 11. Click the OK button (Figure 176, G) to run the filter. ® ® 12. The resulting Microsoft Excel spreadsheet is shown in Figure 177. PXG600E_172 Figure 177 EATON PXG600E User Manual • IM02603003E Rev 5, 11-May-2012 • Firmware Version 5.03:3835...
-
Page 174: Procedure To Download An Interval Log
® Save the data file in the format available. If you have Microsoft Excel at the workstation, download the file as file type XLS. PXG600E_387 Figure 179 EATON PXG600E User Manual • IM02603003E Rev 5, 11-May-2012 • Firmware Version 5.03:3835... - Page 175 Click on the ERASE THE INTERVAL LOG button (Figure 180, B) permanently erase the interval log for the device you selected. PXG600E_182 Figure 180 EATON PXG600E User Manual • IM02603003E Rev 5, 11-May-2012 • Firmware Version 5.03:3835...
-
Page 176: Excel
Viewing the Interval Log With Microsoft Excel 2007 or Greater Open the file. View the data for the interval log for the device you selected. PXG600E_183 Figure 182 EATON PXG600E User Manual • IM02603003E Rev 5, 11-May-2012 • Firmware Version 5.03:3835... -
Page 177: Waveforms
This affects products like the FP5000 and FP6000 Feeder Protector Modbus versions. NOTICE: The time displayed in the waveform timestamp is expressed in GMT. EATON PXG600E User Manual • IM02603003E Rev 5, 11-May-2012 • Firmware Version 5.03:3835... - Page 178 CHAPTER 10 - PXG600E WEB PAGES RETURN This Page Intentionally Left Blank EATON PXG600E User Manual • IM02603003E Rev 5, 11-May-2012 • Firmware Version 5.03:3835...
-
Page 179: Pxg600E System Integration
INCOM network. The full data set of the INCOM device is available to the PowerNet software. To configure the PowerNet software so it connects to the PXG600E, select an EMINT from the software device list to represent the PXG600E when configuring the PowerNet device server. -
Page 180: Modbus Pass-Through To Modbus Rtu Devices
ID is used as the Modbus TCP unit identifier by the Modbus TCP client. To access data from a “downstream” device, the Modbus TCP client generates a request to the IP address of the PXG600E with the unit identifier set to access the targeted “downstream” device. Consult the user information of your Modbus TCP client to determine how to set the unit identifier on a message. -
Page 181: Snmp
Modbus TCP client when pass-through mode is desired. To access data from a “downstream” pass-through device, the Modbus TCP client generates a request to the IP address of the PXG600E with the unit identifier set to access the targeted pass-through “downstream” device. - Page 182 CHAPTER 11 - PXG600E SYSTEM INTEGRATION RETURN This Page Intentionally Left Blank EATON PXG600E User Manual • IM02603003E Rev 5, 11-May-2012 • Firmware Version 5.03:3835...
-
Page 183: Adding Support For New Devices
The PXG600E, as shipped, supports a large number of Eaton and third party downstream devices. However, support for additional Eaton devices and third party devices will be necessary over the life of the PXG600E. As the support for new devices is developed via the electronic data sheets (EDS), they will be made available to all PXG600E users and can be downloaded from the website: www.eaton.com/pxg. -
Page 184: Upload Eds File
NOTICE: Additional slave actions are available for select INCOM devices. Refer to www.eaton.com/pxg for these updated EDS files. Supported devices, DT810 and DT910, do not have the have the command to remotely close a breaker. EATON PXG600E User Manual • IM02603003E Rev 5, 11-May-2012 • Firmware Version 5.03:3835... - Page 185 (Figure 184). After you have uploaded all of the EDS files, the PXG600E must be rebooted in order to access the files. Choose REMOTE REBOOT. Refer to Remote Reboot on page 107.
- Page 186 CHAPTER 12 - ADDING SUPPORT FOR NEW DEVICES RETURN This Page Intentionally Left Blank EATON PXG600E User Manual • IM02603003E Rev 5, 11-May-2012 • Firmware Version 5.03:3835...
-
Page 187: Firmware Updates
Click OK in the “Choose File” dialog box and the file name and location will appear in the “Filename: *.rom” field (Figure 186, Click on the START UPLOAD button (Figure 186, EATON PXG600E User Manual • IM02603003E Rev 5, 11-May-2012 • Firmware Version 5.03:3835... - Page 188 (Figure 187, PXG600E_255 Figure 187 After the firmware upload completes, the “Firmware upload complete. The gateway will now restart. ” message (Figure 188, A) appears. PXG600E_256 Figure 188 EATON PXG600E User Manual • IM02603003E Rev 5, 11-May-2012 • Firmware Version 5.03:3835...
- Page 189 The home web page should appear. If not, press the F5 key on your computer keyboard. 10. The new version of the firmware should now display on the bottom right of the browser (Figure 189, PXG600E_257 Figure 189 EATON PXG600E User Manual • IM02603003E Rev 5, 11-May-2012 • Firmware Version 5.03:3835...
- Page 190 CHAPTER 13 - FIRMWARE UPDATES RETURN This Page Intentionally Left Blank EATON PXG600E User Manual • IM02603003E Rev 5, 11-May-2012 • Firmware Version 5.03:3835...
-
Page 191: Troubleshooting And Maintenance
Level of Repair This manual supports unit-level troubleshooting only. There are no user serviceable parts in the PXG600E. If the cause of a malfunction is traced to the PXG600E, replace the unit and return the suspect unit to Eaton for repair or replacement. -
Page 192: Technical Assistance
PXG600E configuration web page. Click the VIEW THE INCOM LOG button (Figure 190, B) or the VIEW THE MODBUS-RTU LOG button (Figure 190, PXG600E_388 Figure 190 EATON PXG600E User Manual • IM02603003E Rev 5, 11-May-2012 • Firmware Version 5.03:3835... -
Page 193: Resetting Lost Passwords And Ip Addresses
User Password User Name: user Password: user Admin Password User Name: admin Password: admin To customize these passwords, follow the steps in Configuration of Password on page EATON PXG600E User Manual • IM02603003E Rev 5, 11-May-2012 • Firmware Version 5.03:3835... -
Page 194: Troubleshooting Matrix
On a permanent basis, reset screen resolution of the of the web page and the monitor to 1280x1024 (if available on the monitor). version number on the bottom of the page. EATON PXG600E User Manual • IM02603003E Rev 5, 11-May-2012 • Firmware Version 5.03:3835... - Page 195 Browser is not communicating Add gateway IP address to proxy server exceptions or Configuration changes with PXG because of LAN Proxy list. are not being saved. server. EATON PXG600E User Manual • IM02603003E Rev 5, 11-May-2012 • Firmware Version 5.03:3835...
- Page 196 CHAPTER 14 - TROUBLESHOOTING AND MAINTENANCE RETURN This Page Intentionally Left Blank EATON PXG600E User Manual • IM02603003E Rev 5, 11-May-2012 • Firmware Version 5.03:3835...
-
Page 197: Appendix A: Warranty Information
Eaton Corporation. Eaton Corporation will not be responsible for damage incurred during shipping to us. Be sure RMA number is clearly identified on the shipping container. EATON PXG600E User Manual • IM02603003E Rev 5, 11-May-2012 • Firmware Version 5.03:3835... -
Page 198: Repair After Warranty Expiration
The remedies provided herein are Buyer's sole and exclusive remedies. Eaton Corporation shall not be liable for any direct, indirect, special, incidental, or consequential damages, whether based on contract, tort, or any other legal theory. EATON PXG600E User Manual • IM02603003E Rev 5, 11-May-2012 • Firmware Version 5.03:3835... -
Page 199: Appendix Busb Driver Installation
Appendix B USB Driver Installation The USB port provides a convenient way to locally configure the PXG600E. Before you can connect the PXG600E to a PC, you must install the USB driver. Requirements To configure the PXG600E using the USB port, you must have: •... -
Page 200: Procedure For Windows Xp
NEXT (Figure 195, PXG600E_191 Figure 195 Select “Install from a list or specific location (Advanced)” (Figure 196, A) and click NEXT (Figure 196, PXG600E_192 Figure 196 EATON PXG600E User Manual • IM02603003E Rev 5, 11-May-2012 • Firmware Version 5.03:3835... - Page 201 (Figure 197, C) d. Click on the BROWSE button (Figure 197, PXG600E_193 Figure 197 Browse for the folder called “usbd” (Figure 198, A) and click OK. PXG600E_194 Figure 198 EATON PXG600E User Manual • IM02603003E Rev 5, 11-May-2012 • Firmware Version 5.03:3835...
- Page 202 APPENDIX B - USB DRIVER INSTALLATION RETURN Click NEXT (Figure 199, PXG600E_195 Figure 199 Click CONTINUE ANYWAY (Figure 200, PXG600E_196 Figure 200 EATON PXG600E User Manual • IM02603003E Rev 5, 11-May-2012 • Firmware Version 5.03:3835...
- Page 203 APPENDIX B - USB DRIVER INSTALLATION RETURN Wait while the USB drivers are installed (Figure 201). PXG600E_197 Figure 201 Click FINISH (Figure 202, PXG600E_198 Figure 202 EATON PXG600E User Manual • IM02603003E Rev 5, 11-May-2012 • Firmware Version 5.03:3835...
- Page 204 Click on the START button (Figure 205, A) and the start menu (Figure 205, B) appears. b. Click on the RUN button (Figure 205, PXG600E_201 Figure 205 EATON PXG600E User Manual • IM02603003E Rev 5, 11-May-2012 • Firmware Version 5.03:3835...
- Page 205 Close the CMD window. NOTICE: The next time you connect the PXG600E to this computer using the USB port, you will not need to reinstall the drivers. EATON PXG600E User Manual • IM02603003E Rev 5, 11-May-2012 • Firmware Version 5.03:3835...
-
Page 206: Procedure For Windows 7
(also called the “Start Button”) (Figure 210, A) and then the “Control Panel” link (Figure 210, PXG600E_206 Figure 210 Click Hardware and Sound (Figure 211, PXG600E_207 Figure 211 EATON PXG600E User Manual • IM02603003E Rev 5, 11-May-2012 • Firmware Version 5.03:3835... - Page 207 Click on Device Manager (Figure 212, PXG600E_208 Figure 212 RIGHT Click on RNDIS/Ethernet Gadget (Figure 213, A) and select “Update Driver Software... ” (Figure 213, PXG600E_209 Figure 213 EATON PXG600E User Manual • IM02603003E Rev 5, 11-May-2012 • Firmware Version 5.03:3835...
- Page 208 Click “Browse my computer for driver software... ” (Figure 214, PXG600E_210 Figure 214 Click on “Let me pick from a list of device drivers on my computer... ” (Figure 215, PXG600E_211 Figure 215 EATON PXG600E User Manual • IM02603003E Rev 5, 11-May-2012 • Firmware Version 5.03:3835...
- Page 209 APPENDIX B - USB DRIVER INSTALLATION RETURN Select device type: Wait until the list appears on your screen. b. Select “Network Adapters” (Figure 216, Click NEXT (Figure 216, PXG600E_212 Figure 216 EATON PXG600E User Manual • IM02603003E Rev 5, 11-May-2012 • Firmware Version 5.03:3835...
- Page 210 Select MICROSOFT CORPORATION (not Microsoft) (Figure 217, b. Select REMOTE NDIS COMPATIBLE DEVICE (Figure 217, B) Select NEXT (Figure 217, PXG600E_213 Figure 217 10. Click YES (Figure 218, PXG600E_214 Figure 218 EATON PXG600E User Manual • IM02603003E Rev 5, 11-May-2012 • Firmware Version 5.03:3835...
- Page 211 11. Wait while the USB drivers are installed (Figure 219). PXG600E_215 Figure 219 12. Windows will indicate that the USB drivers have successfully been installed (Figure 220). PXG600E_216 Figure 220 EATON PXG600E User Manual • IM02603003E Rev 5, 11-May-2012 • Firmware Version 5.03:3835...
- Page 212 14. Unplug the USB cable from the PXG600E and reboot the computer. 15. After the computer reboots, plug in the USB cable and wait two minutes for the PXG600E to be fully recognized by the computer. EATON PXG600E User Manual • IM02603003E Rev 5, 11-May-2012 • Firmware Version 5.03:3835...
- Page 213 Click on the CMD program (Figure 222, PXG600E_218 Figure 222 d. Enter “ipconfig /all” at the command prompt (Figure 223, A) press the ENTER key on the keyboard. PXG600E_219 Figure 223 EATON PXG600E User Manual • IM02603003E Rev 5, 11-May-2012 • Firmware Version 5.03:3835...
- Page 214 Close the CMD window. NOTICE: The next time you connect the PXG600E to this computer using the USB port, you will not need to reinstall the drivers. EATON PXG600E User Manual • IM02603003E Rev 5, 11-May-2012 • Firmware Version 5.03:3835...
-
Page 215: Appendix C: Connecting To An Ethernet Lan
PXG600E makes a DHCP request. You will need to provide your local network administrator with the PXG600E’s MAC address as printed on the label on the top of the unit. Once you’ve requested a static IP address to be assigned from an existing DHCP server, your network administrator should be able to tell you what the IP address will be. - Page 216 APPENDIX C - CONNECTING TO AN ETHERNET LAN RETURN This Page Intentionally Left Blank EATON PXG600E User Manual • IM02603003E Rev 5, 11-May-2012 • Firmware Version 5.03:3835...
-
Page 217: Appendix D: Root Certificate Authority Installation
You can use the PXG600E without installing a root CA (using http), but the transactions will not be as secure as with the root CA (using https). The performance of the PXG600E is not impacted by using secure transactions. -
Page 218: Installing Root Ca With Microsoft Internet Explorer 6 Or Higher
APPENDIX D - ROOT CERTIFICATE AUTHORITY INSTALLATION RETURN Installing Root CA with Microsoft Internet Explorer 6 or Higher To install a certificate for the PXG600E with Microsoft Internet Explorer 6 or higher: Open the browser and type the IP address of the PXG600E followed by the path “*/ca.html”... - Page 219 NOTICE: The certificate cannot be verified yet because it is issued by a nontrusted CA. PXG600E_224 Figure 228 Click “INSTALL CERTIFICATE... ” (Figure 228, A). The Certificate Import Wizard window opens (Figure 229). EATON PXG600E User Manual • IM02603003E Rev 5, 11-May-2012 • Firmware Version 5.03:3835...
- Page 220 ” (Figure 230, Click the “Browse... ” button (Figure 230, B). In the next window (Figure 231) you will select the certificate store you will use. EATON PXG600E User Manual • IM02603003E Rev 5, 11-May-2012 • Firmware Version 5.03:3835...
- Page 221 11. Verify that the certification store the certificate will be stored in is “Trusted Root Certification Authorities” (Figure 232, 12. Click NEXT (Figure 232, B). The “Completing the Certificate Import Wizard (Figure 233) appears. EATON PXG600E User Manual • IM02603003E Rev 5, 11-May-2012 • Firmware Version 5.03:3835...
- Page 222 (Figure 233, A) to complete the wizard. A message box similar to Figure 234 opens. PXG600E_230 Figure 234 14. Click YES (Figure 234, A) to install the CA. EATON PXG600E User Manual • IM02603003E Rev 5, 11-May-2012 • Firmware Version 5.03:3835...
- Page 223 Figure 235 16. Click OK (Figure 235, 17. The certificate you installed appears once again. Click OK (Figure 236, A) to close the window. PXG600E_232 Figure 236 EATON PXG600E User Manual • IM02603003E Rev 5, 11-May-2012 • Firmware Version 5.03:3835...
- Page 224 20. Open the Internet Options menu by first opening the browser navigation menu (Figure 237) and selecting Tools (Figure 237, A) and then Internet Options (Figure 237, PXG600E_233 Figure 237 EATON PXG600E User Manual • IM02603003E Rev 5, 11-May-2012 • Firmware Version 5.03:3835...
- Page 225 APPENDIX D - ROOT CERTIFICATE AUTHORITY INSTALLATION RETURN 21. The Internet Options menu (Figure 238) opens. Click on the “Content” (Figure 238, A) and then “Certificates” (Figure 238, PXG600E_234 Figure 238 EATON PXG600E User Manual • IM02603003E Rev 5, 11-May-2012 • Firmware Version 5.03:3835...
- Page 226 (Figure 239, A) and verify the “PowerXpert... ” certificate (Figure 239, B) is listed. Click “Close” (Figure 239, C) to close the “Certificates” menu (Figure 239). PXG600E_235 Figure 239 EATON PXG600E User Manual • IM02603003E Rev 5, 11-May-2012 • Firmware Version 5.03:3835...
- Page 227 (Figure 240) and click “Trusted Sites” (Figure 240, Click the “Sites” button (Figure 240, C) and the “Trusted sites” menu (Figure 241) appears. PXG600E_236 Figure 240 EATON PXG600E User Manual • IM02603003E Rev 5, 11-May-2012 • Firmware Version 5.03:3835...
- Page 228 APPENDIX D - ROOT CERTIFICATE AUTHORITY INSTALLATION RETURN d. Type the IP address of the PXG600E in the “Add this website to the zone” (Figure 241, A) making sure you enter the address using the secure server “https://*. ” For example: “https://192.168.1.103. ”...
- Page 229 “Internet Options” menu (Figure 242) and click the “Delete... ” button (Figure 242, B) and “Delete Browsing History” menu (Figure 243) appears. PXG600E_238 Figure 242 EATON PXG600E User Manual • IM02603003E Rev 5, 11-May-2012 • Firmware Version 5.03:3835...
- Page 230 (Figure 243, A) after you change the Internet Options). 26. Click the “Delete” button (Figure 243, B) to complete the delete browsing history operation. PXG600E_239 Figure 243 EATON PXG600E User Manual • IM02603003E Rev 5, 11-May-2012 • Firmware Version 5.03:3835...
- Page 231 APPENDIX D - ROOT CERTIFICATE AUTHORITY INSTALLATION RETURN 27. Click the “OK” button (Figure 244, A) on the “Internet Options” menu (Figure 244) to close it. PXG600E_240 Figure 244 EATON PXG600E User Manual • IM02603003E Rev 5, 11-May-2012 • Firmware Version 5.03:3835...
- Page 232 RETURN 28. Close the browser and reopen it. 29. Type the IP address of the PXG600E in the address bar, making sure you enter the address using the secure server “https://*. ” For example: “https://192.168.1.103. ” The home web page for the PXG600E appears (Figure 245).
-
Page 233: Installing Root Ca With Mozilla Firefox 2 Or Higher
RETURN Installing Root CA with Mozilla Firefox 2 or Higher To install a certificate for the PXG600E with Mozilla Firefox 2 or higher: Open the browser and type the IP address of the PXG600E followed by the path “*/ca.html” in the address bar. For example: “https://192.168.1.103/ca.html. - Page 234 The window shown in Figure 249 appears. PXG600E_245 Figure 249 Click the “Root CA Certificate” link (Figure 249, A) and the window shown in Figure 250 appears. EATON PXG600E User Manual • IM02603003E Rev 5, 11-May-2012 • Firmware Version 5.03:3835...
- Page 235 11. Click the “Trust this CA to identify web sites” (Figure 250, B) check box option. 12. Click OK (Figure 250, C) to complete the installation process. The installation process is complete. EATON PXG600E User Manual • IM02603003E Rev 5, 11-May-2012 • Firmware Version 5.03:3835...
- Page 236 PXG600E_247 Figure 251 16. The “Options” menu (Figure 252) opens. Click on the “Advanced” tab (Figure 252, A) and then “View Certificates” (Figure 252, PXG600E_248 Figure 252 EATON PXG600E User Manual • IM02603003E Rev 5, 11-May-2012 • Firmware Version 5.03:3835...
- Page 237 “Certificate Manager” menu (Figure 253). PXG600E_249 Figure 253 18. The “Options” menu (Figure 254) opens. Click the “OK” button (Figure 254, A) to close the menu. PXG600E_250 Figure 254 EATON PXG600E User Manual • IM02603003E Rev 5, 11-May-2012 • Firmware Version 5.03:3835...
- Page 238 (Figure 256, A) on the Clear Recent History window (Figure 256) and click “Clear Now” (Figure 256, B) to complete the Clear Recent History operation. PXG600E_252 Figure 256 EATON PXG600E User Manual • IM02603003E Rev 5, 11-May-2012 • Firmware Version 5.03:3835...
- Page 239 APPENDIX D - ROOT CERTIFICATE AUTHORITY INSTALLATION RETURN 20. Close the browser and reopen it. 21. You can now access the PXG600E using the https protocol (for example: https://192.168.1.103). 22. Notice that the secure icon appears on the home web page...
- Page 240 APPENDIX D - ROOT CERTIFICATE AUTHORITY INSTALLATION RETURN This Page Intentionally Left Blank EATON PXG600E User Manual • IM02603003E Rev 5, 11-May-2012 • Firmware Version 5.03:3835...
-
Page 241: Appendix E: Supported Device List
APPENDIX E - SUPPORTED DEVICE LIST RETURN Appendix E Supported Device List The following devices are supported by the PXG600E at the time this manual was www.eaton.com/pxg printed. Please refer to for the most current list. Data Acquisition and Integration Table... - Page 242 Starter IT S811 (MV811) Starter IT Starter Starter IT Starter Qsnap EATON PXG600E User Manual • IM02603003E Rev 5, 11-May-2012 • Firmware Version 5.03:3835...
-
Page 243: Appendix F: Glossary
Media Access Control (MAC)/Data Link Layer, and a common addressing format (Ethernet and Timing). EATON PXG600E User Manual • IM02603003E Rev 5, 11-May-2012 • Firmware Version 5.03:3835... - Page 244 Kilowatt Hour Lag: The phase delay in current with respect to voltage. LAN: Local Area Network LED: Light Emitting Diode mA: MilliAmpere - 1/1000 of an ampere EATON PXG600E User Manual • IM02603003E Rev 5, 11-May-2012 • Firmware Version 5.03:3835...
- Page 245 (2) In TCP/IP and UDP networks, an endpoint to a logical connection. The port number identifies what type of port it is. For example, port 80 is used for HTTP traffic. EATON PXG600E User Manual • IM02603003E Rev 5, 11-May-2012 • Firmware Version 5.03:3835...
- Page 246 NTP that does not require storing information about previous communications. It is used in some embedded devices and in applications where high accuracy timing is not required. EATON PXG600E User Manual • IM02603003E Rev 5, 11-May-2012 • Firmware Version 5.03:3835...
- Page 247 World Wide Web website or a local area network. EATON PXG600E User Manual • IM02603003E Rev 5, 11-May-2012 • Firmware Version 5.03:3835...
- Page 248 APPENDIX F - GLOSSARY This Page Intentionally Left Blank EATON PXG600E User Manual • IM02603003E Rev 5, 11-May-2012 • Firmware Version 5.03:3835...
Need help?
Do you have a question about the PXG600E and is the answer not in the manual?
Questions and answers