Table of Contents
Advertisement
Available languages
Available languages
Operator's Manual
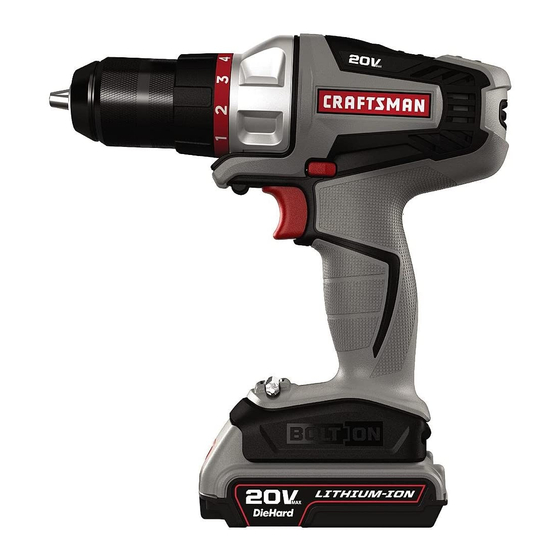
20v Max* Power Unit &
Drill Attachment
Model: 16496
cautiOn: Read, understand and follow
all Safety Rules and Operating Instructions
in this manual before using this product.
Sears brands Management corporation,
hoffman estates, il 60179 u.S.a.
See the full line of craftsman
at craftsman.com
Part No. 90603061
products
®
• Safety
• OperatiOn
• Maintenance
• trOubleShOOting
• eSpañOl pg. 13
*Maximum initial battery pack voltage
(measured without a workload) is 20
volts. The nominal voltage is 18.
October 2013
Advertisement
Table of Contents
Troubleshooting

Related Manuals for Craftsman 16496 Bolt-On


Summary of Contents for Craftsman 16496 Bolt-On
-
Page 1: Troubleshooting
• Maintenance • trOubleShOOting Sears brands Management corporation, • eSpañOl pg. 13 hoffman estates, il 60179 u.S.a. *Maximum initial battery pack voltage See the full line of craftsman products ® (measured without a workload) is 20 at craftsman.com volts. The nominal voltage is 18. Part No. 90603061 October 2013... -
Page 2: General Safety Rules
CRAftSMAN ONe YeAR lIMIteD WARRANtY fOR ONe YeAR from the date of purchase, this power tool and any supplied battery pack and charger are warranted against defects in material or workmanship. With proof of purchase, a defective product will be replaced free of charge. - Page 3 1) WORk AReA SAfetY a) keep work area clean and well lit. Cluttered or dark areas invite accidents. b) Do not operate power tools in explosive atmospheres, such as in the presence of flammable liquids, gases or dust. Power tools create sparks which may ignite the dust or fumes. c) keep children and bystanders away while operating a power tool.
-
Page 4: Specific Safety Rules
repaired before use. Many accidents are caused by poorly maintained power tools. f) keep cutting tools sharp and clean. Properly maintained cutting tools with sharp cutting edges are less likely to bind and are easier to control. g) Use the power tool, accessories and tool bits, etc. in accordance with these instructions, taking into account the working conditions and the work to be performed. - Page 5 • DO NOt attempt to charge the battery pack with any chargers other than the ones in this manual. The charger and battery pack are specifically designed to work together. • these chargers are not intended for any uses other than charging designated Craftsman ®...
- Page 6 WARNING: Burn hazard. Battery liquid may be flammable if exposed to spark or flame. • Charge the battery packs only in Craftsman chargers. ® • DO NOt splash or immerse in water or other liquids. This may cause premature cell failure.
- Page 7 WARNING: Never attempt to open the battery pack for any reason. If battery pack case is cracked or damaged, do not insert into charger. Do not crush, drop or damage battery pack. Do not use a battery pack or charger that has received a sharp blow, been dropped, run over or damaged in any way (i.e., pierced with a nail, hit with a hammer, stepped on).
- Page 8 IMPORtANt ChARGING NOteS 1. Longest life and best performance can be obtained if the battery pack is charged when the air temperature is between 65°F and 75°F (18°- 24°C). DO NOT charge the battery pack in an air temperature below 40°F (4.5°C), or above 105°F (40.5°C). This is important and will prevent serious damage to the battery pack. 2.
- Page 9 PARtS AND feAtUReS 1. power Unit 5. Bit holder 9. Drill attachment 2. Forward/reverse slider 6. 20v max* battery 10. keyless chuck 3. Variable speed trigger 7. Battery release button 11. Torque adjustment collar 4. Attachment release button 8. Battery charger OPeRAtING: POWeR UNIt tRIGGeR SWItCh & fORWARD/ReveRSe SlIDeR The Power Unit’s (1) forward/reverse slider (2) is used to control the direction the chuck (10) spins: Forward to drive screws;...
- Page 10 • Lock the Power Unit by setting the forward/reverse slider (2) to the center position. • To remove an attachment, depress the release button (4) and take the attachment off the tool. • To fit an attachment, line it up with the tool as shown and push it onto the Power Unit until it snaps into place and an audible click is heard. • ensure that attachment is securely attached by gently pulling on it in the opposite direction from the Power Unit.
-
Page 11: Drilling In Metal
To insert a drill bit or other accessory: 1. Grasp the rear half of the chuck (10) with one hand and use your other hand to rotate the front half to the left, as viewed from the chuck end. 2. Insert the bit or other accessory fully into the chuck, and tighten securely by holding the rear half of the chuck and rotating the front portion to the right, as viewed from the chuck end. - Page 12 MAINteNANCe Use only mild soap and damp cloth to clean the tool. Never let any liquid get inside the tool; never immerse any part of the tool into a liquid. iMpOrtant: To assure product saFeTy and ReLiaBiLiTy, repairs, maintenance, and adjustment a qualified service dealer or other (other than those listed in this manual) should be performed by qualified service personnel ACCeSSORIeS WARNING:...
- Page 13 UN AÑO De GARANtÍA lIMItADA PARA lOS PRODUCtOS CRAftSMAN este producto está garantizado contra defectos de material o mano de obra DURANte UN AÑO a partir de la fecha de compra. Se reemplazará un producto defectuoso sin cargo al presentar el comprobante de compra.
- Page 14 1) Seguridad en el área de trabajo a) Mantenga el área de trabajo limpia y bien iluminada. Las áreas abarrotadas y oscuras propician accidentes. b) No opere herramientas eléctricas en atmósferas explosivas, como ambientes donde se encuentran líquidos, gases o polvo inflamables. Las herramientas eléctricas originan chispas que pueden encender el polvo o los vapores.
- Page 15 4) Uso y mantenimiento de la herramienta eléctrica a) No fuerce la herramienta eléctrica. Utilice la herramienta eléctrica correcta para el trabajo que realizará. La herramienta eléctrica correcta hará el trabajo mejor y más seguro a la velocidad para la que fue diseñada. b) No utilice la herramienta eléctrica si no puede encenderla o apagarla con el interruptor.
- Page 16 • Use los mangos auxiliares que se suministran con la herramienta. La pérdida del control podría ocasionar lesiones personales. • Cuando trabaje en una escalera o una plataforma asegúrese de dejar la herramienta de lado cuando no la use. algunas herramientas con baterías grandes se paran sobre su base, pero se pueden volcar fácilmente. • Utilice abrazaderas u otra forma práctica para asegurar y sostener la pieza de trabajo sobre una plataforma estable.
- Page 17 • NO intente cargar el paquete de baterías con otros cargadores que no sean de la marca. los cargadores y los paquetes de baterías están diseñados específicamente para trabajar juntos. • estos cargadores están diseñados para utilizarse exclusivamente con las baterías recargables Craftsman designadas. Otros usos pueden provocar riesgo de incendio, descarga ®...
- Page 18 Peligro de quemaduras. El líquido de la batería puede encenderse si se expone a chispas o llamas. • Cargue los paquetes de baterías sólo con cargadores de Craftsman ® • NO salpique o sumerja en agua u otros líquidos. Esto puede causar una falla prematura de las células.
- Page 19 que los terminales de la batería estén protegidos y bien aislados de materiales que puedan hacer contacto y causar un cortocircuito. NOTA: Las baterías de iones de Lithium-Ion no deben colocarse dentro del equipaje registrado. ReCOMeNDACIONeS CON ReSPeCtO Al AlMACeNAMIeNtO 1.
- Page 20 NOtAS IMPORtANteS SOBRe lA CARGA 1. Obtendrá una duración más prolongada y un mejor rendimiento si el paquete de baterías se carga cuando la temperatura ambiente está entre 18 °C y 24 °C (65 °F y 75 °F). NO cargue el paquete de batería con una temperatura ambiental por debajo de 4,5 °C (40 °F) o por encima de 40,5 °C (105 °F). esto es importante y evitará daños graves en el paquete de baterías. 2. el cargador y el paquete de baterías pueden estar calientes al tacto durante la carga. esto es una condición normal y no indica un problema. para facilitar el enfriado del paquete de baterías después de su uso, evite colocar el cargador o el paquete de baterías en un ambiente cálido, como debajo de un toldo de metal o en un remolque sin aislamiento. 3. si el paquete de baterías no se carga adecuadamente: a. Revise el tomacorriente enchufando una lámpara u otro aparato b. Verifique si el tomacorriente está conectado a un interruptor que corta la energía cuando usted apaga las luces. c. mueva el cargador y el paquete de baterías a un lugar donde la temperatura ambiental sea de aproximadamente 18 °C a 24 °C (65 °F a 75 °F). d. si los problemas de carga persisten, lleve la herramienta, el paquete de baterías y el cargador al centro de mantenimiento local. 4. se debe recargar el paquete de baterías cuando no produce energía suficiente para tareas que previamente realizaba con facilidad.
- Page 21 DeSCRIPCIÓN De lAS fUNCIONeS 1. Unidad motriz 7. Botón de liberación de la batería 2. Interruptor deslizante de avance/reversa 8. Cargador de baterías 3. Gatillo de velocidad variable 9. Aditamento de taladro/destornillador 4. Botón de liberación del aditamento 10. Mandril sin llave 5. Sujetador de puntas 11. Anillo de ajuste de torsión 6. Batería INStRUCCIONeS De OPeRACIÓN: UNIDAD MOtRIZ INteRRUPtOR De GAtIllO INteRRUPtOR DeSlIZANte De AvANCe/ReveRSA El interruptor deslizante de avance/reversa (2) de la unidad motriz (1) se utiliza para controlar la dirección de giro del mandril (10): avance para instalar tornillos y reversa para quitar tornillos.
- Page 22 accesorio del accesorio antes de quitar o de instalar el accesorio. ADveRteNCIA Para reducir el riesgo de lesiones, no introduzca los dedos ni otros objetos en la unidad motriz, que no sean los aditamentos diseñados para funcionar con esta. • Bloquee la unidad motriz fijando el interruptor deslizante de avance/reversa (2) en la posición central. • para quitar un aditamento, oprima el botón de liberación (4) y extraiga el aditamento de la herramienta.
- Page 23 PORtABROCAS SIN llAve - fIGURA e ADveRteNCIA para reducir el riesgo de lesiones, apague la herramienta y quítele la batería o desconecte el enchufe de la fuente de alimentación antes de realizar cualquier ajuste o de quitar o instalar aditamentos o accesorios. Quite todo accesorio del aditamento antes de quitar o instalar el aditamento. ADveRteNCIA No tome la parte delantera del portabrocas y encienda la herramienta para ajustar las brocas (o cualquier otro...
- Page 24 atascaduras. • Asegúrese que el interruptor enciende y apaga el taladro. tAlADRADO eN MADeRA Los orificios en madera se pueden realizar con las mismas brocas de taladro helicoidales que se usan para los metales o con brocas de pala. Estas brocas deben estar afiladas y se deben retirar con frecuencia mientras se taladra para limpiar las virutas de las ranuras.
- Page 25 DeteCCIÓN De PROBleMAS Problema Causa posible Solución posible • La unidad no • el paquete de baterías no • Check battery pack installation. enciende. está bien instalado. • el paquete de baterías no • Check battery pack charging está cargado. requirements. • el accesorio no está • asegúrese de empujar por completo el asegurado. accesorio dentro de la unidad motriz. • el paquete de • el paquete de baterías no • inserte el paquete de baterías en el baterías no carga. está insertado en el cargador. cargador hasta (LED) se encienda la luz verde • el cargador no está...