Advertisement
Quick Links
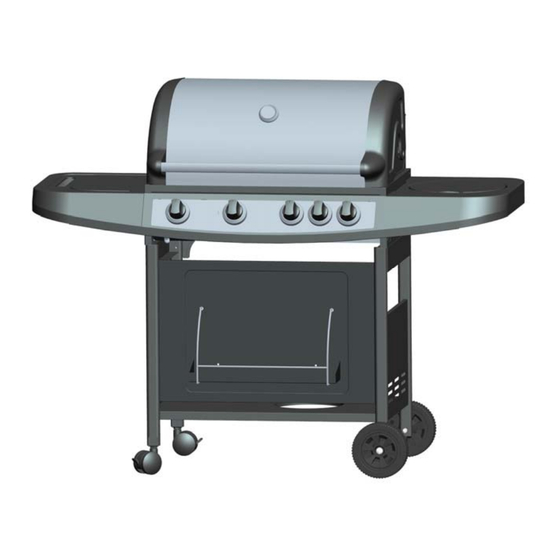
OWNER'S MANUAL FOR BARBECUE GAS GRILL
◆ IF A REPLACEMENT IS NECESSARY, PLEASE CONTACT EITHER OUR CUSTOMER
SERVICE DEPARTMENT OR YOUR LOCAL DEALER.
◆ THE USE OF UNAUTHORISED PARTS CAN CREATE UNSAFE CONDITIONS AND
ENVIRONMENT.
◆ FOR OUTDOOR USE ONLY.
◆ READ THE MANUAL CAREFULLY BEFORE ASSEMBLLING AND OPERATING THE
APPLIANCE.
◆ ACCESSIBLE PARTS MAY BE VERY HOT. PLEASE KEEP YOUNG CHILDREN AWAY.
◆ PLEASE RETAIN THE MANUAL FOR FUTURE REFERENCE.
◆ PLEASE REMOVE ANY TRANSIT PROTECTION BEFORE ASSEMBLLING AND OPERATING
THE APPIANCE.
◆ THIS APPLIANCE MUST BE KEPT AWAY FROM INFLAMMABLE MATERIALS
◆ PLEASE
WEAR
COMPONENTS
Model: CBA-401-A
PROTECTIVE
GLOVES
WHEN
HANDLING
1
PARTICULARLY
HOT
Advertisement

Related Manuals for Cadero CBA-401-A

Summary of Contents for Cadero CBA-401-A
- Page 1 OWNER’S MANUAL FOR BARBECUE GAS GRILL Model: CBA-401-A ◆ IF A REPLACEMENT IS NECESSARY, PLEASE CONTACT EITHER OUR CUSTOMER SERVICE DEPARTMENT OR YOUR LOCAL DEALER. ◆ THE USE OF UNAUTHORISED PARTS CAN CREATE UNSAFE CONDITIONS AND ENVIRONMENT. ◆ FOR OUTDOOR USE ONLY.
-
Page 2: Clearance To Combustibles
Technical information Model: CBA-401-A (with side burner) APPLIANCE CODE: CBA-401-A GAS CATEGORY: 3+(28-30/37) 3B/P(30) 3B/P(50) TYPES OF GAS: Butane Propane LPG Gas Mixtures LPG Gas Mixtures GAS PRESSURE: 28-30 mbar 37 mbar 30 mbar 50mbar TOTAL HEAT INPUT: 18.8kW (1347g/h) 19.5kW (1397g/h) - Page 3 Parts Diagram – Model CBA-401-A...
- Page 4 Parts List – Model CBA-401-A...
- Page 5 NOTE: Based on model CBA-401-A. The assembly for other models is the same. Assemble wheels (14) to legs of right cart frame (10). Secure wheels with two nuts (17), two flat washers (16) and two axles (15). Put bottom shelf (12) between legs of right cart frame (10).
- Page 6 Attach locking casters (13) to legs of left cart frame (9). Tighten casters using wrench provided (24). Right position left cart frame (9) to bottom shelf. Connect the cart frame and the bottom shelf using two M6X10 screws (7) from underside as shown.
- Page 7 First, remove front shelf (11) from back of the cart and right position in front of the cart. Manual match (25) need to be assembled at the same time. Connect the front shelf, manual match and front legs using two M6X10 screws (7) on each side of legs.
- Page 8 Assemble basket shelf (19) to condiment basket (18) as shown. Hang the assembled condiment basket on the front shelf (11). Fix using 2 M6X10 screw. This step requires two people to lift and position main body (5) ahead onto cart. Carefully lower the main body (5) onto the cart between the two braces.
- Page 9 Before assembling left side shelf (4) and right side burner shelf (6), loosen the screw on the left and right side plate of main body (5). Lift left side shelf and right side burner shelf and put down vertically. Side shelf and side burner shelf locked on the main body.
- Page 10 Instruction for fixing cast iron burner on the right side shelf. Open the lid on right side shelf and put the cast iron burner in the hole. Connect the burner with the connector nearby. Secure the burner using two M4X 8 screws (23). Check and make sure the S/S gas flow tube of the cast iron burner expedite before assembly! Connector...
- Page 11 Place flame tamers (3) over burners by inserting tabs of fire box into hole of flame tamer. Place cooking grates (2) into grill bottom. Grates wire running front to back should be facing upward, side to side wires downward. (* Some models are equipped with cooking plate.)
- Page 12 To assemble warming rack (1), insert leg wires into holes insides of grill bottom. Leg wire Hang oil box (20) right under hole of oil tray. Oil tray Oil box...
- Page 13 Connect gas regulator and gas hose assembly to connector of left side of grill main body. Secure hose and connector using wrench. NOTE: *always check leakage with soapy water! Manual match is already assembled in step 5. The match could be used in case of the piezo electric ignition failed to work.
- Page 14 DO NOT Lean over appliance when lighting Use spanner to tighten all gas fittings Leaving cooking food unattended Check all gas hose and line connection for Store combustible material, gasoline or damage,cuts or cracks each time for using flammable liquids or vapors within vicinity of the appliance.
- Page 15 Regulator and Hose Use only regulator and hose approved for LP Gas at the above pressures. The life expectancy of the regulator is estimated as 10 years. It is recommended that the regulator is changed within 10 years of the date of manufacture. The use of wrong regulator or hose is unsafe;...
-
Page 16: Lighting Your Barbecue
can lead to a fire beneath the appliance. Clean burner holes with a heavy-duty pipe cleaner Fit the hose to the appliance using a spanner to tighten it onto the connection thread. If the hose is replaced it must be secured to the appliance and regulator connections with hose clips. Disconnect the regulator from the cylinder (according to the directions supplied with the regulator) when the barbecue is not in use. - Page 17 should be made to any part of this barbecue and repairs and maintenance should only be carried out by a registered service engineer. For Safe Use Of Your Grill And To Avoid Serious Injury: ·DO NOT let children operate or play near grill. ·KEEP grill area clear and free from material that burn.
- Page 18 Lighting Instructions Read instruction before lighting. Open the lid and make sure all the knobs are on the OFF position. Connect the regulator to the gas bottle. Turn the gas supply “ON” at the cylinder. Check with the use of soapy water for any gas leakage between the bottle and the regulator. Push down the turn the knob anticlockwise to HIGH position (a clicking sound is heard).
-
Page 19: Cleaning And Care
- Burners extinguished by trolley doors. - Gas valves, which are difficult to turn. CLEANING AND CARE This appliance should be checked and serviced by an authorized service person every year to ensure the appliance remains in a safe operation condition. All cleaning and maintenance should be carried out when the barbecue is cool and with the fuel supply turned OFF at the gas cylinder. - Page 20 Cleaning the Burner Assembly Follow these instructions to clean and / or replace parts of burner assembly or if you have trouble igniting grill. 1. Turn gas off at control knobs and LP Tank. 2. Remove cooking grates, grease tray and grease cup. 3.
- Page 21 Outside Surface Use mild detergent or baking soda and hot water solution. Non-abrasive scouring powder can be used on stubborn stains, then rinse with water. If the inside surface of the barbecue lid has the appearance of pealing paint, baked on grease build-up has turned to carbon and is flaking off.
Need help?
Do you have a question about the CBA-401-A and is the answer not in the manual?
Questions and answers