Table of Contents
Advertisement
Quick Links
XX194-50-04
MPD-955 IP MEGAPIXEL DOME CAMERA
Vicon Industries Inc. does not warrant that the functions contained in this equipment will meet your
requirements or that the operation will be entirely error free or perform precisely as described in the
documentation. This system has not been designed to be used in life-critical situations and must not
be used for this purpose.
Warning: To prevent fire or shock hazard, do not expose the unit to rain
or moisture.
Copyright © 2010 Vicon Industries Inc. All rights reserved.
Product specifications subject to change without notice.
Vicon and its logo are registered trademarks of Vicon Industries Inc.
ViconNet, Kollector, I-Onyx and their logos are registered trademarks of Vicon Industries Inc.
VICON INDUSTRIES INC., 89 ARKAY DRIVE, HAUPPAUGE, NY 11788
TEL: 631-952-CCTV (2288) FAX: 631-951-CCTV (2288)
TOLL FREE: 800-645-9116
24-Hour Technical Support: 800-34-VICON (800-348-4266)
UK: 44 (0) 1489-566300
WEB: www.vicon-cctv.com
Vicon part number 8009-8194-50-04
Rev 110
Advertisement
Table of Contents

Subscribe to Our Youtube Channel
Related Manuals for Vicon I-Onyx MPD-955


Summary of Contents for Vicon I-Onyx MPD-955
- Page 1 XX194-50-04 MPD-955 IP MEGAPIXEL DOME CAMERA Vicon Industries Inc. does not warrant that the functions contained in this equipment will meet your requirements or that the operation will be entirely error free or perform precisely as described in the documentation. This system has not been designed to be used in life-critical situations and must not be used for this purpose.
-
Page 3: Fcc Notice
FCC Notice Note: Complies with Federal Communications Commission Rules & Regulations Part 15, Subpart B for a Class A digital device. WARNING This equipment generates and uses radio frequency energy and if not installed and used properly, that is, in strict accordance with the manufacturer’s instruction, may cause interference to radio and television reception. -
Page 4: Table Of Contents
Contents Introduction..............................1 Installation................................. 2 Connectors and Controls ..........................2 Lens Adjustments ............................3 Connections ..............................4 Mounting the Dome ............................5 Camera Configuration............................. 7 ViconNet Configuration..........................18 Appendix ................................ 24 Shipping Instructions............................ 27 Network Cable..............................28 Technical Information ........................... 29 Vicon Standard Equipment Warranty...................... - Page 5 Important Safeguards – Indoor 11. Power Cord Protection - Power supply cords should not be routed in trafficked areas or in tight spaces where they will be GRAPHIC SYMBOL EXPLANATION pinched or used to bear weight. Allow some slack in the cord The lightening bolt symbol alerts the user to the presence of where it enters the unit.
-
Page 7: Introduction
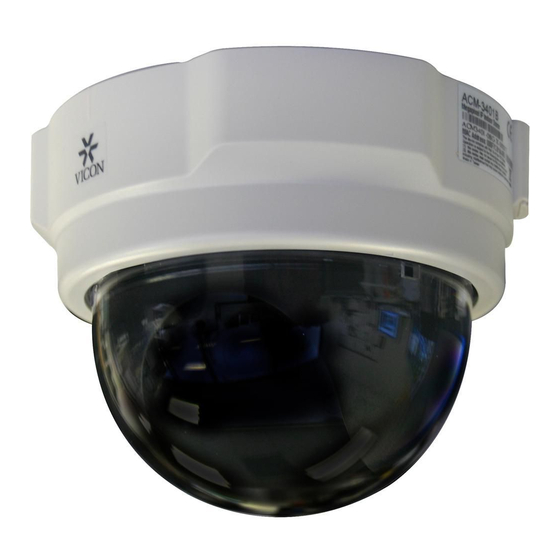
Introduction The information in this manual covers the installation and operation of the MPD-955 I-Onyx® Megapixel IP Dome Camera. This camera dome should only be installed by a qualified technician using approved materials and wiring practices in accordance with the National Electrical Code ANSI/NFPA 70, state, and local electrical codes. -
Page 8: Installation
Installation Connectors and Controls Internal Connections Reset Button To reset the camera back to factory defaults, follow the steps below: Step 1: Switch off the camera by disconnecting the power cable. Step 2: Press and continue to hold the reset button. Reconnect the power cable while continuing to hold the reset button. -
Page 9: Lens Adjustments
Power Input If your power input is 12 VDC, connect to power according to the table below. NAME DESCRIPTION DC Power Input Ground Pin Audio/Alarm Input/Output Not supported by ViconNet (future use). Len Adjustments The MPD-955 camera is supplied with a 4.2 mm fixed megapixel lens. The supplied 4.2 lens has an adjustment ring for focus. -
Page 10: Connections
Connections Follow the procedures below to connect the IP device to other equipment in the system. 1. If using 12 VDC, connect the power adaptor to the camera dome and then to an appropriate power source. 2. When powering with PoE, connect camera’s Ethernet port to an Ethernet (RJ-45) connector. If your camera has built-in PoE, you can regard it as a Powered Device (PD) and connect it directly to a Power Sourcing Equipment (PSE) device, such as a PoE switch. -
Page 11: Mounting The Dome
Mounting the Dome The dome can be installed in two configurations, surface-mount and wall mount. The wall mount installation requires the optional MPD-955 -WM Wall Mount. Refer to instruction manual XX194-60 for complete installation instructions on this mounting option. The MPD-955 consists of a ceiling plate, a base (which includes the camera/lens assembly) and a cover with a clear dome. - Page 12 Make cable connections (RJ-45 and power if not using PoE) to the camera board. There are cable straps and screws provided in the accessory kit to secure cables, as needed. Fasten the camera dome base to the ceiling plate by turning in a clockwise direction until it snaps into the tabs.
-
Page 13: Camera Configuration
Camera Configuration The I-ONYX MPD-955 megapixel cameras are configured in a different way than other ViconNet cameras. Initial setup and configuration are NOT done through VNSetup software but through a Web Browser interface. These cameras will not show up on the ViconNet Setup Site Selection list. - Page 14 Login Login with administrator’s account and password and then click button. Note: Default administrator account is set to Admin; password is set to 123456. After logging in, an ActiveX pop-up will display. ActiveX is not required to configure the camera or for it to work in ViconNet, but it is required to view video through the browser.
-
Page 15: Configuring The Camera
Configuring the Camera The Configuration screen provides access to all the menus necessary to set up the camera. WAN Settings Click button when finished with each Start with the WAN Setting menu to set the desired IP address. setting. • IP Address: The default IP address is 192.168.0.100. - Page 16 Host Settings Use the Host Setting screen to configure camera network information. Enter the Host Name (camera name) and desired menu Language from the drop down list. Vicon recommends that AutoDetect be selected for the WAN Port. Set the HTTP Port to the desired port; Vicon recommends keeping the default port 80.
-
Page 17: Video Settings
Video Settings Using the Video Setting screen, review the default video settings. The choice of settings in this menu has a direct impact on the video quality. Streaming Method is used to select how video is delivered to its destination; choose TCP Only for Unicast or Multicast Only for Multicast. - Page 18 Table 1: Constant Bit Rate Guidelines (MPEG-4 Mode Video Settings Expected Recording Duration Frame Rate Video Resolution Maximum 1 day 7 days 30 days Bit Rate (K) NTSC 8 (constant mode) 2000 21.6 G 151.2 G 648.0 G 4 (constant mode) 1200 13.0 G 90.7 G...
-
Page 19: Video Adjustments
Video Adjustments The Video Adjustment screen allows making changes to the actual camera settings for Brightness, Saturation and Contrast. Click button when settings are complete. Click Quit to return to the Configuration screen. Camera Setup Setup each camera in the system using the Camera Setup screen. Video Flipping inverts the image. Video Mirror reverses the image. -
Page 20: User Accounts
setting individual values for Red Gain and Blue Gain using a scale of 1-255; 1 is the least amount of red or blue color, 255 is the most. Manual should be used if the light range is out of any of the choices. - Page 21 Upgrade Firmware If the firmware needs to be upgraded, use the Firmware screen. (See upgrade instructions in Appendix.) Factory Defaults To return the camera to its factory defaults, select the Factory Default screen. Click button when settings are complete. XX194-50-03 Rev 1009 MPD-955 Megapixel Camera...
-
Page 22: Default Settings
Default Settings Menu Item Detail Default Setting Dynamic IP address Selected as default Static IP address If selected: 192.168.01.00 WAN Setting Subnet Mask: 255.255.255.0 ISP Gateway: 192.168.0.254 WAN Settings PPPoE Blank DNS Server Setting Primary DNS Server Blank Secondary DNS Server Blank DDNS Server Setting DDNS Type... - Page 23 Serial Port Baud Rate 9600 Serial Port Control 8, None, 1 Video Control Port 6001 Video Streaming Port 6002 Motion Enable Not checked Video Adjustment Brightness Saturation Contrast Video Flipping Not checked Video Mirror Not checked Lens Compensation Checked White Balance Mode Auto Camera Setup Exposure Mode...
-
Page 24: Viconnet Configuration
Adding Camera to the ViconNet System The I-ONYX MPD-955 camera will not automatically show up on the site list. It must be added to the ViconNet system. Unlike non-ViconNet cameras, this camera does not require a third party license to be used in the system. - Page 25 This screen allows you to add/search a camera, edit an existing camera or delete a camera. Because the same screen is being used for third party cameras, some cameras may already be in the list. To add a camera 1. Click the button on the I-Onyx 9xx and Third party Camera settings screen.
- Page 26 4. Enter a Camera Name for this camera and select IP or DNS. (DNS is used to add the camera by its hostname on the network instead of its IP address and is only available if the camera is registered in the DNS.) 5.
- Page 27 5. Enter a User Name and Password for this camera. This will be the camera’s identity in its browser. It is recommended that the user be administrator level to be able to access all camera features. 6. Click the button. This is a direct link to the browser for that camera.
- Page 28 Network Considerations The MPD-955 IP Camera Dome can be connected to any ViconNet network (Version 5 software). ViconNet NVRs, DVRs and Workstations can be used for live viewing and recording of network-streamed video. A network can be as simple as a single MPD-955 camera connected to a ViconNet Workstation or can be complex with the addition of several networks interconnected via WAN.
- Page 29 XX194-50-03 Rev 1009 MPD-955 Megapixel Camera...
-
Page 30: Appendix
Appendix The information in this appendix is intended to explain how to use the IP Utility that is on the CD provided with the camera. This utility is similar to VNSetup on Vicon cameras. Vicon recommends that this utility be used only as a tool to find an unknown IP address for a camera and to upgrade the firmware. - Page 31 To Edit Camera Information 1. Click checkbox of camera 2. Click Edit Account tab. 3. Enter Account and Pass word. 4. Click Apply button. 5. Account and Password fields are automatically entered for the camera. 1. Enter Account and Password. 2.
-
Page 32: Upgrade Firmware
Upgrade Firmware When the Firmware Upgrade tab is clicked, the following screen displays. 1. Select the firmware type want to upgrade. 2. Click Browse button to select the firmware you will upgrade. 3. Click Browse button to select the MD5 you will upgrade. 4. -
Page 33: Shipping Instructions
Shipping Instructions Use the following procedure when returning a unit to the factory: 1. Call or write Vicon for a Return Authorization (R.A.) at one of the locations listed below. Record the name of the Vicon employee who issued the R.A. Vicon Industries Inc. -
Page 34: Network Cable
Network Cable Caution: Careful selection of proper cable is essential to obtain the best performance. Vicon assumes no responsibility for poor performance when cables other than the recommended types, or equivalent, are used. Materials Use pure copper stranded conductors to obtain a low DC resistance. The preferred insulation and cable jacket is Polyvinyl chloride (PVC). -
Page 35: Technical Information
Technical Information ELECTRICAL (ViconNet) SOFTWARE OPERATION Input Power Source: 12 VDC or PoE (IEEE 802.3af Class 3). Network Setup: Standard network protocol type using IP addressing scheme and Current: 12 VDC: 275 mA. separate PC application PoE: 90 mA. software. Power Consumption: 12 VDC: 3.3 W. -
Page 36: Controls And Connectors
CONTROLS AND CONNECTORS MECHANICAL Dimensions: See Figure. External Controls: Reset button: Sets factory Height (H): 3.9 in. (99 mm). defaults. Diameter (D): 5.12 in. (130 mm). Connectors: Power: 12 VDC: 3-pin terminal; Weight: 0.7 lb (.35 kg). PoE: RJ-45. Ethernet: RJ-45 CAT 5. Mounting: Surface mount. -
Page 37: Vicon Standard Equipment Warranty
Vicon Standard Equipment Warranty Vicon Industries Inc. (the “Company”) warrants your equipment to be free from defects in material and workmanship under Normal Use from the date of original retail purchase for a period of three years, with the following exceptions: VCRs, all models: Labor and video heads warranted for 120 days from date of original retail purchase. - Page 38 Vicon Industries Inc. Corporate Headquarters 89 Arkay Drive Hauppauge, New York 11788 631-952-CCTV (2288) 800-645-9116 Fax: 631-951-CCTV (2288) Vicon Europe Headquarters Brunel Way Fareham, PO15 5TX United Kingdom +44 (0) 1489 566300 Fax: +44 (0) 1489 566322 Vicon Germany Kornstieg 3 D-24537 Neumuenster Phone: +49 (0) 4321 8790 Fax: +49 (0) 4321 879 97...
Need help?
Do you have a question about the I-Onyx MPD-955 and is the answer not in the manual?
Questions and answers