
Related Manuals for Pride Quantum 6000Z 3S


Summary of Contents for Pride Quantum 6000Z 3S
- Page 1 QUANTUM S E R I E S Including Models: Quantum 6000Z 3S, Quantum 6000Z 3SP, Quantum 6000Z 3MP, Quantum 6400Z 4S, Quantum 6400Z 4SP, Quantum 6400Z 4MP 1-800-800-8586 (US) 1-888-570-1113 (Canada)
- Page 2 The latest/current version of this manual is available on our website. 088 609 661 Copyright © 2009 Pride Mobility Products Corp. INFMANU3447/Rev C/January 2009...
-
Page 3: Table Of Contents
C O N T E N T S INTRODUCTION ..........................4 SAFETY ............................... 5 III. YOUR POWER CHAIR ......................... 17 IV. ASSEMBLY ............................21 COMFORT ADJUSTMENTS ..................... 24 VI. BATTERIES AND CHARGING ....................29 VII. CARE AND MAINTENANCE ..................... 33 VIII.WARRANTY ............................. -
Page 4: Introduction
Pride to enhance or preserve the safe use of this product. - Page 5 I I . S A F E T Y PRODUCT SAFETY SYMBOLS The symbols below are used on the power chair to identify warnings, mandatory actions, and prohibited actions. It is very important for you to read and understand them completely. Read and follow the information in the owner’s manual.
- Page 6 I I . S A F E T Y Do not lift the mobility vehicle while seated in it. Do not lift the mobility vehicle while seated in it. Do not connect an extension cord to the AC/DC converter or the battery charger. Removal of grounding prong can create electrical hazard.
- Page 7 Always replace both batteries at the same time. Battery charger for indoor use only. Disposal and recycling - Contact your Quantum Rehab Provider for information on proper disposal and recycling of your Pride product and its packaging. Quantum 6000Z Series www.pridemobility.com...
- Page 8 I I . S A F E T Y Locked and in drive mode. Place unit on level ground and stand to one side when changing from drive mode to freewheel mode or freewheel mode to drive mode. Unlocked and in freewheel mode. Do not place power chair in freewheel mode on a decline.
-
Page 9: General Guidelines
Pride products. Pre-Ride Safety Check Get to know the feel of your power chair and its capabilities. Pride recommends that you perform a safety check before each use to make sure your power chair operates smoothly and safely. -
Page 10: Your Power Chair
Your power chair is rated for a maximum weight capacity. Please refer to the specifications table for this limit. MANDATORY! Stay within the specified weight capacity of your power chair. Exceeding the weight capacity voids your warranty. Pride will not be held responsible for injuries and/or property damage resulting from failure to observe weight limitations. - Page 11 Doing so could cause instability in your power chair. Pride recommends that the maximum slope of an incline you attempt to safely ascend or descend on your power chair does not exceed 5° (8.7%). See figure 1.
- Page 12 Your power chair is designed to provide optimum stability under normal driving conditions—dry, level surfaces composed of concrete, blacktop, or asphalt. However, Pride recognizes that there will be times when you will encounter other surface types. For this reason, your power chair is designed to perform admirably on packed soil, grass, and gravel.
- Page 13 Motor Vehicle Transport Pride recommends that you do not remain seated in your power chair while traveling in a motor vehicle. The power chair should be stowed in the trunk of a car or in the back of a truck or van with batteries removed and properly secured.
-
Page 14: Positioning Belts
I I . S A F E T Y WARNING! Always be sure your power chair and its batteries are properly secured when it is being transported. Batteries should be secured in an upright position and protective caps should be installed on the battery terminals. Batteries should not be transported with any flammable or combustible items. - Page 15 Pride recommends that the power chair user determine his/her personal limitations and practice bending and reaching in the presence of a qualified healthcare professional.
- Page 16 NOTE: For further information on EMI/RFI, go to the Resource Center on www.pridemobility.com. If unin- tended motion or brake release occurs, turn your power chair off as soon as it is safe to do so. Call Pride at 1- 800-424-8205 to report the incident.
-
Page 17: Assembly
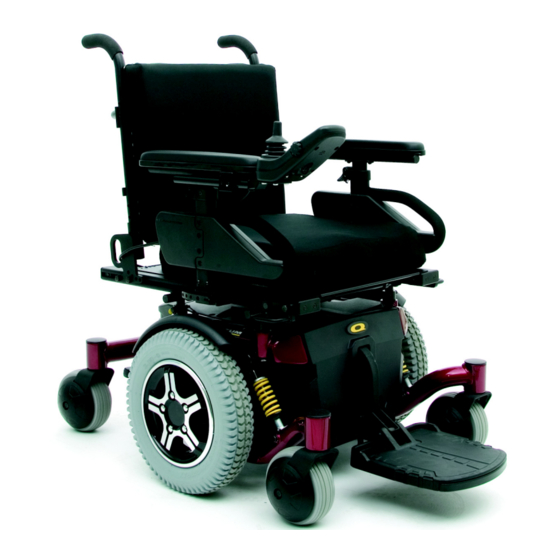
I I I . Y O U R P O W E R C H A I R THE QUANTUM 6000Z SERIES The Quantum 6000Z Series has two main assemblies: the seat assembly and the power base assembly. See figure 5. Typically, the seat assembly includes the armrests, seatback, and seat base. The power base assembly includes two motor/brake assemblies, two drive wheels, four caster wheels, two batteries, and wiring harnesses. - Page 18 I I I . Y O U R P O W E R C H A I R REAR SEAT MOUNT CONNECTORS FRONT SEAT MOUNT CONNECTORS REAR SHROUD REAR SHROUD FASTENER (FASTENER ON OPPOSITE SIDE NOT SHOWN) FRONT COVER MANUAL FREEWHEEL LEVER Figure 6.
- Page 19 I I I . Y O U R P O W E R C H A I R Motor Connectors: This is where the controller connects to the motors. Battery Connector: This is where the controller connects to the batteries. Controller Power Module: This enables the controller to communicate with the batteries and the motors.
- Page 20 I I I . Y O U R P O W E R C H A I R Dual Manual Freewheel Levers For your convenience, your power chair is equipped with dual manual freewheel levers. The levers are located on each motor, and allow you to disengage the drive motors and maneuver the chair manually.
- Page 21 I V . A S S E M B L Y INITIAL ASSEMBLY Your power chair may require some assembly either before initial use or after transportation. It may also require disassembly to make some comfort adjustments. Figure 10 details those parts of the power chair that are designed to be disassembled and assembled by an end user or by a qualified caregiver before using the product or making comfort adjustments.
- Page 22 I V . A S S E M B L Y Seat Installation SEAT It may be necessary to install the seat either prior to LATCH initial operation or after transporting your power chair. SAFETY Contour seats are attached to the power base with the Universal Mounting System (UMS).
- Page 23 I V . A S S E M B L Y Power Elevating Seat Installation Your power chair may be equipped with the power ele- vating seat option. While the seat itself may be any one of the styles offered for this model, the way the seat base attaches to the power base is different.
-
Page 24: Comfort Adjustments
Your Quantum Rehab Provider has evaluated your power chair and made any necessary adjustments to suit your specific requirements. Do not change your seating configuration without first contacting Pride Mobility Products or your Quantum Rehab Provider. - Page 25 V . C O M F O R T A D J U S T M E N T S 10. Reinstall the retaining clips. 11. Reinstall the seat. 12. Reconnect the controller to the power base. 13. Reinstall the rear shroud and tighten the fasteners. Seat Position You can move the seat forward or rearward by chang- ing the extrusion mounting position.
-
Page 26: Controller Position
V . C O M F O R T A D J U S T M E N T S Armrest Width Adjustment You can change each armrest’s width independently of the other. NOTE: Changing the armrest width may increase the overall width of your power chair. - Page 27 V . C O M F O R T A D J U S T M E N T S To change the controller position: 1. Turn off the power to the controller. 2. Loosen the rear shroud fasteners and remove the rear shroud.
- Page 28 V . C O M F O R T A D J U S T M E N T S Quick Release Fasteners: The foot platform is attached to the power base with two quick release fas- teners. See figure 21. Each quick release fastener con- sists of a bolt, a lever, and a nut.
-
Page 29: Batteries And Charging
PROHIBITED! Do not allow unsupervised children to play near the power chair while the batteries are charging. Pride recommends that you do not charge the batteries while the power chair is occupied. - Page 30 4. Plug the off-board charger into the electrical outlet. NOTE: If it is a Pride off-board charger, then there are two lights in it. The red light indicates that power to the off-board charger is on. The green light indi- cates that the batteries are fully charged.
- Page 31 We work closely with our battery manufacturer to provide a battery that best suits your power chair’s specific demands. Fresh batteries arrive regularly at Pride and are promptly shipped with a full charge. During shipping, the batteries encounter temperature extremes that may influence initial performance. Heat robs the charge from the battery, and cold slows the power available and extends the time needed to recharge the battery (just as with a car battery).
- Page 32 V I . B A T T E R I E S A N D C H A R G I N G How can I ensure maximum battery life? A fully charged deep-cycle battery will provide reliable performance and extended battery life. Keep your power chair’s batteries fully charged whenever possible.
-
Page 33: Care And Maintenance
V I I . C A R E A N D M A I N T E N A N C E CARE AND MAINTENANCE Your Quantum 6000Z Series is a sophisticated power chair. Like any motorized vehicle, it requires routine main- tenance checks. - Page 34 V I I . C A R E A N D M A I N T E N A N C E All wheel bearings are prelubricated and sealed. They require no subsequent lubrication. The body shroud has been sprayed with a clear sealant coating. You can apply a light coat of car wax to help it retain its high-gloss appearance.
-
Page 35: Cleaning And Disinfection
V I I . C A R E A N D M A I N T E N A N C E Storage Your power chair should be stored in a dry place, free from temperature extremes. When storing, disconnect the batteries from the power chair. -
Page 36: Battery Replacement
V I I . C A R E A N D M A I N T E N A N C E TIRE TUBE FRONT RIM HALF SCREWS WHEEL REAR RIM HALF LUG NUTS Figure 25. Quantum 6000Z Series Drive Wheel Figure 26. - Page 37 V I I . C A R E A N D M A I N T E N A N C E BATTERY WIRING DIAGRAM FRONT COVER REAR SHROUD REAR SHROUD FASTENER (OPPOSITE SIDE NOT SHOWN) RELEASE HANDLES REAR BATTERY FRONT BATTERY Figure 27.
- Page 38 V I I . C A R E A N D M A I N T E N A N C E To replace the batteries: 1. Turn off the power to the controller. 2. Make sure that the power chair is in drive mode. See III. “Your Power Chair.” 3.
- Page 39 LIFETIME LIMITED WARRANTY For the lifetime of your power chair from the date of purchase, Pride will repair or replace at our option to the original purchaser, free of charge, any of the following parts found upon examination by an authorized represen-...
- Page 40 This warranty gives you specific rights, and you may also have other rights which vary from state to state. Please fill out and return the product registration card to Pride. This will aid Pride in providing the best possible technical and customer service.
-
Page 41: Appendix I - Specifications
A P P E N D I X I - S P E C I F I C A T I O N S SPECIFICATIONS Suspension: Active-Trac ATX with integrated rear dual-strut suspension and articulating caster beam Drive Wheels: 14 in. (35.56 cm), pneumatic or solid available Caster Wheels: 6 in. - Page 42 A P P E N D I X I - S P E C I F I C A T I O N S LENGTH (WITH FRONT RIGGINGS) 43 in. (109.22 cm) LENGTH (WITHOUT FRONT RIGGINGS) 36 in. (91.44 cm) 22.5 in.
- Page 44 Inclusion of all Parts Joystick Serial Number Controller Serial Number Left Motor Serial Number Right Motor Serial Number Fit and Finish Performance Pride keeps a more detailed report on file at the factory. Date Inspected Inspector *INFMANU3447 Product Serial #...