Table of Contents
Advertisement
Available languages
Available languages
Air-Conditioners For Building Application
INDOOR UNIT
CMB-P-V-G1
CMB-P-V-GA1 (MAIN BC CONTROLLER) CMB-P-V-GB1 (SUBBC CONTROLLER)
CMB-P-V-HA1 (MAIN BC CONTROLLER) CMB-P-V-HB1 (SUBBC CONTROLLER)
INSTALLATION MANUAL
For safe and correct use, please read this installation manual thoroughly before installing the air-conditioner unit.
INSTALLATIONSHANDBUCH
Zum sicheren und ordnungsgemäßen Gebrauch der Klimageräte das Installationshandbuch gründlich durchlesen.
MANUEL D'INSTALLATION
Veuillez lire le manuel d'installation en entier avant d'installer ce climatiseur pour éviter tout accident et vous assurer d'une utilisation correcte.
MANUAL DE INSTALACIÓN
Para un uso seguro y correcto, lea detalladamente este manual de instalación antes de montar la unidad de aire acondicionado.
MANUALE DI INSTALLAZIONE
Per un uso sicuro e corretto, leggere attentamente questo manuale di installazione prima di installare il condizionatore d'aria.
INSTALLATIEHANDLEIDING
Voor een veilig en juist gebruik moet u deze installatiehandleiding grondig doorlezen voordat u de airconditioner installeert.
MANUAL DE INSTALAÇÃO
Para segurança e utilização correctas, leia atentamente este manual de instalação antes de instalar a unidade de ar condicionado.
E°XEIPI¢IO O¢H°IøN E°KATA™TA™H™
°È· ·ÛÊ¿ÏÂÈ· Î·È ÛˆÛÙ‹ ¯Ú‹ÛË, ·Ú·Î·Ï›ÛÙ ‰È·‚¿ÛÂÙ ÚÔÛ¯ÙÈο ·˘Ùfi ÙÔ ÂÁ¯ÂÈÚ›‰ÈÔ ÂÁηٿÛÙ·Û˘ ÚÈÓ ·Ú¯›ÛÂÙ ÙËÓ
ÂÁηٿÛÙ·ÛË Ù˘ ÌÔÓ¿‰·˜ ÎÏÈÌ·ÙÈÛÌÔ‡.
РУКОВОДСТВО ПО УСТАНОВКЕ
Для осторожного и правильного использования прибора необходимо тщательно ознакомиться с данным руководством по
установке до выполнения установки кондиционера.
MONTAJ ELK‹TABI
Emniyetli ve do¤ru biçimde nas›l kullan›laca¤›n› ö¤renmek için lütfen klima cihaz›n› monte etmeden önce bu elkitab›n› dikkatle okuyunuz.
INSTALLATIONSHANDBOK
Läs den här installationshandboken noga innan luftkonditioneringsenheten installeras, för säker och korrekt användning.
РЪКОВОДСТВО ЗА МОНТАЖ
За безопасна и правилна употреба, моля, прочетете внимателно това ръководство преди монтажа на климатизатора.
Advertisement
Chapters
Table of Contents

Related Manuals for Mitsubishi Electric CITY MULTI CMB-P104V-G1


Summary of Contents for Mitsubishi Electric CITY MULTI CMB-P104V-G1
-
Page 1: Installation Manual
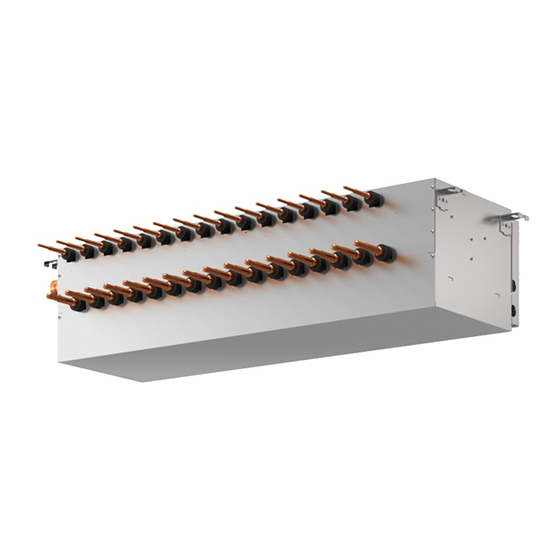
Air-Conditioners For Building Application INDOOR UNIT CMB-P-V-G1 CMB-P-V-GA1 (MAIN BC CONTROLLER) CMB-P-V-GB1 (SUBBC CONTROLLER) CMB-P-V-HA1 (MAIN BC CONTROLLER) CMB-P-V-HB1 (SUBBC CONTROLLER) INSTALLATION MANUAL For safe and correct use, please read this installation manual thoroughly before installing the air-conditioner unit. INSTALLATIONSHANDBUCH Zum sicheren und ordnungsgemäßen Gebrauch der Klimageräte das Installationshandbuch gründlich durchlesen. - Page 2 <A> Top view [Fig. 2.2.1] [Fig. 2.3.1] <B> Front view <A> <B> Model name CMB-P104V-G1 CMB-P105V-G1 CMB-P106V-G1 CMB-P108V-G1 INDOOR UNIT SIDE CMB-P1010V-G1 CMB-P1013V-G1 1098 CMB-P1016V-G1 CMB-P108V-GA1 CMB-P1010V-GA1 A Inspection hole 1110 CMB-P1013V-GA1 B On the side of outdoor unit piping CMB-P1016V-GA1 C Control box CMB-P104V-GB1...
- Page 3 [Fig. 2.4.2] CMB-P108, 1010, 1013, 1016GA1, P104, 108GB1 (GA1: In the case the outdoor unit is 26-hp (P650 model) or less.) CMB-P1016HA1, 1016HB1 (HA1: In the case the outdoor unit is 28-hp (P700 model) or more.) <System that has more than 16 branching points> A Outdoor unit B MAIN BC controller Notes:...
- Page 4 [Fig. 2.4.3] ●Restrictions on piping length PURY-P200/250/300YHM-A, PURY-EP200YHM-A PURY-P600/650YSHM-A, PURY-EP600YSHM-A PQRY-P200/250/300YHM-A 1000 1000 100 110 100 110 PURY-P350/400/450Y(S)HM-A, PURY-EP250/300YHM-A PURY-P700/750/800YSHM-A 1000 1000 100 110 100 110 PURY-P500/550YSHM-A, PURY-EP400/450/500/550YSHM-A(1) PQRY-P400/450/500/550/600YSHM-A 1000 100 110 A Total piping length (m) B Piping length between outdoor unit and BC controller (m) [Fig.
- Page 5 [Fig. 4.1.1] A Indoor unit connecting port B Cutting point : ø9.52 (Liquid side) or ø15.88 (Gas side) (Indoor unit model : bigger than P50) C Cutting point : ø6.35 (Liquid side) or ø12.7 (Gas side) (Indoor unit model : P50 or smaller) D Cut the piping at the cutting point E Have pipe expansion of indoor unit connecting port F Field pipe...
- Page 6 A Locally procured insulating material [Fig. 4.2.1] [Fig. 4.3.1] for pipes B Bind here using band or tape. A Cut here c Do not leave any opening. B Remove brazed cap D Lap margin: more than 40 E Insulating material (field supply) F Unit side insulating material [Fig.
-
Page 7: Table Of Contents
Do not reconstruct or change the settings of the protection devices. - If the pressure switch, thermal switch, or other protection device is shorted HIGH VOLTAGE WARNING: or operated forcibly, or parts other than those specified by Mitsubishi Electric are used, fire or explosion may result. •... -
Page 8: Before Installation
• Use liquid refrigerant to fill the system. 1.4. Before installation (relocation) - electri- - If gas refrigerant is used to fill the system, the composition of the refrigerant cal work in the cylinder will change and performance may drop. •... -
Page 9: Securing Installation And Service Space
1. For hanging from the ceiling [Fig. 2.2.1] (P.2) (Unit: m) Item Piping portion Allowable value • Provide an inspection hole 450 mm square in the ceiling surface as shown in Not to exceed the [Fig. 2.3.1] (P.2). A+B+a+b Total piping length maximum refriger- •... -
Page 10: Installing Bc Controller
*7 In the system to which indoor units of the P100 through P140 models are (Unit: m) connected, merge the two ports before connecting them. (Set DIP SW4-6 Item Piping portion Allowable value on the BC controller to ON.) F+G+A+B+C Not to exceed the *8 It is possible to connect the P100 through P140 models of indoor units to Total piping length... -
Page 11: Refrigerant Piping Work
Caution: 6. Be sure to use non-oxidative brazing where necessary. If you do not use non- oxidative brazing, it may clog the pipes. • Use refrigerant piping made of phosphorus deoxidized copper and cop- While under a nitrogen purge, braze the indoor unit connecting port before per alloy seamless pipes and tubes. -
Page 12: Insulating Refrigerant Pipes
• Connect the supplied drain hose to the discharge port on the unit body. Use 4.3. Insulating refrigerant pipes hard vinyl chloride pipes VP-25 (ø32) for drain piping (2). Tighten the supplied Be sure to add insulation work to refrigerant piping by covering high-pressure pipe and drain hose onto the discharge port using the supplied hose band. - Page 13 и травмированию людей. • Мастер монтажа и электрик должны обеспечить защиту системы от • Aксессуары, указанные компанией Mitsubishi Electric, должны протечек в соответствии с требованиями местного законодательства использоваться в обязательном порядке. и стандартов. - Для установки аксессуаров необходимо обратиться к помощи...
-
Page 14: Меры Предосторожности
• Особое внимание необходимо уделять области установки изделия, • При установке прибора в больнице, на станции связи или в и особенно его основанию, где возможно скопление паров аналогичном помещении обеспечьте достаточную защиту от шума. охлаждающего газа, который тяжелее воздуха. - Преобразовательное оборудование, частный электрогенератор, высоковольтное... -
Page 15: Выберите Место Установки
• Не прикасайтесь к трубам хладагента во время работы и сразу после • Не используйте кондиционер воздуха, если его панели и крышки выключения прибора. сняты. - В течение и сразу после эксплуатации прибора трубы хладагента могут - Движущиеся, горячие части или части под напряжением могут быть... - Page 16 [Fig. 2.4.2] (P .3) (Единица измерения: м) A Наружный блок B ГЛАВНЫЙ ВС-контроллер Допустимое Часть Часть трубы C ВСПОМОГ АТЕЛЬНЫЙ ВС-контроллер значение D Внутренний блок Не превышать A+B+a+b E Ветвь трубный комплект подсоединяется внутри наружного блока на Общая длина трубы максимальной...
-
Page 17: Инсталляция Регулятора Вс
*9 Если производительность наружного блока 28-hp (модель Р700) и Расстояние между главным ВС-контроллером более, используйте главный ВС-контроллер типа НА. ВС-контроллер и самым дальним внутренним блоком типа G нельзя подсоединять к блокам производительностью от 16 -hp (модель P400) до 26-hp (модель P650), а ВС-контроллеры типа G и... -
Page 18: Прокладка Труб Хладагента
Внимание: - Попадание в контур циркуляции хладагента пыли, грязи или воды может • Для трубопроводов хладагента используйте бесшовные трубы и привести к ухудшению свойств масла и отказу компрессора. • Слегка смажьте развальцовки сложноэфирным синтетическим трубки из раскисленной фосфором меди и медного сплава.Кроме маслом, эфирным... -
Page 19: Изоляция Труб Хладагента
4.3. Изоляция труб хладагента • Подсоедините поставленный дренажный шланг к сливному порту на корпусе прибора. Используйте из твердого винилхлорида VP-25 (ø32) для В обязательном порядке снабдите трубы хладагента изоляцией (раздельно дренажных труб. (2). Закрепите поставленный дренажный шланг на трубы высокого и низкого давления) с достаточным количеством порту... -
Page 20: Установка Адресов И Операционных Блоков
6. Установка адресов и операционных блоков s Адрес регулятора ВС, как правило, должен задаваться по формуле Адресный переключатель на каждом регуляторе ВС, поставляемом с завода- 1+ адрес внешнего устройства. Тем не менее, если при использовании изготовителя, установлен на отметку “000” . данной... - Page 21 This product is designed and intended for use in the residential, commercial and light-industrial environment. • Low Voltage Directive 2006/95/EC The product at hand is • Electromagnetic Compatibility Directive based on the following EU regulations: 2004/108/EC Please be sure to put the contact address/telephone number on this manual before handing it to the customer.