
Related Manuals for Daewoo DMP-2000


Summary of Contents for Daewoo DMP-2000
- Page 1 S/ M No. : OSMP200001 Ser v ice M a nua l Digital Multi Player Model: DMP-2000 C aution : In this Manual, some parts can be changed for improving, their performance without notice in the parts list. May. 2005...
-
Page 2: Table Of Contents
Table of Contents I. Functionality Test Test tools and devices……………………………………………………………..3 Introduction of functional buttons………………………………………….…… Test procedure……………………………………………………………..……... 4 II. Troubleshooting Unable to turn power on……………………………………………………….……6 Malfunction after power on………………………………………………….………6 Abnormal LCD display………………………………………………………………7 Abnormal video………………………………………………………………………7 Abnormal flashing……………………………………………………………………7 Unable to charge battery……………………………………………………………8 Abnormal voice recording and replaying………………………………………….8 Inaccurate date and time……………………………………………………………8 Button pressing malfunction……………………………...………………………...8 III. -
Page 3: Functionality Test
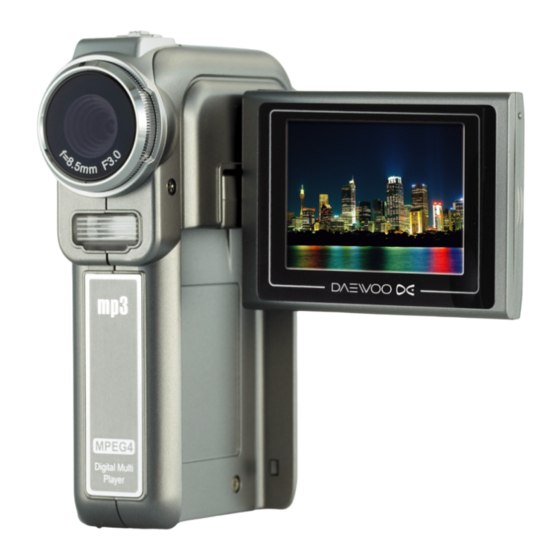
Functionality Test 1. Test tools and devices SD Card, TV, Computer, AC Adapter, TV Cable, USB Cable, Earphone. 2. Introduction of functional buttons ¡ ¹ Front View Lens Flash Self-Timer LED ¡ ¹ Rear View/ Key Pad Illustration Shutter Button Tele-Wide Button Direction Button Mode Button... -
Page 4: Test Procedure
¡ ¹ Side View Strap eyelet Speaker LCD Panel Cover ¡ ¹ Top/ Bottom View Microphon Tripod Mount Macro Switch Power Button 3. Test procedure Test Item Test Procedure Power supply A. Install Li-Ion battery and press Power Button, watch if system the LCD normal. - Page 5 Test Item Test Procedure Button functions A. Press Power Button to turn the power on, test the functions of all buttons. Direction Button: Right button: Flash AUTO/OFF Left button: Self-Timer ON/OFF Up button: Invalid Down button: LCD Information ON/OFF Enter button: Menu ON REC/PLAY button: Switch between Record Mode and Playback Mode.
- Page 6 Film recording A. You can start recording film by pressing shutter button ( ). When a film is under recording, a time indicator will display on LCD monitor. To stop recording, press shutter button ( ) again. B. To view recorded films, press the REC/PLAY button once to switch to Playback Mode.
-
Page 7: Troubleshooting
II. Troubleshooting Adjust the power supply to 4.2V and make sure that power polarities are correct before plugging into the power to avoid the damage to PCBA. 1. Repair instruments: Tri-use meter, oscilloscope, power supply. 2. Troubleshooting: Symptom Repairing Unable to turn (1). -
Page 8: Abnormal Lcd Display
(2). Power can be turned on but it goes off when replaying picture or video file: A. Check if the circuit around U4 DDR RAM is normal, if normal then replace the main board. B. If U4 is normal but the power goes off while replaying picture or video file, replace U3, if U4 is damaged, replace the main board. -
Page 9: Unable To Charge Battery
Flash light not (1). Unable to charge: normal A. Check if the battery still has voltage, use tri-use meter to measure if the U12.3 voltage is at High. B. If the U12.3 voltage is at High, please check if the voltage is at 2.5V. If the voltage is not accurate, check if R27 and R100 are normal. -
Page 10: Software Updating
III. Software Updating 1. Test devices: Camera, SD card, battery (or charger) Ver1.0... -
Page 11: Disassembling
2. Procedure of software updating: A. Make sure SD card has the FW for updating (Place FW file zburnT_C7.run.elf and directory DIC Mat the root directory of the SD card). B. Place the SD card to the lock status. C. Place the SD card and the battery into the camera and open the camera. D. - Page 12 5. Remove right cover and LCD Cable 6.Disassemble screws on the keyboard and take off the keyboard 7. Take off the sensor board 8. Remove the capacitor holder 9. Remove hinge screw and hinge cover 10. Remove the hinge Ver1.0...
-
Page 13: Parts List
11.Take off the LCD panel 12. Push out the LCD panel cover and take off the LCD board 12. Mechanical components 13. Electronic components V. Parts List Number Name Material Number Quantity Main Board Assembly 725-04220L-A01 Sensor Board 725-04220L-A02 Assembly Key Board Assembly 725-04220L-A03 LCD Board... - Page 14 1. Main Board Assembly 2. Sensor Board Assembly 3. Key Board Assembly 4. LCD Board 5. Left Cover 6. Right Cover 7.Battery Cover 8. Front Cover Assembly Ver1.0...
- Page 15 9. LCD Panel 10. Capacitor Holder 11. Speaker Holder 12. LCD Panel Front Cover Assembly 13. LCD Panel Rear Cover Assembly 14. Hinge Cable 15. Key PAD Assembly 16. Hinge Upper and Lower Covers Ver1.0...
-
Page 16: Tools
VI. Tools 1. Twister 2. Screwdriver 3. Oscilloscope 4. Power Supply 5. Tri-use Meter Ver1.0...
Need help?
Do you have a question about the DMP-2000 and is the answer not in the manual?
Questions and answers