Table of Contents
Advertisement
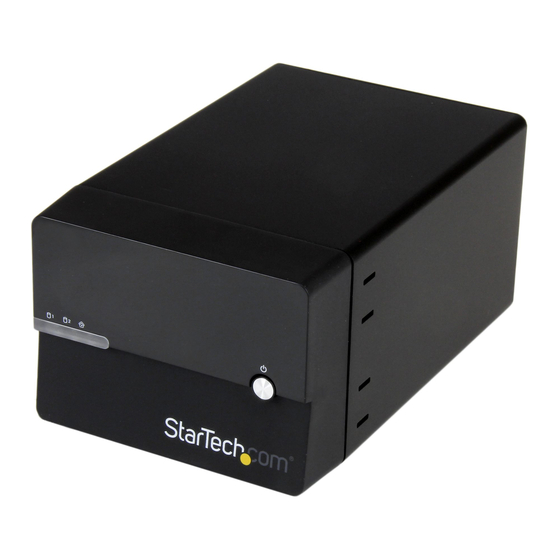
Dual 3.5" SATA NAS Enclosure with RAID
and USB 3.0
S352BMU3N
DE: Bedienungsanleitung - de.startech.com
FR: Guide de l'utilisateur - fr.startech.com
ES: Guía del usuario - es.startech.com
IT: Guida per l'uso - it.startech.com
NL: Gebruiksaanwijzing - nl.startech.com
PT: Guia do usuário - pt.startech.com
For the most up-to-date information, please visit: www.startech.com
Manual Revision: 07/04/2014
*actual product may vary from photos
Advertisement
Table of Contents

Related Manuals for StarTech.com S352BMU3N


Summary of Contents for StarTech.com S352BMU3N
- Page 1 DE: Bedienungsanleitung - de.startech.com FR: Guide de l'utilisateur - fr.startech.com ES: Guía del usuario - es.startech.com IT: Guida per l'uso - it.startech.com NL: Gebruiksaanwijzing - nl.startech.com PT: Guia do usuário - pt.startech.com For the most up-to-date information, please visit: www.startech.com Manual Revision: 07/04/2014...
-
Page 2: Fcc Compliance Statement
StarTech.com. Where they occur these references are for illustrative purposes only and do not represent an endorsement of a product or service by StarTech.com, or an endorsement of the product(s) to which this manual applies by the third-party company in question. Regardless of any direct acknowledgement elsewhere in the body of this document, StarTech.com hereby... -
Page 3: Table Of Contents
Table of Contents Product Diagram ..................1 Front View ..............................1 Rear View ..............................1 Introduction ....................2 Packaging Contents ..........................2 Recommended System Requirements ....................2 Getting Started ..................2 Step 1. Installing your hard drives ....................... 2 Step 2. Set your RAID Configuration ....................7 Step 3. - Page 4 Restore Default settings to your NAS Enclosure (Reset) ............. 51 Enable or Disable SMB Service ......................53 Enable or Disable WebDAV Service ....................54 Enable or Disable FTP Service....................... 56 Download and host Torrent Files ......................57 Manage Accounts ............................. 64 Quick Setup Guide (Optional).......................
-
Page 5: Product Diagram
Product Diagram Front View Front Panel Power Button Drive Activity LEDs Rear View RAID switch LAN Port Drive Fan Reset Button Main Power Switch RAID switch Set RAID Button USB 3.0 Port Power Jack Instruction Manual... -
Page 6: Introduction
Introduction Packaging Contents • NAS HDD RAID Enclosure • Ethernet Cable • 1M USB 3.0 A to B Cable • Universal Power Adapter w/ regional cables (NA/UK/EU) • Rubber foot set • Instruction Manual Recommended System Requirements • 2X 3.5” SATA hard drives For NAS Operation •... - Page 7 1. Using a Phillips head screw driver (not included) remove the screw from the bottom of the enclosure. 2. Slide the “front panel” upward toward the top of the enclosure. Instruction Manual...
- Page 8 3. Lift the panel off to reveal the drive bays. Instruction Manual...
- Page 9 4. Slide each of your hard drives into the bay. Instruction Manual...
- Page 10 5. Place the front panel back on by placing it over the drive bay, and sliding it into place. 6. Replace the screw using the Phillips head screw driver. Instruction Manual...
-
Page 11: Step 2. Set Your Raid Configuration
Step 2. Set your RAID Configuration WARNING! In order to prepare your drives for RAID and Network operation, this enclosure will configure newly installed drives into an acceptable format (exFAT). Please be aware that any data currently on the drives may be lost during this process. It is recommended that you back up all data prior to setting your RAID configuration. -
Page 12: Step 3. Nas Setup
LAN port on your router. 2. Access the web interface by browsing the device name with your web browser: http: //S352BMU3N Note: Not all environments will support browsing by product name. In this case, you need to access your router to get the IP address assigned to your NAS Enclosure. -
Page 13: Step 4. Initialize Your Hard Drives
Default IP address: http://192.168.0.2 Default Device Name: http://S352BMU3N 2. The NAS Enclosure uses user accounts to limit access. An administration account is used for configuration and restricted access. You may be prompted to enter the NAS administration user name and password. - Page 14 Note: The administration account user name and password can be changed, and additional accounts can be added (See: Page 64 <Manage Accounts>). 3. You have now accessed the Web Interface Home page, as the “5 option” web GUI menu is displayed. Hard Drive Initialization WARNING! Newly installed drives will be formatted into an acceptable format for the NAS enclosure (exFAT).
-
Page 15: Step 5. Use Your Nas
You can also click Cancel if you wish to complete additional configuration steps before formatting the hard drive. WARNING! Any data on the drives will be deleted upon format. Step 5. Use your NAS Your NAS is now ready for operation. Please reference Basic NAS Operation for day to day operation and configuration. - Page 16 2. Select Map network drive. 3. In the folder box, type the network path to the NAS Enclosure. Note: The default network path for the NAS Enclosure is: http://192.168.0.2 Instruction Manual...
- Page 17 4. Enter the Username and password for an active account on the NAS enclosure, and click the OK button. 5. The NAS has now been mapped as a network drive. In the future when you want to access the NAS it will be available as a listed drive in my Computer. Create User Accounts If more than one person is accessing the NAS, additional user accounts can be created with full or limited access.
- Page 18 2. Click the Configuration Icon, the main settings status window is displayed. 3. From the main menu on the left hand side, select User Set, and select Account. Instruction Manual...
- Page 19 4. The account page is displayed, select the New button from the account list. 5. Enter your desired name and password in the specified fields. 6. Next specify whether you would like the account to be Read only (can only access files), or Read/Write (Can access save and edit files) by placing a bullet in your preference.
- Page 20 8. The account has now been created, and is listed in the account List box below. Note: A new folder for specific user content is also created with each account and listed under folder list. Set a Static IP Address It is recommended that you set the NAS IP address to a static IP address to avoid your Router automatically adjusting the assigned IP address.
- Page 21 3. Click Network, in the Main Menu on the left hand side, next click IP Settings. 4. The IP Settings window is now displayed. By Default the Internet Protocol Information is set to Automatic IP. To set a static IP address, place a bullet in Static IP as below.
- Page 22 5. Click the Apply button to set your changes. Note: For detailed information regarding the best configuration for your network, please contact your network administrator. Manage NAS Files and View Media Through a Web Browser Access files and folders on your NAS through a web browser You can access files and folders currently saved on your NAS using any local web browser.
- Page 23 Note: Some files are playable from the File and Folder mode of the web page but for more control we recommend the Audio and Video playback modes. Upload files to your NAS You can upload files to your NAS using any web browser. 1.
- Page 24 2. A list of all supported music files that are available to the user will be displayed in the menu on the left hand side. Note: Supported audio playback file formats: mpeg /mp3, mp4/m4a, ogg, and wav. Your web browser can limit support for audio playback file formats. For optimal support we recommend Google Chrome.
- Page 25 Play video files directly in your web browser, with the web based media player You can play video files saved on your NAS through any HTML 5 web browser, using the web based media player. 1. From the 5 option GUI menu, click the Video Icon. 2.
- Page 26 4. (optional) To stop and start playing the video file, use the play/pause button located at the bottom of the window. Note: An HTML 5 browser is required for video playback. You may be prompted to install a plugin in order to play and manage the audio playback. View image files directly in your web browser, with the web based media player You can view image files saved on your NAS through any web browser through the web based media player.
- Page 27 3. Double click the file of your choice to view the image file. Mobile App Access The NAS Enclosure is compatible with most WebDAV mobile applications available on iSO, Android, and Blackberry. Through WebDAV you can access files and folders using the application on your smartphone or tablet.
-
Page 28: Advanced Nas Operation
Advanced NAS Operation From the configuration page you can access advanced configurations and functions. Access Configuration Page 1. Access the Web Interface Home Page. (See: Web Interface Access) 2. From the “5 option” menu select the Configuration Icon. 3. The Configuration Page is now displayed. Instruction Manual... - Page 29 View and edit System and Network Information listed in the status menu View or change System Information: 1. Access Configuration Page. (See: Access configuration page) Note: If you have navigated to a different page, than the home page select the Status menu from the left hand menu.
- Page 30 Click the change button to alter the Network device name, and Work Group. Enter your desired Host Name and Group Name then click the OK button. Note: For compatibility with most operating systems, the Host Name cannot exceed 15 characters in length View or change Administration Account User name and Password Displays the current username and password (password characters are hidden) used to log into the web GUI.
-
Page 31: View Firmware Version
If you have selected Automatic: If you would prefer to use one of our three pre-set SNTP servers, use the drop down menu to select your desired server (clock.isc.org / time.windows.com / stdtime.gov.hk). Or if you would prefer to specify your own SNTP server, place a bullet in Other and enter the URL of your desired server. -
Page 32: View Internal Ip
View Network Information: 1. Access Configuration Page. (See: Access configuration page) Note: If you have navigated to a different page than the home page, select the Status menu from the left hand menu. 2. Network Information is displayed under the Network Information heading toward the bottom of the middle of the window. -
Page 33: View Pppoe Ip Address Or Connect To Pppoe Internet Service
View PPPoE IP Address or Connect to PPPoE Internet Service Displays the IP address that the NAS enclosure is connected to if the NAS has been configured for PPPoE Internet access. (See: Network PPPoE for details regarding PPPoE Internet configuration. To manually connect the NAS enclosure to your PPPoE Internet service, click the Connect button. - Page 34 3. The Service Information window is now displayed. Through Service Information you can place a bullet in Enable or Disable depending on your preference for each service. A description of each service is listed below: Note: As soon as you click on the disable or enable switch the enclosure will attempt to apply the settings.
- Page 35 View the current Disk Status 1. Access Configuration Page. (See: Access configuration page) 2. Click Status, in the Main Menu on the left hand side, next click Disk Status. 3. The Disk Status window is now displayed. Through the disk status menu you can view information about the hard drives and RAID array.
-
Page 36: View Or Change Ip Setting
Disk Name Lists the drive and RAID Configuration enabled. Disk Capacity Displays current information regarding available storage space on your drive/RAID array. A description of each field is listed below. Free Space Displays available storage capacity in Gigabytes. Used Space Displays the percentage of storage capacity used. - Page 37 2. Click Network, in the Main Menu on the left hand side, next click IP Settings. 3. The IP Settings window is now displayed. Through the IP Settings you can view your IP settings, or choose between automatically or manually setting static Internet Protocol address Information.
- Page 38 If you have selected Static IP as below: Enter your desired IP information in each specified field and click Apply. Note: For detailed information regarding the best configuration for your network, please contact your network administrator. Configure PPPoE Network 1. Access Configuration Page. (See: Access configuration page) Instruction Manual...
- Page 39 2. Click Network, in the Main Menu on the left hand side, next click PPPoE. 3. The PPPoE window is now displayed. Through the PPPoE window you can connect your enclosure directly to the Internet via a PPPoE (Point-to-Point Protocol over Ethernet) Internet Service Provider.
- Page 40 Enable and Configure DDNS With DDNS you can assign an Internet Domain Name using a DDNS service for external access to your enclosure over the Internet. 1. Access Configuration Page. (See: Access configuration page) 2. Click Network, in the Main Menu on the left hand side, next click DDNS. Instruction Manual...
- Page 41 3. The DDNS window is now displayed. 4. Select Enable from the bullet menu. If you are using a generic Dynamic DNS service, select Dyn from the service provider drop down menu. Or if you are using No-IP as your service provider select NO-IP from the DDNS service provider drop down menu.
- Page 42 Note: It may take up to an hour for the DDNS server to refresh and direct to the Enclosure. For further assistance please contact your DDNS service provider. Enable and Configure Network Service Ports 1. Access Configuration Page. (See: Access configuration page) 2.
- Page 43 UPnP Port Mapping (Universal plug and play) Enables the enclosure to automatically find and communicate with your router and open any ports required to access the NAS over the internet. This is not recommended for most users unless you intend to access the NAS remotely. Place a bullet under Enable or Disable next to UPnP Port Mapping depending on your preference.
-
Page 44: Manage Your Hard Drive Configuration
WebDAV URL: Displays URL used to access the WebDAV locally. FTP Listen Port: Displays and enables the user to alter the access port used for the FTP service to communicate. FTP URL: Displays URL used to access the FTP Service page locally. BT Port: Displays and enables the user to alter the access port used for the Bit Torrent service to communicate. - Page 45 3. The Disk Management window is now displayed. From the Disk Management Window you can set a sleep timer, format your drive or RAID array, and view S.M.A.R.T (Self-Monitoring, Analysis and Reporting Technology) data for each of the attached drives. Details for each option is listed below: Sleep Time (idle) If you would like the enclosure to enter a power saving sleep mode when it is inactive, use the drop down menu to and select the amount of inactive time you would like the...
- Page 46 You will receive a message alerting you that the format was successful, click the Ok Button. The Disk is now formatted. S.M.A.R.T (SATA0/SATA1) Displays reports regarding the health of each attached drive. The HDD Status row at the bottom of each table will indicate whether the drive is healthy or inform you if drive failure has occurred, or is imminent.
-
Page 47: Manage Your Raid Configuration
Manage your RAID Configuration 1. Access Configuration Page. (See: Access configuration page) 2. Click System Manage, in the Main Menu on the left hand side, next click RAID. 4. The RAID window is now displayed. From the RAID Window you can view your installed drive information and RAID status. -
Page 48: Raid Mode
RAID Mode The drop down menu shows the current RAID configuration. To delete the current RAID configuration click the delete button. WARNING! All drive data will be lost upon deleting the RAID array. A message will appear warning that all written data will be lost. Click the OK button if you wish to continue. Upon deletion of the RAID array the enclosure will default to a JBOD configuration, and S.M.A.R.T table for the main drive will be displayed. - Page 49 A message will appear warning that all written data will be lost. Click the OK button if you wish to continue. Upon creation of the new RAID array the S.M.A.R.T table for available drives will be displayed. RAID Status Displays the current RAID array and the S.M.A.R.T status. Disk Information: Displays the model and capacity of each attached hard drive.
-
Page 50: Update Your Nas Enclosure Firmware Update
2. Click System Manage, in the Main Menu on the left hand side, next click Firmware Update. 3. The Firmware Update window is now displayed. From the Firmware Update Window you can update the current version of your firmware, if a firmware update is available from StarTech.com Instruction Manual... - Page 51 Lost drive data is not the responsibility of StarTech.com To upgrade firmware, visit the StarTech.com website, if a new firmware upgrade is available and recommended, download and save the file to a location you can easily access.
-
Page 52: Reboot Your Nas Enclosure Remotely Using The Web Interface
Reboot Your NAS Enclosure remotely using the Web Interface 1. Access Configuration Page. (See: Access configuration page) 2. Click System Manage, in the Main Menu on the left hand side, next click Reboot. 3. The Reboot window is now displayed. From the reboot Window you can remotely reboot the system through the web interface. -
Page 53: Shutdown Your Nas Enclosure Remotely Using The Web Interface
4. To reboot the enclosure click the Reboot button. You will receive a message alerting you that all open connections will be reset, click the OK button if you would like to continue. 5. The enclosure will reboot. Note: It may take several seconds for the system to fully reboot. If you have changed the IP address of the enclosure or if the enclosure is set to automatically obtain an IP, you may have to update the address bar to regain access to the enclosure’s web configurations. - Page 54 2. Click System Manage, in the Main Menu on the left hand side, next click Shut Down. 3. The Shutdown window is now displayed. From the shutdown Window you can remotely shutdown the NAS Enclosure through the web interface. 4. To power off the enclosure click the Shutdown button. You will receive a message alerting you that all open connections will be reset, click the OK button if you would like to continue.
-
Page 55: Restore Default Settings To Your Nas Enclosure (Reset)
Restore Default settings to your NAS Enclosure (Reset) 1. Access Configuration Page. (See: Access configuration page) 2. Click System Manage, in the Main Menu on the left hand side, next click Default. 3. The Default window is now displayed. From the Default Window you can remotely restore the NAS Enclosure to its default settings (reset) through the web interface. - Page 56 WARNING! It is recommended that all drive DATA be backed up prior to Resetting the NAS Enclosure. Lost drive data is not the responsibility of StarTech.com 4. To restore default settings click the Reset button. 5. You will receive a message alerting you that all default settings will be restored, and advising you not to turn off the enclosure power, or close your web browser during the Reset process, click the OK button if you would like to continue.
-
Page 57: Enable Or Disable Smb Service
Enable or Disable SMB Service 1. Access Configuration Page. (See: Access configuration page) 2. Click App Server, in the Main Menu on the left hand side, next click SMB Server. 3. The SMB Server window is now displayed. From the SMB Server Window you can enable or disable the ability to browse the files and folders on the NAS enclosure across your network via SMB protocol. -
Page 58: Enable Or Disable Webdav Service
From the SMB Status section you can enable or disable SMB service. Depending on your preference place a bullet in Enable or Disable. Enable or Disable WebDAV Service 1. Access Configuration Page. (See: Access configuration page) 2. Click App Server, in the Main Menu on the left hand side, next click WebDAV Server. Instruction Manual... - Page 59 3. The WebDAV Server window is now displayed. From the WebDAV Window you can enable or disable the ability for your local computer, tablet, iPhone or smartphone to access files and play media stored on your NAS Enclosure using third party WebDAV file management apps.
-
Page 60: Enable Or Disable Ftp Service
Enable or Disable FTP Service 1. Access Configuration Page. (See: Access configuration page) 2. Click App Server, in the Main Menu on the left hand side, next click FTP Server. 3. The FTP Server window is now displayed. From the FTP Service Window you can enable or disable the ability of external FTP applications to access your enclosure for uploading/downloading files using FTP protocol. -
Page 61: Download And Host Torrent Files
From the FTP Status select you can enable or disable FTP service. Depending on your preference place a bullet in Enable or Disable. Download and host Torrent Files 1. Access Configuration Page. (See: Access configuration page) 2. Click App Server, in the Main Menu on the left hand side, next click BT Download Instruction Manual... - Page 62 3. The BT Download window now displayed. From the BT Download Window you can download and host Torrent files to and from external sources over the Internet. Instructions for Bit Torrent Operation are listed below: To add a torrent file that is locally on your computer or network, click the browse button located below Upload a Torrent File, a file explorer window will appear allowing you browse your files and locate your desired torrent file.
- Page 63 The Download Queue shows the status of currently hosted and downloading files. Note: Once you have added the torrent file you will host the downloaded portion of the torrent file until it is removed from your Downloaded Queue. The button menu below the Download Queue allows for control and configuration. Functionality of each button is listed below: Activate Download Enables you to activate a torrent to begin the download process.
- Page 64 Settings Opens the BT Option menu. The BT option menu enables you to set the following configurations using the value boxes listed: Note: entering a value of 0 will allocate the maximum amount available resources for each field. Upload Limits: Enter the amount of bandwidth you would like to allocate for uploading your hosting data in Kilobytes.
-
Page 65: Mail Notification
Mail Notification Enables you to receiver an alert message via e-mail for each torrent file that has completed downloading To activate e-mail notification, place a check in the Enable box. If your e-mail server requires authentication please place a check in the Authentication box as well. - Page 66 Assign Folder for UPNP AV/DNLA Service and iTunes Playlists 1. Access Configuration Page. (See: Access configuration page) 2. Click App Server, in the Main Menu on the left hand side, next click Media Server. 3. The Media Server window now displayed. From the Media server window you can build an iTunes music Playlists based on available media, and identify which folders contain which type of media within specific folders on your NAS Enclosure.
- Page 67 Select the drop down menu next to the specific media type that you would like to share using DNLA and UPnP AV. From within the drop down menu, select the specific folder you would like pull the selected media type from. To build a iTunes playlist form the music folder, click the build button to create the playlist.
-
Page 68: Manage Accounts
Manage Accounts 1. Access Configuration Page. (See: Access configuration page) 2. Click User Set, in the Main Menu on the left hand side, next click Account. 3. The Account window is now displayed. From the Account window you can create, modify, limit, disable or delete specific user accounts. - Page 69 Create an Account 1. Click the New button. Enter your desired username and password in the specified fields. 2. Next specify whether you would like the account to be Read only (can only access files), or Read/Write (Can access save and edit files) by placing a bullet in your preference.
- Page 70 3. The account has now been created is listed in the account List box below. Note: A new folder for specific user content is also created with each account and listed under folder list. Change Account Settings 1. Select the account from the account box, and click the modify button. 2.
- Page 71 Enable an account 1. Select the account from the account box, and click the Enable Button. Note: Enable/Disable button is displayed based on account status. 2. The account has now been enabled. Delete an Account 1. Select the account from the account box, and click the Delete Button. 2.
- Page 72 2. Select the folder from the Folder List box, and click the Right pointing Arrow button (Green) located between the Folder List box and the Sharing List box. 3. The user account has now been granted access to the specified folder. Limit Folder Access 1.
- Page 73 Account Folder Management Create a New Folder 1. To create a new folder, click the Create button located in the Folder List box 2. Enter your preferred folder name in the text box, and click the OK Button. 3. The folder has now been created and is listed in the Folder List box. Rename Folder 1.
- Page 74 2. Enter your preferred new name in the New Name Box and Click OK. 3. The Folder name has now been changed. Delete a Folder WARNING! Any Data within the folder will be deleted. 1. Select the folder from the Folder List box, and click the Delete button. 2.
-
Page 75: Quick Setup Guide (Optional)
Quick Setup Guide (Optional) 1. Access Configuration Page. (See: Access configuration page) 2. Click User Set, in the Main Menu on the left hand side, next click Set Guide. 3. The ½ Web Language Settings window is now displayed. The User Set Guide is an basic setup Wizard that can walk you through initial setup and configuration. -
Page 76: Technical Support
Limitation of Liability In no event shall the liability of StarTech.com Ltd. and StarTech.com USA LLP (or their officers, directors, employees or agents) for any damages (whether direct or indirect, special, punitive, incidental, consequential, or otherwise), loss of profits, loss of business, or any pecuniary loss, arising out of or related to the use of the product exceed the actual price paid for the product. - Page 77 StarTech.com is an ISO 9001 Registered manufacturer of connectivity and technology parts. StarTech.com was founded in 1985 and has operations in the United States, Canada, the United Kingdom and Taiwan servicing a worldwide market.
Need help?
Do you have a question about the S352BMU3N and is the answer not in the manual?
Questions and answers