Sony Bravia XBR-70X850B Operating Instructions Manual
Hide thumbs
Also See for Bravia XBR-70X850B:
- Operating instructions manual (82 pages) ,
- Repair manual (31 pages) ,
- Brochure & specs (5 pages)
Table of Contents
Advertisement
Available languages
Available languages
Television
Téléviseur
XBR-70X850B / 65X850B / 55X850B / 49X850B
KDL-70X830B / 65X830B / 55X830B
4-533-569-12(1)
Operating Instructions
(Setup Guide)
Mode d'emploi
(Guide d'installation)
Sony Customer Support
U.S.A.:
http://www.sony.com/tvsupport
Canada:
http://www.sony.ca/support
United States
Canada
1.800.222.SONY
1.877.899.SONY
Please Do Not Return
the Product to the Store
Service à la clientèle Sony
Canada :
http://support.sony.ca/fr
États-Unis :
http://www.sony.com/tvsupport
Canada
États-Unis
1.877.899.SONY
1.800.222.SONY
Ne retournez pas le produit au magasin
US
FR
Advertisement
Chapters
Table of Contents

Related Manuals for Sony Bravia XBR-70X850B


Summary of Contents for Sony Bravia XBR-70X850B
- Page 1 Please Do Not Return the Product to the Store Service à la clientèle Sony Canada : http://support.sony.ca/fr États-Unis : http://www.sony.com/tvsupport Canada États-Unis 1.877.899.SONY 1.800.222.SONY Ne retournez pas le produit au magasin XBR-70X850B / 65X850B / 55X850B / 49X850B KDL-70X830B / 65X830B / 55X830B...
- Page 2 Refer are owned by the Bluetooth SIG, Inc. Licensing Information to them whenever you call upon and any use of such marks by Sony your Sony dealer regarding this The terms HDMI and HDMI High- Corporation is under license. Other...
-
Page 3: Remote Control
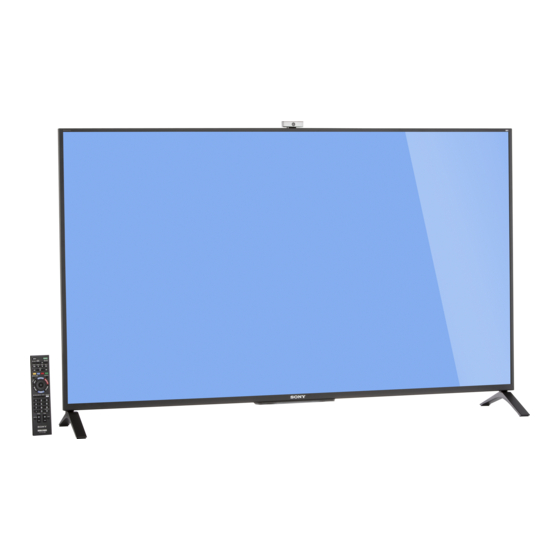
For models with supplied Touchpad Remote Control: The N Mark is a trademark or registered trademark of NFC Forum, Inc. in the United States and in other countries. The 70 class has a 69.5 inch viewable image size, the 65 class has a 64.5 inch viewable image size, the 55 class has a 54.6 inch viewable image size and the 49... - Page 4 ® The BRAVIA 4K TV Experience • Bring the astonishing resolution of your Sony 4K Ultra HD TV to life with Sony 4K Thank you for choosing Sony! Your new Ultra HD Media Player. (The availability ® BRAVIA TV opens the door to the “4K TV depends on region) Experience”.
-
Page 6: Operating Instructions
About this manual (Operating Instructions) This manual explains how to setup your TV. For more information on how to use your BRAVIA TV, refer to the “Electronic manual”. Operating Instructions Explains how to setup your TV such as connections, initial setup, and basic operations. For more information, see the i-Manual Electronic manual (i-Manual) -
Page 7: Table Of Contents
Table of Contents Getting Started Checking the accessories................8 Inserting batteries into the remote control..........8 Before setting up your TV.................9 1: Attaching the Table-Top Stand ............10 2: Connecting the TV................13 3: Securing the TV ..................19 4: Bundling the cables ................21 5: Connecting the TV to the Internet............21 6: Running initial setup ................22 Watching TV ...................23 Using the remote control ................24... -
Page 8: Getting Started
(For models with supplied Touchpad (XBR-70/65/55/49X850B only) Remote Control) Size AAA batteries (2) (KDL-70/65/55X830B only) Stand cover (2) (XBR-70X850B, KDL-70X830B only) Table-Top Stand (2) (except XBR-70X850B, KDL-70X830B) Fixing screws for Table-Top Stand (M5 × 12) (4) (except XBR-70X850B, KDL-70X830B) Active 3D Glasses (battery included) (2) -
Page 9: Before Setting Up Your Tv
Before setting up Guidelines for IR Remote Control • Point your remote control directly at the your TV IR sensor located on your TV. • Make sure that no objects are blocking the path between the remote control and the IR sensor on your TV. Some TV models are packaged with a detached Table-Top Stand so you can mount your TV to a wall right away. -
Page 10: 1: Attaching The Table-Top Stand
• Ensure that there are no objects in front of the TV. Table-Top Stand 3D Sync Transmitter Recommended (edge position) (XBR-70X850B, (except XBR-70X850B, KDL-70X830B KDL-70X830B) only) Refer to the supplied Table-Top Stand IR Sensor leaflet for proper attachment. • Do not put stress on the LCD panel or the frame around the screen. - Page 11 Alternative (middle position) You can change the Table-Top Stand from the edge to the middle position by referring to the instructions below. Repeat step 1 for the left side Middle position Thick cushion • If using an electric screwdriver, set the torque at approximately 1.5 N·m {15 kgf·cm}.
- Page 12 Detaching the Table-Top Stand from the TV To detach the Table-Top Stand from the TV, remove the screws • Do not remove the Table-Top Stand for any Repeat step 1-4 for the left side. reason other than to install corresponding accessories on the TV.
-
Page 13: 2: Connecting The Tv
TV when it is moved. • Use an HDMI cable connector within 12 mm (thickness) × 21 mm (width). • Use Sony HDMI cable with “High Speed” indication for HDMI connection. • For more information on connections, refer to the i-Manual. - Page 14 Shown with a Set Top Box with Shown with a Set Top Box with HDMI connection COMPONENT connection 900 mA MAX 900 mA MAX Set Top Box • Connect 4K devices (4K Media Player, 4K Set Top Box, etc.) to the HDMI IN 2 or HDMI IN 1 jack of the TV to enjoy copyright protected content.
- Page 15 Cable System or VHF/UHF Antenna Shown with MHL device with MHL System connection Use authorized MHL 2 CABLE with MHL logo Cable or Antenna 900 mA MAX MHL 2 device 900 mA MAX Use authorized MHL 3 CABLE with MHL logo MHL 3 device The TV simultaneously charges the MHL-...
- Page 16 ® Shown with HD BRAVIA Sync™ Basic Connection Optical Connection Rear of TV Side Panel A/V Receiver 900 mA MAX Blu-ray Disc 900 mA MAX HD Cable Box or HD Satellite Receiver SAT (Dish) Cable/ Antenna Signifies a BRAVIA Sync capable device. The optical connection is only needed for A/V receivers that do not support ARC (Audio Return Channel).
- Page 17 Shown with HD Basic Connection with Home Theater System Side Panel 900 mA MAX Rear of TV *Optical Connection 900 mA MAX Home Theater System Blu-ray Disc/DVD Cable/ Antenna SD Cable Box or SD Satellite Receiver VIDEO Cable/ SAT (Dish) * The optical connection is only needed for home theater system that do not support ARC (Audio Return Channel) when connecting with HDMI.
- Page 18 Shown with PC Connection with SD VCR/DVD Notebook PC Side Panel * DVI 900 mA MAX 900 mA MAX Rear of TV VCR/DVD Combo Splitter Cable/Antenna * DVI does not support audio signals. Connect the audio output of the PC to the PC speakers or an A/V receiver to listen to sound from the PC.
-
Page 19: 3: Securing The Tv
• Install the TV so that the TV's Table-Top Stand does not protrude out from the Stand (not supplied). If the Table-Top Stand protrudes out from the Stand, it may Sony strongly recommends cause the TV set to topple over and fall taking measures to prevent down. - Page 20 The length of the M4 machine screw Recommended Measures differs depending on the rope or chain to Secure the TV diameter. Please see below illustration. Consider the following measures when 8-12 mm securing your TV to a Stand (not supplied). Secure the Stand for the TV.
-
Page 21: 4: Bundling The Cables
4: Bundling the 5: Connecting the TV cables to the Internet Before bundling the cables, remove the When you connect this TV to the Internet, cable holder from the AC cover. Reuse the you can enjoy multiple functions. For details cable holder to bundle the other cables. -
Page 22: 6: Running Initial Setup
6: Running initial Preparing a Wi-Fi setup connection The built-in Wi-Fi device allows you to access the Internet and your home network. With this feature, you can connect to a wireless network and enjoy the benefits of networking in a cable-free environment. ... -
Page 23: Watching Tv
Watching TV Slide up/down/left/right to select an item, then press the touchpad (press V/v/B/b, then press if using IR Remote Control). Follow the instructions on the screen. Turn on the TV. Press "/1 on the TV or POWER on the Touchpad Remote Control to turn on the TV. -
Page 24: Using The Remote Control
Using the remote Slide left/right to select a TV channel or input, then control press the touchpad. Screen You can operate the TV by using the supplied Touchpad Remote Control or IR Remote Control. The supplied Touchpad Remote Control depends on your TV model. Touchpad IR Remote Remote Control... - Page 25 Displaying the Touchpad Launching the Touchpad Operation Guide Tutorial Touchpad Operation Guide allows you to Press HOME. see the main gesture commands that are available for the current TV screen. Touch and keep your finger on the center of the touchpad to display the Touchpad Operation Guide.
-
Page 26: Using Your Bravia Tv
Using Your BRAVIA TV Discovering the Enjoying social contents you like networking while (Discover) watching TV (Social Viewing) You can use Discover to search for content (such as TV programs, Internet contents, Social Viewing brings the benefits of social etc.). Contents that appear in Discover vary networking to your TV viewing experience. -
Page 27: Selecting Various Contents And Tools (Home Menu)
Selecting various Slide down, then slide left/ right to select the desired contents and tools subcategory. (Home Menu) When the cursor is moved beyond the left/right edge of the subcategory, the next subcategory is displayed (if there is more than one subcategory). Select the desired category at the top of the Home Menu. - Page 28 Selecting various contents Selecting a Tool The categories are available depending on The tools are available depending on your your TV model/region/country. TV model/region/country. You can view the list of digital You can input a keyword to broadcast contents and search for content.
-
Page 29: Looking For Instructions
Looking for Instructions Looking for Select an item. instructions in the Slide left/right to select an item. electronic manual (i-Manual) Operating instructions are built into your BRAVIA TV and can be displayed on the screen. To learn more about your TV features, access your i-Manual with the remote control. - Page 30 To remove a bookmark When using IR Remote Control When the bookmarked page is displayed, press the Control Bar (..). Slide to select Press i-MANUAL. red button, then press the touchpad. Press V/v/B/b to select an item. To display the page of the selected item, When using IR Remote Control press .
-
Page 31: Additional Information
If the problem persists, contact Sony Customer Support (information provided on the front cover) with the number of times the illumination LED flashes red (interval time is three seconds). Press "/1 on the TV to turn it off, disconnect the AC power cord, and contact Sony Customer Support. - Page 32 Condition Explanation/Solution How to reset the TV to • Turn on the TV. While holding down V on the IR Remote Control, press "/1 on the TV. (The TV will turn factory settings itself off, then back on again.) Release V. WARNING: The reset will clear all of your customized settings including the Parental Lock setting.
-
Page 33: How To Care For Your Bravia Tv
How to care for your BRAVIA TV Safety is very important. Please read and follow the safety documentation (Safety Booklet) separately provided. Unplug the TV and other connected equipment from the wall outlet before you begin cleaning your TV. • Wipe the LCD screen gently with a soft cloth. •... -
Page 34: Specifications
Specifications System Television system NTSC: American TV standard ATSC (8VSB terrestrial): ATSC compliant 8VSB QAM on cable: ANSI/SCTE 07 2000 (Does not include CableCARD functionality) Channel coverage Analog terrestrial: 2 - 69 / Digital terrestrial: 2 - 69 Analog Cable: 1 - 135 / Digital Cable: 1 - 135 Panel system LCD (Liquid Crystal Display) Panel, LED Backlight Speaker output... - Page 35 Optional accessories Touchpad Remote Control: RMF-YD003 (KDL-70/65/55X830B only) Wireless Subwoofer: SWF-BR100 MHL Cable: DLC-MC20 Active 3D Glasses: TDG-BT500A (XBR-70X850B, KDL-70X830B only) Passive 3D Glasses: TDG-500P (except XBR-70X850B, KDL-70X830B) Operating temperature 32 ºF – 104 ºF (0 ºC – 40 ºC)
-
Page 36: Installing The Tv To The Wall
Table-Top Stand; see page 12 (Detaching the Table-Top Stand from the TV). Prepare the TV for the Wall-Mount Bracket before making cable connections. For product protection and safety reasons, Sony strongly recommends that installation of your TV on the wall be performed by qualified professionals. Do not attempt to install it yourself. -
Page 37: Installing The Tv Against A Wall Or Enclosed Area
Installing the TV against a wall or enclosed area Make sure that your TV has adequate ventilation. Allow enough space around the TV as shown in the illustration. Installed with stand inches (30 cm) inches 4 inches 4 inches (6 cm) (10 cm) (10 cm) Leave at least this much space around the set. -
Page 38: Safety Information
XBR-65X850B/KDL-65X830B/XBR-55X850B/ To prevent radio interference to the licensed KDL-55X830B/XBR-49X850B service, this device is intended to be operated Responsible Party: Sony Electronics Inc. indoors and away from windows to provide Address: 16530 Via Esprillo, maximum shielding. Equipment (or its transmit San Diego, CA 92127 U.S.A. - Page 40 Les adultes Le logo et le terme « Sony Fiche d’identification doivent surveiller les jeunes enfants Entertainment Network » sont des Les numéros de modèle et de pour s’assurer qu’ils suivent les marques de commerce de Sony série sont indiqués à l’arrière et recommandations ci-dessus.
- Page 41 La taille d’image visualisable de la classe 70 est de 69,5 pouces, la taille d’image visualisable de la classe 65 est de 64,5 pouces, la taille d’image visualisable de la classe 55 est de 54,6 pouces et la taille d’image visualisable de la classe 49 est de 48,5 pouces.
- Page 42 • Donnez vie à la résolution époustouflante de votre téléviseur Sony Ultra HD 4K télévision BRAVIA en 4K avec le Lecteur Media Sony Ultra HD 4K. Nous vous remercions d’avoir choisi Sony! (La disponibilité dépend des régions) Votre nouveau téléviseur BRAVIA est la •...
- Page 43 Le tableau ci-dessous indique les formats de haute définition (HD) et de définition standard (SD) pris en charge par les entrées de votre téléviseur BRAVIA. Formats pris en charge CONNECTEUR VIDEO AUDIO 1080/24p/ 1080p* 1080i 720/24p/ 720p* 480p 480i HDMI Composant Prise audio L/R (G/D)
- Page 44 À propos de ce manuel (Mode d’emploi) Ce manuel explique comment configurer votre téléviseur. Pour plus de détails sur l’utilisation de votre téléviseur BRAVIA, reportez-vous au « Manuel électronique ». Mode d’emploi Explique comment installer votre téléviseur tels que les branchements, la configuration initiale et le fonctionnement de base.
- Page 45 Table des matières Pour commencer Vérifier les accessoires ................8 Insérer les piles dans la télécommande ..........8 Avant d’installer votre téléviseur...............9 1 : Fixer le support de table ..............10 2 : Raccorder le téléviseur ..............13 3 : Fixer le téléviseur................20 4 : Regrouper les câbles ................22 5 : Brancher le téléviseur à...
-
Page 46: Pour Commencer
(XBR-70/65/55/49X850B seulement) Piles AAA (2) (KDL-70/65/55X830B seulement) Couvercle (2) (XBR-70X850B, KDL-70X830B seulement) Support de table (2) (excepté pour le XBR-70X850B, KDL-70X830B) Vis de fixation pour le support de table (M5 × 12) (4) (excepté pour le XBR-70X850B, KDL-70X830B) Lunettes 3D actives (pile incluse) (2) Retirez le feuillet protecteur. -
Page 47: Avant D'installer Votre Téléviseur
Avant d’installer votre Directives pour la télécommande • Pointez la télécommande en direction du téléviseur capteur infrarouge du téléviseur. • Assurez-vous qu’aucun objet ne se trouve entre la télécommande et le capteur infrarouge. Avec certains modèles de téléviseur, le support de table n’est pas fixé afin de vous permettre de monter directement le téléviseur au mur. -
Page 48: Fixer Le Support De Table
Si cela se produit, laissez la Recommandé (position limite) condensation s’évaporer complètement (excepté pour le XBR-70X850B, avant de mettre le téléviseur sous KDL-70X830B) tension. Reportez-vous au feuillet d’instructions •... - Page 49 Alternative (position intermédiaire) Vous pouvez faire passer le support de table de la position limite à l’intermédiaire en vous reportant aux instructions ci-dessous. Répétez l’étape 1 pour le côté gauche. Position intermédiaire Coussin épais • Si vous utilisez un tournevis électrique, réglez le couple de serrage à...
- Page 50 Démonter le support de table du téléviseur Démonter le support de table du téléviseur, retirer les vis • N’enlevez pas le support de table pour Répétez l’étape 1-4 pour le côté gauche. aucune raison autre que l’installation des accessoires correspondants sur le téléviseur.
-
Page 51: Raccorder Le Téléviseur
• Utiliser un raccord de câble HDMI d’une épaisseur de 12 mm d’épaisseur par 21 mm de largeur. • Utilisez un câble HDMI Sony portant la mention « Haute vitesse » pour la connexion HDMI. • Pour plus de détails sur les connexions, reportez-vous au i-Manual. - Page 52 Illustré avec un décodeur avec la Recommandation relative à une fiche de type F connexion à HDMI La partie saillante de la tige centrale du connecteur doit être de moins de 1,5 mm. 7 mm max. 1,5 mm max. (Dessin de référence pour une fiche de type F) 900 mA MAX 900 mA MAX...
- Page 53 Illustré avec un décodeur avec la Système de câblodistribution ou connexion COMPONENT d’antenne VHF/UHF Câblodistribution ou antenne Décodeur (Suite)
- Page 54 Illustré avec un appareil MHL équipé de connexion MHL • Si Modif. auto de l’entrée (MHL) est réglé sur Oui, le téléviseur change automatiquement vers HDMI IN 2/MHL ou HDMI IN 4/MHL à partir d’une autre entrée lorsque l’appareil compatible avec la fonction MHL ou HDMI IN 4/MHL est connecté...
- Page 55 ® Illustré avec une connexion HD BRAVIA Sync™ de base Connexion optique Arrière du téléviseur Panneau latéral Récepteur audio-vidéo 900 mA MAX Blu-ray Disc 900 mA MAX Décodeur de câblodistribution HD ou récepteur satellite HD (antenne satellite) Câblodis- tribution/ antenne Indique un appareil doté...
- Page 56 Illustré avec une connexion HD de base avec un système de cinéma-maison Panneau latéral Arrière du 900 mA MAX téléviseur *Connexion optique 900 mA MAX Système de cinéma-maison Câblodis- Blu-ray Disc/DVD tribution/ antenne Décodeur de câblodistribution SD ou récepteur satellite SD VIDEO Câblodistribution/ SAT (antenne...
- Page 57 Illustré avec la connexion à un ordinateur avec un magnétoscope ou lecteur DVD à définition standard Ordinateur portable Panneau latéral * DVI Ordinateur 900 mA MAX 900 mA MAX Arrière du téléviseur Magnétoscope Combiné Répar- magnétoscope/ titeur Câblodistribution/ antenne * La prise DVI ne prend pas en charge les signaux audio. Connecter la sortie audio de l’ordinateur aux enceintes d’ordinateur ou à...
-
Page 58: Fixer Le Téléviseur
• Installez le téléviseur de manière à ce que le support de table du téléviseur ne dépasse pas du support (non fourni). Si le support de table dépasse du support, Sony recommande le téléviseur pourrait basculer et tomber. fortement de prendre les mesures nécessaires pour prévenir le basculement du... - Page 59 Mesures recommandées Trou de vis sur le couvercle arrière pour fixer solidement le Vis à métal M4 téléviseur (non fournie) Tenez compte des mesures suivantes Corde ou chaîne lorsque vous fixez votre téléviseur à une (non fournie) base (non fournie). Fixer solidement la base du téléviseur.
-
Page 60: Regrouper Les Câbles
4 : Regrouper les Fixez le téléviseur au mur avec des boulons, un dispositif d’ancrage au mur câbles et une chaîne (ou une corde). Boulons d’ancrage (M6) (non fourni) Avant de regrouper les câbles, retirez le porte-câble du couvercle CA. Réutiliser le support à... -
Page 61: Brancher Le Téléviseur À Internet
5 : Brancher le Préparer une connexion téléviseur à Wi-Fi Internet Le dispositif Wi-Fi intégré vous permet d’accéder à Internet et à votre réseau domestique. Cette fonction vous permet de Lorsque ce téléviseur est connecté à vous connecter à un réseau sans fil et de Internet vous profitez de plusieurs fonctions. -
Page 62: Exécuter La Configuration Initiale
6 : Exécuter la Faites glisser vers le haut/bas/gauche/ droite pour sélectionner l’élément désiré, configuration puis appuyez sur le pavé tactile initiale (appuyez sur V/v/B/b, puis appuyez sur si vous utilisez la télécommande IR). Suivez les instructions qui s’affichent à l’écran. -
Page 63: Regarder La Télévision
Regarder la télévision Recherchez les canaux disponibles à l’aide du syntoniseur intégré du téléviseur en sélectionnant Syntoniseur intégré t Autom.. Si vous allez utiliser Allumez le téléviseur. un décodeur de câblodistribution ou un récepteur satellite et que vous ne Appuyez sur la touche "/1 du souhaitez pas utiliser le syntoniseur téléviseur ou POWER de la intégré... -
Page 64: Utiliser La Télécommande
Utiliser la Faites glisser vers la gauche/droite pour télécommande sélectionner un canal du téléviseur ou une entrée, puis appuyez sur le pavé Vous pouvez faire fonctionner le téléviseur à tactile. l’aide de la télécommande à pavé tactile ou de la télécommande IR fournies. La télécommande à... - Page 65 Affichage du guide Lacement du tutoriel du d’utilisation du pavé tactile pavé tactile Le guide d’utilisation du pavé tactile vous Appuyez sur HOME. présente les principales commandes gestuelles disponibles pour l’écran actuel du téléviseur. Touchez et maintenez votre doigt au centre du pavé...
-
Page 66: Utiliser Votre Téléviseur Bravia
Utiliser votre téléviseur BRAVIA Retrouver les Lorsque vous utilisez la contenus que vous télécommande IR aimez (Discover) Appuyez sur DISCOVER. Appuyez sur V/v pour sélectionner la catégorie souhaitée. Vous pouvez utiliser Discover pour Appuyez sur B/b pour sélectionner rechercher du contenu (émissions de l’élément désiré, puis appuyez sur télévision, contenu Internet, etc.). -
Page 67: Profitez Des Réseaux Sociaux En Regardant La Télévision (Social Viewing)
Profitez des réseaux Sélectionner sociaux en regardant différents contenus et la télévision outils (Social Viewing) (menu d’accueil) Le Social Viewing apporte les avantages Sélectionnez la catégorie souhaitée en haut des réseaux sociaux à votre expérience du Menu Accueil. Vous pouvez reproduire télévisée. - Page 68 Faites glisser vers le bas, Sélectionner plusieurs puis vers la gauche/droite contenus pour sélectionner la sous- catégorie sélectionnée. La disponibilité des catégories peut varier selon votre modèle de téléviseur, votre Lorsque le curseur est déplacé au-delà région ou votre pays. de la limite gauche/droite de la sous- catégorie, la sous-catégorie suivante est affichée (s’il existe plus d’une sous-...
- Page 69 Sélectionner un outil La disponibilité des outils peut varier selon votre modèle de téléviseur, votre région ou votre pays. Vous pouvez saisir un mot-clé afin de rechercher du contenu. Recher- Vous pouvez également cher sélectionner les mots-clés précédemment utilisés. Vous pouvez sélectionner un périphérique d’entrée Entrées connecté...
-
Page 70: Rechercher Des Instructions
Rechercher des instructions Rechercher des Faites glisser votre doigt vers le haut/bas pour instructions dans le sélectionner ? i-Manual, manuel électronique puis appuyez sur le pavé (i-Manual) tactile. Le mode d’emploi est intégré à votre téléviseur BRAVIA et s’affiche à l’écran. Pour en apprendre davantage au sujet des fonctions de votre téléviseur, vous pouvez accéder à... - Page 71 Pour accéder à la page mise en La page des éléments sélectionnés signet apparaît. Lorsque l’i-Manual s’affiche, appuyez sur la barre de contrôle (..). Faites glisser pour sélectionner le bouton bleu et appuyez sur le pavé tactile pour afficher la liste des signets.
-
Page 72: Information Complémentaire
CA pendant deux minutes, puis allumez le téléviseur. Si le problème persiste, contactez le Service à la clientèle Sony (coordonnées indiquées sur la couverture de ce document) en indiquant le nombre de fois que la LED d’éclairage clignote en rouge (l’intervalle de temps est de 3 secondes). - Page 73 Symptôme Explication/solution Comment réinitialiser le • Allumez le téléviseur. Tout en maintenant enfoncée la touche V de la télécommande IR, appuyez sur la téléviseur à ses réglages touche "/1 du téléviseur. (Le téléviseur s’éteindra lui- d’usine. même, puis se rallumera.) Relâcher V. AVERTISSEMENT : La réinitialisation effacera tous vos réglages personnalisés, y compris le réglage Contrôle parental.
-
Page 74: Entretien De Votre Téléviseur Bravia
Entretien de votre téléviseur BRAVIA La sécurité est très importante. La sécurité étant de première importance, veuillez lire la documentation de sécurité (Feuillet de consignes de sécurité) fournie séparément et vous y conformer. Débranchez le téléviseur et les appareils raccordés de la prise de courant avant de nettoyer le téléviseur. -
Page 75: Spécifications
Spécifications Système Système de télévision NTSC: Norme de télévision en Amérique ATSC (8VSB terrestre): 8VSB conforme avec ATSC QAM sur le câble: ANSI/SCTE 07 2000 (n’inclut pas la fonctionnalité CableCARD) Plages de canaux Analogique terrestre : 2 - 69 / Numérique terrestre : 2 - 69 Câble analogique : 1 - 135 / Câble numérique : 1 - 135 Système de l’écran Écran ACL (affichage à... - Page 76 Infragrave sans fil : SWF-BR100 Câble MHL : DLC-MC20 Lunettes 3D actives: TDG-BT500A (XBR-70X850B, KDL-70X830B seulement) Lunettes 3D passives: TDG-500P (excepté pour le XBR-70X850B, KDL-70X830B) Température de service 0 °C – 40 °C (32 °F – 104 °F) Nom du modèle...
-
Page 77: Installation Du Téléviseur Au Mur
Préparez le téléviseur pour l’installation du support de fixation murale avant d’effectuer le raccordement des câbles. Pour des raisons de sécurité et de protection du produit, Sony recommande fortement l’utilisation du modèle de support de fixation murale conçu pour votre appareil, et que l’installation soit effectuée par un détaillant Sony ou un entrepreneur agréé. -
Page 78: Installation Du Téléviseur Contre Un Mur Ou Dans Un Endroit Fermé
Installation du téléviseur contre un mur ou dans un endroit fermé Assurez-vous que l’air circule adéquatement autour du téléviseur. Tel qu’illustré, laissez suffisamment d’espace autour du téléviseur. Installation sur support 30 cm pouces) 6 cm 10 cm 10 cm pouces) (4 pouces) (4 pouces) Laissez au moins cet espace autour du téléviseur. -
Page 79: Consignes De Sécurité
Pour empêcher que cet appareil cause du KDL-55X830B/XBR-49X850B brouillage au service faisant l’objet d’une licence, Partie responsable: Sony Electronics Inc. il doit être utilisé à l’intérieur et devrait être placé Adresse: 16530 Via Esprillo, San Diego, CA loin des fenêtres afin de fournir un écran de 92127 U.S.A. - Page 80 : REMARQUE : Si votre téléviseur est connecté à Internet, vous pouvez vérifier les mises à jour du logiciel en sélectionnant Aide, Service à la clientèle, puis Mise à jour du logiciel. © 2014 Sony Corporation Printed in U.S.A.