Franke FDW 908 IB XS Instructions For Use And Installation
Cooker hood
Hide thumbs
Also See for FDW 908 IB XS:
- User manual (157 pages) ,
- Instructions for use and installation (140 pages) ,
- Instructions for use and installation (88 pages)

Related Manuals for Franke FDW 908 IB XS


Summary of Contents for Franke FDW 908 IB XS
- Page 1 Instructions for use and installation Cooker Hood Istruzioni per l’uso e l’installazione Cappa Mode d’emploi et installation Hotte de Cuisine Bedienungsanleitung und Einrichtung Dunstabzugshaube Kullanım ve montaj talimatları Davlumbaz FDW 908 IB XS...
- Page 2 INDEX RECOMMENDATIONS AND SUGGESTIONS ........................3 CHARACTERISTICS ................................4 INSTALLATION..................................6 USE ...................................... 16 MAINTENANCE ................................... 18 INDICE CONSIGLI E SUGGERIMENTI............................20 CARATTERISTICHE................................21 INSTALLAZIONE ................................. 23 USO...................................... 33 MANUTENZIONE ................................35 SOMMAIRE CONSEILS ET SUGGESTIONS............................37 CARACTERISTIQUES................................. 38 INSTALLATION..................................40 UTILISATION ..................................
-
Page 3: Recommendations And Suggestions
RECOMMENDATIONS AND SUGGESTIONS The Instructions for Use apply to several versions of this appliance. Accordingly, you may find descriptions of individual features that do not apply to your specific appliance. INSTALLATION • The manufacturer will not be held liable for any damages resulting from incorrect or im- proper installation. -
Page 4: Characteristics
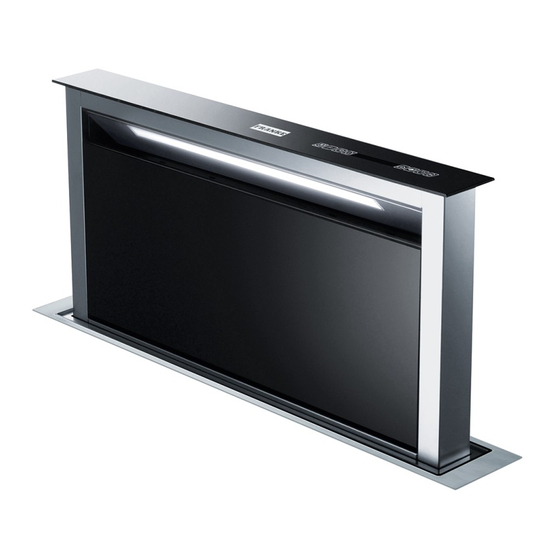
CHARACTERISTICS Components Ref. Q.ty Product Components Hood Canopy complete with: Controls, Light, Filters Motor unit Electric unit Front Frame Ref. Q.ty Installation Components Splashback Fixing Bracket Hob Fixing Bracket Side Bracket Screws 3.5 x 9.5 Screws M4 x 8 Screws 4 x 15 Q.ty Documentation Instruction Manual... - Page 5 Dimensions This Cooker hood can be used in conjunction with a Gas Cook Top 1,9 kW 2,6 kW having the following characteristics: • Maximum power 12,4 kW 5 kW • 5 fire like the picture 1,9 kW 1 kW...
- Page 6 INSTALLATION This Hood is set up to be fitted inside the kitchen unit in: • Ducting version: Evacuation to the outside. • Recirculation version: Internal recirculation. Sequence of operations - Installation • Drilling the Support Surface and Fitting the Hood •...
- Page 7 Inserting the Hood Canopy into the support surface from below • The Hood is built ready for front installation of the Mo- tor Unit. • If the kitchen unit is arranged differently and the Motor Unit has to be fitted on the back, the Plug already fitted on the back of the Hood Can- opy must be removed and replaced at the front, and the Cable with cable raceway for connection of the Motor must also be repositioned using the slot provided on each side (A).
- Page 8 Inserting the Hood Canopy into the support surface from above • Insert the Brackets 7.2, as indi- cated in the figure, into the slots provided and fix them with the screws 12a provided. • The Hood is built ready for front in- stallation of the Motor Unit.
- Page 9 Fixing the Lower Brackets • Screw the brackets 7.1 to the front of the Hood Canopy using the screws 12a provided. • Before tightening the Brackets completely, make all the adjustments to allow them to rest on the lower base of the worktop to avoid deformation of the upper brackets 7.2 as shown in the figure.
- Page 10 Fixing the Squaring Brackets • Screw the brackets 7.3 to the Hood Canopy using the screws 12b provided, without tightening completely. • Using the screws 12c provided, fasten the other part of the brackets 7.3 either to the side walls of the unit or to the lower part of the cooker top. •...
- Page 11 Fixing the Motor Unit • Installation of the Motor Unit (1) at the front or rear must be de- cided according to the position of the Kitchen unit, making sure that the plug is properly positioned. • Subsequently, according to where the air outlet opening has been created on the unit, the Motor Unit can be turned by 90°...
- Page 12 Fixing the Electric Unit • Connect the Electric cables that come out of the lower right hand part of the Hood Canopy to the Connectors on the Electric unit. • Each cable connector has a corresponding connector on the Electric Unit, so take care not to make mistakes when connecting •...
-
Page 13: Maintenance
Connections DUCTED VERSION AIR EXHAUST SYSTEM When installing the ducted version, connect the hood to the chimney using either a flexible or rigid pipe ø 150 or 120 mm, the choice of which is left to the installer. • To install a ø 120 mm air exhaust connection, insert the ø... - Page 14 Fitting the Front element • Lift the mobile hood canopy (see paragraph on Use) by just a few centimetres. • To stop movement, simply press down on the mobile can- opy as it lifts up. Warning: Never block the slid- Warning..: ing door when it is opening or Handle with...
- Page 15 Surround Suction Panel • Open the Hood Door (see USE). • Remove the 2 strips of adhesive tape fastening the panel during transport. 1 15...
-
Page 16: Control Panel
Control panel Button Function LED button The button only works when the door is open. Press Briefly = Turns the Lights On/Off at maximum intensity. Press and hold for 2 Seconds = Turns the Courtesy Lights On/Off. Door Open or Closed After 100 hours in operation the Drop symbol is Press briefly = Performs a Reset of the Filter saturation displayed to indicate saturation of the Metal... - Page 17 REMOTE CONTROL (OPTIONAL) The appliance can be controlled using a remote control powered by a 1.5 V carbon-zinc alkaline batteries of the standard LR03-AAA type (not included). • Do not place the remote control near to heat sources. • Used batteries must be disposed of in the proper manner.
-
Page 18: Cleaning The Comfort Panels
MAINTENANCE Cleaning the Comfort Panels • Open the Comfort Panel by pulling it at the top. • Unhook the security chain by opening the spring catch. • Disconnect the panel from the hood canopy. • The comfort panel must never be washed in the dishwasher. •... -
Page 19: Installation
Activated Charcoal Filter (Recirculation Version) Can be washed in the dishwasher. It must be washed when button “C” lights up or at least once every 4 months, or more frequently if use is particularly intense. Guaranteed to operate after washing for up to a maximum of 5 times before requiring replacement. The Alarm signal, if it has been activated, only appears when the Suction motor is turned on. - Page 20 Franke S.p.a. Via Pignolini,2 37019 Peschiera del Garda (VR) www.franke.it 991.0266.342_ver4...
Need help?
Do you have a question about the FDW 908 IB XS and is the answer not in the manual?
Questions and answers