Table of Contents
Advertisement
Quick Links
Advertisement
Table of Contents

Subscribe to Our Youtube Channel
Related Manuals for Kathrein UFD 346


Summary of Contents for Kathrein UFD 346
- Page 1 Operating Instructions Kathrein Satellite Receiver UFD 346 Order-No.: 260413...
-
Page 2: Table Of Contents
Contents Contents Operating Controls, Display and Connections... 3 Front panel with infra-red sensor, rear panel and remote control views ... 3 Front panel and infra red sensor ... 4 Rear panel connections... 4 Remote control operating buttons ... 4 Safety Information... 5 Important locating and setting-up instructions ... -
Page 3: Operating Controls, Display And Connections
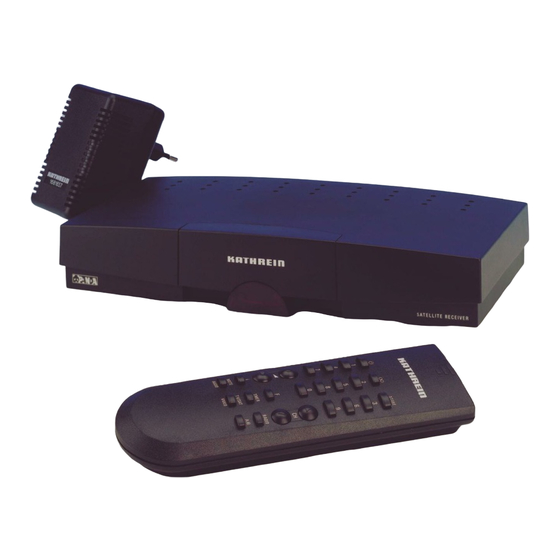
Controls, displays and connection Operating Controls, Display and Connections In this section you will find a short description of all operating controls, the display and all connections as well as symbol description. Front Panel View Rear-panel View Remote Control View... -
Page 4: Front Panel And Infra Red Sensor
Controls, displays and connection Front Panel Infra-red sensor well Movable Infra-red sensor Receives the infra-red signal from the remote control. As long as the movable infra-red sensor is within the range of the remote controls infra-red signal it is possible to switch on a concealed receiver. -
Page 5: Safety Information
Safety instructions afety Information In the following section you will find important instructions for operating, locating and connecting the receiver. Read these instructions carefully before using the equipment. Important Locating and Setting-up Instructions Long absence/Lightning If you are going to be away for a long period, switch off the receiver at the mains. If you are using the receiver and lightening starts, also switch off at the mains. -
Page 6: Safety Instructions
If an external supply voltage is used as the supply voltage for the feeder-system (LNB) and polarity inversion can not be achieved (e.g. Kathrein single cable supply system UAS 330), then the receivers LNB voltage-supply must be switched to ”Off”... -
Page 7: Connecting And Setting-Up The Receiver
Please see the section ”Safety and Location Information”. Receiver Location Although the satellite receiver UFD 346 is designed for mobile homes (campers) and caravans, it may also be used from a stationary position in the house. Locating the Receiver The receivers modern compact design with its reduced dimensions enables you to position the receiver within sight, i.e. -
Page 8: Connecting The Equipment
Connecting and Setting-up the Receiver Connecting the Equipment Voltage-Supplies When used as a mobile receiver, plug the supplied adapter cable (adapter cable with universal plug for car cigarette lighters or car socket and low voltage plug- socket.) directly into the onboard power unit (12 - 24 V). Connect the low voltage adapter cable to the power-supply socket (6). -
Page 9: Decoder Connection
Connecting and Setting-up the Receiver Decoder Connection You may also connect a Pay-TV decoder to the receiver by using a scart-cable. When decoding, the video signal is used and the switching signal is present, i.e. Premiere-decoder and video-encryption decoding, no other connection may be made at the same time. -
Page 10: Operating The Receiver
Operating the Receiver Operating the Receiver In this chapter you will learn how to select TV and radio programs, set the required volume and other options. Switching on the equipment The equipment remains at ”Stand-by” as long as the voltage-supply is present. Use this remote control operation, which is indicated by a red LED (light diode) in the infra-red sensor. -
Page 11: Analog Radio Programs
Operating the Receiver Analog Radio Programs Analog radio programs are received using the well known "Wegener Panda 1" Standard. (DNR) Unlike digital ADR radio programs, information is not transmitted together with the analog radio programs. The program name must be entered in the setting-up menu for analog radio pro- grams. -
Page 12: Volume, Balance And Tone Settings
Operating the Receiver This menu is displayed ADR – Category Selection Button '1' : CLASSIC Button '2' : POP Button '3' : OLDIES Button '4' : ROCK Button '5' : JAZZ Button '6' : COUNTRY Button '7' : SPECIALITY Button '8' : REGIONAL Button '9' : NEWS/EVENTS Button '0' : GENERAL Use the number... -
Page 13: Tone Muting Switch
Operating the Receiver Tone muting switch Press this The tone will be muted, allowing you to telephone undisturbed. Press this Important Stereo / Mono Channel Switching Transmissions may be recorded using the two channel system. (e.g. Original English tone on channel 1, German tone on channel 2). Press this Stereo The selected channel will be shown on the screen. -
Page 14: Channel Numbers: Changing, Sorting And Copying
Operating the Receiver Channel numbers: changing, sorting and copying With the option ”Channel Sorting” you can change, sort and copy the TV and radio channels into any order you like. Example: You wish to move the program that is saved under channel "P083" to channel "P003". -
Page 15: Tuning A Weak Video Signal
Operating the Receiver Program Listings (Only in TV and analog radio modes) Press this The program listings are now displayed on the screen. The selected program is marked with these <..> characters. Tuning a Weak Reception Signal When the received signal is weak, e.g. spikes (herring-bone patterns) are dis- played at the picture edges, use the option "Picture Tuning"... -
Page 16: Selecting Tv Programs
Selecting TV Programs Selecting TV Programs The satellite receiver has already been pre-programmed by the manufacturer as a satellite reception system with a feeder system working with a 9.75 GHz oscillator frequency. All selected programs are shown in the accompanying table. If you are going to use your satellite reception system with a feeder system that uses a different frequency, you must set the receiver to the oscillator frequency during the installation. - Page 17 Selecting TV Programs Satellite frequencies The 5 digit frequencies in the range 10700 to 12747 MHz. may be entered by using the number buttons ceiving frequency correctly using 1 MHz. steps (recommended when the picture signal is weak and fading.) Polarity/Orbital Position In both of the following menus you may select the required LNB feed-voltage and the 22 kHz switching-signal (which is over-ridden by the LNB feed-voltage).
-
Page 18: Decoder Menu
Selecting TV Programs The LO-Frequency groups are also used for satellite identification when our Auto- matic-Positioner HDP 160 is running a fully automatic set-up. The individual satellites have been assigned the following LO groups: Satellite Astra Eutelsat 13° Eutelsat 10° Eutelsat 16°... -
Page 19: The "Audio" Menu
Selecting TV Programs The ”Audio” Menu The following settings may be made from within the audio menu: Mode: Frequency: De-emphasis: 0-9 VOL VID A/B STOR STBY Audio modes Select one of the following modes: ”Stereo”, ”Mono-narrow” or ”Mono-wide”. The modes ”Stereo” and ”Mono-narrow” are set when the sub-carrier is received and ”Mono-wide”... -
Page 20: Selecting Radio Programs
Selecting Radio Programs Selecting Radio Programs The program suppliers transmit new permanent radio programs over the satellites. You may save these programs using the ”Radio” menu. Select the new programs through: Manual selection of analog radio programs. Manual or automatic search selection of digital radio programs (ADR). To select radio programs in ”Radio”... -
Page 21: Basic Setting-Up
Basic Setting-up Basic Setting-up The ”Basic Setting-up” menu enables you to connect the receiver to the satellite reception system. Important The receiver has already been pre-programmed by the manufacturer as a standard satellite receiving system. Changes to the basic setting-up are only required if your receiving equipment is non-standard or you wish to use a non-standard reception system. -
Page 22: Lnb Voltage-Supply
The voltage-supply for the feeder-system can be switched out, when it is supplied by an external source and the signal selection is not controlled by the LNB voltage- supply system. (i.e. Kathrein single cable feeder system UAS 330). When the receiver is connected to a satellite reception system with a switching matrix, then the polarity inversion voltage must be switched on. -
Page 23: Oscillator Frequency
The receiver calculates the required working frequency by subtracting the oscillator frequency from the satellite transmitting frequency saved with each program. This is why it is so easy to connect the UFD 346 to other reception systems, with- out having to re-program every individual channel. -
Page 24: Diseqc Menu
(described as Simple DiSEqC or Easy DiSEqC) DiSEqC 1.0 DiSEqC 2.0 The UFD 346 receiver uses both Tone Burst Signal and DiSEqC 1.0. Which one is required depends upon the components in your reception-system. DiSEqC Menu Settings Call-up the basic setting-up menu (see section, ”Calling-up the Basic Setting-up menus”). -
Page 25: Tone-Burst And Diseqc Signal
Remote The setting ”Remote” in menu-option ”DiSEqC” is for planned future modifications. If the receiver UFD 346 is connected to a reception-system with a ”subscriber con- trolled signal processing system e.g. ”Kathrein UFO mini digital ”, then Remote must be selected from the DiSEqC menu. -
Page 26: Remote Control Command Set Switching
Basic Setting-up "EEPROM" Menu Option The menu option "EEPROM" is provided so that the service technician may read the program data in and out. Remote Control Command Set Switching The remote control includes 2 sets of command instructions. Therefore it is possi- ble to operate 2 independent 200 and 300 series satellite receivers in a room with only 1 remote-controller. -
Page 27: Equipment Features
Equipment features Equipment features The UFD 346 receiver is equipped with the following features: Memory storage for 200 TV programs Memory storage for 250 ADR programs Memory storage for 99 analog radio programs Low threshold tuner for tuning the video signal when the reception is weak... -
Page 28: Technical Data
Technical Data Technical Data HF-Characteristics: Sat ZF-frequency range: Input level range: ZF-frequency: ZF-bandwidth: FM-threshold: Low threshold tuner Video: Frequency range: Hub: Output voltage: De-emphasis: Audio (digital) Standard: Audio carrier range: Tuning: Bandwidth: Frequency range: Harmonic distortion (1KHz): S/N (A-curve): Output voltage: Bit error rate (9 dB C/N): Audio (analog) Sub-carrier frequency range:... - Page 29 Technical Data Voltage supply: Operating voltage Mains-supply: Power consumption: Receiver Operating / Stby Receiver with power-supply: Operating/Stand-by: LNB supplies: LNB current: Control signal: Connections Sat-ZF input: TV/VCR/Decoder Infra-red sensor/ Data interface: Operating Voltage General: Unit dimensions (W/H/D): Weight: Receiver Power-unit Temperature range: Surrounding temperature: Accessories...
-
Page 30: Menu Structures
Menu Structures Video and Audio Settings menus Return (by stepping) to the normal program-mode with this Press this button twice to save your settings Use these buttons to select the menu option Use these buttons or the number buttons to enter the frequencies Use this button to switch from the video to the audio mode Use this... - Page 31 Menu Structures Radio Settings Menu Return (by stepping) to the normal program-mode with this Press this button twice to save the settings Use these buttons to select the menu option Use these buttons or the number buttons to enter the frequencies Call-up radio setting-up menu with STORE + RADIO buttons...
- Page 32 Menu Structures Basic setting-up menu Return (by stepping) to the normal program mode with this Press this twice to save your settings Use these buttons to select the menu option Use these buttons or the number buttons to enter the frequencies Call-up Basic Installation menu by switching off, pressing and holding down...
-
Page 33: Connection Examples
If you experience continual problems with your receiver, please contact your equipment supplier, or our Customer Service Dept. at the following address: Electronic Service Chiemgau GmbH Bahnhofstraße 108 D-83224 Grassau, Germany Tel: +49-8641-9545-0 Fax: +49-8641-9545-35 and 36 Internet : http://www.esc-kathrein.de... - Page 34 KATHREIN-Werke KG ž Telefon (0 80 31) 18 40 ž Fax (0 80 31) 18 43 06 Anton-Kathrein-Straße 1-3 ž Postfach 10 04 44 ž D-83004 Rosenheim...
Need help?
Do you have a question about the UFD 346 and is the answer not in the manual?
Questions and answers