Table of Contents
Advertisement
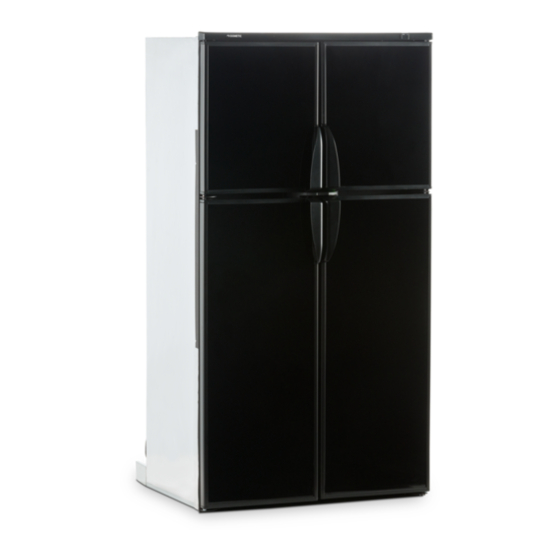
rM1350
FOR YOUR SAFETY
If you smell gas:
1. Open windows.
2. Don't touch electrical switches.
3. Extinguish any open flame.
4. Immediately call your gas supplier.
FOR YOUR SAFETY
Do not store or use gasoline or other
flammable vapors and liquids in the
vicinity of this or any other appliance.
6
warning
!
Improper installation, adjustment,
alteration, service or maintenance can
cause injury or property damage. Refer to
this manual. For assistance or additional
information consult a qualified installer,
service agency or the gas supplier.
6
warning
!
If the refrigerator stops cooling - or - if
ammonia emanates from it, immediately
turn the refrigerator off and contact a
Service Center.
USA
Service Office
Dometic, LLC
2320 Industrial Pkwy.
Elkhart, IN 46516
Phone: 574-294-2511
825129202
(French 825129252)
©2006-2009 Dometic, LLC
LaGrange, IN 46761
Si vous sentez une odeur de gaz:
1. Ouvrez les fenêtres.
2. Ne touchez à aucun interrupteur.
3. Éteignez toute flamme nue.
4. Avertissez immédiatement votre
Ne pas entreposer ni utiliser de l'essence
ni d'autres vapeurs ou liquides inflamma-
bles à proximité de cet appareil ou de tout
autre appareil.
Une installation, un réglage, une modifi-
cation, une réparation ou un entretien non
conforme aux normes peut entraîner des
blessures ou des dommages matériels.
Lisez attentivement le mode d'emploi
fourni avec l'appareil. Pour obtenir de
l'aide ou des renseignements supplémen-
taires, consultez un installateur ou un
service d'entretien qualifié ou le fournis-
seur de gaz.
Si le réfrigérateur cesse de refroidir - ou - si
de l'ammoniac s'en dégage, arrêtez immé-
diatement le réfrigérateur et contactez un
centre de réparation.
Corporate Office
2320 Industrial Parkway Elkhart, IN 46516
For Service Center Assistance
Call: 800-544-4881
installation
operating
instructions
POUR vOTRE SéCURITé
fournisseur de gaz.
POUR vOTRE SéCURITé
6
avertissement
!
6
avertissement
!
CANADA
Dometic, LLC
46 Zatonski, Unit 3
Brantford, ON N3T 5L8
CANADA
Phone: 519-720-9578
&
MO 0939
Advertisement
Table of Contents

Related Manuals for Dometic RM1350M


Summary of Contents for Dometic RM1350M
- Page 1 Dometic, LLC Dometic, LLC 46 Zatonski, Unit 3 2320 Industrial Pkwy. Brantford, ON N3T 5L8 Elkhart, IN 46516 For Service Center Assistance CANADA Phone: 574-294-2511 Call: 800-544-4881 Phone: 519-720-9578 MO 0939 825129202 (French 825129252) ©2006-2009 Dometic, LLC LaGrange, IN 46761...
-
Page 3: Table Of Contents
- dometic Warranty . . . . . . . . . . . . . . . . . . -
Page 4: Introduction
Please read this manual thoroughly before installing the refrigerator. model denominations The following model denominations are used: RM1350M Manual door lock, door insert panels or steel doors. RM1350MIM Manual door lock, ice maker and door insert panels. -
Page 5: Ventilation Requirements
ventilation requirements general information ventilation heights Provide necessary air circulation over the cooling unit. Open- It is essential that all maximum or minimum dimensions are ings for air supply or for venting of combustion products shall strictly maintained as the performance of the refrigerator is de- have a minimum dimension of not less than 1/4 inch. -
Page 6: Installation Procedure
ventilation requirements overall and recess dimensions Side view OVeRAll DImeNSIONS Height (A) 1632 inches 64-17/64 Width (B) inches 33-11/16 (steel doors) Depth (C) (door insert panels) 28 1/16 (steel doors) inches 29 1/2 (door insert panels) view from above ReCeSS DImeNSIONS Height (H) 1605 inches... - Page 7 installation procedure INSTALL THE SIX SCREWS IN THE FOLLOWING installing the drain water hose ORDER: TO INSTALL THE DRAIN WATER HOSE, FOLLOW Two screws installed through the front base. THESE STEPS: (Installation of the lower front strip.) Drill a hole through flooring. It is essential that it is The refrigerator is provided with a lower front strip drilled in the cut out opening of the base plate at the (shipped as a loose part).
-
Page 8: Connections
connections electrical connection alternator (d+) connection D+ connection is only valid for models with the 120 v ac connection automatic door locking system. The refrigerator requires the The refrigerator is equipped with a three-prong (grounding) connection of a signal wire from the alternator (D+) in order plug for your protection against shock hazards and should be to maintain the automatic door travel latch and the temporary plugged directly into a properly grounded three prong recep-... -
Page 9: Water Supply Connection
connections gas connection If no bubbles were present at the burner jet orifice, rinse it with fresh water. Be careful not to damage Hook up to the gas supply line is accomplished at the manual the burner jet orifice. gas valve, which is furnished with a 3/8” SAE (UNF 5/8” -18) Put back the cover. -
Page 10: Mounting The Door Panels
Read the instructions thoroughly and check that the panel dimensions are in compliance with those given in the table below. panel dimensions max. thicKneSS 5/32" (4 mm) height width UPPeR RM1350M 19-7/32 19-9/64 15-43/64 15-19/32 inches RM1350MIM... - Page 11 mounting the door panels TO MOUNT THE DOOR PANEL, FOLLOW THESE STEPS: Insert the door panel’s edges into the grooves of the door frame. Push the panel sideways until the edge Open the door. of the panel is fitted into the opposite side groove. Remove the screw (A).
-
Page 12: Operating Instructions
O PE RATI Ng I N ST RUC T ION S refrigerator overview models with the manual door locking system Control panel LED display Airing position device (detachable) Ice box Door compartment Finned plate Shelf Drip protection Draining pipe Crispers General view of the appliance. -
Page 13: Refrigerator Overview
refrigerator overview models with the automatic door locking system and equipped with water dispenser Control panel LED display Ice box Automatic travel latch Water dispenser Door compartment Finned plate Shelf Drip protection Draining pipe Crispers General view of the appliance. Model shown is equipped with ice maker and water dispenser. The number of shelves and door compartments may vary according to the user’s requirements. - Page 14 refrigerator overview models with the automatic door locking system and equipped with ice and water dispensers Control panel LED display Automatic travel latch Ice box Drip tray Door compartment Finned plate Drip protection Draining pipe Shelf Crispers General view of the appliance. The number of shelves and door compartments may vary according to the user’s requirements.
-
Page 15: Control Panel
refrigerator overview control panel ON/OFF button (main power) Press the button to turn the refrigerator ON or OFF. AUTO/GAS mode selector button Press the button to turn the AUTO mode ON or OFF. TemP. SeT button The thermostat has 5 settings where 1 indicates the warm- est and 5 the coldest temperature setting. - Page 16 refrigerator overview Verify that a small spacing has been created between models withthe automatic door the cabinet and the doors and that the doors have not locking system been closed completely. If so, unlock the latch and close the doors again. automatic travel latch In order to open the doors again the travel latch must The refrigerator is equipped with a travel latch that automatically...
-
Page 17: Leveling The Refrigerator
refrigerator overview absorption cooling system purging air from the lines In an absorption refrigerator system, ammonia is liquefied in the If the refrigerator has not been used for a long time - or - finned condenser coil at the top rear of the refrigerator. The liq- the LP tanks have just been refilled, air may be trapped in the uid ammonia then flows into the evaporator (inside the freezer supply lines. -
Page 18: Operating Instructions
operating instructions turning on the refrigerator operating the ice maker rm1350im, rm1350mim, rm1350wim & rm1350wid wARNINg Before the ice maker can operate, make sure that: • The refrigerator is connected to 120 V AC . FIRe HAZARD. Before lighting the gas burner, •... - Page 19 operating instructions dispenser(s) adjusting the size of cubes If the ice maker was cleaned and drained, no ice cubes rm1350wid will be dumped into the bin during the first cycle. If new installation or used for the first time after the RV has been winterized/put into storage, the water tank, located inside The first few cycles may have small cubes due to air trapped the refrigerator, must be filled with water.
-
Page 20: Storage Compartments
operating instructions turning off the refrigerator you can turn off your refrigerator by pressing the main power If your RV is being put into winter storage, it is recommended ON/OFF button found on the control panel to the off position. to either put your RV batteries on a battery charger or turn off This will shut off all power to the refrigerator, including DC the vehicle’s main 12V switch. -
Page 21: Product Care
storage compartments Reposition the shelf in the desired location. Insert removing and replacing the shelves the ends of the wire shelf on the left-hand side and Remove the shelf locks by inserting the tip of a flat slide the shelf into the holes on the right-hand side. bladed screwdriver into the slot of the locks. -
Page 22: Maintenance & Service
& service CAUTION If your refrigerator stops cooling, immediately turn the refrigerator off and see a Dometic dealer. storage procedure /winterizing WATeR SOleNOID VAlVe - Rm1350WIm & Rm1350WID the refrigerator Water inlet rm1350im, rm1350mim, rm1350wim & rm1350wid hose The refrigerator is equipped with a heater tape wrapped around the water solenoid valve and outlet water tube. -
Page 23: Replacing The Heater
maintenance & service electric equipment Repeat the harvest cycle operation several times. Up to 20 PSIG air pressure can be used to clear the replacing the heater solenoid valve. Damage to solenoid can occur if AC power is applied for more than 20 seconds. The heat necessary for the operation of an absorption cooling unit is supplied by an electric heater mounted in a pocket of the Make sure that the metal tube is in the plastic water... - Page 24 maintenance & service TO CHECk THE CONNECTIONS FOR LEAkS, FOLLOW Put back the flue baffle. THESE STEPS: Clean the burner tube with a brush. Blow out the Verify that the LP gas supply is turned on. burner with compressed air. Apply a commercial non-corrosive bubble solution Remove burner jet, but first, clean burner area of to all LP gas connections.
-
Page 25: Refrigerator Removal
The refrigerator has • Immediately turn the refrigerator off and contact a Dometic dealer or Service Center. stopped cooling. NOTE! Do not leave it running for days and never try to solve the problem by repeatedly restarting the refrigerator. -
Page 26: Error Codes
troubleshooting warnings For information about warnings, refer to the following table. The messages are displayed flashing (alternating between temperature and the message). warnings information • Gas ignition failed. The gas flame has not been ignited after 45 seconds. Turn refrigerator OFF and then back ON to return to normal operation. -
Page 27: Diagnostic Test
diagnostic test The diagnostic test should be performed by a service technician. TO PERFORM A DIAGNOSTIC TEST, FOLLOW THESE STEPS: Turn off the refrigerator by pressing the main power ON/OFF button. Press and hold the TEMP. SET button while pressing the ON/OFF button. Release buttons when display comes on. Press the TEMP. -
Page 28: Appendix A - Spare Parts
- spare parts The following table displays commonly used parts which should be available from your Dometic Service Center. spare parts part no models Airing position device 3851270011 RM1350M, RM1350MIM Baffle 2932667054 RM1350M RM1350IM, RM1350MIM RM1350WIM, RM1350WID Burner... -
Page 29: Appendix B - Rearview Equipment
- rearview equipment rm1350m 385 13 31−01 F4 (5A) F3 (5A) SWITCHED AC HTR AC HTR LAMP LINE NEUT TEST LINE NEUT 12V DC Power module rm1350im, rm1350mim & rm1350wim 385 13 31−01 F4 (5A) F3 (5A) SWITCHED... - Page 30 appendix b - rearview equipment rm1350wid Water hose Heating cable Icemaker Drain water hose Water hose Water dispenser door Control unit Heaters Flexible cord Ice dispenser Protection plate W A R N I N G ! D I S C O N N E C T 1 2 0 V A C B E F O R E S E R V I C I N G PART No.
-
Page 31: Appendix C - Wiring Diagram
- wiring diagram rm1350m 3 8 5 1 4 9 0 C I R C U I T B O A R D P O W E R B R O W N P 1 − 1 B L A C K P 1 −... - Page 32 appendix c - wiring diagram rm1350im 3 8 5 1 4 9 2 C I R C U I T B O A R D P O W E R B R O W N P 1 − 1 B L A C K P 1 −...
- Page 33 appendix c - wiring diagram rm1350wid 3 8 5 1 4 9 4 C I R C U I T B O A R D P O W E R B R O W N P 1 − 1 B L A C K P 1 −...
-
Page 34: Appendix D - Consumer Support
For service, please contact the Service Center Assistance, see the front page of this manual - or - visit the Dometic website to find the location of the nearest Dometic Service Center. -
Page 35: Appendix E - Dometic Warranty
In order to obtain the benefits of this warranty, the original purchaser must return the product which is found defective to the Seller named below or to a Dometic Authorized Service Center during the period that this warranty is in effect. The original pur- chaser is responsible for all charges incurred in delivery of the product to the Seller or Dometic Authorized Service Center, and in pick up after the warranty service has been completed. -
Page 36: Appendix F - Maintenance Schedule
appendix f - maintenance schedule refrigerator owner maintenance yearly record Customer Name: Model No.: Date of Purchase: Address: Serial No.: City: State: Zip Code: Phone: SECOND YEAR FIRST YEAR Date: Date: Dealership: Dealership: Address: Address: City: City: State: Zip: State: Zip: Phone: Phone:... - Page 39 We truly appreciate that you have chosen to purchase a dometic product for your recreational vehicle and we want to help you protect this wise investment . We at dometic back our products with one of the most comprehensive warranties in the industry .
- Page 40 Owner’s Registration Card Registering your product is an essential step to ensure that you receive all the benefits you are entitled to as a DOMETIC customer. Complete the information below and mail to us or register on-line at www.edometic.com. be sure to include your email address so that we can communicate with you quickly and efficiently.