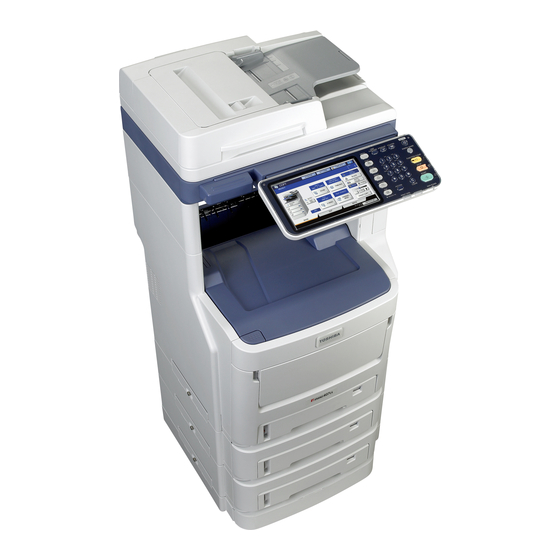
Toshiba e-studio287CS User Manual
Multifunctional digital color systems
Hide thumbs
Also See for e-studio287CS:
- Service manual (683 pages) ,
- User manual (368 pages) ,
- Software installation manual (238 pages)
Table of Contents
Advertisement
Quick Links
Download this manual
See also:
User Manual
Advertisement
Table of Contents

Related Manuals for Toshiba e-studio287CS


Summary of Contents for Toshiba e-studio287CS
-
Page 1: Setup Guide
MULTIFUNCTIONAL DIGITAL COLOR SYSTEMS User’s Manual Setup Guide... -
Page 2: About The Product Warranty
All rights are reserved by TOSHIBA TEC Corporation. You must not copy, transfer, translate, etc. the content herein without authorization. You must obtain written permission from TOSHIBA TEC Corporation before doing any of the above. -
Page 3: Emergency First Aid
Seek medical attention. Spillages should be treated with cold water and soap to help reduce risk of staining skin or clothing. • Manufacturer TOSHIBA TEC Corporation, 1-11-1, Shinagawa-ku, Tokyo, 141-8562, Japan For all sales, support and general enquiries contact your local distributor. -
Page 4: For Your Safety
• For Your Safety Read the User’s Manual for your safety before using the product. Cautions related to safety A warning provides additional information which, if ignored, may result in a risk of personal WARNING injury. A caution provides additional information which, if ignored, may result in equipment CAUTION malfunction or damage. -
Page 5: When Installing Or Moving
When installing or moving WARNING For the U.S.A. and Canada Multifunctional Digital Systems require 110 to 127 V, 8 A, 50/60 Hz electric power. For the EU Multifunctional Digital Systems require 220 to 240 V AC, 4 A, 50/60 Hz electric power. Except the U.S.A., Canada and the EU Multifunctional Digital Systems require 220 to 240 V AC, 4 A, 50/60 Hz electric power. -
Page 6: When Using The Machine
CAUTION • When removing the plug from the outlet, do not pull the power cord. Always hold the plug when removing it from the outlet. If the power cord is pulled, the wires may break and this could cause a fire or give you an electric shock. - Page 7 • Do not touch the metal portion of the guide plate in the duplexing unit or automatic duplexing unit as it could burn you. • Do not touch the hinge (= a connecting part) on the rear side of the Reversing Automatic Document Feeder.
-
Page 8: During Maintenance Or Inspection
Q Other points • Be very careful to treat the touch panel gently and never hit it. Breaking the surface could cause malfunctions. • Be sure to turn the power OFF when leaving the office or if there is a power outage. However, do not turn the power OFF if the weekly timer is in use. -
Page 9: When Handling Supplies
When handling supplies CAUTION • Never attempt to incinerate toner cartridges and waste toner boxes. Dispose of used toner cartridges and waste toner boxes in accordance with local regulations. Q Other points • Read the user's manual carefully to replace the toner cartridge using the correct procedure. An improper procedure could cause toner leakage or scattering. -
Page 10: About The Manuals
• About the Manuals The following user manuals are included with this product. All guides are included in the Client Utilities/User Documentation DVD. Read the Setup Guide first. S tep • Checking the Product Installing the machine • Installing the Machine Setup Guide (This manual) •... - Page 11 Read these guides as necessary. (continue) S tep Using the TopAccess • Overview TopAccess Guide • [Device] Tab Page • [Job Status] Tab Page This guide describes how to use the • [Logs] Tab Page TopAccess. • [Registration] Tab Page •...
-
Page 12: About This Manual
• About This Manual Notation used in this manual The following notations may be used in this manual. If there is no special description, Windows 7 is used as Windows, Mac OS X 10.7 is used as Mac OS X, and e-STUDIO407CS is used as the machine for examples in this document. -
Page 13: Table Of Contents
Table of contents Table of contents About the Product Warranty ..2 Installing Additional Paper Feed Units ........32 Emergency first aid ....3 Setting Up the Printer for Windows ..36 Manufacturer ......3 Configuring the options ......36 For Your Safety ......4 Setting the department code ....37 When using the machine ......6 Copying the PPD file for Windows ..39 During maintenance or inspection ..8... - Page 14 Table of contents Loading the paper in the Large Capacity Feeder........... 63 Using the Bypass Tray ..... 64 Registering a Custom Size (Undefined Size) ..........67 About Auto Tray Switching (Auto Tray Switch Function) ......68 Paper Output ......69 Using the Face Down Tray ....
-
Page 15: Checking The Product
Checking the Product Name and Function of Each Part ……………… P.16 About the Operator Panel ………………………… P.20 Checking the Product ……………………………… P.23... -
Page 16: Name And Function Of Each Part
Name and Function of Each Part • Name and Function of Each Part Machine Document Guide Scanner Part Document Cover Lever Operator Panel Inner Finisher RADF Cover Open Lever Document Holder Top Cover Lever Manual Guide Bypass Tray Vent Paper Support Top Cover Open Button Front Cover... - Page 17 Name and Function of Each Part Offline Stapler (when installing the offline stapler) USB Port Face Up Tray Vent Duplex Printing Unit Interface Part Power Connector Power Switch <Interface Part> (HANDSET) HANDSET TEL Connector LINE Connector LINE USB Interface Connector LINE Network Interface Connector (1000/100/10BASE)
-
Page 18: Operator Panel
Name and Function of Each Part Operator Panel Number Name Function [SCAN] button Use this button to access the scanning function. [COPY] button Use this button to access the copying function. [MENU] button Use this button to display frequently used templates. [USER FUNCTIONS] button Use this button for paper size or media type setting of drawer, and registration of the copy, scan and fax settings including a... -
Page 19: Adjusting The Angle Of The Control Panel
Name and Function of Each Part Number Name Function [MEMORY RX] / LINE lamp This green lamp lights in the status of the fax data reception and fax communication. The equipment can be operated even while these lamps are lit. [FAX] button Use this button to access the Fax / Internet Fax function. -
Page 20: About The Operator Panel
About the Operator Panel • About the Operator Panel Description of the Touch Panel Display When the power is turned ON, the basic menu for copying functions is displayed on this touch panel. The status of the equipment is also displayed on the touch panel with messages and illustrations. The menu shown at the time of turning the power ON can be changed to one for functions other than copying, for example, Fax function. -
Page 21: Touch Buttons
About the Operator Panel Touch buttons Press these buttons on the touch panel lightly to set various functions. Adjusting the contrast of the touch panel You can set the contrast of the touch panel in the USER FUNCTIONS menu entered by pressing the [USER FUNCTIONS] button on the control panel. -
Page 22: Setting Letters
About the Operator Panel Setting letters Press these to move the cursor. [Back Space]: Press this to delete the letter The following menu is displayed when the entry before the cursor. of any letter is required for scanning or e-Filing, [Clear]: Press this to delete all letters etc. -
Page 23: Checking The Product
Checking the Product • Checking the Product Check that you have everything shown below. CAUTION May cause injury! • At least three people are needed to safely lift the machine due to its 60 kg weight (with the Inner Finisher). •... -
Page 24: Installing The Machine
Installing the Machine Installation Conditions …………………………… P.25 Unpacking and Installing the Machine ……… P.27 About the option ……………………………………… P.31 Installing Additional Paper Feed Units ……… P.32 Connecting the Cables ……………………………… P.43 Checking the Copy Operation …………………… P.47... -
Page 25: Installation Conditions
Installation Conditions • Installation Conditions Q Operating Environment Q Installation Precautions Your machine must be placed in the following WARNING environment: • Do not install the machine near high temperatures Temperature: 10 - 32 °C or fire. 20% - 80% RH •... -
Page 26: Installation Conditions
Installation Conditions • Q Installation Space Top View (when installing the optional tray) Place the machine on a flat surface that is wide enough to accommodate the feet of the machine 30cm securely. Allow for enough space around the machine. (124.5cm) Note •... -
Page 27: Unpacking And Installing The Machine
Unpacking and Installing the Machine • Unpacking and Installing the Machine Remove the protector. Remove the protective tape. Note • The box, packaging, and cushioning material are needed to transport the machine. Do not dispose of Protective tape these items. Remove the machine from the box, and then remove the cushioning. -
Page 28: The Machine
Unpacking and Installing the Machine Close the bypass tray. Remove the four image drum cartridges. Image Drum Bypass Tray Cartridge Remove the image drum cartridges. Note • The image drum (the green tube) is fragile; Hold the Document holder lever handle it carefully. - Page 29 Unpacking and Installing the Machine Carefully place each of the four Load paper in the drawer cassette. image drum cartridges in the Open the drawer cassette. machine. Label Label Adjust the paper stop and paper guide to match the paper size. Close the top cover.
- Page 30 Unpacking and Installing the Machine Load the paper with the side to be printed on face down. The side to be printed on should be face down. Set the direction of the paper. Mark Note • Load the paper, making sure that it does not exceed the ...
-
Page 31: About The Option
Spacer GR-1160 The spacer adjusts the height of the machine. Inner Finisher MJ-1038 This finisher enables sort/group finishing (For e-STUDIO287CS/347CS/407CS) and stapling. Offline Stapler MJ-1039 This stapler is optional. FAX Unit GD-1340 This is a unit for using the machine as a Fax machine. -
Page 32: Installing Additional Paper Feed Units
Installing Additional Paper Feed Units • Installing Additional Paper Feed Units Installing additional paper feed units will increase the amount of paper you can load. You can install a maximum of three additional drawers. One drawer can hold 550 sheets of paper at 64 g/m . - Page 33 Installing Additional Paper Feed Units • Attach the caster unit. When you tighten the bottom screws, attach the anti-tip foot to the location where a screw does not incline. Note • * You can attach the screws to Case1 and Case2. When the casters are not used, this step is not As the screw inclines when you tighten the screw necessary.
-
Page 34: Drawer Unit
Installing Additional Paper Feed Units Put the bottoms of the anti-tip Put the machine on the additional feet on the floor and tighten drawer unit. them with three screws. CAUTION May cause injury! • At least three people are needed to safely lift the machine due to its 50 kg weight. - Page 35 Installing Additional Paper Feed Units Press down the lock levers of the Do not push the machine’s rear side when two or more drawer cassettes are pulled out. additional drawer unit’s front casters and lock the casters. Note • For prevention of fall, note the following points in transporting the equipment and printing.
-
Page 36: Setting Up The Printer For Windows
Installing Additional Paper Feed Units Setting Up the Printer for Memo • When SNMP communication between this equipment and Windows your computer is enabled, you can retrieve the option configuration information by clicking [Update Now]. Configure the additional tray by using the printer driver. -
Page 37: Setting The Department Code
Installing Additional Paper Feed Units • Click [Drawer Settings]. If the [File] menu is not displayed, press [Alt]. The [Drawer Settings] dialog box appears. • If the dialog box displayed does not Set the following options and click allow the printer driver properties to be [OK]. - Page 38 Installing Additional Paper Feed Units Select the printer driver of Note • this equipment, and then click When the User Management setting is enabled, it is used to manage a print job instead of the Department [File] menu and select [Printing Code Management setting.
-
Page 39: Copying The Ppd File For Windows
[Print & Scan]. Location: <Any Name> Print Using: TOSHIBA ColorMFP-X7 Memo • For MAC OS X 10.4.x to 10.6x, select TOSHIBA ColorMFP-X4. • In the [Name] box, the name that is entered in the [Address] box is automatically displayed. •... - Page 40 The [Installable Options] window appears. Set the following options. Click [+]. • Model Selection TOSHIBA e-STUDIO407CSSeries — Choose this for using e-STUDIO287CS/ 287CSL/347CS/347CSL/407CS. • Finisher Not Installed — Select this if a finisher is not installed. Inner Finisher (1 Tray) — Select this when the Inner Finisher is installed.
- Page 41 • Drawers Memo Drawer 1 • For MAC OS X 10.4.x to 10.6x, select TOSHIBA Select this when the drawer 1 is installed. ColorMFP-X4. Drawer 1 & Drawer 2 • In the [Name] box, the name that is entered in the Select this when the drawer 1 and 2 are [Address] box is automatically displayed.
- Page 42 Drawer 1, 2 & Drawer 3, 4 [Print Using] box. Therefore, select [Other] in the Select this when the drawer 1, 2, 3 and 4 [Print Using] box, and select the PPD file TOSHIBA ColorMFP-X7 from the [/Library/Printers/PPDs/ are installed.
-
Page 43: Connecting The Cables
Connecting the Cables • Connecting the Cables Connecting the Network Connecting the USB cable Cables Prepare a USB cable. Procure a network cable and a hub. Note • A USB cable is not provide with this product. Procure Note a USB 2.0 cable separately. •... -
Page 44: Connecting To The Telephone Line
Connecting the Cables • When connecting to a public network Connecting to the telephone (When connecting the telephone to the line machine) Insert the telephone line cable (that is connected The telephone line cable connection method to the public network (analog)) into the [LINE varies depending on the operating environment connector]. - Page 45 Connecting the Cables • • When connecting to an ADSL environment When connecting the CS tuner and digital Insert the telephone line cable (connected to the ADSL modem) into the [LINE connector]. Insert the telephone line cable (that is connected Insert the telephone line cable from an external to the public network (analog)) into the [LINE telephone into the [TEL connector]...
- Page 46 Connecting the Cables • When connecting the telephone as an extension telephone Insert the telephone line cable (that is connected to a controller such as the PBX) into the [LINE connector]. Insert the cover provided with this machine into the [TEL connector]. TEL Connector Controller such as PBX...
-
Page 47: Checking The Copy Operation
Checking the Copy Operation • Checking the Copy Operation For details about how to turn ON the machine, see “Turning Power ON” (P.50). Checking the copy operation Check the copy operation of the machine. Memo • The following procedure uses the factory settings. •... -
Page 48: Turning Power On/Off
Turning Power ON/OFF Precautions about the Power Supply ………… P.49 Turning Power ON …………………………………… P.50 Turning Power OFF ………………………………… P.51 Reducing Power Consumption When the Machine is not in Use (Power Save Mode) ……………… P.52... -
Page 49: Precautions About The Power Supply
Precautions about the Power Supply • Precautions about the Power Supply WARNING There is a risk of electric shock and/or fire. • Be sure to turn off the power when attaching or removing the AC cable and ground wire. • Be sure to connect the ground wire to a dedicated grounding terminal. -
Page 50: Turning Power On
Turning Power ON • Turning Power ON Connect the power supply cord. Check that the power switch has been turned OFF (O). Connect the power supply cord to the machine. Insert the power supply plug into the outlet. Turn ON the power switch. Check that there are no documents in the document holder. -
Page 51: Turning Power Off
Turning Power OFF • Turning Power OFF Make sure you follow this procedure when turning OFF the power. Note • Do not abruptly turn OFF the power supply. This may damage the machine. Press the [ON/OFF] button until a “pip” sound is heard. The following screen appears for a while. -
Page 52: Reducing Power Consumption When The Machine Is Not In Use (Power Save Mode)
Reducing Power Consumption When the Machine is not in Use (Power Save Mode) • Reducing Power Consumption When the Machine is not in Use (Power Save Mode) When the machine has been idle for a certain period of time, it automatically enters power save mode to reduce power consumption. -
Page 53: About Paper
About Paper About Paper …………………………………………… P.54 How to Load the Paper …………………………… P.62 Paper Output ………………………………………… P.69... -
Page 54: About Paper
About Paper • About Paper The Width and Length of the Paper When expressing the size of paper, X represents the width of the paper and Y represents its length. • Drawer Cassette • Bypass Tray - 54 -... -
Page 55: Supported Paper
About Paper Supported Paper For high quality printing, use paper that meets the requirements for quality, thickness, and surface finish. If not using recommended paper, test the print quality and the movement of the paper beforehand to avoid problems. Q About the type, size, and thickness of the paper. Note •... -
Page 56: Acceptable Paper
About Paper Q Acceptable paper Feeder Media type Weight Maximum sheet Paper size capacity Drawer 1 Plain (Thin) 64 - 74 g/m 580 sheets A4, A5, B5, Folio, Letter, Legal, Optional Drawers 17 - 19 lb. Bond 13”LG, 8.5”SQ, 16K, 13.5”LG, (2 - 4) Executive Plain... -
Page 57: Paper Recommendations
About Paper Q Paper Recommendations Your machine will handle a variety of print media, including a range of paper weights and sizes. This section provides general advice on choice of media, and explains how to use each type. The best performance will be obtained when using standard 75 - 90 g/m paper designed for use in copiers and laser printers. -
Page 58: Selecting The Paper Source And Output Method For Each Paper Type
About Paper Selecting the paper source and output method for each paper type. : You can use one-sided or two-sided (duplex) printing. : You can use one-sided printing only. : You can use various sizes of print media (one- or two-sided printing). : You can use various sizes of print media (one-sided printing only). -
Page 59: Output Method
About Paper Paper Source Output Method Drawer Cassette* Face Up Bypass Face Down Paper Type Paper Size Drawer 2 * (Page Output Tray (Page Output from the Drawer 1 Drawer 3 Manual from the back) front) Drawer 4 Envelope* DL, CHO-3, YOU-4, C5, COM9, COM10, Monarch Label*... -
Page 60: Printable Areas Of The Paper
About Paper Printable Areas of the Paper About Symbols The area of the paper that cannot be printed on The ( ) symbol indicates vertical placement of is shown below. the paper when viewed from the front of the machine. Area (A) of 4 mm ±... -
Page 61: Storing Paper
About Paper Storing Paper Be sure to store paper properly, otherwise it can absorb moisture, discolor, or curl. If that happens, it can affect print quality and cause paper misfeeds. Do not open the packaging until you intend to use the paper. Q Store paper under the following conditions. -
Page 62: How To Load The Paper
How to Load the Paper • How to Load the Paper Loading the paper in the The side that you want to print on should be placed face down when drawer cassette loading the paper. Plain paper is the only type of paper that can be loaded in the drawer cassette. -
Page 63: Setting The Paper Size Dial
How to Load the Paper Return the drawer cassette to its Loading the paper in the original position. Large Capacity Feeder Follow this procedure to load the paper in the Large Capacity Feeder. After you have loaded the paper, configure the paper type and thickness by using the operator panel. -
Page 64: Using The Bypass Tray
How to Load the Paper The side that you want to print on Using the Bypass Tray should be placed face down when loading the paper. Use the bypass tray when you want to print on plain paper, postcards, envelopes, OHP film, or labels. -
Page 65: Paper Width
How to Load the Paper Adjust the manual guides to fit the Press [BYPASS FEED] on the touch paper width. panel. Manual Guide Bypass Tray Manual Guide Press down the back of the bypass tray. Press [ZOOM] on the touch panel. With the side you want to print on facing up, insert the edge of the paper into the back of the bypass... - Page 66 How to Load the Paper Press [PAPER TYPE] on the touch Paper type Icon panel if the paper type of the paper PLAIN − you placed on the bypass tray is PLAIN (THIN) other than plain paper. THICK 1 THICK 2 THICK 3 THICK 4 THICK 5...
-
Page 67: Registering A Custom Size (Undefined Size)
How to Load the Paper After printing is completed, close Press the button of the same size as the bypass tray. the paper you placed on the bypass tray. Close the paper support. Bypass Tray Paper Support Slide each manual guides back to its original position. -
Page 68: About Auto Tray Switching (Auto Tray Switch Function)
How to Load the Paper Press the button of the same paper About Auto Tray Switching type as the paper you placed on the (Auto Tray Switch Function) bypass tray. Then press [OK]. When a drawer or bypass tray runs out of paper while printing, the machine locates another drawer or bypass tray with the same size of paper and begins feeding paper from that... -
Page 69: Paper Output
Paper Output • Paper Output Using the Face Down Tray Using the Face Up Tray Printed paper is delivered with the print side face Printed paper such as A6 paper, postcards, down, and stacked in the order printed. envelopes, labels, and OHP film is delivered to the face up tray. -
Page 70: About Document Copies
About Document Copies About Document Copies …………………………… P.71 Loading Documents ………………………………… P.75... -
Page 71: About Document Copies
About Document Copies • About Document Copies Document Conditions You cannot load the following kinds of documents into the automatic document feed. Please use the platen (glass surface). • • Documents with tears or holes. Documents that are creased or curled. •... -
Page 72: Readable Areas Of The Document
About Document Copies Readable Areas of the About Symbols Document This symbol indicates horizontal placement of the document when viewed from the front of the Even characters in the gray area may be machine. Documents are inserted from the short unreadable. -
Page 73: The Width And Length Of The Document
About Document Copies The Width and Length of the Loadable Document Sizes Document Q Document sizes for the automatic When expressing the size of the document, document feed. X represents the width of the paper and Y represents its length. •... - Page 74 About Document Copies Q Document Sizes for the Platen (Glass Surface) Load Reference Position Maximum Size 215.9mm 355.6mm Maximum Width 215.9mm (8.5”) × length 355.6mm (14”) Minimum 20mm or less - 74 -...
-
Page 75: Loading Documents
Loading Documents • Loading Documents Loading the Documents Q When loading a document on the platen (glass surface). Make sure that documents containing correction fluid, ink, and stamps are completely dry before Open the document cover, place loading them. the side of the document that you want to copy face down, and align CAUTION the document to the load reference... -
Page 76: Loading Documents Of Various Sizes (Mix Documents)
Loading Documents Loading documents of various sizes (mix documents). When loading several documents with the same width but different lengths, follow these points. Memo • There are three ways in which you can load paper in sets. • A4 ( ) and A5 ( Adjust the document guides to the width of the document. -
Page 77: Using Each Function
Using Each Function Configuration of the Printer, Fax, and Scanner Functions ……………………………………………… P.78... -
Page 78: Configuration Of The Printer, Fax, And Scanner Functions
Configuration of the Printer, Fax, and Scanner Functions • Configuration of the Printer, Fax, and Scanner Functions To use the printer, fax, and scanner functions, configure the printer after installation in accordance with the following flow chart. Configuration is not required for copy and scan to USB. Printer For Windows For Macintosh... - Page 79 Configuration of the Printer, Fax, and Scanner Functions Scan To Scan To Scan To Scan To Mail Network PC Remote PC Local PC Check the administrator password and IP address of the machine. Check the settings of the computer. Check the settings of the mail software.
-
Page 80: Index
Index... - Page 81 About Auto Tray Switching ..68 Index Card ......55 Setting letters ......22 Adjusting the angle of the control Installation Conditions ....25 Setting Up the Printer ....36 panel ........19 Installing ......... 27 Simultaneous Functions ..... 21 Auto Tray Switch Function ..
- Page 82 ©2012 - 2014 TOSHIBA TEC CORPORATION All rights reserved Under the copyright laws, this manual cannot be reproduced in any form without prior written permission of TTEC.
- Page 83 FC-287CS/347CS/407CS FC-287CSL/347CSL OME120267B0...
- Page 84 MULTIFUNCTIONAL DIGITAL COLOR SYSTEMS User’s Manual Setup Guide 1-11-1, OSAKI, SHINAGAWA-KU, TOKYO, 141-8562, JAPAN ©2012 - 2014 TOSHIBA TEC CORPORATION All rights reserved R121220M7502-TTEC Patent; http://www.toshibatec.co.jp/en/patent/ Ver02 F 2014-06...
Need help?
Do you have a question about the e-studio287CS and is the answer not in the manual?
Questions and answers