Table of Contents
Advertisement
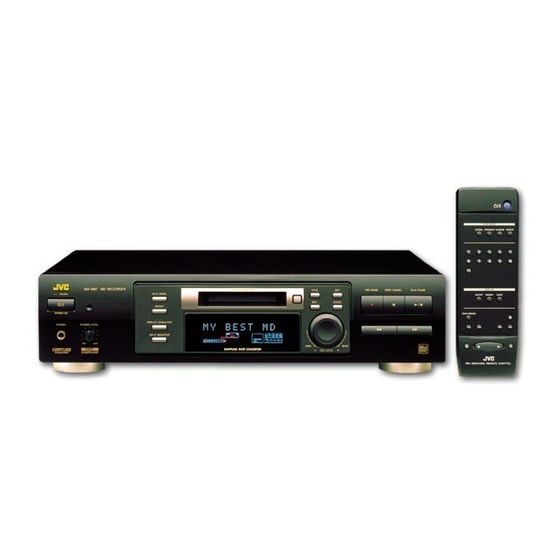
MD RECORDER
XM-228BK
1
2
3
4
5
6
7
8
9
10
+10 CANCEL
REPEAT
RANDOM PROGRAM
REC PAUSE
TRACK
TITLE
DISPLAY
MARKING
/EDIT
/CHARA SCROLL
ENTER
SET
RM-SM228EU
REMOTE CONTROL
INSTRUCTIONS
For Customer Use:
Enter below the Model No. and Serial
No. which are located either on the rear,
bottom or side of the cabinet. Retain this
information for future reference.
Model No.
Serial No.
LVT0111-003B
[B]
Advertisement
Table of Contents

Related Manuals for JVC XM-228BK


Summary of Contents for JVC XM-228BK
- Page 1 MD RECORDER XM-228BK +10 CANCEL REPEAT RANDOM PROGRAM REC PAUSE TRACK TITLE DISPLAY MARKING /EDIT /CHARA SCROLL ENTER RM-SM228EU REMOTE CONTROL INSTRUCTIONS For Customer Use: Enter below the Model No. and Serial No. which are located either on the rear, bottom or side of the cabinet.
- Page 2 Warnings, Cautions and Others IMPORTANT for the U.K. DO NOT cut off the mains plug from this equipment. If the plug fitted is not suitable for the power points in your home or the cable is too short to reach a power point, then obtain an appropriate safety approved extension lead or consult your dealer.
-
Page 3: Welcome
Welcome ! We would like to thank you for purchasing one of our JVC products. Before connecting this unit to the wall outlet, please read the instructions carefully to ensure that you obtain the best possible performance. If you have any questions, please consult your JVC dealer. -
Page 4: Table Of Contents
Table of Contents Welcome ! ... 1 Important cautions ... 1 For safe use, observe the following ... 1 Parts Index ... 3 Front panel ... 3 Display ... 3 Remote control unit ... 4 Setting up the System ... 5 Supplied Accessories ... -
Page 5: Parts Index
Parts Index Front panel ———————————————————————————— PHONES jack PHONES LEVEL control DISPLAY/CHARACTER button INPUT SELECTOR button Display Jog dial (4, ¢/REC LEVEL) 1, ¡ buttons 6 PLAY/PAUSE button Display —————————————————————————————— DIGITAL 12 32kHz 44.1kHz 48kHz 40 30 20 15 10 6 3 0 dB Level indicators and OVER indicator TOC indicator REC indicator... -
Page 6: Remote Control Unit
Remote control unit ———————————————————————— +10 CANCEL REPEAT RANDOM PROGRAM REC PAUSE TRACK TITLE DISPLAY MARKING /EDIT /CHARA SCROLL ENTER RM-SM228EU REMOTE CONTROL (STANDBY/ON) button Numeric keys CANCEL button PROGRAM button RANDOM button MD control buttons ¶ REC PAUSE 8 (Pause) 7 (Stop) 3 (Play) 4, ¢... -
Page 7: Setting Up The System
Setting up the System Supplied Accessories Before setting up your system make sure you received all of the following supplied accessories. AC power cord (1) Audio pin cord (2) Compu Link cable (1) Optical digital cable (1) Batteries R6P (SUM-3)/AA (15F) (2) Remote Control (1) Remote control batteries Match the polarity (+ and –) on the batteries with the + and –... -
Page 8: Connection
PLAY & EXCHANGE CD 2 CD 1 REPEAT PLAY MODE Optical digital cable Connect to the DIGITAL OUT jack of the CD player, for example. DIGITAL IN 1- OPTICAL- 2 AC POWER CORD VICTOR COMPANY OF JAPAN, LIMITED MADE IN JAPAN... -
Page 9: Turning The Power On And Off
Next, plug the AC power cord plug into the wall outlet. AC POWER CORD Cautions • Use only the JVC AC power cord provided with this system to avoid malfunction or damage to the system. • Be sure to unplug the power cord from the outlet when going out or when the system is not in use for an extended period of time. -
Page 10: Playback
Playback Normal playback The basic operation for playing an MD is described below. When no MD is loaded yet, “NO DISC” is shown on the display. 1 Load an MD. Hold an MD with the side on which an arrow is marked facing up, and insert it into the slot in the direction of the arrow. -
Page 11: Using Headphones
To pause the MD: Press 6 on the main unit or press on the remote control unit. The indicator lights up. To cancel pause, press 6 on the main unit or press 3 on the remote control unit. The MD starts from the position where it has paused. -
Page 12: Switching The Displayed Information
Switching the displayed information The display can show the disc title, track title and remaining time (recording time available when a recordable MD is loaded) information. DISPLAY /CHARA Number of tracks and total playing time Number of tracks and remaining recording time Disc title Program playback... - Page 13 3 Select desired track numbers to be programmed. Main unit: Turn the jog dial to the right or left to select the desired track number to be programmed. (Turning it to the right increases the track number and vice versa.) The selected track number will blink.
-
Page 14: Random Playback
To clear the program: Press 0 on the main unit or the remote control unit. The programmed tracks are cleared then the MD is ejected. To play programmed tracks repeatedly: Combine the program playback and repeat playback to play the programmed tracks repeatedly. -
Page 15: Repeat Playback
Repeat playback You can repeat all the tracks or single track in each playback mode. 1 Press REPEAT on the main unit or the remote control unit to select Repeat Play mode. REPEAT Each time REPEAT is pressed, the repeat mode indicators switches as follows. REPEAT ALL : In Normal Play mode, repeats all the tracks. -
Page 16: Recording
Recording An audio signal from a variety of sources can be recorded by using either digital or analog input as required. Things to know before recording —————————— • It may be unlawful to record or play back copyrighted material without the consent of the copyright owner. - Page 17 The input level for the digital inputs does not need adjustment. • When DIGITAL 1 or DIGITAL 2 is selected, one of the sampling frequency indicators lights up. For example, 44.1kHz indicator is displayed for a CD player input. However, if no source component is connected to the digital input or the sampling frequency input is other than 32 kHz, 44.1 kHz, or 48 kHz,...
-
Page 18: Track Marking
TRACK MARKING For digital input: When tracks are recorded from a CD player by digital input, track markings are recorded automatically at the points where the CD tracks change. ——————————————————— A track marking is automatically recorded every time a blank of more than 3 seconds is detected. -
Page 19: Editing Functions
Editing Functions MD editing functions A recorded MD can be edited in many ways. The editing functions include the dividing, joining, moving, erasing a single track, erasing the entire disc and assigning titles to the disc and tracks, and more than one of them can be combined as required. After track B division After track B... - Page 20 Part to be erased Dividing track A into 3 tracks Erasing track Joining tracks Combining editing functions By combining “DIVIDE”, “ERASE” and “JOIN”, for example, it is possible to erase only a part of existing track. Track No. Track No. Track No.
-
Page 21: Dividing A Track (Divide)
Dividing a track (DIVIDE) A track can be divided into desired number of tracks by adding track markings in the middle, in the desired points or where you want to search later. This makes it possible to assign track numbers after recording medley music or FM broadcast. -
Page 22: Joining Tracks (Join)
5 Fine-adjust the track marking position. Turn the jog dial on the main unit or 4 or ¢ on the remote control unit. The track marking position can be fine-adjusted in the range of ±128 positions (approx. ±8 sec.). As you adjust, the track marking displaces slightly and the 4-second section from the newly divided point will be played repeatedly. - Page 23 2 Press SET on the main unit or the remote control unit. 3 Select the track to be joined with the previous track. Using the jog dial or 4 or ¢ : Select the track number by turning the jog dial on the main unit or 4 or ¢ on the remote control unit.
-
Page 24: Moving A Track (Move)
Moving a track (MOVE) A track can be moved to the desired position by selecting its track number and the destination track number. 1 Press EDIT on the main unit or the TITLE/EDIT on the TITLE remote control unit to select “MOVE”. /EDIT The MOVE indicator lights up. -
Page 25: Erasing A Track (Erase)
5 Press ENTER on the main unit or the remote control unit. The change made above is entered ENTER temporarily in the memory. The display shows “EDITING” and the TOC indicator lights up. 6 Press 0 on the main unit or the remote control unit to eject the MD. -
Page 26: Erasing All Tracks In An Md (All Erase)
Using the numeric keys: Select the track number with the numeric keys on the remote control unit. The selected track is repeatedly played. Then press SET on the remote control unit. To select a track, see “Selecting a track with the numeric keys” on page 9. •... - Page 27 2 Press SET on the main unit or the remote control unit. • If the display shows “TRACK PROTECTED”, the tracks have been protected against accidental erasure by other component than the MD recorder in use. If you still want to erase the tracks, go to step 3. If you will not erase them, press EDIT on the main unit or the TITLE/EDIT on the remote control unit.
-
Page 28: Assigning The Disc Title And Track Titles
Assigning the disc title and track titles A disc title and track titles can be assigned to a recorded MD. Any title name can be given up to 64 characters. This operation is possible while the MD recorder is in Stop mode. •... - Page 29 4 Input the disc or track title. The following table shows the buttons to be used to input a title. Also, an example how to input title is explained here. [Title editing buttons and their functions] Button Changes the type of characters to be input as follows. Upper case letters and symbols Lower case letters and symbols DISPLAY...
-
Page 30: Disc Title
Editing the title name: • • 5 Press ENTER on the main unit or the remote control unit. The display shows “EDITING” and the TOC indicator lights up. Next, the display shows the disc title name and then shows the track number and the ENTER total playback time. -
Page 31: Assigning A Track Title During Playback Or Recording
Assigning a track title during playback or recording A track title up to 64 characters can be assigned as you play or record the track. 1 Starts playback or recording the track. 2 Press TITLE on the main unit once or press TITLE/EDIT on the remote control repeatedly until the title editing display appears. -
Page 32: Compu Link
Linked Operation of the Other Optional Components (Compu Link) The XM-228BK MD recorder can be controlled under linked operation provided by the JVC’s Compu Link remote control system. What is Compu Link The world of single components, in which you purchase a cassette deck, CD player, amplifier and other components separately and enjoy your own composition, is an effective means for pursuit of high-quality reproduction. -
Page 33: Rule On Digital Copying
Rule on Digital Copying The digital audio equipment exchange audio signals in the digital forms through digital input/output jacks, and include the CD (Compact Disc) player, MD (Mini Disc) recorder and DAT (Digital Audio Tape) recorder. The digital audio equipment allows digital copy of signals with little deterioration of music signals. -
Page 34: About Md (Mini Disc)
About MD (Mini Disc) The MD (Mini Disc) is a new digital audio medium using a disc with a diameter of 64 millimeters. In spite of the small size, the MD has multiple functions, high audio quality and recording/playback capabilities for up to 74 minutes. Role of the cartridge Cartridge Disc... -
Page 35: Atrac (Adaptive Transform Acoustic Coding)
ATRAC (Adaptive TRansform Acoustic Coding) (dB) High sens. 20 50 Audio freq. Sound skip guard memory stop During normal During playback vibration UTOC (User Table Of Contents) UTOC Contents 1st tune... 2nd tune... Music data 3rd tune... The MD (Mini Disc) has half the size of the CD but can record data for the same period of time. -
Page 36: Md Messages
MD Messages The display of the MD recorder may show the messages which are explained in the following table. Messages Description BLANK DISC The loaded disc is a non-recorded disc. CANNOT JOIN An attempt is made to join tracks that cannot be joined. DISC ERROR The MD is abnormal (damaged). -
Page 37: Md Restrictions
MD Restrictions The MD uses a unique data recording format that is different from the formats used by Cassette tape and DAT. Due to the restrictions imposed by this MD recording format, following symptoms may be observed. Note that these symptoms do not indicate malfunction of the product. Symptom “DISC FULL”... -
Page 38: Handling Mds
Handling MDs MD handling precautions —————————————— To maintain high quality audio for a long period Since the disc is accommodated inside a cartridge, it can be handled easily without caring about dust and dirt. However, to maintain the high audio quality for an extended period, use care in the following points. -
Page 39: Troubleshooting
Troubleshooting In case of difficulty, check the following before calling for service. Symptom Sound is not heard. Recording is not possible. Remote control is not possible. Operation is abnormal. Cause • Cables are not connected properly. • The power cord is unplugged from the power outlet. -
Page 40: Specifications
Specifications Format Minidisc digital audio system Recording format Magnetic modulation overwrite format Reading format Non-contacting optical method by semiconductor laser ( =780 nm) Sampling frequency 44.1 kHz Compression/expansion ATRAC (Adaptive method TRansform Acoustic Coding) method Number of channels 2 channels Frequency response 5 Hz to 20,000 Hz (±0.5 dB) S/N ratio...