Table of Contents
Advertisement
Advertisement
Table of Contents

Subscribe to Our Youtube Channel
Summary of Contents for Request AudioReQuest F.Series
- Page 1 AudioReQuest ANUAL ANUAL...
- Page 2 Copyright ©2005 ReQuest, Inc. All rights reserved. Printed in the USA. REQ-20050101-04-02000 ReQuest, ReQuest Multimedia, ReQuest logo, AudioReQuest logo and Digital Music System are trademarks of ReQuest, Inc. 2005. All rights reserved. MusicMatch and the MusicMatch logo are trademarks of MusicMatch, Inc. and is used with permission. All rights reserved.
-
Page 3: Table Of Contents
T a b l e o f C o n t e n t s Table of Contents ......................1 Getting Started........................2 How to Use This Manual ....................2 How to Get Help ........................3 Package Contents......................3 1. Setting-Up Your AudioReQuest..................4 1.1 Front Panel and Faceplate ..................4 1.2 Behind the Faceplate.................... -
Page 4: Getting Started
This manual is for all AudioReQuest products with firmware 2.0 or later. These products include: AudioReQuest F.Series, N.Series, Z.Series, Nitro, Fusion, and Tera. Additional instructions for Teras ship separately with the units; please refer to them for more specific instructions on setup. -
Page 5: How To Get Help
AudioReQuest model and serial number. T e l e p h o n e If you were unable to get the answer you needed from the ReQuest website, you may wish to contact ReQuest’s technical support line at (800) 236-2812. Please have your AudioReQuest model, serial number, and the name of your ReQuest dealer ready. -
Page 6: Setting-Up Your Audiorequest
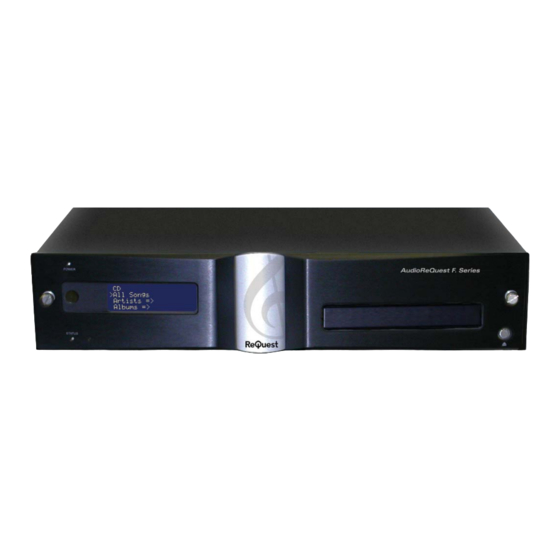
1 . S e t t i n g - U p Y o u r A u d i o R e Q u e s t 1 . 1 F r o n t P a n e l a n d F a c e p l a t e 1.1.1 Status Light The status light on the front of the AudioReQuest indicates the state of your Pro and Zone unit(s). - Page 7 All remote control functions can be performed on a USB style QuickPlay QuickBoard from ReQuest or a USB keyboard. There is a USB port for keyboards in the front of the unit behind the faceplate in addition to USB and PS2 ports in the rear of the unit. We advise you to turn off the AudioReQuest before connecting any keyboard.
-
Page 8: Back Panel - How To Connect Your Audiorequest
WARNING! • These are NOT HOT-SWAPPABLE drives! The unit must be hard powered down before removing the QuickSwap drive. • Never unlock the QuickSwap Bay to remove the drive from the AudioReQuest until it has spun down completely (10 seconds). Just because you cannot hear it spinning does not mean that it has completely stopped. - Page 9 1.3.3 Connecting AudioReQuest to a TV NOTE: The AudioReQuest cannot use VGA and any other video output simultaneously. To connect your AudioReQuest directly to a TV, you can use any of these combinations: 1. Component output and/or composite (Component recommended if available on your 2.
-
Page 10: Powering On And Off The Audiorequest
If you are interested in using touch panels, keypads, or other home automation products, please contact your dealer. There are help guides for these interfaces available at www.request.com, in the Support Section under Integration Support for the AudioReQuest. -
Page 11: Networking
PC, control system, or PDA (such as Java Remote or ARQPocket) please refer to the appropriate manual found at www.request.com under Support. 2 . 1 S e t t i n g u p t h e A u d i o R e Q u e s t a n d N e t w o r k i n g 2.1.1 Ethernet Connections... -
Page 12: Audiorequest Configuration
In that window you will find your PC’s IP address. Take that IP and use the same first 3 set of numbers in the address of your ReQuest. The last number set needs to be unique. You will need to check your router’s documentation for the proper static address range. -
Page 13: Navigating Your Audiorequest
3 . 1 R e m o t e C o n t r o l s Please refer to the instruction manual that accompanied your particular remote. All remote guides can be found at www.request.com, in Support under AudioReQuest Documentation. - Page 14 3.2.1 Navigator Mode The Navigator Mode serves as your basic start screen. This view is where you can see your music in the ALL SONGS category, or sorted by ARTIST, ALBUM, or GENRE. You can also view or edit your playlists (under SELECTED SONGS), and begin creating new ones from this screen (See Section 6).
-
Page 15: Recording Music
4 . R e c o r d i n g M u s i c 4 . 1 R e c o r d M u s i c f r o m a n A u d i o C D This section will lead you through the process of recording (also known as encoding) music from a CD onto your AudioReQuest. -
Page 16: Recording From Line-In
4.1.3 Manually Recording CDs With Auto-Rip disabled, load a CD into the CD tray of your AudioReQuest unit. AudioReQuest will read the CD and place the tracks in the Songs column of the AudioReQuest Navigation Screen. To record an entire CD, move the cursor over CD and press the RECORD (F7) button on the remote. -
Page 17: Playing And Browsing Music
5 . P l a y i n g a n d B r o w s i n g M u s i c 5 . 1 F i n d i n g Y o u r M u s i c Switch to the Navigator Mode by pressing the MODE (F2) button or CANCEL (ESC). -
Page 18: Playing Cds
Enter Random Mode – JUMP DOWN (PAGE UP) “jumps” to ANY random song on the entire system and continues to play random songs in the system. Exit Random Mode – JUMP UP (PAGE DOWN) brings you out of Random mode and back into NOW PLAYING. -
Page 19: Playing From Line-In
5 . 4 P l a y i n g f r o m L i n e - I n ( S u p p o r t e d U n i t s O n l y ) A unique feature of AudioReQuest is its ability to play music from almost any analog device such as audiocassettes and radio through its Line-In connections and enjoy the animations and visuals that AudioReQuest provides. -
Page 20: Organizing Music
6 . O r g a n i z i n g M u s i c As mentioned in the previous sections of this manual, AudioReQuest includes seven main categories. The first six categories, CD, ALL SONGS, ARTISTS, ALBUM, GENRES, and NOW PLAYING are provided to make listening to your music easy and convenient. -
Page 21: Create A New Playlist
SELECTED SONGS The SELECTED SONGS category displays all of the songs that have been selected by the user to be deleted, copied, or added to custom playlist. These songs are displayed in the Songs column of the Navigator View. * In certain main categories you can “Drill in” to additional fields. For example, in Artists you can “Drill in”... -
Page 22: Copy
6 . 4 C o p y AudioReQuest allows you to add additional songs to a custom playlist by selecting songs, artists, albums, or playlists and copying them into the desired playlist. To add Artists, Albums, or Songs to a custom playlist, you must first select them. To add your selected artists, albums, or songs at the end of the playlist, place the cursor over the custom playlist to which you want to add them and press the COPY Command: ALT+C (INSERT). -
Page 23: Edit
6 . 6 E d i t AudioReQuest allows you to edit song titles, artist names, album titles, genres, and custom playlists. You can enter text using the alphabet keys on the remote control or a keyboard. You can also look up AlbumArt from the Internet for songs and albums. 6.6.1 Song To edit the title, artist, album, AlbumArt, year, or rating of a song stored on your AudioReQuest unit,... - Page 24 6.6.5 Playlist To edit the name of a custom playlist press the EDIT Command, ALT+Z (SHIFT+F12), while the cursor is over the playlist you wish to edit. When complete, place the cursor over the “OK” icon and press ENTER (ENTER). 6.6.6 AlbumArt An AudioReQuest can automatically look up AlbumArt when properly configured to connect to the Internet.
-
Page 25: Music Transfer With Samba
Information. Note: Use the “\\” keys above the Enter key instead of “//” which brings you to the Web Server. To connect using Mac OSX or Linux, please refer to the help guides on www.request.com. Click on Support, then the Mac/Linux page under Integration. Once connected to Samba, you will see 5 folders: MP3s, Upload, Pictures, Themes, and Themes Backup. -
Page 26: Upload Folder
The Themes folder is a writable directory that allows users to add new Themes for the video interface. Themes may be downloaded from www.request.com. 7 . 4 T h e m e s B a c k u p F o l d e r The Themes backup folder is a read-only folder that contains the original Themes that ship with the unit, in case any themes that were deleted need to be restored. -
Page 27: Albumart, Themes, Visuals, And Screen Saver
You can update the internal database by running database update CDs. These are available by contacting ReQuest through support@request.com. To look up all existing CDs that were not previously looked up, press MENU (F3) → Settings → CD &... -
Page 28: Visuals
8 . 3 V i s u a l s Press the VISUALS Command: ALT+6 (SHIFT+F6) to enable the screensaver. To get out of the animation screen, press the CANCEL (ESC) button. 8 . 4 S c r e e n S a v e r AudioReQuest comes equipped with a screen saver to prevent “burn-in”... -
Page 29: Arq Web Server
9 . A R Q W e b S e r v e r The AudioReQuest has a built-in Web Server. To view it within your home network, open your preferred web browser and type: http://Your Units IP Address. The IP address can be found under System Information under the Menu Screen of your unit. - Page 30 For more assistance for working with iTunes, please refer to the iTunes manual, located at www.request.com under Support. 9 . 3 M a k i n g P l a y l i s t s a n d E d i t i n g G e n r e s Depending on the type of playlist that you want, click on the corresponding category link listed at the top of the page.
- Page 31 1. Open the ARQ Web Server, and click Java AlbumArt Manager. NOTE: Some windows users may be asked to accept a contract allowing ReQuest to run their JavaApplet. Please click “YES.” 2. If you want to focus on adding cover art rather than editing, check the “Only Albums without Cover Art.”...
- Page 32 If your browser does not support Java AlbumArt Manager (non-IE or Netscape), then another method to add cover art is available: Here are steps to add cover art to your albums: 1. Create a new folder on your desktop where the cover art images will be stored temporarily until you transfer them to the AudioReQuest.
-
Page 33: Advanced Networking: Multi-Location Access, Netsync, And Arqlink
1 0 . A d v a n c e d N e t w o r k i n g : M u l t i - l o c a t i o n A c c e s s , N e t S y n c , a n d A R Q L i n k This section outlines how to setup advanced networking available with the AudioReQuest. - Page 34 If you change the web port, in order to access it on a web browser, you will need to put the address in the following format: http://ARQ_IP_ADDRESS:WEB_PORT. (i.e. http://192.168.1.50:100) To reset all the ports to the default values, as well as reset the Web Server passwords, using the remote control and TV interface, press MENU (F3) press MENU (F3) →...
- Page 35 10.2.1 Setting Up NetSync on the Master Pro You can set up NetSync over both your internal network and over the Internet. To set up NetSync every Pro and Zone will need an IP address. See section 6.1 for Network Configuration. To set up the Master AudioReQuest Pro unit go to MENU (F3) →...
- Page 36 10.2.4 Manual NetSync By default, Zones are set for Auto NetSync and “Pro as a Zone” is set for No Automatic NetSync. NetSync can be initiated or cancelled manually on each Zone. Go to Menu NetSync for the Begin NetSync Now and Cancel NetSync options. 10.2.5 Multi-Location NetSync and ARQLink AudioReQuest’s unique NetSync architecture allows the customer’s music collection and playlists to synchronize to their units anywhere in the world over the Internet.
- Page 37 Step 2: Adding AudioReQuests to ARQLink Each individual ARQ that you add must be configured to connect to ARQLink, which is done inside the ARQ Web Server settings page or on the TV Interface under Menu → NetSync → ARQLink. 1.
- Page 38 ARQLink gives you the opportunity to connect to your ARQ unit’s settings to change any configuration you may need to make. To do this, click on the Settings link under the “Actions” column for the device you wish to configure. Step 8: Connecting to your ARQ Unit The main purpose of ARQLink is to allow you, the end user, access to all of your ARQ units.
-
Page 39: Future Updates
1 1 . F u t u r e U p d a t e s The digital music industry is constantly changing, and AudioReQuest has been designed to change too. Your new AudioReQuest unit has been designed to be updated, from time to time, as new technology becomes available. - Page 40 1 2 . 2 I n d i v i d u a l A r t i s t s 303 Infinity www.303infinity.com A musical entity created to represent the core idea behind electronic music: Independence. “Drift into Infinity” and “Winter Rain” produced, written, recorded, and promoted by 303 Infinity.
-
Page 41: Specifications
1 3 . S p e c i f i c a t i o n s Special Features CD Player/Music Jukebox/Internet & MP3 Music Player Built-in Removable QuickSwap™ Hard Drive Support for WAV*, FLAC*, MP3, CD-R/CD-RW Ethernet, Serial, and IR control support for any home control system CD Lookup Support (automatic CD identification) Interfaces Built-In LCD Display... -
Page 42: Regulatory Notices
1 4 . 2 F C C D e c l a r a t i o n o f C o n f o r m i t y We, ReQuest, Inc., 100 Saratoga Village Blvd. #44, Ballston Spa, NY 12020 declare under our sole responsibility that the AudioReQuest Digital Music System complies with Part 15 of the FCC rules. - Page 44 Ballston Spa, NY 12020 phone: 800.236.2812 fax: 518.899.1251 email: support@request.com w w w w w w . . r r e e q q u u e e s s t t . . c c o o m m...
Need help?
Do you have a question about the AudioReQuest F.Series and is the answer not in the manual?
Questions and answers