Table of Contents
Troubleshooting

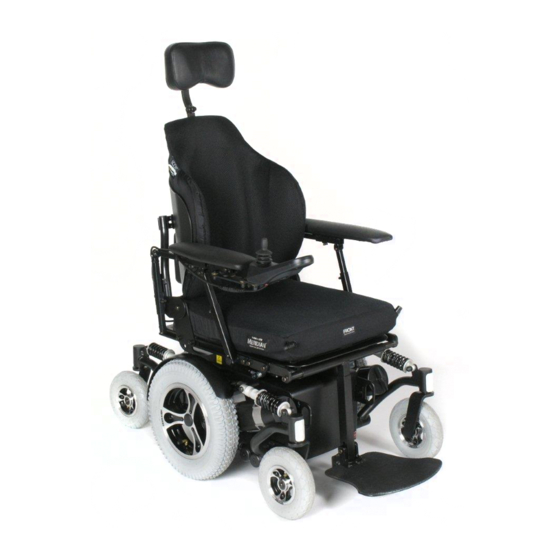
Related Manuals for TA Service iQ MWD: 97050


Summary of Contents for TA Service iQ MWD: 97050
- Page 1 Art. Nr: TA iQ MWD: 97050 TA iQ RWD: 97060 TA iQ FWD: 97070 TA. Service A/S · Orupgade 32 B · Orup · 4640 Faxe Telefon +45 56 72 57 77 · Telefax +45 56 72 57 76 ·...
-
Page 2: Warnings
Repairs and programming of the power chair must be performed by TA Service A/S or a repairer who is authorized by TA Service A/S. -
Page 3: Preface
Tel. + 45 56 72 57 77 Fax + 45 56 72 57 76 ta-service@ta-service.dk TA Service A/S makes continuous product development and we reserve the right to make changes. CE DECLARATION TA iQ is tested by TÜV, and complies with standard EN 12184:2009. -
Page 4: Pre-Sale Information
PRE-SALE INFORMATION A) By request the user manual can be made with large font The TA iQ`s designed for users with normal visual and cognizance ability. MAX. User weight 140 kg. C) The TA iQ`s designed for use both indoors and outdoors. When you drive indoors, you must be careful in, for example, narrow passages, when going through doors and entrances and when using lifts, ramps, etc. -
Page 5: Table Of Contents
CONTENTS Warnings................................2 Preface ................................3 CE DECLARATION ............................3 Pre-sale information ............................4 Contents ................................5 Technical Data ..............................6 Serial number ..............................7 Operating Instructions............................8 Before driving:..............................8 Performance check ............................9 Getting in and out of the wheelchair ......................10 While driving: .............................. -
Page 6: Technical Data
TECHNICAL DATA Power chair Type: Class B: Dimensions: Width excl. seat: 63 cm Floor clearance: app. 7 cm. (depending on the adjustment of the springs) Length excl. footplate / foot supports (shortest) TA iQ FWD: 82 cm TA iQ MWD: 90 cm TA iQ RWD: 82 cm Seat Mounting Height: 38,5 cm (for top plate) -
Page 7: Serial Number
It is possible to set how fast the chair's slowdown will be. If this change is wanted please contact TA Service A/S. Electromagnetic brake is activated when the chair is stationary and serves as a "parking"... -
Page 8: Operating Instructions
OPERATING INSTRUCTIONS. BEFORE DRIVING: WARNING!! TA iQ is not intended for users with a weight exceeding 140 kg WARNING!! TA iQ should be turned off when entering and exiting the power chair and when assisted by a helper, so that the power chair does not accidentally move if the joystick is activated. CAUTION! Smoking or use of open fire, while seated in the power chair, creates a risk of burns to the user or upholstery. -
Page 9: Performance Check
Joystick: With the control system switched off, check that the joystick is not bent or damaged and that it returns to the center when you push and release it. If there is a problem do not continue with the safety checks and contact TA Service or your service agent. Weekly Checks Parking brake: This test should be carried out on a level floor with at least one meter clear space around the wheelchair. -
Page 10: Getting In And Out Of The Wheelchair
Getting in and out of the wheelchair ! Before getting in and out of the wheelchair, make sure that the wheelchair is turned off. If the user can transfer itself, lower the tilt and the lift to the lowest position. For transferring from the front tilt the footplate up figure 1 Figure 1... -
Page 11: While Driving
It is possible to adjust how fast the chair is slowing down and thus reduce any late run on the chair. This adjustment is carried out by TA Service A/S. At a short late run, braking will be experienced very sharp. -
Page 12: Force Of Obstacles
This brake method results in a very abrupt deceleration and should only be performed in an emergency and only if the user of the power chair is prepared. WARNING!! Slowing down by pressing the On /Off button creates the risk that the user's torso could fall over. This could lead to, the user falling out of the power chair. -
Page 13: Control Box
Control box 1 Power button 2 Horn 3 Display 4 Driving Profile 5 Speed up button. 6 Switching between driving and menu 7 Speed down button. Display 1 - Battery indicator 2 - Main Screen 3 - Profile indicator Battery indicator – figure A All 10 bar lights (red, yellow and green): The power chair is fully charged Figure A 7 bar lights (red and yellow): The power chair must be recharged as soon as... - Page 14 DANGER!!! Programming of the power chair must be performed by TA Service A/S or repairer who is authorized by TA Service A/S. Unauthorized programming can cause that the power chair will handle in a way that could cause...
-
Page 15: Locking The Joystick
Locking the Joystick Locking the system: Figure 1 When the power chair is on, press and hold the "Power" button. 1. After 1 second the power chair beeps, release "On-Off" 2. Press the joystick forward until a beep appears 3. Press the joystick back until a beep appears 4. -
Page 16: Setting Menu
(The display is more visible with a white background in bright sunlight) Auto = The power chair can be programmed to display different backgrounds at different profiles. Contact TA Service for special adaptation. Figure C Distance - following submenu appears: (figure c) Total distance: total distance power module has been running Trip distance: Trip odometer - can be reset. -
Page 17: Setting The Power Functions
SETTING THE POWER FUNCTIONS The power chair may depending on model have the following power functions: Seat lift · Seat tilt · Back · Right legsupport · Left legsupport · Figure 1 The functions are activated by pressing the "Mode" button on the control box, then there's a picture of power features (figure 1). -
Page 18: Alternative Controls/Functions
The system is set up to function as max speed. If profiles (fx 1 slow and 1 quick) are wanted instead, please contact TA Service for different programming. Adjusting speed (or choice of profile, depending on setting) - Page 19 Battery indicator Shows that the power chair is on, plus status of batteries. Red, yellow and green light (1-10 lights: This indicates all is well. Red and yellow light (1-7 lights): The control system is functioning correctly, but you should charge the battery as soon as possible. Red lights (1-3 lights constant or flashing): The power chair must be charged immediately not to destroy the batteries.
-
Page 20: Adjustments
ADJUSTMENTS Setting the armrests. Armrest cushion position relative to the back is adjusted by loosening the 2 screws under the horizontal tube with a 4 mm Allen key (A1), and the 2 screws in the c-profile with a 6 mm Allen key (A2) Armrest height is adjustable by loosening screws (B) on the armrest vertical tube with a 4mm Allen key. -
Page 21: Setting Up The Leg Rest
Mounting of hipbelt. It is possible to mount a hip belt on TA iQ. TA Service A/S recommends that the hip belt is attached by the back bracket (A) or on the bracket of the seats C-profile. Use a 6 mm Allen key Suspension. -
Page 23: Transportation By Car
TRANSPORTATION BY CAR. TA iQ is crash tested with 4 point car attachment and Dahl Docking System (accessories), so it can be used as a seat in a car, bus or similar. The user can use the TA iQ during transport by a car, bus or similar, if the TA iQ is equipped with TA 4 point car attachment and/or Dahl Docking system. -
Page 24: Charging
CHARGING. TA iQ is equipped with a battery level indicator at the top of the control box - the long series of LEDs. As the power chair is used the battery level falls and the LEDs turn off. See the following explanation: Battery indicator: (figure 1) All 10 bar lights Figure 1... -
Page 25: Disposal
If there is doubt about whether a particular battery charger can be used contact TA Services A/S. PACKING AND SHIPPING If the wheelchair needs to go to the dealer or TA Service contact the local dealer who will arrange the transport to the dealer or TA Service. -
Page 26: Troubleshooting
TROUBLESHOOTING. Problem: Cause: Solution: The power chair cannot run 1. Charging connector is Remove the charging plug. connected to the control box. 2. Motor brake is disengaged. Connect the motor brakes. 3. Other cause. Contact authorized service center. The chair drives slowly. 1. -
Page 27: Troubleshooting - Control Box Without Display
TROUBLESHOOTING – CONTROL BOX WITHOUT DISPLAY If a system failure should occur, you can find the cause by counting the number of light diodes flashing – If light diodes lights constant – see Control box without display, page 17. Number of light diodes flashing: Cause: Solution: 1. -
Page 28: Service And Maintenance
A service manual is available for dealers and service agents – contact TA. Service for more information TA Service recommends that the wheelchair get service at a Dealer or at the factory of TA Service. ! Maintenance and service that are not listed under SERVICE AND MAINTENANCE and ADJUSTMET shall be done by the service agent, dealer or TA Service. -
Page 29: Batteries
Batteries: The batteries are motive power batteries in gel technology and therefore maintenance-free. (no topping up) It is recommended that only the dealer or TA service replaces the batteries, they will also take care of the disposal. If the batteries run out of current the wheelchair can be pushed, see section: MECHANICAL DISENGAGING THE BRAKES. -
Page 30: Tyre Punctures
Tyre punctures: Start by lifting the wheelchairs wheel free from the ground, either by using a lift or by putting something stable between the bottom frame and the ground. Figure 1 ! Tilt or lift only the wheelchair when the user is not in the wheelchair Figure 1 Castors... - Page 31 Repair or replace the tube with a new one, and Figure 5 assemble the wheel again It’s recommended to Inflate the wheel to 2.0 bar / 30 psi. ! Be aware not to squeeze the tube between the two rim parts when assembling. ! Notice the way of the valve before assembling the rim.
-
Page 32: Accessories And Spareparts
Figure 10 Figure 9 ACCESSORIES AND SPAREPARTS TA Service is constantly developing various accessories. For more information about accessories and spare parts contact the local dealer or TA Service.
Need help?
Do you have a question about the iQ MWD: 97050 and is the answer not in the manual?
Questions and answers