Table of Contents
Advertisement
Important Safeguards..........................................................................3
Setting Up Your Oven..........................................................................7
Operation..............................................................................................9
Troubleshooting..................................................................................20
One Year Limited Warranty.................................................................21
SAVE THIS INSTRUCTION MANUAL FOR FUTURE REFERENCE
©
2013 West Bend
Manufactured and Distributed by Midea America Corp.,Authorized Licensee,Parsippany,
NJ 07054
MICROWAVE OVEN
Instruction Manual
TM
,a Brand of FocusProducts Group International, LLC.
Advertisement
Table of Contents

Related Manuals for West Bend AG028PLV


Summary of Contents for West Bend AG028PLV
-
Page 1: Table Of Contents
MICROWAVE OVEN Instruction Manual Important Safeguards................3 Setting Up Your Oven................7 Operation....................9 Troubleshooting..................20 One Year Limited Warranty..............21 SAVE THIS INSTRUCTION MANUAL FOR FUTURE REFERENCE © 2013 West Bend ,a Brand of FocusProducts Group International, LLC. Manufactured and Distributed by Midea America Corp.,Authorized Licensee,Parsippany, NJ 07054... -
Page 2: Specifications
(2) HINGES AND LATCHES (broken or loosened) (3) DOOR SEALS AND SEALING SURFACE (d) The oven should not be adjusted or repaired by anyone except properly qualified service personnel. Specifications Model: AG028PLV Rated Voltage: 120V~ 60Hz Rated Input Power(Microwave): 1500W Rated Output Power(Microwave):... -
Page 3: Important Safeguards
IMPORTANT SAFEGUARDS CAUTION WARNING To reduce the risk of burns, electric shock, fire,injury to persons or exposure to excessive microwave oven energy when using your appliance, follow basic safety precautions, including the following: • Read all instructions before using • Install or locate this oven only in accordance with the installation the appliance. -
Page 4: Grounding Instructions
• Do not let cord hang over edge of table or counter. • When cleaning interior or exterior surfaces, used only mild, nonabrasive, soaps or detergents applied with a sponge or soft cloth. • Liquids, such as water, coffee, or tea may overheat beyond the boiling point without appearing to be boiling. -
Page 5: Radio Interference
1. A short power-supply cord is provided to reduce the risks resulting from becoming entangled in or tripping over a longer cord. 2. Longer cord sets or extension cords are available and may be used if care is exercised in their use. - Page 6 Materials you can use in microwave oven Materials Comments Shielding only. Small smooth pieces can be used to cover thin parts of meat or poultry to prevent overcooking. Arcing Aluminum foil can occur if foil is too close to oven walls. The foil should be at least 1 inch (2.5cm) away from oven walls.
-
Page 7: Setting Up Your Oven
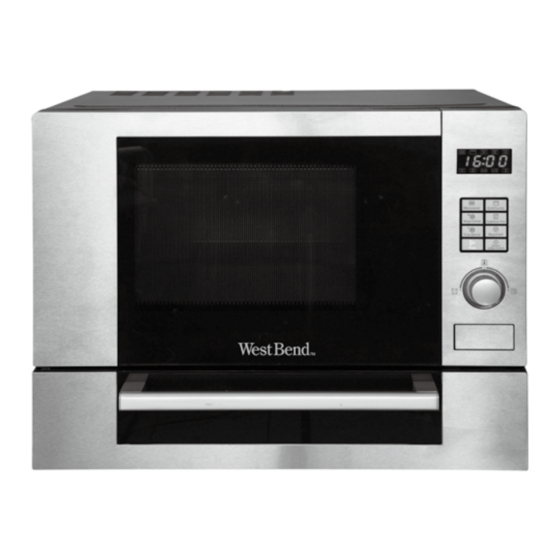
SETTING UP YOUR OVEN Names of Oven Parts and Accessories Remove the oven and all materials from the carton and oven chamber. Your oven comes with the following accessories: Glass tray Turntable ring assembly Instruction Manual Pizza Baking Tray Grill rack A.Pizza Oven Door B.Pizza Baking Tray C.Door... -
Page 8: Before Installation
Before Installation R e m o v e a l l p a c k i n g m a t e r i a l a n d Cabinet: Remove any protective film found accessories. Examine the oven for any on the microwave oven cabinet surface. -
Page 9: Operation
OPERATION Control Panel and Features (1) Microwave (6) Stop/Clear (2) Grill/Combi. (7) Pizza (3) Weight Defrost (8) Start/+30Sec./Confirm (4) Clock/Kitchen Timer (9) Clock/Weight/Auto Menu Knob (5) Time Defrost English-9... -
Page 10: Clock Setting
OPERATION 1.Clock Setting When the microwave oven is plugged in, the LED will display "0:00", buzzer will beep once. Press"Clock/Kitchen Press"Clock/Kitchen Press"Clock/Kitchen Timer" once to select Ti m e r " , t h e m i n u t e Timer"to finish clock clock function, the hour figures will flash.Turn"... -
Page 11: Power Levels
Example: If you want to use 80% microwave power to cook for 20 minutes, you can operate the oven as the following steps. Press "Microwave" Press "Microwave" Press"Start/+30Sec. Turn " " to adjust the once, the screen display once again or turn" "to /Confirm"... - Page 12 3.Grill or Combi. Cooking Press "Grill/Combi " the LED will display"G",and press "Grill/Combi" or turn the to choose the power you want, and "G","C-1" or "C-2" will display.Then press " " to confirm, and turn " " to set cooking time from 0:05 to 95:00. Press "Start/+30Sec./Confirm"...
-
Page 13: Quick Start
4. Quick Start Press "Start/+30Sec. O r t u r n " " l e f t t o Microwave,Grill,Combi or /Confirm". Oven will set cooking time with Time Defrost, each press start cooking at 100% 1 0 0 % m i c r o w a v e of "Start/+30Sec./ power for 30 seconds. -
Page 14: Defrost By Time
6. Defrost By Time Press"Time Defrost" Turn " " to select the Press "Start/+30Sec. o n c e , t h e o v e n w i l l defrost time. The MAX /Confirm" to start display "dEF2". time is 95 minutes. defrosting. -
Page 15: Auto Menu
8. Auto Menu 1) Turn " " right to choose the menu, and "A-1" to "A-6" will display. 2)Press "Start/+30Sec./Confirm" to confirm. 3) Turn " " to choose the default weight as the menu chart. 4) Press "Start/+30Sec./Confirm" to start cooking. Example: If you want to use "Auto Menu"... - Page 16 9. Multi-Function Cooking At most 2 functions can be set for cooking in multi-function cooking. Note: If defrosting, it will automatically be placed as the first function. Example: If you want to defrost food for 5 minutes and then cook with 80% microwave power for 7 minutes, operate it as the following: Press "Time Defrost"...
-
Page 17: Pizza Function
10. Pizza function Open the pizza oven door, put the pizza on the baking tray, then close the door. Press "Pizza" once, Press "Pizza" three Press "Start/+30Sec. Turn " " to choose the " " will light and the times or turn " " to /Confirm"... - Page 18 Menu chart: Program/Display Weight The preset cooking time 8 inch 13:00mins Pizza/ P-1 9 inch 15:00mins 8 Oz 20:00mins Chicken Wings/C-1 16 Oz 25:00mins 8 Oz 20:00mins Chicken Nuggets/C-2 16 Oz 25:00mins Custom time/C-3 Enter the time by " "Max.cooking time is 95 minutes. Note: If door is opened,baking and timer stop.Press "Start/+30Sec./Confirm"...
- Page 19 12. Lock-out Function for Children Lock: Press "Stop/ Clear " for 3 seconds, there will be a long " beep" denoting entering the child-lock state . The lock icon will light. Lock Cancel: Press "Stop/Clear" for 3 seconds, there will be a long "beep"...
-
Page 20: Troubleshooting
Troubleshooting Check your problem by using the chart below and try the solutions for each problem. If the microwave oven still does not work properly, contact the nearest authorized service center. TROUBLE POSSIBLE CAUSE POSSIBLE REMEDY a. Electrical cord for oven is a. -
Page 21: One Year Limited Warranty
ONE YEAR LIMITED WARRANTY This product carries a warranty that it will be free from defects in material and workmanship for a period of one year from the date of purchase. This warranty is valid for the original retail purchaser from the date of initial retail purchase and is not transferable. - Page 22 Made in China PN: 261800313062...
Need help?
Do you have a question about the AG028PLV and is the answer not in the manual?
Questions and answers