Table of Contents
Advertisement
Available languages
Available languages
Quick Links
Download this manual
See also:
User Manual
Overview [en]
This Quick Installation Guide provides
a description of the installation of the
myUTN-120. It contains the following
information:
General Information
Safety Regulations
Hardware Installation
Software Installation
Getting Started
Configuring the UTN Server
Please note the table of contents on
page 3. Should you have any further
questions, please contact our support
hotline.
Monday - Thursday
Friday
℡
+49 (0)521 94226-44
@
support@seh.de
Quick Installation Guide
USB SDCardserver
myUTN-120
Quick Installation Guide
Überblick [de]
Dieser Quick Installation Guide beinhaltet
eine Beschreibung der Installation des
myUTN-120. Sie erhalten die folgenden
Informationen:
Allgemeine Information
Sicherheitsvorschriften
Hardware-Installation
Software-Installation
Erste Schritte
UTN-Server konfigurieren
Beachten Sie das Inhaltsverzeichnis auf
Seite 17. Falls Sie noch Fragen haben,
kontaktieren
Hotline.
8:00 a.m. to 4:45 p.m. and
8:00 a.m. to 3:15 p.m. (CET)
Sie
unsere
Support-
1
Advertisement
Chapters
Table of Contents

Subscribe to Our Youtube Channel
Related Manuals for SEH myUTN-120


Summary of Contents for SEH myUTN-120
-
Page 1: Quick Installation Guide
Überblick [de] This Quick Installation Guide provides Dieser Quick Installation Guide beinhaltet a description of the installation of the eine Beschreibung der Installation des myUTN-120. It contains the following myUTN-120. Sie erhalten die folgenden information: Informationen: General Information Allgemeine Information... - Page 2 Date of Manufacture The serial number includes the date of manufacture. The serial number can be found on the type plate. Quick Installation Guide...
-
Page 3: Table Of Contents
2 Getting Started: SEH UTN Manager ....10 Starting the SEH UTN Manager ......11 Assigning an IP Address to the UTN Server . -
Page 4: General Information
SD card reader and the USB device. The SEH UTN Manager is installed on all clients that are intended to access the SD card reader or a USB device in the network. The SEH UTN Manager shows the availability of all devices in the network and establishes a connection between the client and the SD card reader or USB device. -
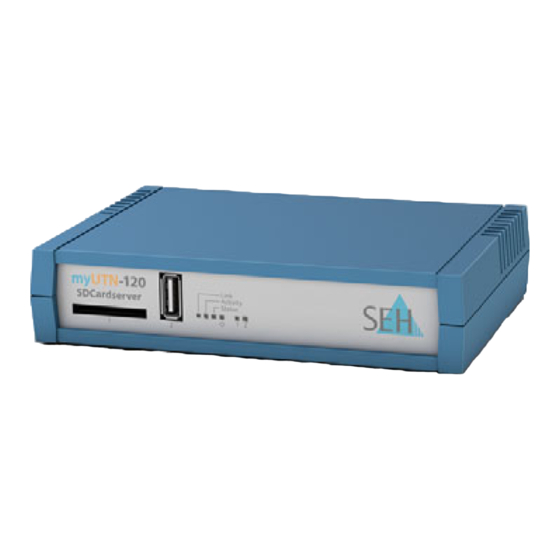
Page 5: Technical Data
Technical Data 1) SD card reader 2) USB port 3) Link LED (green) 4) Activity LED (yellow) 5) Status LED (green) 6) Power LED (yellow) Front view 7) LED for the SD card reader (green/ orange) 8) LED for the USB port (green/orange) 9) Network connector (RJ-45) for 1000BaseT, 100BaseTX and 10BaseT 10) Reset button... -
Page 6: Led Display
LED Display The LEDs of the UTN server provide information about its status. Action Color Description Link permanently on green There is a connection to the network. permanently off There is no connection to the network. Activity blinks at irregular yellow Indicates the exchange of network data intervals... -
Page 7: Safety Regulations
Safety Regulations UTN servers are network devices for use in office environments. The myUTN-120 is designed for the integration of USB devices and SD cards into TCP/IP networks. Before starting the initial setup procedure and during the operation of the UTN server, please note the following safety regulations. -
Page 8: Hardware Installation
Hardware Installation You can directly connect one USB device to the UTN server (myUTN-120). You can read and write SD cards via the SD card reader. Do not connect devices with power supply solely via the USB port to the UTN server. -
Page 9: Software Installation
Software Installation The software tool SEH UTN Manager handles the access of the SD card reader and the USB device. The SEH UTN Manager is installed on all clients that are intended to access USB devices in the network. The SEH UTN Manager is available in two versions:... -
Page 10: Getting Started: Seh Utn Manager
Getting Started: SEH UTN Manager After the SEH UTN Manager is started, the network will be scanned for connected UTN servers. The network range to be scanned is freely definable. After the network scan all UTN servers found – together with the connected devices –... -
Page 11: Starting The Seh Utn Manager
Starting the SEH UTN Manager Start the SEH UTN Manager on your client via the Windows start menu. (Start --> All Programs --> SEH Computertechnik GmbH --> SEH UTN Manager) During the initial configuration, client and UTN server must be assigned to the same local network segment. -
Page 12: Assigning An Ip Address To The Utn Server
Assigning an IP Address to the UTN Server Once the UTN server is connected to the network, it checks whether an IP address can be obtained from the boot protocols BOOTP or DHCP. If this is not the case, the UTN server assigns itself an IP address via ZeroConf from the address range (169.254.0.0/16) which is reserved for ZeroConf. -
Page 13: Adding The Utn Server To The Selection List
Adding the UTN Server to the Selection List In order to connect a UTN server to a client, you must assign the UTN server to the selection list. Put together a selection list with your preferred UTN servers. Proceed as follows: 1. -
Page 14: Connecting Sd Card Reader And Usb Device To The Client
Connecting SD Card Reader and USB Device to the Client SD card readers and USB devices that appear in the selection list can be connected to the client. Make sure that: - All provisions (driver installation, etc.) necessary to operate the device locally (i.e. -
Page 15: Configuring The Utn Server
Configuring the UTN Server The UTN server can be configured and monitored via the myUTN Control Center. The myUTN Control Center is stored in the UTN server and can be launched by means of a browser (Internet Explorer, Firefox, Safari). Proceed as follows: 1. - Page 16 [en] Quick Installation Guide...
- Page 17 2 Erste Schritte mit dem SEH UTN Manager ..24 SEH UTN Manager starten....... 25 UTN-Server eine IP-Adresse zuweisen .
-
Page 18: Allgemeine Information
Die Zugriffsverteilung des SD-Card-Readers und USB-Gerätes erfolgt über das Software-Tool 'SEH UTN Manager'. Der SEH UTN Manager wird auf alle Clients installiert, die auf den SD-Card- Reader oder ein im Netzwerk bereitgestelltes USB-Gerät zugreifen sollen. Der SEH UTN Manager zeigt die Verfügbarkeit aller in das Netzwerk eingebundenen Geräte an und stellt die Verbindung zwischen Client und SD-Card-Reader bzw. -
Page 19: Technische Daten
Technische Daten 1) SD-Card-Reader 2) USB-Port 3) Link-LED (grün) 4) Activity-LED (gelb) 5) Status-LED (grün) 6) Power-LED (gelb) Vorderansicht 7) LED für den SD-Card-Reader (grün/ orange) 8) LED für den USB-Port (grün/orange) 9) Netzwerkanschluss (RJ-45) für 1000BaseT, 100BaseTX und 10BaseT 10) Reset-Taster 11) Anschluss für die Stromversorgung über das mitgelieferte Netzteil... -
Page 20: Led-Anzeige
LED-Anzeige Durch die Interpretation des LED-Leuchtverhaltens kann der Zustand des UTN- Servers ermittelt werden. Aktion Farbe Beschreibung Link Dauer-An grün Eine Verbindung zum Netzwerk ist vorhanden. Dauer-Aus Es besteht keine Verbindung zum Netzwerk. Activity unregelmäßiges gelb Signalisiert den Austausch von Netzwerk- Blinken Datenpaketen. -
Page 21: Sicherheitsvorschriften
Sicherheitsvorschriften UTN-Server sind Netzwerkgeräte für den Gebrauch in Büroumgebungen. Der myUTN-120 dient dem Einbinden von USB-Geräten und SD-Karten in TCP/IP- Netzwerken. Beachten Sie vor Inbetriebnahme und beim Betrieb des UTN-Servers die folgenden Sicherheitsvorschriften, um sich und andere vor Personenschäden zu schützen sowie Beschädigungen am Gerät zu vermeiden. -
Page 22: Hardware-Installation
Hardware-Installation Am UTN-Server (myUTN-120) kann ein USB-Gerät direkt angeschlossen werden. Über den SD-Card-Reader kann eine SD-Karte ausgelesen und beschrieben werden. Schließen Sie am UTN-Server kein Gerät an, dessen Stromversorgung ausschließlich über den USB-Port erfolgt. Gehen Sie wie folgt vor: 1. Verbinden Sie den UTN-Server und das USB-Gerät mit dem USB-Datenkabel. -
Page 23: Software-Installation
Windows-Dienst 'SEH UTN Service'. Detaillierte Beschreibungen finden Sie in der myUTN-Benutzerdokumentation. Stellen Sie folgende Punkte sicher: - Die Installation des SEH UTN Managers ist für Windows XP und höher geeignet. - Die Installation kann ausschließlich durch Windows-Benutzer mit administrativen Rechten durchgeführt werden. -
Page 24: Erste Schritte Mit Dem Seh Utn Manager
Erste Schritte mit dem SEH UTN Manager Nach dem Start des SEH UTN Managers wird das Netzwerk nach angeschlossenen UTN-Servern gescannt. Der zu scannende Netzwerkbereich ist frei definierbar. Nach dem Netzwerkscan werden alle gefundenen UTN-Server und deren angeschlossene Geräte in der 'Netzwerkliste' angezeigt. Die benötigten Geräte werden ausgewählt und der 'Auswahlliste' hinzugefügt. -
Page 25: Seh Utn Manager Starten
SEH UTN Manager starten Starten Sie auf Ihrem Client den SEH UTN Manager über das Windows- Startmenü. (Start --> Alle Programme --> SEH Computertechnik GmbH --> SEH UTN Manager) Während der Erstkonfiguration müssen Client und UTN-Server demselben lokalen Netzwerksegment zugeordnet sein. -
Page 26: Utn-Server Eine Ip-Adresse Zuweisen
UTN-Server eine IP-Adresse zuweisen Nachdem der UTN-Server an das Netzwerk angeschlossen ist, überprüft der UTN- Server, ob er eine IP-Adresse über die Bootprotokolle BOOTP oder DHCP erhält. Ist das nicht der Fall, gibt sich der UTN-Server über ZeroConf selbst eine IP-Adresse aus dem für ZeroConf reservierten Adressbereich (169.254.0.0/16). -
Page 27: Utn-Server Der Auswahlliste Hinzufügen
UTN-Server der Auswahlliste hinzufügen Um einen UTN-Server mit dem Client zu verbinden, muss der UTN-Server der Auswahlliste zugeordnet werden. Stellen Sie die Auswahlliste mit Ihren bevorzugt genutzten UTN-Servern zusammen. Gehen Sie wie folgt vor: 1. Wählen Sie im Menü Auswahlliste den Befehl Bearbeiten. Der Dialog Auswahlliste bearbeiten erscheint. -
Page 28: Sd-Card-Reader Und Usb-Gerät Mit Client Verbinden
SD-Card-Reader und USB-Gerät mit Client verbinden Die in der Auswahlliste aufgeführten SD-Card-Reader und USB-Geräte können mit dem Client verbunden werden. Stellen Sie folgende Punkte sicher: - Auf dem Client sind alle Vorbereitungen (Treiberinstallation usw.) getroffen worden, die notwendig wären, um das Gerät lokal (also direkt am Client angeschlossen) zu betreiben. -
Page 29: Utn-Server Konfigurieren
UTN-Server konfigurieren Über das myUTN Control Center kann der UTN-Server konfiguriert und überwacht werden. Das myUTN Control Center ist in dem UTN-Server gespeichert und kann mit einem Internet-Browser (Internet Explorer, Firefox, Safari) aufgerufen werden. Gehen Sie wie folgt vor: 1. Öffnen Sie Ihren Browser. 2. - Page 30 The latest version of the EC declaration of conformity can be downloaded from the homepage of SEH Computertechnik GmbH: http://www.seh-technology.com/services/ce-notification.html [de] Quick Installation Guide...
- Page 31 Quick Installation Guide...
- Page 32 © 2013 SEH Computertechnik GmbH All trademarks, registered trademarks, logos and product names are property of their respective owners. This product uses ’Open Source Software’ . For further information, please contact http://www.seh.de. The product documentation gives you valuable information about your product.
Need help?
Do you have a question about the myUTN-120 and is the answer not in the manual?
Questions and answers