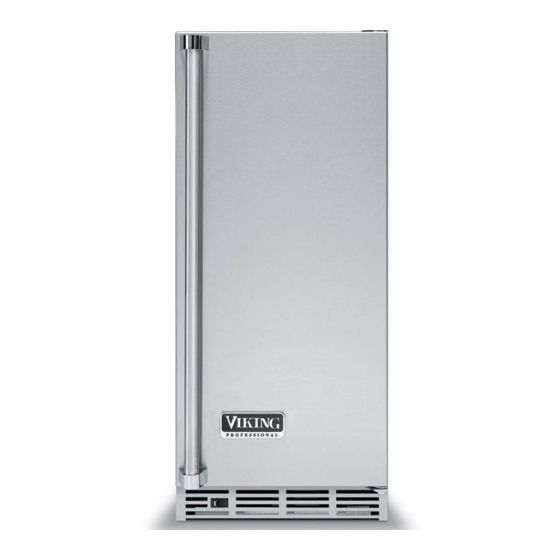
Viking 15”W. Undercounter/Freestanding Ice Machine Use & Installation Manual
15”w. undercounter/freestanding ice machine
Hide thumbs
Also See for 15”W. Undercounter/Freestanding Ice Machine:
- Use & care manual (12 pages) ,
- Installation manual (10 pages) ,
- Installation manual (10 pages)
Table of Contents
Advertisement
Quick Links
Viking Range Corporation
111 Front Street
Greenwood, Mississippi 38930 USA
(662) 455-1200
For product information,
call 1-888-VIKING1 (845-4641)
or visit the Viking Web site at
vikingrange.com
F20475C EN
41011417 Rev. B
U L
U L
C
(071309J)
Viking Use/Installation Guide
15"W. Undercounter/
Freestanding Ice Machine
Advertisement
Table of Contents

Summary of Contents for Viking 15”W. Undercounter/Freestanding Ice Machine
- Page 1 Viking Use/Installation Guide Viking Range Corporation 111 Front Street Greenwood, Mississippi 38930 USA (662) 455-1200 For product information, call 1-888-VIKING1 (845-4641) or visit the Viking Web site at 15”W. Undercounter/ vikingrange.com Freestanding Ice Machine F20475C EN (071309J) 41011417 Rev. B...
-
Page 2: Important - Please Read And Follow
Units Certified for Outdoor Use - outdoor models contain a T after the base model number (ex. VUIM153T) and • Viking Range Corporation will NOT warranty any problems resulting from GFI outlets which are not have a stainless steel outer cabinet. - Page 3 SPECIFICATIONS/DIMENSIONS SPECIFICATIONS/DIMENSIONS PROFESSIONAL MODELS DESIGNER MODEL Basic Electric Data Basic Electric Data •115 VAC/60 Hz •115 VAC/60 Hz •Maximum amps - 3.0 •Maximum amps - 3.0 Approximate Shipping Weight - 100 lbs. (45.0 kg) •Approximate Shipping Weight - 100 lbs. (45.0 kg) Dimensions Dimensions VUIM...
- Page 4 SPECIFICATIONS/DIMENSIONS FULL OVERLAY PANEL INSTALLATION CUSTOM PANEL MODEL NOTE: Weight of wood panel must not exceed 20 lbs. Basic Electric Data Wood Screws •115 VAC/60 Hz 1. A #10 pan head wood screw should be used to properly secure the wood panel. A total of 10 screws will be •Maximum amps - 3.0 needed.
- Page 5 Selecting and Preparing the Wood Frame - DFIM Models Selecting and Preparing the Wood Frame - DFIM Models FOR A 3-1/2” TOE KICK FOR 3-1/2” TOE KICK (COVERS THE ENTIRE DOOR FRONT - RIGHT HINGE) (COVERS THE ENTIRE DOOR FRONT - LEFT HINGE) 1/4”...
-
Page 6: Leg Leveler Installation
ATTACHING THE OVERLAY PANEL TO THE DOOR LEG LEVELER INSTALLATION 1. If the door is attached to the unit, remove by unscrewing the top Allen head set screw at the top hinge. Remove R R e e a a d d B B e e f f o o r r e e I I n n s s t t a a l l l l i i n n g g L L e e g g L L e e v v e e l l e e r r s s the door by angling the door off of the bottom hinge pin. -
Page 7: Water Connection
WATER CONNECTION DRAIN PLUMBING Your ice machine uses a gravity drain that requires 5/8” (.63 cm) ID tubing from the back of the ice maker to a plumbed connection to a sanitary sewer (see Gravity Drain drawing below). Remove the access panel, with a 5/16” (0.8 cm) wrench to plumb in drain connection. - Page 8 ICE MACHINE FEATURES USING YOUR ICE MACHINE 1. Escutcheon Panel 1. Allow your ice machine to run for at least 48 hours to accumulate ice in the ice bin. 2. Ice Storage Bin 2. The unit will cycle off between ice production and ice harvest cycles. 3.
-
Page 9: Preparing The Ice Machine For Storage
Stainless Steel Parts PREPARING THE ICE MACHINE FOR CAUTION All stainless steel parts should be wiped regularly with hot soapy water. Use a liquid cleaner designed for stainless STORAGE steel when soapy water will not do the job. DO NOT USE bleach, steel wool, abrasive cloths, cleansers, or powders. This ice machine must have all water drained and removed to If the ice machine is moved, not used for an extended Do not permit citrus or tomato juice to remain on stainless steel surfaces, as citric acid will permanently discolor... - Page 10 TROUBLESHOOTING GUIDE TROUBLESHOOTING GUIDE PROBLEM POSSIBLE CAUSE CORRECTION PROBLEM POSSIBLE CAUSE CORRECTION Ice cubes are too small Low ice consumption Ice is slowly melting in the ice bin and will Unit does not operate. The unit is unplugged Plug in the unit. (less than 1/2”...
-
Page 11: Final Preparation
Clearly describe the problem that you are having. If you are unable to obtain the name of an authorized service agency, of the unit. Clean the condenser with a vacuum and or if you continue to have service problems, contact Viking Range Corporation at 1-888-VIKING1 (845-4641), or write to: brush attachment. - Page 12 Viking Range Corporation service agent, or Viking Range Corporation. Provide model and serial purchased or Viking Range Corporation. I I M M P P O O R R T T A A N N T T : : Retain proof of original purchase to establish warranty period.


