Subscribe to Our Youtube Channel
Summary of Contents for Clarke Metalworker CBG8370L
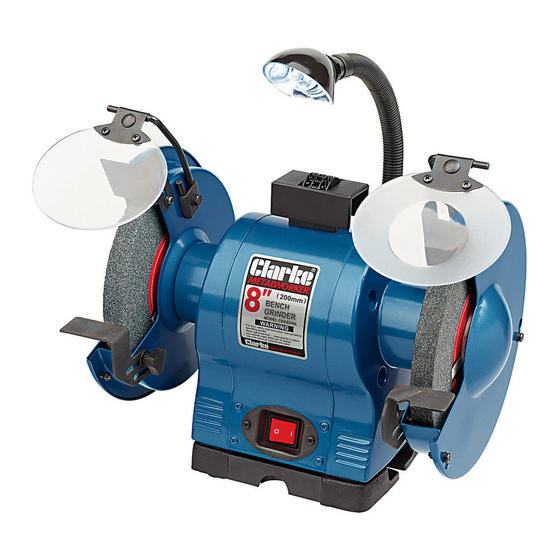
- Page 1 BENCH GRINDER WITH LIGHT AND WHEEL DRESSER MODEL NO: CBG8370L PART NO: 6500532 OPERATION & MAINTENANCE INSTRUCTIONS LS0512...
-
Page 2: Specifications
INTRODUCTION Thank you for purchasing this CLARKE Bench Grinder with light and wheel dresser. Before attempting to use this product, please read this manual thoroughly and follow the instructions carefully. In doing so you will ensure the safety of yourself and that of others around you, and you can look forward to your purchase giving you long and satisfactory service. -
Page 3: Power Tool Safety Warnings
POWER TOOL SAFETY WARNINGS 1) WORK AREA 1. Keep the work area clean and well lit. Cluttered and dark areas invite accidents. 2. Do not operate power tools in explosive atmospheres, such as in the presence of flammable liquids, gases or dust. Power tools create sparks which may ignite the dust or fumes. -
Page 4: Bench Grinder Safety Warnings
4) POWER TOOL USE AND CARE 1. Do not force the power tool. Use the correct accessories for your application. The correct power tool will do the job better and safer at the rate which it was designed. 2. Do not use the power tool if the switch does not turn it on and off. Any power tool that cannot be controlled with the switch is dangerous and must be repaired. -
Page 5: Safety Symbols
8. ALWAYS check for damaged parts. Before further use of the tool, a guard or other part that is damaged should be carefully checked to determine if it would operate properly and perform its intended function. Check for misalignment or binding of moving parts, breakage of parts and any other condition that may affect the tool's operation. -
Page 6: Electrical Connections
ELECTRICAL CONNECTIONS WARNING! Read these electrical safety instructions thoroughly before connecting the product to the mains supply. Before switching the product on, make sure that the voltage of your electricity supply is the same as that indicated on the rating plate. This product is designed to operate on 230VAC 50Hz. -
Page 7: Carton Contents
CARTON CONTENTS The following items should be supplied in the carton. If any parts are missing or damaged, please contact the Clarke dealer where you purchased the bench grinder. 1 x Bench Grinder Assembly with Lamp (2 grinding wheels attached) -
Page 8: Before Use
BEFORE USE MOUNTING THE GRINDER ON A WORKBENCH NOTE: We highly recommend that you bolt this bench grinder securely to a workbench to gain maximum stability for your machine. 1. Using the base of the bench grinder as a template, mark the bench through the holes in the casting. -
Page 9: Installing The Eye Shields
INSTALLING THE EYE SHIELDS 1. Attach the left eye shield arm to the bench grinder using the bracket, flat washer and bolt supplied. 2. Fit the lens to the lens holder as shown. NOTE: One of the lenes has a manifying window. -
Page 10: Operation
OPERATION CAUTION: KEEP ALL BYSTANDERS A SAFE DISTANCE AWAY FROM THE TOOL AND NOT IN DIRECT LINE, FRONT OR BACK OF THE GRINDER. CAUTION: ALWAYS WEAR SAFETY GLASSES NOTE: Check that there is a 1.5 mm clearance between the tool rests and the surface of the grinding wheel. -
Page 11: Sharpening Tips
SHARPENING TIPS SCISSORS If possible, take the scissors apart to make the sharpening operation easier and safer. Remove material only from the outside surface and work from the handle end of the blade toward the tip. KNIVES Remove metal equally from both faces, working from the handle end of the blade toward the tip. -
Page 12: Replacing The Grinding Wheels
(approximately 1 minute). CHANGING THE LIGHT BULB Remove the bulb by twisting it anticlockwise. Replace with an identical bulb (12V, 10W, ES10 fitting) available from the Clarke Parts Department. Parts & Service: 020 8988 7400 / E-mail: Parts@clarkeinternational.com or Service@clarkeinternational.com... -
Page 13: Parts Diagram
PARTS DIAGRAM Parts & Service: 020 8988 7400 / E-mail: Parts@clarkeinternational.com or Service@clarkeinternational.com... -
Page 14: Parts List
PARTS LIST Wheel(60#) WACBG8370L37 Philips Screw Assembly WACBG8370L01 Philips Screw WACBG8370L38 Left Guard Cover WACBG8370L02 Toothed Locking Washer WACBG8370L39 I type Hex Nut WACBG8370L03 Philips Screw WACBG8370L40 Wheel Flange WACBG8370L04 Cord bushing WACBG8370L41 Wheel(36#) WACBG8370L05 Right Guard Inner Cover WACBG8370L42 Philips Screw WACBG8370L06 I type Hex Nut... -
Page 15: Declaration Of Conformity
DECLARATION OF CONFORMITY Parts & Service: 020 8988 7400 / E-mail: Parts@clarkeinternational.com or Service@clarkeinternational.com...


Need help?
Do you have a question about the Metalworker CBG8370L and is the answer not in the manual?
Questions and answers