Table of Contents
Advertisement
Advertisement
Table of Contents

Related Manuals for Pfaff expression line


Summary of Contents for Pfaff expression line
- Page 1 Owner's manual...
-
Page 2: Important Safety Instructions
This household sewing machine is designed to comply with IEC/EN 60335-2-28 and UL1594. IMPORTANT SAFETY INSTRUCTIONS When using an electrical appliance, basic safety precautions should always be followed, including the following: Read all instructions before using this household sewing machine. Keep the instructions at a suitable place close to the machine. - Page 3 FOR EUROPE ONLY: This appliance can be used by children aged from 8 years and above and persons with reduced physical, sensory or mental capabilities or lack of experience and knowledge if they have been given supervision or instruction concerning use of the appliance in a safe way and understand the hazards involved.
-
Page 4: Table Of Contents
Before you start, please spend some time reading this owner’s manual. You will soon discover how to maximize the use of your machine. Your authorized PFAFF dealer will of course also be ®... -
Page 5: Introduction
Introduction... -
Page 6: Machine Overview
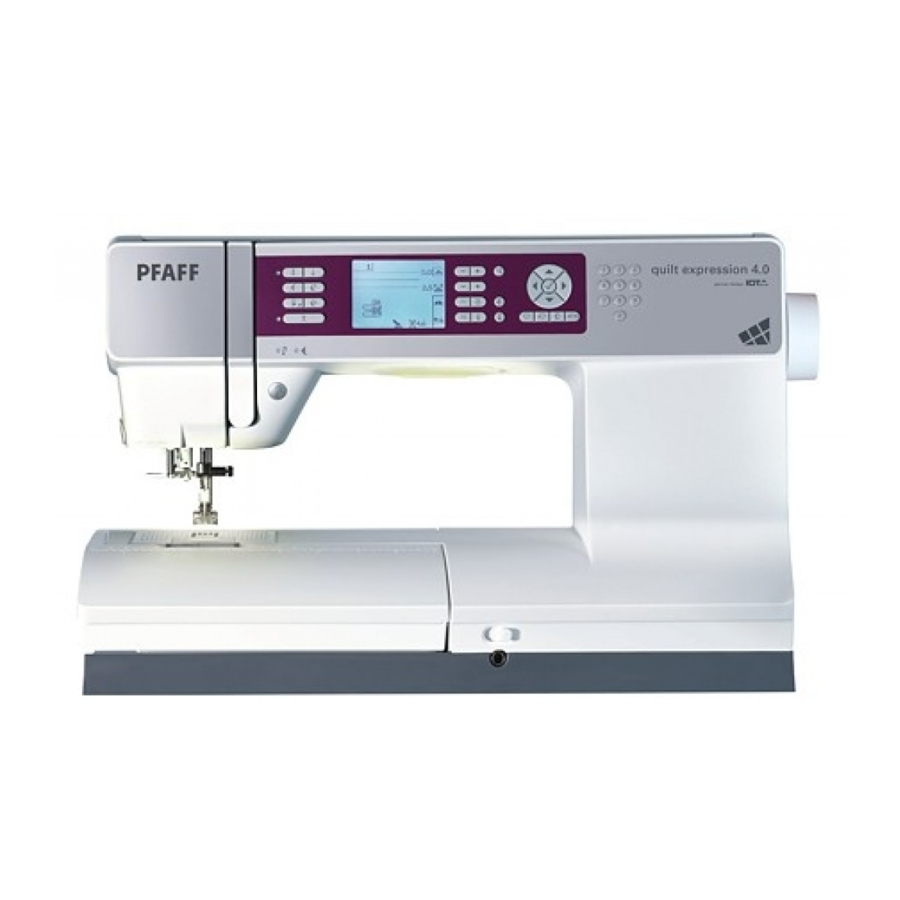
Machine overview Front side Top parts Lid with stitch overview and button ruler 22. Pre-tension disk for threading and bobbin winding Threading slots 23. Bobbin winder thread guide Thread cutter 24. Thread guide Sensormatic buttonhole foot socket 25. Bobbin thread guides LED lights 26. -
Page 7: Accessory Tray
The accessory tray features special compartments for presser feet and bobbins, plus space for needles and other accessories. Store the accessories in the tray so they are easily accessible. 33. Space for accessories 34. Removable tray for presser feet 35. Removable bobbin holder Included accessories 36. -
Page 8: Presser Feet
Presser feet Standard presser foot 0A with IDT system (attached on the machine upon delivery) ™ This foot is used mainly for straight stitching and zigzag stitching with a stitch length longer than 1.0 mm. Fancy stitch foot 1A with IDT system ™... -
Page 9: Stitch Overview
Stitch overview Stitch number Stitch Name Description For seaming and topstitching. Select from 37 different needle positions. Straight stitch Note: This stitch makes a stronger tie-off than stitch 52 (4.2) / 43 (3.5). Stretch triple straight stitch Reinforced seam. Topstitching. Straight stitch reverse Sew continuous reverse. - Page 10 Stitch number Stitch Name Description Overlock Elastic decorative hem for stretch fabrics. Closed overlock Seam and overcast in one step, patch, hem. Stretch knit overlock Seam and overcast stretch fabrics in one step. – Reinforced overlock Seam and overcast stretch fabrics in one step and reinforce. –...
-
Page 11: Quilt Stitches
Stitch number Stitch Name Description Bartack Automatically reinforce seams and pockets. Denim bartack Automatically reinforce seams and pockets decoratively. Decorative bartack Automatically reinforce seams and pockets decoratively. – Cross bartack Automatically reinforce seams and pockets. Quilt stitches Stitch – – –... -
Page 12: Alphabets
Stitch – Stitch – – – – – – – – – – – Requires optional Candlewicking Foot w/ system (Part number 820613-096). Requires optional Beading Foot 6mm (Part number 820605-096). Requires optional Beading Foot 4mm (Part number 820604-096). Requires optional Bi-level Topstitch Foot w/ system (Part number 820676-096). -
Page 13: Preparations
Preparations... -
Page 14: Unpacking
Note: Styrofoam left in the accessory tray while sewing may affect stitch quality. The styrofoam is for packing purposes only and should be removed. expression Note: Your PFAFF ™ sewing machine is ® adjusted to provide the best stitch result at normal room temperature. -
Page 15: Led Lights
Switch the main switch off. Unplug the cord from the wall socket and then from the machine. Unplug the foot control cord from the machine. Wind the cord around the foot control for easy storage. Place all accessories in the accessory tray. Slide the tray on to the machine around the free arm. -
Page 16: Threading The Machine
Vertical position Raise the spool pin to the vertical position. Slide on the large spool cap and place a felt pad under the thread spool. This is to prevent the thread from reeling off too fast. Do not place a spool cap on top of the spool pin as that would prevent the spool from rotating. - Page 17 Needle threader The needle threader allows you to thread the needle automatically. The needle must be in the up position to use the built-in needle threader. We also recommend lowering the presser foot. Use the handle to pull the needle threader all the way down.
-
Page 18: Bobbin Winding
Bobbin winding Winding from horizontal position Place an empty bobbin on the bobbin spindle, with the logo facing up. Use only the original PFAFF bobbins approved for this model. ® Place the thread spool on the spool pin in horizontal position. Slide a spool cap tightly against the spool. -
Page 19: Inserting The Bobbin
(C). Replace the cover. Pull the thread to the left to cut. Note: The bobbin cover can be used as a magnifying glass. For sewing any fabric precisely PFAFF ® expression sewing machine provides the ideal ™... -
Page 20: Electronic Knee-Lift (4.2)
Electronic knee-lift (4.2) Your machine comes with an electronic knee-lift for regulating the presser foot height. Insert the knee-lift in the provided hole on the machine. Adjust the rectangular bar on the knee- lift (A) until it is positioned at a comfortable height for you. -
Page 21: Changing The Needle
Changing the needle Use the hole in the multi-purpose tool to hold the needle. Loosen the needle screw. Use the screw driver if necessary. Remove the needle. Insert the new needle, using the multi-purpose tool. Push the new needle upwards with the further. - Page 22 Buttons for 4.2 machine 9 10 14 13 18 19 20 21 22 23 24 25 26 27 Needle stop up/down with indicator (1) Reverse (7) with indicator (5) Press this button to move the needle up or down. For permanent reverse, press the button The setting of the needle stop position is changed before starting to sew.
- Page 23 Presser foot down and pivot toggle (10) Direct selection (17) Lower the presser foot completely. Press the button By pressing one of, or a combination of, the 0 to 9 once more to raise the presser foot to pivot height. buttons, you select the stitch represented by that number immediately.
- Page 24 Buttons for 3.5 machine 11 10 15 16 17 18 19 20 21 22 23 Needle stop up/down with indicator (1) Reverse (7) with indicator (5) Press this button to move the needle up or down. For permanent reverse, press the button The setting of the needle stop position is changed before starting to sew.
- Page 25 Stitch width or stitch positioning (10) F2 - Function 2 (16) Increase or decrease the stitch width using the + The F2 button is used to set the tie-off and thread and - buttons. snips options and in sequencing it is used to select font.
- Page 26 2:14...
-
Page 27: Settings Menu
Settings menu In the settings menu, you can override default settings and make manual adjustments to the machine settings, sound settings and screen settings. Open the menu by pressing the settings menu button and select the setting you wish to adjust by pressing the up and down arrow buttons on the wheel. - Page 28 Note: The open toe free-motion foot is optional and can and change the setting there. be purchased at your local authorized PFAFF ® dealer. Do not use if sensormatic free-motion is activated, since the needle might damage the presser foot.
-
Page 29: Sewing
Sewing... -
Page 30: Sewing Mode - Overview
sewing. This is also the menu where you adjust the settings of your stitch. Straight stitch is selected by default. Sewing mode - overview Selected stitch number Stitch width/stitch positioning Stitch length/density Tapering program Tie-off options Select a stitch By pressing one of the direct selection buttons, you select that stitch number immediately. - Page 31 If the bobbin thread is visible on the top side of the fabric, the needle thread tension is too tight. Your machine will set the best settings for Reduce the needle thread tension. each selected stitch. You can make your own If top thread is visible on the underside of the adjustments on the selected stitch.
- Page 32 Mirroring To mirror stitches or sequences side to side, press the mirror side to side button. For 4.2: To mirror end to end, press the mirror end to end button. Tie-off options The tie-off options let you program tie-offs both at the beginning (A) and the end (B) of the stitch.
-
Page 33: Speed Control
Tapering program Tapering increases or decreases the width of the stitch during sewing to create symmetrical or asymmetrical tapers. Open the tapering program view by pressing the F1 button. Use the left and right arrow buttons on the wheel to select beginning or end tapering. Press OK to turn the setting on or off. -
Page 34: Personal Stitches
Personal stitches Save personal stitch Save your personal stitches in your machine by pressing the save button. This will open the save personal stitch or sequence menu. Select an empty memory by using the arrow OK. If the selected memory is not empty, a pop-up message will appear asking if you wish to overwrite the previously saved stitch or sequence with the new one. -
Page 35: Sewing Techniques
Sewing techniques Handlook quilting A quilt usually consists of three layers, two layers of fabric with a layer of batting sandwiched between. Baste the completed quilt top to the batting and backing. Thread the needle with an invisible matching rayon or cotton thread in the bobbin. Snap on the recommended foot shown in the sewing recommendations view. -
Page 36: Free-Motion Position (3.5)
Free-motion position (3.5) When using the free-motion/darning foot, the presser foot needs to be in the free-motion position. Disengage the IDT system and lower the feed dogs. ™ Attach the free-motion/darning foot and select a stitch. To engage the free-motion position, move the presser foot lift up and push the switch (A), on the underside of the lift, towards you until it snaps into place. - Page 37 Manual buttonhole To sew a manual buttonhole in four steps, use presser foot 5M. buttonhole. The graphic display will show the part and sewing direction of the buttonhole that is being sewn. Press the reverse button. The machine sews the bartack and the second column. When the columns are aligned, press the reverse button again to sew the second bartack.
-
Page 38: Common Sewing Pop-Ups
Common sewing pop-ups Bobbin thread low (4.2) When the bobbin is almost empty, the machine stops automatically and a pop-up appears on the screen. Replace the empty bobbin with a full one Mainmotor overload If you are sewing on very heavy fabric or if the machine is blocked when sewing, the mainmotor can get overloaded and the machine will stop sewing. - Page 39 Sequencing...
-
Page 40: Sequencing 4:1
The sequencing function on your machine makes it possible to create stitches and sequences with your own personal settings and to combine stitches and letters into sequences. You can add up to 40 stitches, letters and commands in the same sequence. Save your own stitches and sequences on your machine and reload and sew them any time you like. -
Page 41: Using The Alphabet
Using the alphabet with the left and right arrow buttons on the wheel to where you want to add a letter. Use the down arrow button to step through the sequence commands (3) to the alphabet (4). Select a letter using the arrow buttons and press OK to insert it. -
Page 42: Sewing A Sequence
You can save and reload your sequences. Each sequence memory has a space of 40 stitches. Save sequence Saving your sequence works just like in sewing mode. See page 3:6. Load sequence Loading your sequence works just like in sewing mode. -
Page 43: Maintenance
Maintenance... -
Page 44: Cleaning The Machine
Cleaning the machine To keep your sewing machine operating well, clean it often. No lubrication (oiling) is needed. Wipe the exterior surface of your machine with a soft cloth to remove any dust or lint built up. Wipe the graphic display with a clean, soft and damp cloth. -
Page 45: Troubleshooting
Troubleshooting For further information please contact your local authorized PFAFF dealer who will be happy to help ® you. Problem/cause General problems Thread snips do not cut the thread? Remove stitch plate and clean lint from bobbin area. Fabric does not move? Make sure that machine is not set in free-motion mode in the settings menu. - Page 46 Is the stitch plate hole damaged? Change the stitch plate. Is the bobbin area clean? Clean lint from bobbin area and use only the original PFAFF bobbins approved for this model. ® Is the bobbin wound correctly? Wind a new bobbin.
- Page 47 Patents protecting this product are listed on a label positioned underneath the Sewing Machine. PFAFF, PERFECTION STARTS HERE, EXPRESSION, QUILT EXPRESSION and IDT (image) are trademarks of KSIN Luxembourg II, S.ar.l. Please note that on disposal, this product must be safely recycled in accordance with relevant National legislation relating to electrical/electronic products.
- Page 48 www.pfaff.com...