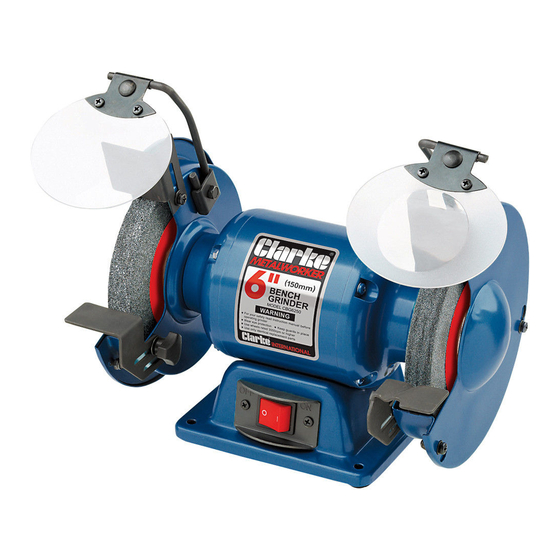
Summary of Contents for Clarke Metalworker CBG6250
- Page 1 BENCH GRINDER MODEL NO: CBG6250 PART NO: 6500522 OPERATION & MAINTENANCE INSTRUCTIONS LS1111...
-
Page 2: Specifications
INTRODUCTION Thank you for purchasing this CLARKE Bench Grinder. Before attempting to use this product, please read this manual thoroughly and follow the instructions carefully. In doing so you will ensure the safety of yourself and that of others around you, and you can look forward to your purchase giving you long and satisfactory service. -
Page 3: Power Tool Safety Warnings
POWER TOOL SAFETY WARNINGS 1) WORK AREA 1. Keep the work area clean and well lit. Cluttered and dark areas invite accidents. 2. Do not operate power tools in explosive atmospheres, such as in the presence of flammable liquids, gases or dust. Power tools create sparks which may ignite the dust or fumes. -
Page 4: Bench Grinder Safety Warnings
4) POWER TOOL USE AND CARE 1. Do not force the power tool. Use the correct accessories for your application. The correct power tool will do the job better and safer at the rate which it was designed. 2. Do not use the power tool if the switch does not turn it on and off. Any power tool that cannot be controlled with the switch is dangerous and must be repaired. -
Page 5: Safety Symbols
8. ALWAYS check for damaged parts. Before further use of the tool, a guard or other part that is damaged should be carefully checked to determine if it would operate properly and perform its intended function. Check for misalignment or binding of moving parts, breakage of parts and any other condition that may affect the tool's operation. -
Page 6: Electrical Connections
ELECTRICAL CONNECTIONS WARNING! Read these electrical safety instructions thoroughly before connecting the product to the mains supply. Before switching the product on, make sure that the voltage of your electricity supply is the same as that indicated on the rating plate. This product is designed to operate on 230VAC 50Hz. -
Page 7: Carton Contents
CARTON CONTENTS The following Items should be supplied in the carton, if any parts are missing or damaged, please contact the clarke dealer where you purchased the bench grinder. 1 x Bench Grinder Assembly (2 grinding wheels attached) 2 x Eye Shields (1 with Built-in Magnifying Lens) -
Page 8: Before Use
BEFORE USE MOUNTING THE GRINDER ONTO A WORKBENCH NOTE: We highly recommend that you bolt this bench grinder securely to a workbench to gain maximum stability for your machine. 1. Using the base of the bench grinder as a template, mark the bench through the holes in the casting. -
Page 9: Installing The Eye Shields
INSTALLING THE EYE SHIELDS 1. Attach the left eye shield arm to the bench grinder using the bracket, flat washer and bolt supplied. 2. Fit the lens to the lens holder as shown. 3. Repeat for right side eye shield. NOTE: Adjust the eye shields to an appropriate distance from the tool rests avoiding... -
Page 10: Operation
The grinding wheel may need dressing occasionally. Only dress the wheel with a proper dressing tool, whilst wearing safety goggles or glasses. If in doubt seek professional advice. Dressing tools are available from your Clarke Dealer. Parts & Service: 020 8988 7400 / E-mail: Parts@clarkeinternational.com or Service@clarkeinternational.com... -
Page 11: Maintenance
MAINTENANCE REPLACING THE GRINDING WHEELS WARNING: DO NOT USE DAMAGED GRINDING WHEELS. WARNING: SWITCH THE GRINDER OFF AND DISCONNECT THE POWER SUPPLY BEFORE CHANGING THE GRINDING WHEELS 1. Loosen the screws shown and rotate and remove the cover. 2. Hold the other wheel by hand, and remove the nut and outer flange. -
Page 12: Parts Diagram
PARTS DIAGRAM Parts & Service: 020 8988 7400 / E-mail: Parts@clarkeinternational.com or Service@clarkeinternational.com... -
Page 13: Part List
PART LIST Switch Plate WACBG625030 Eyeshield Assembly WACBG625001 Switch WACBG625031 Left Eyeshield WACBG625002 Mounting Rod Philips Screw Flat WACBG625032 Washer Assembly Bracket WACBG625003 Oothed Washer Flat Washer WACBG625033 WACBG625004 Rubber Bushing WACBG625034 Hex Nut WACBG625005 Stator WACBG625035 Work Rest Locking WACBG625006 Knob Waving Washer... -
Page 14: Declaration Of Conformity
DECLARATION OF CONFORMITY Parts & Service: 020 8988 7400 / E-mail: Parts@clarkeinternational.com or Service@clarkeinternational.com... - Page 15 NOTES Parts & Service: 020 8988 7400 / E-mail: Parts@clarkeinternational.com or Service@clarkeinternational.com...


Need help?
Do you have a question about the Metalworker CBG6250 and is the answer not in the manual?
Questions and answers