D-Link DWL-AG520 Manual
Tri-mode dualband wireless pci adapter
Hide thumbs
Also See for DWL-AG520:
- Quick installation manual (12 pages) ,
- Manual (44 pages) ,
- Manual (35 pages)

Related Manuals for D-Link DWL-AG520


Summary of Contents for D-Link DWL-AG520
- Page 1 D-Link Air Xpert DWL-AG520 Tri-mode Dualband Wireless PCI Adapter Manual Building Networks for People...
-
Page 2: Table Of Contents
Contents Package Contents ................3 Introduction....................4 Wireless Basics ..................6 Getting Started ..................10 Using the Configuration Utility ..............13 Networking Basics ................20 Troubleshooting ...................33 Technical Specifications ..............38 Contacting Technical Support ..............40 Warranty and Registration ..............41... -
Page 3: Package Contents
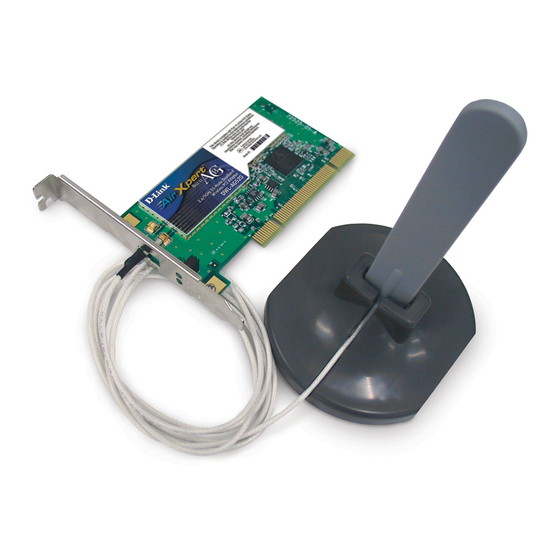
Package Contents Contents of Package: D-Link Air Xpert DWL-AG520 Tri-mode Dualband Wireless PCI Adapter Manual, Warranty and Drivers on CD Printed Quick Installation Guide If any of the above items are missing, please contact your reseller. System Requirements for Configuration: A desktop computer with an available 32-bit PCI 2.2... -
Page 4: Introduction
802.11i compatible products, without a RADIUS server, the Pre Shared Key mode of WPA will assign a new security key every time the DWL-AG520 connects to the draft 802.11i Access Point. If you choose to enable the enhanced security features of the DWL-AG520, you need only to input your encryption information once in the configuration menu. - Page 5 Features Dualband versatility - With the DWL-AG520, you have the option of using one of two frequencies. If the 2.4GHz frequency band is experiencing interruptions and interference from cordless phones, and microwave ovens, you have the op- tion of using the 5GHz band with 802.11a enabled devices.
-
Page 6: Wireless Basics
Wireless Basics D-Link wireless products are based on industry standards to provide easy-to- use and compatible high-speed wireless connectivity within your home, business or public access wireless networks. D-Link wireless products will allow you access to the data you want, when and where you want it. You will be able to enjoy the freedom that wireless networking brings. - Page 7 The DWL-AG520 is compatible with the following wireless products: D-Link Air Xpert DWL-AG650, D-Link AirPro DWL-A650, D-Link AirPlus DWL-650+, D-Link AirPlus Xtreme G DWL-G650,...
- Page 8 AG520 is compatible with 802.11b devices. This means that if you have an existing 802.11b network, or a network with a mixture of 802.11g, 802.11a and 802.11b, the devices in that network will be compatible with the DWL-AG520. WPA will be available Q3 2003 as a driver or firmware download...
-
Page 9: Installation Considerations
(radio frequency) noise in your home or business. The key to maximizing wireless range is to follow these basic guidelines: 1. Keep the number of walls and ceilings between the DWL-AG520 and other network devices to a minimum - each wall or ceiling can reduce your D-Link wireless product’s range from 3-90 feet (1-30 meters.) Position... -
Page 10: Getting Started
Ad-Hoc – directly connecting to another computer, for peer-to- peer communication, using wireless network adapters on each computer, such as two or more DWL-AG520 wireless network PCI adapters. On the following pages we will show you an example of an Infrastructure Network and an Ad-Hoc Network. - Page 11 Connect the Cable or DSL modem to your broadband router (see the Quick Installation Guide included with your router). Install the D-Link Air Xpert DWL-AG520 wireless PCI adapter into an available PCI slot on your desktop computer. (See the Quick Installation Guide included with the network adapter).
- Page 12 Getting Started Setting up a Wireless Ad-Hoc Network Install the D-Link DWL-AG520 Wireless PCI adapter into a desktop computer. (See the Quick Installation Guide included with the product for installation instructions). Install a DWL-AG650 into a laptop computer, or you can install another DWL-AG520 wireless PCI adapter into a desktop computer.
-
Page 13: Using The Configuration Utility
Utility icon in the taskbar in the lower corner of your computer screen and uncheck the box in the Properties window that enables Windows configuration. After you have done this, you can then use the D-Link Configuration utility with Before you use the configuration utility for the DWL-AG520, you must install the drivers and the configuration utility from the CD-ROM that came with the DWL-AG520. -
Page 14: Configuration Utility
SSID setting is set to default. Frequency: The DWL-AG520 is a tri-mode, dualband wireless PCI adapter. In this instance 802.11b indicates that the DWL-AG520 is communicating in the 2.4GHz band. Wireless Mode: Either Infrastructure or Ad-Hoc will be displayed here. - Page 15 Configuration Utility D-Link AirPlus DWL-650+ 2.4GHz Wireless Cardbus Configuration default Adapter SSID - (Service Set Identifier) is a name that identifies a wireless network. Access Points and wireless clients attempting to connect to a specific WLAN (Wireless Local Area Network) must use the same SSID.
- Page 16 Configuration Utility Advanced Frequency - Select the Frequency here. Auto is the default setting. Starting Ad-Hoc Network – Each wireless adapter communicating in , Ad-Hoc mode must have the same setting here. Turbo Mode - To enable Turbo mode, all devices must have the same setting Ad-Hoc Channel - All devices in the Ad-Hoc network must have the same channel Encryption Type–...
-
Page 17: Site Survey
Configuration Utility Site Survey Available Network The top section of the window displays the Available Networks. Scroll up and down the list and highlight the network to which you wish to connect. Click on the Connect button. Profile In the lower half of the screen, you can manage the profiles that you have created. - Page 18 Configuration Utility Add New Profile In this window you can configure all the properties of a profile in order to connect with a network of your choice. After you have entered your changes in this window, click OK to save the changes.
- Page 19 Configuration Utility About The ABOUT screen gives you information about the MAC Address and the Utility and Driver Versions and Support Frequency of the DWL-AG520.
-
Page 20: Networking Basics
Networking Basics Using the Network Setup Wizard in Windows XP In this section you will learn how to establish a network at home or work, using Microsoft Windows XP. Note: Please refer to websites such as http://www.homenethelp.com http://www.microsoft.com/windows2000 for information about networking computers using Windows 2000, ME or 98SE. - Page 21 Networking Basics Please follow all the instructions in this window: Click Next In the following window, select the best description of your computer. If your computer connects to the internet through a gateway/router, select the second option as shown. Click Next...
- Page 22 Networking Basics Enter a Computer description and a Computer name (optional.) Click Next Enter a Workgroup name. All computers on your network should have the same Workgroup name. Click Next...
- Page 23 Networking Basics Please wait while the Network Setup Wizard applies the changes. When the changes are complete, click Next. Please wait while the Network Setup Wizard configures the computer. This may take a few minutes.
- Page 24 Networking Basics In the window below, select the option that fits your needs. In this example, Create a Network Setup Disk has been selected. You will run this disk on each of the computers on your network. Click Next. Insert a disk into the Floppy Disk Drive, in this case drive A. Click Next...
- Page 25 Networking Basics Please read the information under Here’s how in the screen below. After you complete the Network Setup Wizard you will use the Network Setup Disk to run the Network Setup Wizard once on each of the computers on your network. To continue click Next.
- Page 26 Networking Basics Please read the information on this screen, then click Finish to complete the Network Setup Wizard. The new settings will take effect when you restart the computer. Click Yes to restart the computer. You have completed configuring this computer. Next, you will need to run the Network Setup Disk on all the other computers on your network.
- Page 27 Networking Basics Naming your Computer To name your computer, please follow these directions:In Windows XP: Click Start (in the lower left corner of the screen) Right-click on My Computer Select Properties and click Select the Computer Name Tab in the System Properties window.
- Page 28 Networking Basics Naming your Computer In this window, enter the Computer name Select Workgroup and enter the name of the Workgroup All computers on your network must have the same Workgroup name. Click OK Checking the IP Address in Windows XP The wireless adapter-equipped computers in your network must be in the same IP Ad- dress range (see Getting Started in this manual for a definition of IP Address Range).
- Page 29 Networking Basics Checking the IP Address in Windows XP This window will appear. Click the Support tab Click Close Assigning a Static IP Address in Windows XP/2000 Note: Residential Gateways/Broadband Routers will automatically assign IP Ad- dresses to the computers on the network, using DHCP (Dynamic Host Configura- tion Protocol) technology.
- Page 30 Networking Basics Assigning a Static IP Address in Windows XP/2000 Double-click on Network Connections Right-click on Local Area Connections Double-click on Properties...
- Page 31 IP Address: e.g., 192.168.0.2 Subnet Mask: 255.255.255.0 Default Gateway: Enter the LAN IP address of the wireless router. (D-Link wireless routers have a LAN IP address of 192.168.0.1) Select Use the following DNS server addresses. Enter the LAN IP address of the Wireless Router.
- Page 32 Networking Basics Checking the Wireless Connection by Pinging in Windows XP and 2000 Go to Start > Run > type cmd. A window similar to this one will appear. Type ping xxx.xxx.xxx.xxx, where xxx is the IP Address of the Wireless Router or Access Point.
-
Page 33: Troubleshooting
This chapter provides solutions to problems that can occur during the installation and operation of the DWL-AG520. Read the following descriptions if you are having problems. (The examples below are illustrated in Windows XP. If you have a different operating system, the screenshots on your computer will look similar to the following examples). - Page 34 Double-click on Network Adapters Right-click on D-Link DWL-AG520 Wireless PCI Adapter D-Link Air Xpert DWL-AG520 D-Link AirPro DWL-AB650 Wireless Cardbus Adapter Select Properties to check that the drivers are in- stalled properly D-Link Air Xpert DWL-AG520 Look under Device Status to check that the...
- Page 35 Troubleshooting 2. I cannot connect to the Access Point or the wireless Router. Make sure that the SSID on the DWL-AG520 PCI adapter is exactly the same as the SSID on the Access Point or wireless Router. Move the DWL-AG520 and Access Point or wireless Router into the same room and then test the wireless connection.
- Page 36 Windows 2000 will rename .inf files that have not received WHQL certification into oem.inf files (e.g., oem1.inf). 6. The computer with the DWL-AG520 installed is unable to connect to the wireless network and/or the Internet. Check that the LED indicators for the broadband modem are indicating normal activity.
- Page 37 If Security is enabled, make sure that the correct encryption keys are entered on both the DWL-AG520 and the access point. Double- click on the WLAN icon in the taskbar > click Encryption. Check to see that the key selected is set to the same key as other devices on the network.
-
Page 38: Technical Specifications
Technical Specifications Standards IEEE 802.11a IEEE 802.11b IEEE 802.11g Bus Type PCI 2.2 PCI 32-bit Interface Temperature Operating: 32ºF to 149ºF (0ºC to 55ºC) Humidity: 95% maximum, non-condensing Internal Antenna Type: Omni Directional Dipole Antenna with 2~4 dbi gain Security: 64, 128-bit WEP 802.1x WPA* - Wi-Fi Protected Access (64-,128-WEP with TKIP, MIC, IV... - Page 39 Technical Specifications Data Rates: With Automatic Fallback 54Mbps; 48Mbps; 36Mbps; 24Mbps; 18Mbps; 12Mbps; 11Mbps; 9Mbps; 6Mbps; 5.5Mbps; 2Mbps; 1Mbps Media Access Control: CSMA/CA with ACK Frequency Range: 2.4GHz to 2.462GHz 5.150GHz to 5.850GHz Range*: Indoors: Up to 328 feet (100 meters) Modulation Technology: Orthogonal Frequency Division Multiplexing (OFDM) Complementary Code Keying (CCK)
-
Page 40: Contacting Technical Support
Air Xpert™ DWL-AG520 Contacting Technical Support You can find the most recent software and user documentation on the D-Link website. D-Link Technical Support over the Internet: http://support.dlink.com When contacting technical support, please provide the following information: • Serial number of the unit •... -
Page 41: Warranty And Registration
Air Xpert™ DWL-AG520 Warranty and Registration Wichtige Sicherheitshinweise 1. Bitte lesen Sie sich diese Hinweise sorgfältig durch. 2. Heben Sie diese Anleitung für den spätern Gebrauch auf. 3. Vor jedem Reinigen ist das Gerät vom Stromnetz zu trennen. Vervenden Sie keine Flüssig- oder Aerosolreiniger. Am besten dient ein angefeuchtetes Tuch zur Reinigung. - Page 42 Air Xpert™ DWL-AG520 14.Öffnen Sie niemals das Gerät. Das Gerät darf aus Gründen der elektrischen Sicherheit nur von authorisiertem Servicepersonal geöffnet werden. 15.Wenn folgende Situationen auftreten ist das Gerät vom Stromnetz zu trennen und von einer qualifizierten Servicestelle zu überprüfen: a –Netzkabel oder Netzstecker sint beschädigt.
-
Page 43: Limited Warranty
Registration Card is filled out and returned to a D-Link office within ninety (90) days of purchase. A list of D-Link offices is provided at the back of this manual, together with a copy of the Registration Card. - Page 44 Air Xpert™ DWL-AG520 If a Registration Card for the product in question has not been returned to D-Link, then a proof of purchase (such as a copy of the dated purchase invoice) must be provided. If Purchaser's circumstances require special handling of...
- Page 45 Warranty service for software products may be obtained by contacting a D-Link office within the applicable warranty period. A list of D-Link offices is provided at the back of this manual, together with a copy of the Registration Card. If a...
- Page 46 D-Link's obligation under this warranty shall be a reasonable effort to provide compatibility, but D-Link shall have no obligation to provide compatibility when there is fault in the third-party hardware or software. D-Link makes no warranty that operation of its software...
- Page 47 INTENDED USE, OR BY ACCIDENT, FIRE, LIGHTNING OR OTHER HAZARD. LIMITATION OF LIABILITY IN NO EVENT WILL D-LINK BE LIABLE FOR ANY DAMAGES, INCLUDING LOSS OF DATA, LOSS OF PROFITS, COST OF COVER OR OTHER INCIDENTAL, CONSEQUENTIAL OR INDIRECT DAMAGES ARISING OUT THE INSTALLATION,...
- Page 48 No part of this publication may be reproduced in any form or by any means or used to make any derivative such as translation, transformation, or adaptation without permission from D-Link Corporation/D-Link Systems Inc., as stipulated by the United States Copyright Act of 1976...
-
Page 50: Fcc Warning
Air Xpert™ DWL-AG520 FCC Warning This equipment has been tested and found to comply with the limits for a Class A digital device, pursuant to Part 15 of the FCC Rules. These limits are designed to provide reasonable protection against harmful interference when the equipment is operated in a commercial environment. This equipment generates, uses, and can radiate radio frequency energy and, if not installed and used in accordance with this user’s guide, may cause harmful interference to radio communications. - Page 51 Air Xpert™ DWL-AG520 Offices Australia D-Link Australasia Unit 16, 390 Eastern Valley Way, Roseville, NSW 2069 Australia TEL: 61-2-9417-7100 FAX: 61-2-9417-1077 TOLL FREE (Australia): 1800-177100 TOLL FREE (New Zealand): 0800-900900 URL: www.dlink.com.au E-MAIL: support@dlink.com.au & info@dlink.com.au Level 1, 434 St. Kilda Road, Melbourne, Victoria 3004 Australia...
- Page 52 TEL: 65-774-6233 FAX: 65-774-6322 E-MAIL: info@dlink.com.sg URL: www.dlink-intl.com South Africa D-Link South Africa 102 – 106 Witchhazel Avenue, Einstein Park 2, Block B, Highveld Technopark, Centurion, South Africa TEL: 27 (0) 12-665-2165 FAX: 27 (0) 12-665-2186 URL: www.d-link.co.za E-MAIL: attie@d-link.co.za...
- Page 53 Air Xpert™ DWL-AG520 Spain D-Link Iberia C/Sabino De Arana, 56 Bajos, 08028 Barcelona, Spain TEL: 34 93 4090770 FAX: 34 93 4910795 URL: www.dlinkiberia.es E-MAIL: info@dlinkiberia.es Sweden D-Link Sweden P. O. Box 15036, S-167 15 Bromma, Sweden TEL: 46-(0) 8-564-61900 FAX: 46-(0) 8-564-61901 E-MAIL: info@dlink.se URL: www.dlink.se...
Need help?
Do you have a question about the DWL-AG520 and is the answer not in the manual?
Questions and answers