Advertisement
Table of Contents
www.healthrider.com
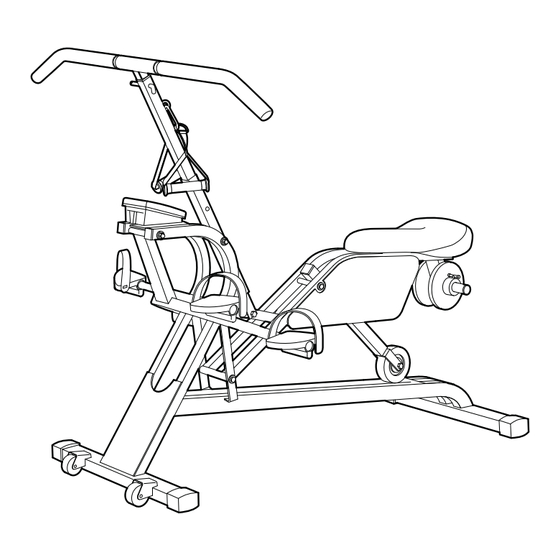
Model No. HRCR02411.0
Serial No.
Write the serial number in the space
above for reference.
Serial
Number
Decal
QUESTIONS?
If you have questions, or if parts
are damaged or missing, DO NOT
CONTACT THE STORE; please
contact Customer Care.
IMPORTANT: Please register this
product (see the limited warranty
on the back cover of this manual)
before contacting Customer Care.
CALL TOLL-FREE:
1-888-922-4222
Mon.–Fri., 6 a.m.–6 p.m. MT
Sat. 8 a.m.–4 p.m. MT
ON THE WEB:
www.healthriderservice.com
CAUTION
Read all precautions and instruc-
tions in this manual before using
this equipment. Keep this manual
for future reference.
USER'S MANUAL
Advertisement
Table of Contents

Subscribe to Our Youtube Channel
Summary of Contents for Healthrider HRCR02411.0
- Page 1 Model No. HRCR02411.0 Serial No. USER’S MANUAL Write the serial number in the space above for reference. Serial Number Decal QUESTIONS? If you have questions, or if parts are damaged or missing, DO NOT CONTACT THE STORE; please contact Customer Care.
-
Page 2: Table Of Contents
TABLE OF CONTENTS WARNING DECAL PLACEMENT ............. . . 2 IMPORTANT PRECAUTIONS . -
Page 3: Important Precautions
IMPORTANT PRECAUTIONS WARNING: To reduce the risk of serious injury, read all important precautions and instructions in this manual and all warnings on your exerciser before using your exerciser. ICON assumes no responsibility for personal injury or property damage sustained by or through the use of this product. -
Page 4: Before You Begin
TONY reading this manual, please see the front cover of this ® LITTLE TWIST exerciser. The TONY LITTLE TWIST manual. To help us assist you, note the product model exerciser offers a unique form of low-impact exercise number and serial number before contacting us. The... -
Page 5: Part Identification Chart
PART IDENTIFICATION CHART Use the drawings below to identify the small parts needed for assembly. The number in parentheses below each drawing is the key number of the part, from the PART LIST near the end of this manual. The number following the key number is the quantity needed for assembly. -
Page 6: Assembly
ASSEMBLY • To hire an authorized service technician to • In addition to the included tool(s), assembly assemble the exerciser, call 1-800-445-2480. requires the following tools: two adjustable wrenches • Assembly requires two persons. one rubber mallet • Place all parts in a cleared area and remove the packing materials. - Page 7 3. Hold the Front Cover Panel (34) against the Main Frame (1) in the indicated location. Attach the Front Cover Panel (34) with four ST4 x 16mm Screws (57) and four M4 Washers (45). 4. Using a small plastic bag to keep your fingers clean, apply some of the included grease to a Frame Axle (13).
- Page 8 6. Hold the Left Shield (21) against the left side of the Seat Frame (2) in the indicated location. Attach the Left Shield (21) to the Seat Frame (2) with three ST4 x 16mm Screws (57) and three M4 Washers (45). Attach the Right Shield (not shown) in the same way.
- Page 9 9. Press the Snap Button (46) on the Handlebar Post (32) with your thumb and forefinger. Insert the Handlebar Post (32) into the Handlebar Swing Arm (5). Make sure that the Snap Button (46) is engaged in one of the two sets of holes in the Handlebar Swing Arm.
- Page 10 11. The Console (35) can use two AA batteries (not included); alkaline batteries are recom- mended. IMPORTANT: If the Console has been exposed to cold temperatures, allow it Battery to warm to room temperature before insert- Cover ing batteries. Otherwise, you may damage the console displays or other electronic components.
-
Page 11: Adjustment And Operation
ADJUSTMENT AND OPERATION DESCRIPTION OF THE CONSOLE To reset the time, reps, and calories modes to zero, hold down the console button for a few seconds. The console offers five modes that provide exercise feedback: 3. The console has an auto-off feature. If the ped- als are not moved and the console button is not Time—This mode displays the elapsed time. - Page 12 HOW TO ADJUST THE HEIGHT OF THE HOW TO LOCK THE HANDLEBAR HANDLEBAR POST The exerciser can be used with the handlebar in the The height of the handlebar post can be adjusted. locked position or the unlocked position. Press the Snap To lock the handle- Handlebar Button (46) and...
-
Page 13: Maintenance And Troubleshooting
MAINTENANCE AND TROUBLESHOOTING Inspect and tighten all parts of the exerciser regularly. HOW TO LUBRICATE THE EXERCISER Replace any worn parts immediately. Every three months, apply a small amount of light To clean the exerciser, use a damp cloth and a small multi-purpose oil between the axle nuts and the frame amount of mild soap. -
Page 14: Part List
PART LIST Model No. HRCR02411.0 R0711A Key No. Qty. Description Key No. Qty. Description Main Frame Console Seat Frame Magnet w/Bracket Roller Swing Arm Seat Knob Pedal Frame Seat Washer Handlebar Swing Arm 32mm Square Cap Handlebar 25mm Square Cap... -
Page 15: Exploded Drawing
EXPLODED DRAWING Model No. HRCR02411.0 R0711A... -
Page 16: Ordering Replacement Parts
ORDERING REPLACEMENT PARTS To order replacement parts, please see the front cover of this manual. To help us assist you, be prepared to provide the following information when contacting us: • the model number and serial number of the product (see the front cover of this manual) •...


Need help?
Do you have a question about the HRCR02411.0 and is the answer not in the manual?
Questions and answers