
Related Manuals for Antari W-101


Summary of Contents for Antari W-101
-
Page 1: User Manual
W-101 Bubble Machine User Manual English Français Deutsch • • • 中文 © 2014 Antari Lighting and Effects Ltd. - Page 2 Page>01 Page>08 Page>16 Page>28...
- Page 3 User Manual W-101 Bubble Machine Congratulations on the purchase of your new ANTARI W-Series bubble MACHINE. Introduction Thank you for choosing an Antari W-Series Bubble Machine. You now own a rugged and powerful state-of-the-art bubble machine. Prior to use, we suggest that you carefully read all of the instructions.
-
Page 4: Unpacking And Inspection
If any equipment is missing contact your Antari dealer immediately. Before beginning your initial setup on the Antari W-101 Bubble Machine, make sure that there is no evident damage caused by transportation. In the event that the unit's housing or cable is damaged, do not plug it in and do not attempt to use it until after contacting your Antari dealer for assistance. - Page 5 - Always replace the caps on the liquid container immediately after filling to avoid contamination. W-101 Hanging Bracket: Your model includes a mounting bracket designed for overhead installation; it may be installed at floor level or suspended overhead. If the unit is to be mounted using the bracket, it is important that the bubbles do not shoot directly at anyone's face.
-
Page 6: Operation
Safety Screw Finger Screw To help avoid accidental exposure to dangerous live AC mains voltage, two safety screws are fitted that require a screw driver to remove. Once these are removed, the finger screws can be undone by hand (see photo above). Once the screws are removed, the lid of the housing can be carefully swung upwards, as shown above. - Page 7 produces bubbles. For wireless operation with the W-1, set the power switch to “Wireless Mode”. Now please refer to chapter “W-1 Wireless Remote” for setting the remote control. W-1 Wireless Remote The wireless remote control system W-1 consists of a transmitter equipped with two buttons for bubbles on and off, and a receiver pre-attached to the rear panel of each W-series model.
-
Page 8: Technical Specifications
- Registering transmitters: To operate the machine with a different transmitter than the included one, or to operate it with up to 5 different transmitters, each transmitter must be registered first. There is an LED light on the rear control panel of the machine. -
Page 9: Warranty
Approval This product is in accordance with the R&TTE directive (Radio and Telecommunication Technical Equipment) of the European Union and falls into equipment Class 1. In all EU member countries, the operation of this wireless system is generally approved by the national telecom regulatory authori ty. The system is license-free. - Page 10 Bedienungsanleitung W-101 Seifenblasenmaschine Herzlichen Glü ckwunsch zum Kauf Ihrer neuen Antari- Seifenblasenmaschine W-Serie. Einfü hrung Vielen Dank, dass Sie sich fü r eine Antari-Seifenblasenmaschine der W-Serie e n t s c h i e d e n h a b e n . S i e s i n d n u n i m B e s i t z e i n e r r o b u s t e n u n d leistungsstarken Seifenblasenmaschine.
- Page 11 Ö ffnen Sie den Versandkarton und stellen Sie sicher, dass alle Teile, die fü r den Betrieb des Systems notwendig sind, in einem einwandfreien Zustand eingetroffen sind. Der Versandkarton sollte die folgenden Posten beinhalten: Eine Seifenblasenmaschine W-101 Eine W-1 Sendeeinheit Bedienungsanleitung Netzkabel mit Netzstecker Montagebü...
- Page 12 - Setzen Sie sofort nach Befü llen des Tanks den Deckel des Tanks sowie des Kanisters wieder auf. W-101 Montagebü gel: Ihr Modell verfü gt ü ber einen Montagebü gel; das Gerä t kann auf dem Boden oder hä ngend installiert werden. Wird das Gerä t hä ngend installiert, achten Sie bitte darauf, dass Seifenblasen niemals direkt in das Gesicht einer Person ausgestoß...
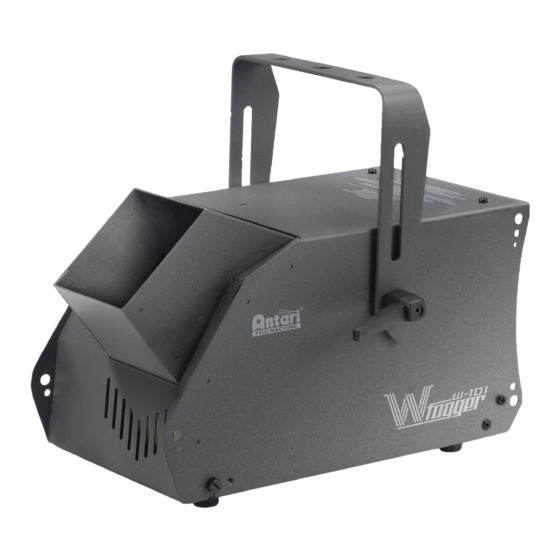
- Page 13 W-101 Bedienelemente und Anschlü sse 01. Gehä use 02. Auslass 03. Montagebü gel 04. Feststellschraube 05. Unterlegscheibe 06. Betriebsanzeige 07. W-1 Funkempfä nger 08. Netzschalter 09. Sicherungshalter 10. Lü fter 11. Konterschraube 12. Fuß 13. Netzkabel 14. W-1 Funkfernbedienung WI R E LE SS R E...
- Page 14 Safety Screw Finger Screw Um den unbeabsichtigten Kontakt mit lebensgefä hrlicher Netzspannung zu vermeiden, befinden sich an der Maschine zwei Sicherheitsschrauben, die nur mit einem Schraubendreher entfernt werden kö nnen. Sind die Sicherheitsschrauben entfernt, kö nnen die Fingerschrauben per Hand gelockert werden (siehe Foto).
-
Page 15: Bedienung
Bedienung Fü r manuellen Betrieb, stellen Sie den Netzschalter auf der Rü ckseite des Gerä ts auf “Manual Mode”. Das Seifenblasenrad und der Lü fter werden aktiviert und die Maschine produziert Seifenblasen. Fü r den Betrieb mit der Funkfernbedienung W-1, stellen Sie den Netzschalter auf “Wireless Mode”. Bitte lesen Sie nun das Kapitel “Funkfernbedienung W1”, um die Funkfernbedienung einzurichten. - Page 16 Der Empfä nger wird getestet und an den Maschinen der W-Serie vorinstalliert. Versuchen Sie nicht, den Empfä nger zu entfernen. Ein Empfä nger kann von bis zu 5 Sendeeinheiten gesteuert werden, die auf die Maschine adressiert sind. Die mitgelieferte Sendeeinheit ist vor der Auslieferung adressiert worden.
-
Page 17: Technische Daten
Technische Daten Spannungsversorgung 120 V AC, 60 Hz (120-V-Modell) 230 V AC, 50 Hz (230-V-Modell) Sicherung F 2 A/250 V (120-V-Modell) T 1 A/250 V (230-V-Modell) Maß e( mm) 241 x 170 x 172 (mm) Gewicht netto 3,4 kg; brutto 4,2 kg Funkti onen An/ aus, kei ne DMX-Schni ttstel l e Tankinhalt... - Page 18 Mode d'emploi W-101 Machine à Bulles Nous vous fé licitons pour l'achat de votre nouvelle Machine à Bulles d'Antari Introduction Nous vous remercions d'avoir choisi une machine à bulles d'Antari. Vous ê tes en possession d'un produit robuste et puissant. En vue d'utiliser correctement votre nouvel appareil, veuillez lire attentivement ce mode d'emploi.
-
Page 19: Dé Ballage & Inspection
Ouvrez le carton exté rieur et assurez vous que toutes les piè ces n'aient subi aucun dommage durant leur transport. Assurez-vous que le carton d'expé dition contient le articles suivants : Une unité de W-101 Machine à Bulles Une unité de W-1 Transmetteur Mode d'emploi Câ... - Page 20 - Aprè s l'avoir rempli de liquide à bulles, refermez toujours immé diatement les couvercles du bidon de liquide et du ré servoir de la machine. W-101 Lyre de fixation : Votre modè le dispose d'un lyre de fixation et peut ê tre fixé au plafond. Lors de cette installation, faites attention que les bulles ne s'é...
- Page 21 NOTICES DE SÉ CURITÉ IMPORTANTES : Dé montez l'approvisionnement é lectrique de l'appareil avant de retirer la couverture. Safety Screw Finger Screw Pour é viter des dangers à cause de courant alternatif, il n'a deux vis de sé curité sur le boitier. Dé visser les vis de sé curité avec un tournevis. Dé visser les vis de main (voir figure).
-
Page 22: Opération
Opé ration Pour opé ration manual, mettez le commutateur d'alimentation à l'arriè re de l'appareil en mode “Manual Mode”. Les fonctions sont activé es et la machine produit de boules. Pour opé ration avec le contrô leur sans fil W-1, mettez le commutateur d'alimentation à... -
Page 23: Caractéristiques Techniques
Le ré cepteur est testé et fixé au dos de chaque modè le de la sé rie W. S'il vous plaît ne pas essayer de le dé tacher. Le ré cepteur ré agit à jusqu'à 5 transmetteurs diffé rents registré s avec la machine. Le transmetteur inclus est registré... -
Page 24: Garantie
Admission Ce systè me sans file ê tre testé et autorisé dans l'Union europé enne selon les termes de la directive R+TTE. En la UE, le systè me sans file possè de une autorisation gé né rale et ne né cessite pas de dé claration spé cifique. Dé... - Page 25 恭 喜 您 成 為 A n t a r i W 無 線 泡 泡 機 的 使 用 者 感 謝 您 選 用 A n t a r i 泡 泡 機 產 品 , 現 在 您 已 經 擁 有 W 系 列 泡 泡 機 , 在 開 始 使 用 之 前 , 我 們...
- Page 26 拆 除 包 裝 及 檢 視 機 器 請 打 開 包 裝 確 認 機 器 運 作 的 所 有 設 備 齊 全 , 請 參 考 配 置 圖 , 確 認 您 所 購 買 的 機 型 應 包 括 之...
- Page 27 W- 1 0 1 吊 架 : 您 的 A n t a r i W- 1 0 1 泡 泡 機 配 備 有 能 夠 裝 置 在 高 處 的 吊 架 , 可 裝 置 在 天...
- Page 28 埋 頭 螺 絲 拇 指 螺 絲 機 器 下 端 有 兩 顆 安 全 螺 絲 及 兩 顆 拇 指 螺 絲 , 請 先 用 螺 絲 起 子 鬆 開 安 全 螺 絲 , 而 拇 指 螺 絲...
- Page 29 操 作 方 式 開 啟 在 W- 1 0 1 泡 泡 機 後 方 的 電 源 開 關 , 即 可 啟 動 泡 泡 成 型 輪 環 及 風 扇 , 此 時 便 可 開 始 產...
- Page 30 * 設 定 功 能 : 1 . 所 有 的 接 收 器 都 能 接 收 任 何 已 完 成 對 頻 的 發 射 器 。 2 . 每 個 接 收 器 在 每 一 次 開 機1 5秒 內 最 多 能 同 時 對 頻 五 組 發 射 器 訊 號 。 3 .
- Page 32 C08W10101...
Need help?
Do you have a question about the W-101 and is the answer not in the manual?
Questions and answers