Table of Contents
Advertisement
Quick Links
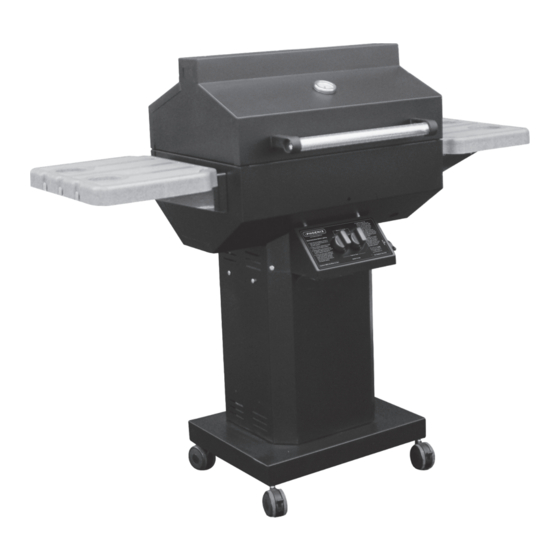
Assembly and Maintenance Instructions
THIS GAS APPLIANCE IS DESIGNED FOR OUTDOOR USE ONLY.
Model: PFMGBFAB-P Propane
PFMGBFAB-N Natural Gas
THESE INSTRUCTIONS SHOULD BE LEFT WITH
THE CUSTOMER. KEEP THESES INSTRUCTIONS
FOR FUTURE REFERENCE.
YOU MUST READ THIS OWNERS MANUAL BEFORE
OPERATING YOUR GAS GRILL.
10/12
Owner's Manual
FOR YOUR SAFETY
If you smell gas:
1. Shut off gas to appliance.
2. Extinguish any open flame.
3. Open Lid.
4. If odor continues, immediately
call your gas supplier or your
fire department.
FOR YOUR SAFETY
1. Do not store or use gasoline or
other flammable vapors and liq-
uids in the vicinity of this or any
other appliance.
2. An LP cylinder not connected
for use shall not be stored in
the vicinity of this or any other
appliance.
FOR YOUR SAFETY
Follow all leak-test procedures
carefully in this manual before us-
ing. Do this even if the grill was
dealer assembled. Do not try to
light this appliance without read-
ing the "Lighting" instructions in
this manual.
Advertisement
Table of Contents

Subscribe to Our Youtube Channel
Related Manuals for Phoenix PFMGBFAB-P


Summary of Contents for Phoenix PFMGBFAB-P
- Page 1 2. An LP cylinder not connected for use shall not be stored in the vicinity of this or any other appliance. Model: PFMGBFAB-P Propane PFMGBFAB-N Natural Gas FOR YOUR SAFETY THESE INSTRUCTIONS SHOULD BE LEFT WITH Follow all leak-test procedures THE CUSTOMER.
-
Page 2: Note To Customer
Note To Customer: We recommend that you “break in” your grill by cooking the first two or three times at medium or low temperature settings. This allows the cast aluminum drip pan to “season/break in’. Caution: We recommend after each use, you turn the control knobs to HIGH (with the lid closed) and run the grill for approximately 10 minutes. - Page 3 SAFETY ment of Transportation (DOT), or the National IMPORTANT! Standard of Canada CAN/CSA-B339 Cylin- Check for compliance to these safety rules be- der, Spheres and Tubes For Transportation of fore each use! Dangerous Goods, and Commission as Appli- -Maintain a minimum clearance of 24 inches cable.
- Page 4 well ventilated space, NOT in a building, ga- Phoenix Grill dealer or local gas utility in accor- rage, or any other enclosed area. It must be out dance with all applicable codes. CAUTION: Any of reach of children. A dust cap MUST be used additions, changes, or conversions required in whenever the tank is disconnected from the order for the appliance to satisfactorily meet the...
- Page 5 Phoenix Grill WARRANTY 10-YEAR WARRANTY ON THE FOLLOWING: (Against Rust Through) • Stainless Steel Burner • Stainless Steel Cooking Grid • Cast Aluminum Drip Pan 5-YEAR WARRANTY ON THE FOLLOWING: (Against Rust Through) Black Aluminized Steel Grill Top and Bottom (Paint Excluded) • Aluminized Steel ...
- Page 6 GETTING TO KNOW YOUR PHOENIX GAS GRILL Heat Indicator Grill Lid Vents on Sta-Kool Back of Lid Swivel Handle Side Shelf Shelf Brackets Match Hole Grill Fire Pit Rotary Igniter Left and Right Side Burner Control Panel Controls Drip Pan Drain Valve Column Grease/Water...
-
Page 7: Tools Needed For Assembly
Phoenix Grill Assembly Instructions Carton contains the following components for assembly: Please check to be sure that all parts are included before proceeding. Hardware/Fasteners Contact your dealer or the factory if any parts are missing. Grill and Cart Components HARDWARE QUAN. -
Page 8: Step 3: Attaching Control Panel
Step 1: Mounting Column to Base A. Attach the front (center) section of the column to the base using 2, 1/4-20 x 1/2” hex head bolts, 4 flat washers and 2 Kep nuts. (Fig. A) B. Attach the two (2) sides of the column to the base using 4, 1/4-20 x 1/2”... - Page 9 CONTINUE Step 3: Attaching Control Panel to Grill Pit. A. Press the rotary control knob to igniter stem. (Fig. H) B. Attach the igniter probe wire (preassembled at factory to the gas Fig. H collector box) to the rotary piezo spark generator. (Fig. I) Igniter Wire Fig.
- Page 10 Gas and LP Tank Connections CONNECTING THE LP CYLINDER (Fig. R) LP-GAS CYLINDER FILLING & HANDLING (Continued) Install the gas cylinder in the back of your grill, with the open side of the Air must be removed from a new LP cylinder before the initial ...
- Page 11 Leak Testing and Lighting Your Grill Leak Testing Lighting Your Grill ALWAYS OPEN GRILL BEFORE LIGHTING THE LEAK TEST ALL GAS CONNECTIONS BEFORE US- BURNER. ING YOUR GRILL. DO NOT LEAN OVER AN OPEN GRILL. KEEP YOUR DO NOT SMOKE WHILE LEAK TESTING. HEAD AND BODY AT LEAST ONE FOOT AWAY WHEN LIGHTING THE GRILL.
-
Page 12: Annual Maintenance
Warning: Check the hose before each use of the grill for nicks, Clean Out Venturi Tube cracking, abrasions or cuts. If the hose is found to be damaged in any way, do not use the grill. Replace using only MHP au- Venturi Brush thorized replacement hose. - Page 13 Maintenance General Maintenance B. Check spark. Pull the connector wire from the collector box (see “X” Fig. S). Bring wire to bottom or top of control panel, hold about 1/8" away and operate the ignitor. Check for spark. If there is no spark replace the Rotary Ignitor. If there is a spark the Rotary Ignitor is OK, but the Collector Box/Electrode Rotary Spark Ignitor System assembly should be replaced (the ceramic insulator could be...
-
Page 14: Cooking Tips
You can fabricate your own container(s) by folding heavy gauge you notice grease accumulating in the drip pan but is not run- aluminum foil into an open square or purchase a MHP stainless ning into the grease bucket, then either your drain valve is not steel smoker box (part #SDSSST) from your Local Dealer. -
Page 15: Cooking Times
Cooking Tips LIQUID SMOKE GRILLING The following quality MHP accessories are designed to make Make sure your drip pan is relatively clean, see page 14 for drip your smoking experience more convenient and enjoyable. See pan removal cleaning. Close the drip pan drain valve and fill the these products and a complete list of accessories for your new drip pan with water (be sure not to overfill your drip pan). -
Page 16: Troubleshooting Guide
TROUBLE SHOOTING GUIDE If you are having difficulty with your grill, follow this guide to solve some common problems. Problem #1: BURNER(S) WILL NOT LIGHT OR THE GRILL DOES NOT GET HOT ENOUGH. PROBABLE CAUSE SOLUTION A. Propane Cylinder Almost Empty. Have Propane Cylinder Filled. -
Page 17: Parts Information
Rotary Ignitor GGK9 Ignitor Control Knob HHVLV28SD Propane Gas Grill Valve (Model PFMGBFAB-P) HR4B Propane Gas Hose and Regulator (Model PFMGBFAB-P) HHVLV32SD Natural Gas Grill Valve (Model PFMGBFAB-N) ASCPL1 12’ Quick Disconnect Hose (Model PFMGBFAB-N) SDSSDT-A Cast Aluminum Drip Pan... -
Page 18: Infrared Burner
UPGRADES AND ACCESSORIES FOR ADDED VERSATILITY, CONVENIENCE AND OUTDOOR COOKING ENJOYMENT. Infrared Burner #PFMGSEAR Reversible State-of-art cooking system gives you time saving grilling at high tem- perature in seconds. The overall intense heat Anodized Aluminum Grid seals in meat juices for better flavor. Stainless #SDGRIDS Steel construction and mounts easily to the Reversible rust-free anodized cooking... - Page 19 Stainless Steel Cleaner Ceramic Pizza Stone Skewer Set #SDSDSCC #PZT13 #SDSR7B Specially formulated for MHP For an evenly cooked pizza and a 6-piece chrome plated skewers stainless steel grills. crispy crust. The stone sumulates designed so food does not 8 oz. bottle.
- Page 20 First in Grill Replacement Parts Stainless Steel Grills Outdoor Lighting ©2012 Modern Home Products Corp. MHP configuration, SearMagic, ProFire Grills are registered trademarks of Modern Home Products Corp. Because of constant product improvement, ProFire Grills reserves the right to change specification without notice. 10/12...
Need help?
Do you have a question about the PFMGBFAB-P and is the answer not in the manual?
Questions and answers