Table of Contents
Advertisement
C Y C L O N I C
BAGLESS
UPRIGHT
OWNER'S MANUAL
OPERATING AND SERVICING INSTRUCTIONS
IMPORTANT: READ CAREFULLY
BEFORE ASSEMBLY AND USE.
Questions or concerns? For assistance,
please call Customer Service at
1-800-944-9200 Mon-Fri 8am-7pm EST
before returning this product to the store.
THIS PRODUCT IS INTENDED FOR HOUSEHOLD USE ONLY.
IF USED COMMERCIALLY WARRANTY IS VOID.
Advertisement
Table of Contents

Related Manuals for Hoover CYCLONIC BAGLESS UPRIGHT


Summary of Contents for Hoover CYCLONIC BAGLESS UPRIGHT
- Page 1 C Y C L O N I C BAGLESS UPRIGHT OWNER’S MANUAL OPERATING AND SERVICING INSTRUCTIONS IMPORTANT: READ CAREFULLY BEFORE ASSEMBLY AND USE. Questions or concerns? For assistance, THIS PRODUCT IS INTENDED FOR HOUSEHOLD USE ONLY. please call Customer Service at 1-800-944-9200 Mon-Fri 8am-7pm EST IF USED COMMERCIALLY WARRANTY IS VOID.
-
Page 2: Table Of Contents
Embedded DirtFINDER ........11 Be sure to register your product online at Hoover.com 6. G EN ERAL M A IN TE N A N C E ..1 2 or call 1-800-944-9200 to register by phone. -
Page 3: S Afety I Ns T R Uct Ion S
IMPORTANT SAFETY INSTRUCTIONS SAVE THESE INSTRUCTIONS When using an electrical appliance, basic precautions should always be followed, including the following: READ ALL INSTRUCTIONS BEFORE USING THIS APPLIANCE. WARNING: TO REDUCE THE RISK OF FIRE, ELECTRIC SHOCK OR INJURY: • Fully assemble before operating. •... - Page 4 CAUTION - TO REDUCE THE RISK OF WARNING: DAMAGE: • To reduce the risk of electric shock, this appliance has a polarized plug (one blade is wider than the other). This plug • Avoid picking up hard, sharp objects with this product, as they will fit in a polarized outlet only one way.
-
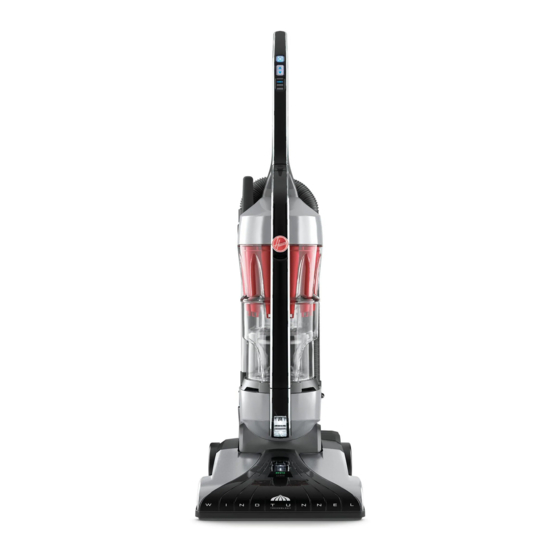
Page 5: Features
1. FEATURES Handle Grip Power Button Floor Selector Button Floor Selector Indicator Light Dirt Cup Release Button Stretch Hose Wand Handle Primary Filter Access Button (Filter located above dirt cup) Carrying Handle Dusting/Upholstery Tool Dirt Cup Crevice Tool Handle Release Pedal Headlight Embedded DirtFINDER™... -
Page 6: Carton Contents
2. CARTON CONTENTS Remove all parts from carton and identify each item shown. Make sure all parts are located before disposing of packing. Upper Handle Cleaner Body Bagged Screws (2) Dusting/Upholstery Tool Crevice Tool... -
Page 7: Vacuum Controls
3. VACUUM CONTROLS 1 P o w er B utton Push to turn cleaner on and off. 2 F lo o r S el e ctor Push the floor selector button to raise and lower the nozzle to clean bare floors and various carpet pile heights. -
Page 8: How To Assemble
4. HOW TO ASSEMBLE Attac h Ha n d le Slide upper handle down into cleaner body. Insert the (2) screws provided into the handle where indicated in the figure. Tighten with screwdriver. Tool Stora ge A. Dusting/Upholstery Tool storage. B. -
Page 9: How To Operate
5. HOW TO OPERATE Ha n d l e R e le a s e H a n d le P o s i ti ons Carry Handle Ped a l The cleaner can be Step on handle release The handle of your cleaner has three positions; moved by using the pedal to lower handle. -
Page 10: Select Proper Tools
5. HOW TO OPERATE Select Pro p er Tools A ttac h Tool s Dusting/Upholstery Tool may be used on table Crevice Tool may be Disconnect cleaner tops, books, lighting fixtures, and blinds. used in tight spaces, from electrical outlet. cor ners along Remove brush to clean upholstered furniture,... -
Page 11: Stair Cleaning
5. HOW TO OPERATE St ai r Cle ani ng Use the wand and the Dusting/Upholstery Tool for stair cleaning. Clean from bottom to top. CAUTION: Use extra care when cleaning on stairs. To avoid personal injury or damage, and to prevent the cleaner from falling, always place cleaner at bottom of stairs or on floor. -
Page 12: G En Eral M A In Te N A N C
Familiarize yourself with these home maintenance tasks as proper use and care of your cleaner will ensure continued cleaning effectiveness. 6. GENERAL MAINTENANCE Any other servicing should be done by an authorized service representative. NOTICE An internal thermal protector has been designed into your cleaner to protect it from overheating. -
Page 13: Cleaning Filters
Allow filter to dry completely before replacing. May take up to 24 hours. Replace filter, tab side out. Replace dirt cup as described in Fig 6.4. W hat t o B uy When purchasing a new Primary filter, ask for HOOVER part No. 43615096. -
Page 14: Umbrella Filter
6. GENERAL MAINTENANCE CLEANING FILTERS 6.11 6.10 6.12 Umbrella Tube When to Cl ean Check Umbrella tube on a monthly basis and clean when it is wrapped with debris. H o w to Clean CAUTION - To reduce the risk of personal injury - Unplug before cleaning or servicing. -
Page 15: Hepa Filter
Turn knob on top of lid to unlatch. When purchasing a new filter made with HEPA 6.14 Remove lid. media cartridge, ask for HOOVER part No. 6.15 Remove the filter made with HEPA media. 38765035. Hold filter over a trash receptacle and tap out dirt and debris. -
Page 16: Brushroll
What to Buy To assure cleaning effectiveness, use only Hoover ® Brushroll part #48414156. It is important that you use only genuine HOOVER ® parts to assure your cleaner operates at peak performance. To order bags please visit www.hoover.com. HOOVER products ®... -
Page 17: Tro Ub Le Sho O Ti Ng Gui De
Dealer or visit our website at www.hoover.com. Costs of any transportation to and from any place of repair are to be paid by the owner. The service parts used in this unit are easily replaced and readily available from an authorized HOOVER ®... -
Page 18: Service
• call 1-800-944-9200 for an automated referral of authorized service outlet locations (U.S. only). Do not send your cleaner to Hoover, Inc., in Glenwillow for service, this will only result in delay. If further assistance is needed, contact the Exclusive Hoover Platinum Collection Member Services Line 1.877.MYPLTNM (1.877.697.5866), Mon-... - Page 19 ©2010 Techtronic Floor Care Technology Limited. All rights reserved. #56511C81 ID100382-R2...