Table of Contents
Advertisement
Advertisement
Table of Contents

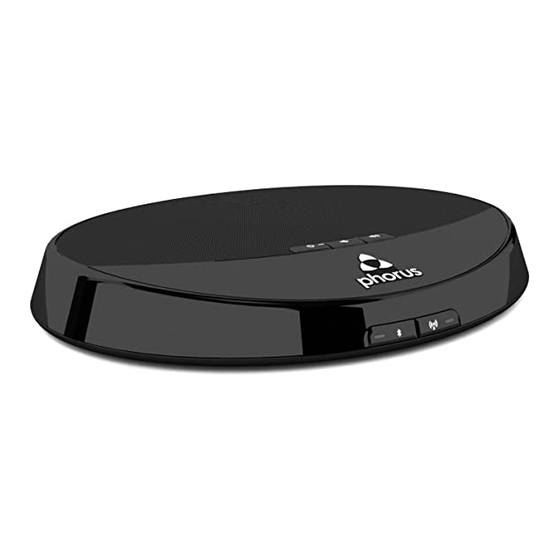
Summary of Contents for Phorus PR1
- Page 1 Phorus PR1 Receiver Owner’s Manual...
-
Page 2: Table Of Contents
Setup Standard Wi-Fi Setup - Steps 1-4 Standard Wi-Fi Setup - Steps 5-6 Standard Wi-Fi Setup - Steps 7-9 Wi-Fi Protected Setup (WPS) Naming a PR1 Receiver Wi-Fi Wi-Fi - Fine Tuning Your System Wi-Fi - Static IP Configuration Bluetooth... -
Page 3: Safety Information - Warnings And Cautions
Things not to do with your power supply: If any of these have occurred please call Phorus to be • This product is intended to be used only with the power referred to an authorized service center near you. -
Page 4: System Requirements
System Requirements Here’s what you’ll need to connect your PR1 Receiver to your router: 1. An Android phone or tablet with at least version 2.2 of the Android Operating System. 2. A Wi-Fi access point or router broadcasting with 802.11g/n.* Android 2.2 (or greater) -
Page 5: What's Included
What’s Included Thank you for purchasing a PR1 Receiver! You’re about to enjoy an unparalleled, rich audio experience directly from your Android phone or tablet. Your system includes the following components. • PR1 Receiver • USB-to-Micro USB • 3.5mm Aux Cable •... -
Page 6: Overview
Overview This is your PR1 Receiver. It’s going to be a big part of your life, so let’s get you introduced. Front Power Button Volume Up Button Volume Down Button Mute: Press both Volume Up and Down Bluetooth Setup Button... -
Page 7: Setup
The PR1 Receiver streams music over your existing Wi-Fi network. One great feature of the PR1 Receiver is that it’s really simple to set up. There are two methods for connecting the Receiver to your home network. You can perform the Standard Wi-Fi Setup or WPS. -
Page 8: Standard Wi-Fi Setup - Steps
Before starting, make sure the system requirements are met and that you have all the components from the What’s Included section. 1. For best results place your PR1 Receiver(s) near your router. You may move Receiver(s) after setup is complete. -
Page 9: Standard Wi-Fi Setup - Steps 5-6
Android device, or leave the network during the update. Alternative Network If you want to set up a PR1 Receiver to connect to a network other than the one you’re currently connected to, press the Alternative Network button on the Enter Network Password screen. -
Page 10: Standard Wi-Fi Setup - Steps
Custom Name at the end of the name list. Setting Up PR1 Receivers After Launching the App The Play-Fi App only looks for devices in Standard Wi-Fi Setup Mode when it is launched. To detect a Play-Fi device after launching the app, go to the Home screen, select Settings and then Add Play-Fi Device. -
Page 11: Wi-Fi Protected Setup (Wps)
3. Place your router in WPS mode. Usually this PR1 Receiver can be set up at a time (see is done by holding the router’s WPS button but the Standard Wi-Fi Setup section for multiple check your router owner’s manual. -
Page 12: Naming A Pr1 Receiver
Naming a PR1 Receiver Any PR1 Receiver that is linked to your Android 3. Press the Menu button on your Android device can be named. and then select “Rename Devices” 1. Select the Play-Fi button in the lower right corner of the screen. -
Page 13: Wi-Fi
Wi-Fi The Wi-Fi light tells you what your PR1 Receiver is thinking: • Fast Blink – Attempting to connect or connecting to a Wi-Fi router • Slow Pulse – Setup Mode • Two Blinks + Pause – WPS Mode • Solid - Connected to router The Wi-Fi button is used only for entering/exiting a Wi-Fi setup mode. -
Page 14: Wi-Fi - Fine Tuning Your System
For instructions on how to identify the best broadcast channel and switch channels go to the following URL and search for “How do I change broadcast channels on my router?” in the knowledge base. http://support.phorus.com Wi-Fi 12... -
Page 15: Wi-Fi - Static Ip Configuration
Wi-Fi - Static IP Configuration A PR1 Receiver may be assigned a static IP address, but it requires a Wi-Fi enabled computer. To set a static IP address, place your PR1 Receiver into Standard Wi-Fi Setup Mode. From your personal computer, select the Play-Fi device in your Wi-Fi networks menu. -
Page 16: Bluetooth
If you ever need to exit the Bluetooth Setup Mode just Pairing is a security measure that only needs to press the Bluetooth button once and the Bluetooth be done one time. After a PR1 Receiver is set up light will go off. Bluetooth 14... -
Page 17: Line Out
Line Out Your PR1 Receiver’s line out audio jack is connects your Receiver to powered stereo speakers. Line Out 15... -
Page 18: Settings
Settings Keep Screen On The Settings menu is accessed from the Home menu of the Play-Fi App by pressing the Menu Ticking the check box prevents your Android button on your Android device. device’s screen from turning off while playing music. -
Page 19: Factory Reset
Factory Reset To return a PR1 Receiver to its original factory state, follow these instructions. This will delete any saved Bluetooth and Wi-Fi connection information. 1. Ensure that the unit is fully powered on. 2. Locate the Reset button on the back of the unit. -
Page 20: Troubleshooting
Troubleshooting Please visit the Knowledge Base at the following URL for troubleshooting information. http://support.phorus.com Troubleshooting 18... - Page 21 01-31-000013-01 ©2012 Phorus inc. All Rights Reserved. 16255 Ventura Blvd. Suite 310 Encino, CA 91436...


Need help?
Do you have a question about the PR1 and is the answer not in the manual?
Questions and answers