Table of Contents
Advertisement
Advertisement
Table of Contents

Related Manuals for Life Gear 97780


Summary of Contents for Life Gear 97780
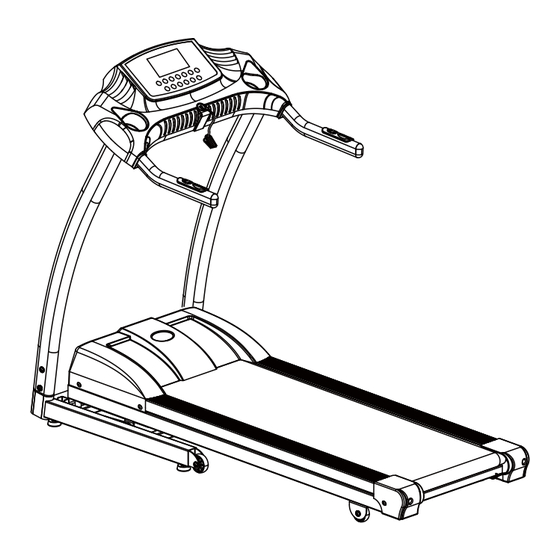
- Page 1 ACAMAR PROGRAMMABLE MOTORIZED TREADMILL ITEM NO: 97780 OWNER’S MANUAL IMPORTANT: Read all instructions carefully before using this product. Retain this owner’s manual for future reference. The specifications of this product may vary from this photo, subject to change without notice.
-
Page 2: Table Of Contents
TABLE OF CONTENTS WARRANTY -------------------------------------------------------------------------------- 1 SAFETY INSTRUCTIONS -------------------------------------------------------------- 2 PARTS LIST -------------------------------------------------------------------------------- 4 HARDWARE PACKING LIST & TOOLS -------------------------------------------- 6 OVERVIEW DRAWING ----------------------------------------------------------------- 7 ASSEMBLY INSTRUCTIONS --------------------------------------------------------- 8 STORAGE ---------------------------------------------------------------------------------- 12 OPERATING THE COMPUTER ------------------------------------------------------ 13 CARE, MAINTENANCE & TROUBLESHOOTING GUIDE --------------------- 18 BELT ADJUSTMENT AND LUBRICATION ---------------------------------------- 19 WARM UP AND COOL DOWN ROUTINE ----------------------------------------- 20 ONE YEAR LIMITED WARRANTY... -
Page 3: Safety Instructions
SAFETY INSTRUCTIONS Basic precautions should always be followed, including the following safety instructions when using this treadmill: Read all instructions before using this treadmill. DANGER: To reduce the risk of electric shock, please read the following: Always unplug the treadmill from the electrical outlet immediately after using and before cleaning, assembling, or servicing. -
Page 4: Grounding Instructions
This appliance is not intended for use by persons (including children) with reduced physical, sensory or mental capabilities, or lack of experience and knowledge, unless they have been given supervision or instruction concerning use of the appliance by a person responsible for their safety. Children should be supervised to ensure that they do not play with the appliance. -
Page 5: Parts List
PARTS LIST Part # Description Qty Part # Description Base Frame 1 031 Motor Main Frame 1 032 Power Socket Left Handlebar Support Tube 1 033 Motor Bumper Pad I Right Handlebar Support Tube 1 034 Computer Computer Bracket 1 034A Upper Computer Cover Handrail Tube 2 034B... - Page 6 PARTS LIST Part # Description Qty Part # Description Hex. Socket Round Head Bolt Hand Pulse Sensor 3 070 M8x45 Extension Wire I Hex. Socket Round Head Bolt Hand Pulse Sensor 2 071 M8x40 Extension Wire II Hex. Socket Head Cap Bolt Hex.
-
Page 7: Hardware Packing List & Tools
HARDWARE PACKING LIST & TOOLS (52) Curve Washer Ø8 4 PCS (72) Hex. Socket Round Head Bolt M8x12 8 PCS (55) Nylon Nut M8 4 PCS (44) Hex. Socket Round Head Bolt M8x50 4 PCS (51) Flat Washer Ø8 12 PCS (45) Hex. -
Page 8: Overview Drawing
OVERVIEW DRAWING 58 51 56 54... -
Page 9: Base Frame 1
ASSEMBLY INSTRUCTIONS Tool: 5mm Allen Wrench with Phillips Screwdriver Multi Hex Tool Step 1 Insert the Sensor Wire I (85) through into the bottom hole of Right Handlebar Support Tube (4) and pull it out from the top hole of Right Handlebar Support Tube (4). Then install the Right Handlebar Support Tube (4) to the Base Frame (1) by inserting the Right Handlebar Support Tube (4) onto the Base Frame (1), using two M8x50 Hex. -
Page 10: Left Handlebar Support Tube 1
(45) Hex. Socket Round Head Bolt M8x16 (52) Curve Washer Ø8 2 PCS 2 PCS ․․․․․․․․․․․․․․․․․․․․․․․․․․․․․․․․․․․․․․․․ 72 51 Tool: 5mm Allen Wrench with Phillips Screwdriver Step 2 Connect the Sensor Wire I (85) from the Right Handlebar Support Tube (4) to the Sensor Wire II (84) from the Computer Bracket (5). - Page 11 Tool: 5mm Allen Wrench with Phillips Screwdriver Step 3 Connect the Hand Pulse Sensor and Speed Buttons Wires (39) from the right Handrail Tube (6) to the Control Button Wire (53) and Hand Pulse Sensor Extension Wire I (70) from the Computer Bracket (5). Then install the right Handrail Tube (6) to the Computer Bracket (5) by inserting the right Handrail Tube (6) onto the Computer Bracket (5), using two M8x12 Hex.
- Page 12 Plug the one end of the Wire for MP3 or CD Player (34L) into MP3 port on the Computer (34). NOTE: This step is ONLY for the treadmill has speakers (optional device) and a MP3 port (optional device) on the computer console. User can plug one end of the Wire for MP3 or CD Player (34L) (optional accessory) into the MP3 port on the computer console and then connect the other end of Wire for MP3 or CD Player (34L) into the jack for MP3 or CD...
-
Page 13: Storage
STORAGE FOLDING UP THE TREADMILL Firmly grasp the back end of the treadmill with both hands. Carefully lift the end of the treadmill up into the upright position until the Foot Lock Latch engages and securely locks the deck into position. Make sure the deck is securely latched before moving the treadmill. (See diagrams A and B.) The unit can be carefully tilted onto its transport wheels for easy moving and storage. -
Page 14: Belt.
OPERATING THE COMPUTER QUICK START: Flip the Master Power Switch that is located at the front of the treadmill to the ON position. Before beginning a workout session ensure that the Safety Tether Key is properly installed onto the Computer Console and the Safety Clip is securely attached to an article of your clothing. - Page 15 COMPUTER BUTTON FUNCTIONS: ON/OFF: Press the ON/OFF button to start or stop training on different training mode. MODE: Press the MODE button to select pre-set programs P1 to P25. CLEAR/SET: Press the CLEAR/SET button to select function of TIME, DISTANCE, or CALORIES for target pre-setting in Program 0.
- Page 16 speed of 1.0 KPH. You may press the SPEED UP or SPEED DOWN button on the computer console or handlebar to increase or decrease the running speed during exercise. Time starts counting down from pre-set target time to 0:00 per 1 second backward. Once the pre-set target time count down to 0:00, the computer will begin beeping to remind you and the running belt will stop automatically.
-
Page 17: Wireless Chest Belt Heart Rate Transmitter
target Calories counts down to 0, the computer will begin beeping to remind you and the running belt will stop automatically. PULSE: The PULSE window will display your current heart rate figures in 4-5 seconds after you hold both two hands on handlebar grip sensors during exercise. To ensure the pulse readout is more precise, please always hold on to the handlebar grip sensors with two hands instead of just with one hand only when you try to test your heart rate figures. - Page 18 WARNING: Signal interference in the environment can be due to electromagnetic disturbances. These may occur near televisions, computers, or cellular phones. Under interference, the heart rate readings may become unstable and inaccurate. Wireless Chest Belt Heart Rate Transmitter...
-
Page 19: Care, Maintenance & Troubleshooting Guide
CARE, MAINTENANCE & TROUBLESHOOTING GUIDE WARNING: To prevent electrical shock, please turn off and unplugg(ed) the treadmill before cleaning or performing routine maintenance. CLEANING The treadmill can be cleaned with a soft cloth and mild detergent. Do not use abrasives or solvents. -
Page 20: Belt Adjustment And Lubrication
BELT ADJUSTMENT AND LUBRICATION Belt Adjustment: The belt is adjusted at the factory; it may come loose during transportation and/or from use. After prolong use of the treadmill, the belt will stretch out. If the belt is shifting to the left, turn on the main power switch of treadmill and let the belt run at the speed of 2-3 KPH. -
Page 21: Warm Up And Cool Down Routine
WARM UP AND COOL DOWN ROUTINE A good exercise program consists of a warm-up, aerobic exercise, and a cool down. Do the entire program at least two to three times a week, resting for a day between workouts. After several months you can increase your workouts to four or five times per week. AEROBIC EXERCISE is any sustained activity that sends oxygen to your muscles via your heart and lungs. - Page 22 QUADRICEPS STRETCH With one hand against a wall for balance, reach behind you and pull your right foot up. Bring your heel as close to your buttocks as possible. Hold for 15 counts and repeat with left foot. INNER THIGH STRETCH Sit with the soles of your feet together and your knees pointing outward.
Need help?
Do you have a question about the 97780 and is the answer not in the manual?
Questions and answers