Table of Contents
Advertisement
Quick Links
Advertisement
Table of Contents

Related Manuals for Kärcher CV71/2


Summary of Contents for Kärcher CV71/2
- Page 1 Model: CV71/2 1.012-548.0 Operating Instructions (ENG) 86309230-D 01/10/09...
-
Page 2: Machine Data Log/Overview
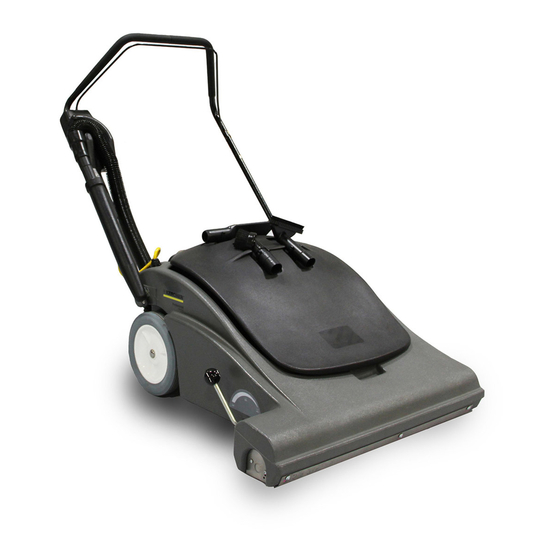
Sales Representative: Address: Phone Number: OVERVIEW The CV71/2 is a electric motor powered, wide area vacuum intended for commercial use. The CV71/2 brushes and vacuums debris from carpeted surfaces and stores the collected debris in vacuum bags. 86309230 CV71/2 02/19/08... -
Page 3: Table Of Contents
Regular/Periodic Maintenance......4-2 Wiring Diagram..........4-3 Service Schedule..........4-4 GROUP PARTS LIST Brush and Drive Group.........5-1 Brush Height and Wheel Group....5-3 Vacuum Group..........5-5 Handle Group..........5-7 Lid/Decal Group..........5-9 Electrical Panel and Cover Group………….5-11 Suggested Spare Parts……………………...5-13 86309230 CV71/2 02/19/08... -
Page 4: How To Use This Manual
NOTE: If a service or option kit is installed on your machine, be sure to keep the KIT INSTRUCTIONS which came with the kit. It contains replacement parts numbers needed for ordering future parts. 86309230 CV71/2 02/19/08... -
Page 5: Important Safety Instructions
Do not pull or carry by cord, use cord as a handle, close a door on cord, or pull cord around sharp edges or corners. Do not pull/run machine over cord. Keep cord away from heated surfaces. Connect to a properly grounded outlet. See Grounding Instructions. SAVE THESE INSTRUCTIONS 86309230 CV71/2 02/19/08... -
Page 6: Hazard Intensity Level
Unless Operation Guide is Read and understood. In Flammable or Explosive areas. In areas with possible falling objects. WHEN SERVICING MACHINE: Avoid moving parts. Do not wear loose clothing; jackets, shirts, or sleeves when working on the machine. Use approved replacement parts. 86309230 CV71/2 02/19/08... -
Page 7: Grounding Instructions
The green colored rigid ear, lug, or wire extending from the adaptor must be connected to a permanent ground such as a properly grounded outlet box cover. Whenever the adaptor is used, it must be held in place by a metal screw. 86309230 CV71/2 02/19/08... -
Page 8: Controls
12. Dust bag cover. Raise to allow access to dust bag and vac motors. 13. Cloth dust bag. High filtration cloth bag with zipper opening to access paper bag. 14. Paper bag. Fits within cloth bag for clean and easy dust removal. 86309230 CV71/2 02/19/08... -
Page 9: Set Up
NOTE: Attach strain relief/cord retainer to the power cord. 1. Make a loop in power cord approximately 12” from receptacle end. 2. Slide cord loop through slot in retainer arm. Pull slack cord back through slot to secure. Attach retainer to handle. 86309230 CV71/2 02/19/08... -
Page 10: Operation
9. When finished vacuuming, coil the cable by hand by looping into about a 3 foot diameter, Hang coiled cable over handle. Wrap the end around the cable loop to secure. Return brush to storage position. 86309230 CV71/2 02/19/08... -
Page 11: Maintenance
7. When installing belt push down on motor for proper tension. 8. When reinstalling brush, check belt for proper tension. TO ACCESS AND REMOVE VAC MOTOR AND FILTERS. 1. Open lid cover. 2. Remove (2) screws from each/both vac motor brackets. 86309230 CV71/2 02/19/08... -
Page 12: Brush Motor
4. Remove brush motor pulley and (2) bolts holding motor to bracket, lift out brush motor. CARBON BRUSH 1. Access belt and brush as described above. 2. Remove brush caps. Note: Brushes should be replaced when worn to 3/8” or less. 86309230 CV71/2 02/19/08... -
Page 13: Wiring Diagram
PRV NO. 57104 87016 86010640 PRV NO. 87016 GROUND MICRO POST SWITCH POWER CORD 86006500 70024 70363 PRV NO. 70024 SWITCH BOX 880253 86261570 86261570 88231 88349 SCREW PRV NO. 88349 PRV NO. 880253 EXHAUST HANDLE SCREEN 86309230 CV71/2 02/19/08... -
Page 14: Service Schedule
Check vac motor carbon brushes Check for arcing and pitting on any electrical contacts; replace if found Inspect and clean vac shoe; check for dents and damage which would detrimentally effect vacuum and brush movement Check overall performance of machine 86309230 CV71/2 02/19/08... - Page 15 THIS PAGE LEFT BLANK INTENTIONALLY 86309230 CV71/2 02/19/08...
-
Page 16: Brush And Drive Group
BRUSH AND DRIVE GROUP BRUSH ASSEMBLY -DETAIL- Vacuum Door Assembly BRUSH ASSEMBLY BRUSH DRIVE MOTOR ASSEMBLY VACUUM DOOR ASSEMBLY BRUSH BRUSH DRIVE MOTOR ASSEMBLY 86309230 CV71/2 04/07/08... - Page 17 86003380 29202 DOOR, FLAPPER 86270910 57042 NUT, 3/8 PUSHLOCK 86007690 73240 SPRING, EXT. 0.5OD X 2.25L X .063W 86305040 GASKET, FLAPPER 86274750 70270 SCR, 1/4-20 X 3/4 HHCS 86133710 99862 6” TAPE, 5/8W X 1/4T PORON 4701-01 86309230 CV71/2 10/23/08...
-
Page 18: Brush Height And Wheel Group
BRUSH HEIGHT AND WHEEL GROUP MAIN FRAME ASSEMBLY 7 17 86309230 CV71/2 02/19/08... - Page 19 WASHER, 3/4ID X 1.00 PLTD. 86010660 87025 WASHER, 1/4 LOCK EXT. STAR SS 86007740 73362 SPRING, EXT .5OD X 1.75L X .06W 86006920 70507 SCR, 3/8-16 X 3/4 HHCS GR5 PLTD. 86275570 70505 SCR, 1/4-20 X 1.0 HHCS PLTD. 86309230 CV71/2 02/19/08...
-
Page 20: Vacuum Group
VACUUM GROUP 7 (BRUSH SET) 86309230 CV71/2 02/19/08... - Page 21 GASKET, FILTER BAG NECK 86010660 87025 WASHER, 1/4 LOCK EXT STAR SS 86275570 70505 SCR, 1/4-20 X 1.0 HHCS PLTD. 86006600 70114 SCR, #10 X 3/4 POLYFAST 86309510 DEBRIS CHUTE, CV 71/2 86026850 53783 VAC MOTOR, 120V 5.7 1ST 86309230 CV71/2 02/19/08...
-
Page 22: Handle Group
HANDLE GROUP HANDLE ASSEMBLY - DETAIL - HANDLE ASSEMBLY 86309230 CV71/2 02/19/08... - Page 23 86146430 51299 LEVER, SPRING STEEL 86006810 70363 SCR, 10-32 X 3/8 PHTR PLTD. 86007010 70663 SCR, 1/4-20 X 3-1/4 HHCS PLTD. 86010660 87025 WASHER, 1/4 LOCK EXT STAR SS 86279220 57104 NUT, 10-32 W/ STAR WASHER PLTD 86309230 CV71/2 01/10/09...
-
Page 24: Lid/Decal Group
LID/DECAL GROUP 86309230 CV71/2 02/19/08... - Page 25 LABEL, WARNING 86245620 50762 LABEL, BRUSH HEIGHT ADJ. 86000080 02084 TOOL, 5" UPHOLSTERY 86000070 02083 BRUSH, 3" DUST 86274520 70233 SCR, #10 X 3/8 PH HI-LO PLTD 86002990 27744 CLIP, C 1-1/2 PLASTIC 86283600 02085 BRUSH, UPHOLSTERY 86309230 CV71/2 02/19/08 5-10...
-
Page 26: Electrical Panel And Cover Group
ELECTRICAL PANEL AND COVER GROUP NUT SUPPLIED WITH SWITCH NUTS SUPPLIED WITH CIRCUIT BREAKER 86309230 CV71/2 02/19/08 5-11... - Page 27 PLATE, ELECTRICAL PANEL 86238400 36125 GROMMET, 3/4ID X 1.38OD 86086830 73863 SCREEN, EXHAUST 86006500 70024 SCR, #8 X 1/2 SHT METAL SS 86236080 34326 FILTER, EXHAUST 86063720 27738 COVER, REAR 86172770 70610 SCR, 1/4-20 X 1.0 BLK THUMB 86309230 CV71/2 02/19/08 5-12...
-
Page 28: Suggested Spare Parts
11041 BELT, 220 J-6 POLY-V 86215090 140949 BAGS, PAPER (PKG. OF 10) 86003510 34012 FILTER, VAC MOTOR 86236040 34309 FILTER, EXHAUST 86001200 140164 BAG, CLOTH 86135260 140211 BRUSH SET, VAC MOTOR 86135360 14340 BRUSH SET, 53616/53617 86309230 CV71/2 02/19/08 5-13...