Table of Contents
Advertisement
Advertisement
Table of Contents

Related Manuals for Universal Remote Control Automator URC-200


Summary of Contents for Universal Remote Control Automator URC-200
- Page 1 Owner’s Manual...
-
Page 2: Thank You
MADE IN THIS MANUAL. The information in this manual may be subject to change without prior notice. Automator is a registered trademark of Universal Remote Control, Inc. Power of Simple is a trademark of Universal Remote Control, Inc. DoubleTap learning is a trademark of Universal Remote Control, Inc. All other brand or product names are trademarks or registered trademarks of their respective companies or organizations. -
Page 3: Table Of Contents
Table of Contents Getting Started ............2 Button Layout ............3 Basic Setup ............... 5 Pre-Programmed Method .......... 5 Learning Method ............. 10 Volume Control Punch Through ......13 Advanced Operation ..........15 Advanced Setup ............17 Editing Button Labels..........17 Macro Button Setup .......... -
Page 4: Getting Started
T h e A u t o m a t o r Getting Started Congratulations! You’ve purchased one of the most advanced and easy to setup control systems available. The Automator’s built-in library includes thousands of different brands and models of remote controls. -
Page 5: Button Layout
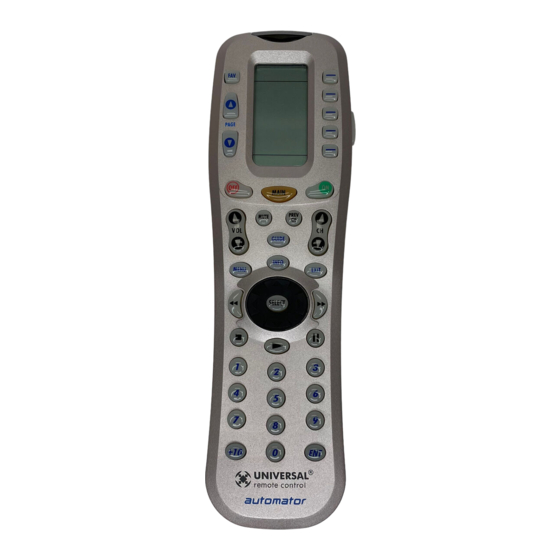
U R C - 2 0 0 Button Layout TITLE FAVORITE LIGHT CHANNEL Button Button PAGE Screen Buttons Labeled change the Display page of Buttons Display Buttons. PAGE Numbers MAIN Button takes you to the MAIN Menu. FUNCTION Buttons... - Page 6 T h e A u t o m a t o r Selecting a New DEVICE Changes All Button Commands Instantly The Automator can operate ten different devices even though it is only one remote control. Let’s try it now! Press the MAIN button, then press the TV DEVICE button.
-
Page 7: Basic Setup
U R C - 2 0 0 Basic Setup You can start setting up your Automator using either the Pre-Programmed Method or the Learning Method. However, all the buttons of the Automator are setup at once with the Pre-Programmed Method, so it is usually faster than the one-button-at-a-time Learning Method. - Page 8 T h e A u t o m a t o r Press the P-PRO button to select the Pre-Programmed Method. P-PRO Button The display changes so that you can select which Device button to setup. First Five Device Names Press a Page button to display the other five Device names.
- Page 9 U R C - 2 0 0 In this step you verify the type of component you plan to operate with this device button. If the flashing name is correct, press SELECT. SELECT If the name flashing in the display is incorrect (for example, you are setting up AUX to operate a Laser Disc Player), use the UP and DOWN buttons to change the flashing name to the correct type of component.
- Page 10 T h e A u t o m a t o r Note: If your component fails to turn off after you have entered all the code numbers listed for your brand, you can scan through the other brands in the table by alternately pressing the UP (or DOWN) and POWER OFF buttons.
- Page 11 U R C - 2 0 0 When the display shows “MAIN”, you are back in normal operating mode. Now it’s time to test all the buttons. If some buttons don’t work, try repeating steps 1-9, to see if you can improve the match to your component.
-
Page 12: Learning Method
T h e A u t o m a t o r Learning Method The Automator can learn commands from your old remote controls one-button-at-a-time by following these simple steps: Line-up the Automator with your old remote con- trol, head-to-head, one or two inches apart. Press and hold the MAIN and ENT (Enter) buttons at the same time for approximately three seconds. - Page 13 U R C - 2 0 0 The display will show a list of the first five devices. Select the device you would like to teach commands to by pressing the Device button. Press any of Device Buttons. Press any button you want to teach a command to. Press Button.
- Page 14 T h e A u t o m a t o r Press and hold the button on your old remote con- trol until the display changes to “RETRY”. Press and hold the same button on your old remote control once again. The Automator’s unique DoubleTap learning technology ensures compatibility with the widest variety of remote controls ever!
-
Page 15: Volume Control Punch Through
U R C - 2 0 0 Volume Control Punch Through In most home entertainment systems, the sound volume is only controlled by one device. In some systems, it is the TV speakers that make the sound, so you would use the TV device on the Automator to raise and lower the volume. - Page 16 T h e A u t o m a t o r The bottom of the display flashes ”PUNCH TO”. Press the device button for the device that doesn’t have volume control commands yet (i.e.,DVD). This is the device you are going to PUNCH TO for the volume and mute commands.
-
Page 17: Advanced Operation
U R C - 2 0 0 Advanced Operation Setting Backlight Options You can adjust the amount of time that the Automator backlight stays on by entering the SETUP mode and proceeding to page two (using the PAGE UP button), then pressing the LIGHT button on the display (not the Backlight button). - Page 18 T h e A u t o m a t o r Adjusting Contrast You can make the text darker by pressing both the MAIN and cursor UP buttons at the same time. To make the text appear lighter, press both the MAIN and cursor DOWN buttons at the same time.
-
Page 19: Advanced Setup
U R C - 2 0 0 Advanced Setup After you’ve finished all your basic setup, you can choose to make operation easier by customizing the Automator just the way you want, using the Advanced Setup features described in this section. Editing Button Labels You can change the name of any of the display buttons (including Favorite Channels) by following these steps:... - Page 20 T h e A u t o m a t o r The screen displays the list of devices and “EDIT” will appear at the top of the screen. Navigate to the device and page where there is a button label you want to EDIT, selecting between the FAV, MAIN, DEVICE;...
- Page 21 U R C - 2 0 0 Change the character by using any of the number keys. Each press of the same number button selects the next character of that number’s group, as shown below. A,B,C,1 G,H,I,3 D,E,F,2 J,K,L,4 P,Q,R,6 M,N,O,5 S,T,U,7 Y,Z,9...
-
Page 22: Macro Button Setup
T h e A u t o m a t o r Macro Button Setup Imagine turning on your TV, your DVD player and your surround sound receiver by pressing a single button on your Automator! What would normally take three remotes and three button pushes, the Automator can accomplish with the press of one button. - Page 23 U R C - 2 0 0 Press the button you want to set as a Macro button. The top of the screen will display the label of the button you selected. At the bottom of the screen it displays “STEP0”, indicating that no macro steps have been entered yet.
-
Page 24: Favorite Channel Setup
T h e A u t o m a t o r Favorite Channel Setup Imagine surfing all your favorite channels, without ever typing in a channel number. By simply setting up each of the favorite channel buttons, you can make TV, cable or satellite operation fun and easy. - Page 25 U R C - 2 0 0 Press each of the number buttons for the channel. Note: If a number is repeated when setting the channel (for example, channel “33” or “522”) it is usually best to set a half second delay in between the identical numbers by pressing the PAUSE button.
-
Page 26: Hiding And Adding Pages
T h e A u t o m a t o r Hiding and Adding Pages Each of your Automator Devices actually contains eight pages. However, only five pages are visible in the factory default setting. Three pages are hidden in each device. - Page 27 U R C - 2 0 0 “PAGE” appears at the top of the screen. Now, you can navigate to any page, using the MAIN, DEVICE, FAV, and PAGE buttons. Button DEVICE PAGE Buttons Buttons MAIN Button When you select a page, the top of the screen indicates whether you want to “ADD?”...
-
Page 28: Erasing Settings
T h e A u t o m a t o r Overview of Erasing You can erase an individual button with a learned command, a macro or a favorite channel. You can erase an entire Device’s learned command or macro buttons. - Page 29 U R C - 2 0 0 If you press ALL, the Automator displays a SURE? button. After the SURE button is pressed, all the buttons will be erased. SURE Button If you press DEVICE, a list of Devices will appear. Press the device button that you wish to erase.
-
Page 30: Cloning One Automator To Another
T h e A u t o m a t o r Cloning One Automator to Another If you own two or more Automators, you can copy and transfer all the setup from one Automator to another. Just follow these easy steps: Enter SETUP mode by pressing and holding both MAIN and ENT for three seconds. -
Page 31: Recalling Pre-Programmed Settings
U R C - 2 0 0 Recalling Pre-Programmed Settings If you didn’t write down the code numbers you setup your Automator with, you can recall them via this simple process: Enter SETUP mode by pressing and holding both MAIN and ENT for three seconds. Note: You have 30 seconds for each step, otherwise the Automator will time out automatically. -
Page 32: The Optional Expander
T h e A u t o m a t o r The Optional Expander You can use the Automator as you would your other remote controls. It transmits very powerful line-of-sight output using infrared light commands (invisible to the naked eye). - Page 33 U R C - 2 0 0 The Automator sends radio signal to the Expander, which is a radio receiver. The Expander converts radio signals to standard infrared commands and sends them out via a built-in front blaster to components in the same cabinet space.
-
Page 34: Pre-Programmed Code Notes
T h e A u t o m a t o r Pre-Programmed Code Notes Record the code numbers for your system here: CABLE AUDIO VCR2... -
Page 35: Pre-Programmed Code Tables
U R C - 2 0 0 Pre-Programmed Code Tables The Automator’s Pre-Programmed code library is divided into categories (TV, VCR, AUX, etc.). Each category actually includes many types of components. For example, the VCR category includes TV/VCR combo units. Within each category, the code numbers are listed in rows by brand (Sony, Panasonic, B &... - Page 36 TV - TVs, Plasmas, Projectors and Monitors BRAND CODE NUMBERS ADMIRAL 072 081 161 160 ADVENT AKAI 197 146 248 A MARK 112 143 AMPRO 167 073 157 183 AMSTRAD ANAM 043 054 056 080 112 131 197 004 112 058 AUDIOVOX BARCO BLAUPUNKT...
- Page 37 TV (continued) - TVs, Plasmas, Projectors and Monitors BRAND CODE NUMBERS LOGIK LUXMAN 166 007 015 052 081 160 164 MAGNAVOX 164 059 197 003 060 061 004 063 064 127 022 160 094 239 256 MARANTZ 197 164 184 MATSUI MEMOREX 007 072 004...
- Page 38 TV (continued) - TVs, Plasmas, Projectors and Monitors BRAND CODE NUMBERS TOSHIBA 015 138 030 007 040 062 101 TOTEVISION UNIVERSAL 008 009 VIDEO CONCEPTS VIDIKRON 174 184 188 192 VIDTECH WARDS 004 008 009 019 028 060 061 063 064 072 074 143 164 034 WESTING HOUSE YAMAHA 197 004...
- Page 39 CABLE (continued) - Cable TV Descramblers/Tuners BRAND CODE NUMBERS PANASONIC 044 047 PARAGON PHILIPS 006 012 013 020 085 095 PIONEER 103 034 051 063 076 105 PRUCER 011 071 074 PULSAR RECOTON REGAL 049 050 REGENCY SAMSUNG SCIENTIFIC ATLANTA 003 011 041 042 043 045 046 SIGNAL SIGNATURE...
- Page 40 DVD (continued) - DVD Players and Changers BRAND CODE NUMBERS MERIDIAN MITSUBISHI MYRYAD 102 134 NAKAMICHI ONKYO 076 035 PANASONIC 021 042 138 139 144 150 PHILIPS 066 083 095 105 PIONEER 023 092 099 107 108 131 PROCEED PROSCAN 026 027 026 027 SAMSUNG...
- Page 41 VCR - VCRs and TV/VCR Combos BRAND CODE NUMBERS AIWA 034 161 AKAI 016 146 043 046 124 125 142 AMPRO ANAM AUDIO DYNAMICS 012 023 039 043 BROOKSONIC 035 037 129 CANON 028 031 CAPEHART CRAIG 003 040 135 CURTIS MATHES 031 041 DAEWOO 111 116 117 119 005 007 010 065 108 110 112...
- Page 42 VCR (continued) - VCRs and TV/VCR Combos BRAND CODE NUMBERS QUARTZ 002 014 QUASAR 066 145 075 RADIO SHACK 107 109 144 147 158 041 145 013 020 140 034 040 REALISTIC 003 008 010 014 031 034 040 053 054 101 RICO RUNCO SALORA...
- Page 43 AUDIO (continued) - Amps, Preamps and A/V Receivers BRAND CODE NUMBERS ATLANTIC TECHNOLOGY 342 AUDIO ACCESS AUDIO ALCHEMY 135 AUDIO DESIGN 194 221 011 AUDIO EASE 021 196 207 AUDIO FILE AUDIO MATRIX AUDIO SOURCE AUDIO TECHNICA 134 B & K 096 097 BOSE 070 170 224 347...
- Page 44 AUDIO (continued) - Amps, Preamps and A/V Receivers BRAND CODE NUMBERS MERIDIAN 100 012 013 MITSUBISHI 242 243 204 MONDIAL 157 158 042 043 081 112 MYRYAD 276 293 186 113 283 NAKAMICHI 111 244 245 172 183 287 NIRO ONKYO 017 046 064 107 108 187 079 080 090 179 209 270 275 OPTIMUS...
- Page 45 SAT (continued) - DSS Satellite Receivers BRAND CODE NUMBERS EXPRESSVU GENERAL ELECTRIC 151 106 150 GENERAL INSTRUMENT 148 HITACHI 139 140 HUGHES 161 162 068 154 165 166 108 117 MAGNAVOX MEMOREX MITSUBISHI 068 154 MOTOROLA NEXT LEVEL PANASONIC 142 160 PAYSAT PHILIPS 152 153 156 068 154 136 108 117...
- Page 46 CD (continued) - CD Players and Changers BRAND CODE NUMBERS GENEXXA 010 069 102 GOLDSTAR HAITAI HARMAN KARDON 018 033 047 208 HITACHI 042 175 INKEL 130 143 144 JCPENNEY 014 061 092 141 JENSEN 004 022 136 163 213 214 242 243 KENWOOD 185 007 023 055 071 072 142 137 254 KOSS...
- Page 47 CD (continued) - CD Players and Changers BRAND CODE NUMBERS SYMPHONIC 052 181 TAEKWANG 195 085 TANDY TEAC 015 034 036 051 052 101 131 140 079 TECHNICS 060 103 200 172 184 008 068 TECHWOOD THETA DIGITAL 234 235 TOSHIBA 006 067 091 160 148 VECTOR RESEARCH...
- Page 48 AUX (continued) - Tape Decks BRAND CODE NUMBERS PANASONIC 007 010 032 088 195 PHILIPS 027 087 PIONEER 003 039 047 050 066 098 222 QUASAR 007 088 SANSUI 027 113 119 224 SHARP 026 057 131 175 181 SHERWOOD 038 004 028 030 033 034 SONY 020 022 052 084 089...
- Page 49 AUX (continued) - Custom Installation Products BRAND CODE NUMBERS TURBOSCAN VELODYNE X-10 183 093 XANTECH 168 169 170 171 172 188 189...
-
Page 50: Frequently Asked Questions
Automator would still remember your settings. Who can I call for more answers? The Universal Remote Control technical support and customer service staff are ready to answer any questions you might have. -
Page 51: Specifications/Warranty
U R C - 2 0 0 Warranty The URC-200 is covered against any manufacturers defects or workmanship for a period of one year from the date of purchase if purchased from an authorized Universal Remote Control dealer. Units purchased from online auction sites or other unauthorized resellers have no warranty. - Page 52 M E M O...
- Page 53 M E M O...
- Page 54 M E M O...
- Page 56 OCE-0024A Rev. 03...